[React Native] 인스타그램 UI 만들기 #4

리액트 네이티브(React Native)로 인스타그램 UI를 구현하는 네 번째 강의입니다. 이번에는 프로필 화면을 구현합니다. 이 포스팅은 아래 무료 동영상 강의를 참고하여 작성하였습니다.
상단바 수정하기
탭 화면마다 상단바가 다르기 때문에 수정해야합니다. 현재는 모든 탭 화면에서 같은 상단바가 보입니다.
먼저 MainScreen.js 파일을 수정합니다. 아래와 같이 header에 null 을 입력합니다.
export default class MainScreen extends Component {

  static navigationOptions = {
    header: null
  }

// ... 일부 코드 생략 ...
그다음 ./Components/AppTabNavigator/HomeTab.js 파일을 수정합니다. Header, Left, Right, Body를 추가로 import 합니다.
import { Container, Content, Icon, Thumbnail, Header, Left, Right, Body } from 'native-base';
그리고 render() 함수를 수정합니다. Container 아래에 Header를 추가합니다.
export default class HomeTab extends Component {
    render() {
        return (
            <Container style={style.container}>
                <Header>
                    <Left><Icon name='ios-camera' style={{ paddingLeft:10 }}/></Left>
                    <Body><Text>Instagram</Text></Body>
                    <Right><Icon name='ios-send' style={{ paddingRight:10 }}/></Right>
                </Header>

{/* ... 일부 코드 생략 ... */}
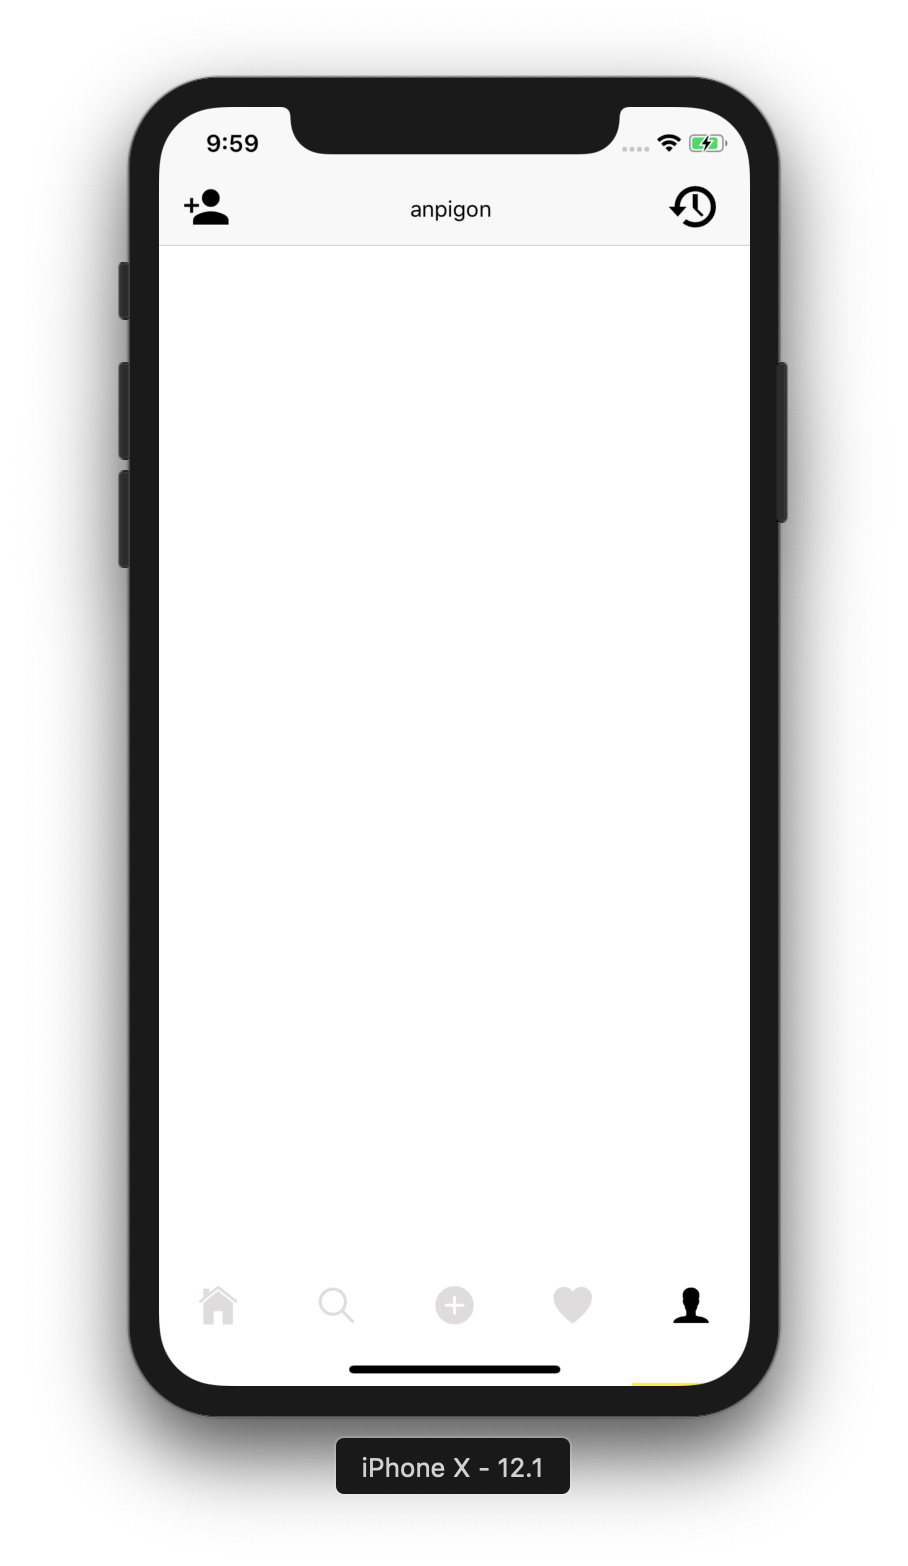
여기까지 작업하고 확인해보겠습니다. 확인해보면 HomeTab 에만 헤더가 있고, 나머지 탭 화면는 헤더가 없습니다.

프로필 페이지 헤더 만들기
./Components/AppTabNavigator/ProfileTab.js를 수정합니다. Image와 Container, Content, Header, Left, Body, Right, Button를 추가로 import 합니다.
import { View, Text, StyleSheet, Image } from 'react-native';
import { Icon, Container, Content, Header, Left, Body, Right, Button, Image } from 'native-base';
그다음 render() 함수를 수정합니다. 다음과 같이 Header 를 추가합니다.
export default class ProfileTab extends Component{

    render() {
        return (
            <Container style={{ flex:1, backgroundColor: 'white'}}>
                <Header>
                    <Left><Icon name="md-person-add" style={{ paddingLeft:10 }} /></Left>
                    <Body><Text>anpigon</Text></Body>
                    <Right><EntypoIcon name="back-in-time" style={{ paddingRight:10, fontSize: 32 }} /></Right>
                </Header>
            </Container>
        );
    }

{/* ... 일부 코드 생략 ... */}
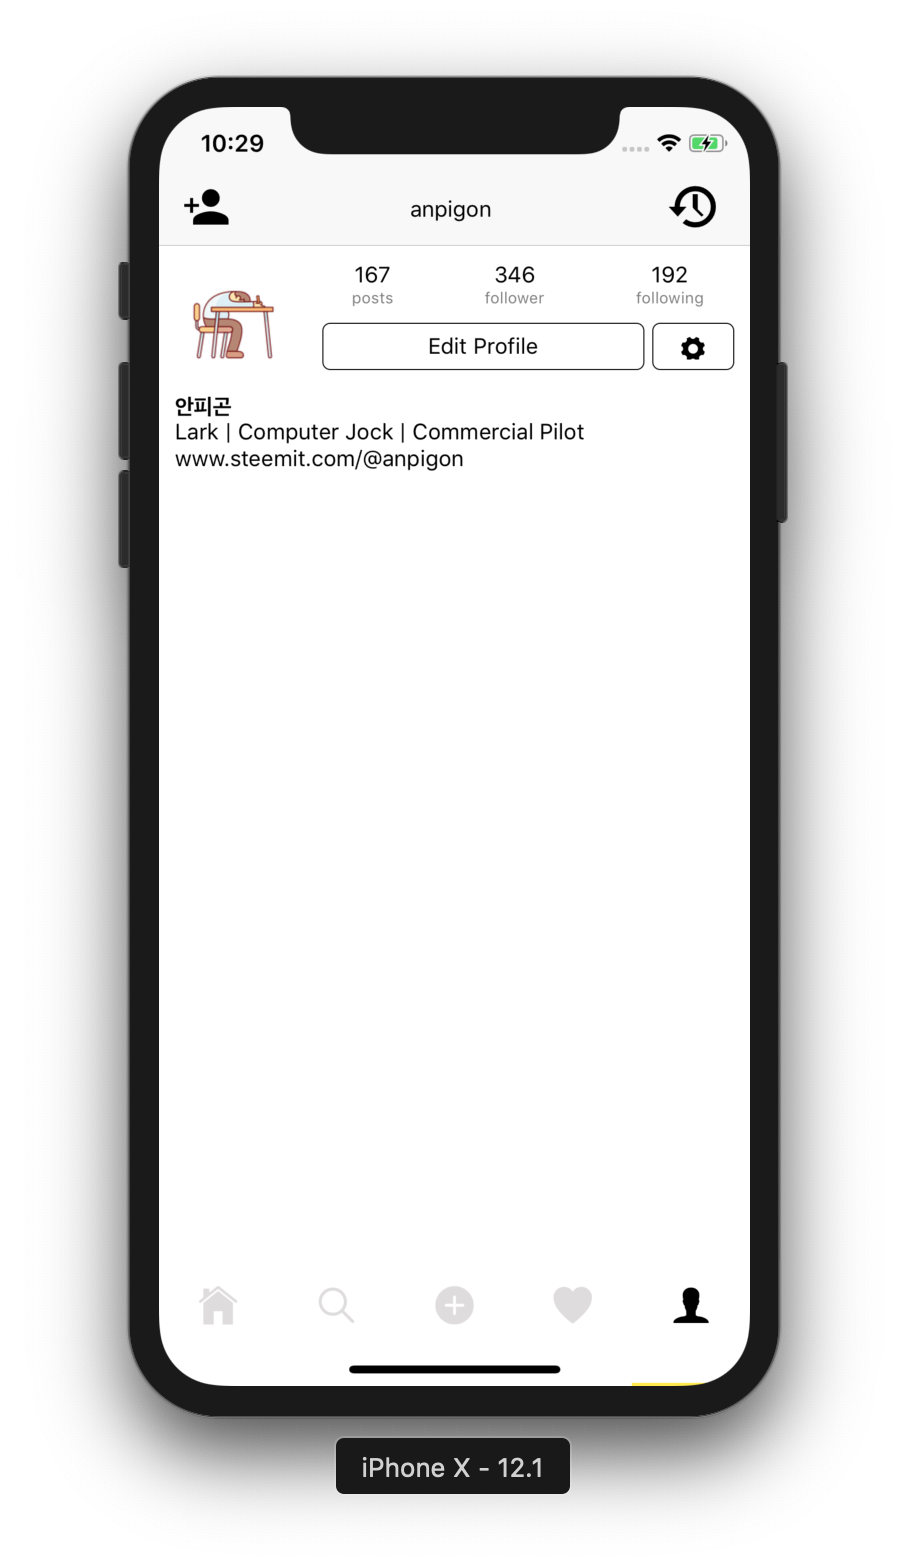
여기까지 작업한 화면입니다. 상단 좌우에 아이콘이 생겼습니다.
Header 바로 아래에 다음 코드를 입력합니다. 프로필 이미지, 포스팅 수, 팔로워 수, 팔로잉 수를 출력합니다. 바로 아래에 프로필 수정 버튼과 설정 버튼이 위치하고 있습니다. 그리고 그 아래에 이름과 프로필 정보가 출력됩니다.
<Content>
  <View style={{flexDirection:'row', paddingTop:10}}>
    <View style={{flex:1, alignItems:'center'}}>
      <Image source={{ url: 'https://steemitimages.com/u/anpigon/avatar' }}
             style={{width:75, height:75, borderRadius:37.5}}/>
    </View>
    <View style={{flex:3}}>
      <View style={{flexDirection:'row', justifyContent:'space-around'}}>
        <View style={{alignItems:'center'}}>
          <Text>167</Text>
          <Text style={{fontSize:10, color:'gray'}}>posts</Text>
        </View>
        <View style={{alignItems:'center'}}>
          <Text>346</Text>
          <Text style={{fontSize:10, color:'gray'}}>follower</Text>
        </View>
        <View style={{alignItems:'center'}}>
          <Text>192</Text>
          <Text style={{fontSize:10, color:'gray'}}>following</Text>
        </View>
      </View>
      <View style={{flexDirection:'row'}}>
        <Button bordered dark
                style={{flex:4, marginLeft:10, justifyContent:'center', height:30, marginTop:10}}>
          <Text>Edit Profile</Text>
        </Button>
        <Button bordered dark small icon
                style={{flex:1, marginRight:10, marginLeft:5, justifyContent:'center', height:30, marginTop:10}}>
          <Icon name="settings" />
        </Button>
      </View>
    </View>
  </View>
  <View style={{paddingHorizontal:10, paddingVertical:10}}>
    <Text style={{fontWeight:'bold'}}>안피곤</Text>
    <Text>Lark | Computer Jock | Commercial Pilot</Text>
    <Text>www.steemit.com/@anpigon</Text>
  </View>
</Content>
여기까지 작업한 화면입니다.
스팀잇 프로필 정보 출력하기
스팀잇 서버에서 계정 정보를 가져오는 함수를 입력합니다. 스팀잇의 database_api.get_accounts API를 사용합니다.
fetchAccount(username) {
  const data = {
    id: 3,
    jsonrpc: "2.0",
    method: "call",
    params: [
      "database_api",
      "get_accounts",
      [[username]]
    ]
  };
  return fetch('https://api.steemit.com', {
    method: 'POST',
    body: JSON.stringify(data)
  })
  .then(res => res.json())
  .then(res => res.result[0])
}
그리고 스팀잇 팔로우 수와 팔로잉 수를 가져오는 함수를 입력합니다. follow_api.get_follow_count API를 사용합니다.
fetchFollowCount(username) {
  const data = {
    id: 4,
    jsonrpc: "2.0",
    method: "call",
    params: [
      "follow_api",
      "get_follow_count",
      [username]
    ]
  };
  return fetch('https://api.steemit.com', {
    method: 'POST',
    body: JSON.stringify(data)
  })
  .then(res => res.json())
  .then(res => res.result)
}
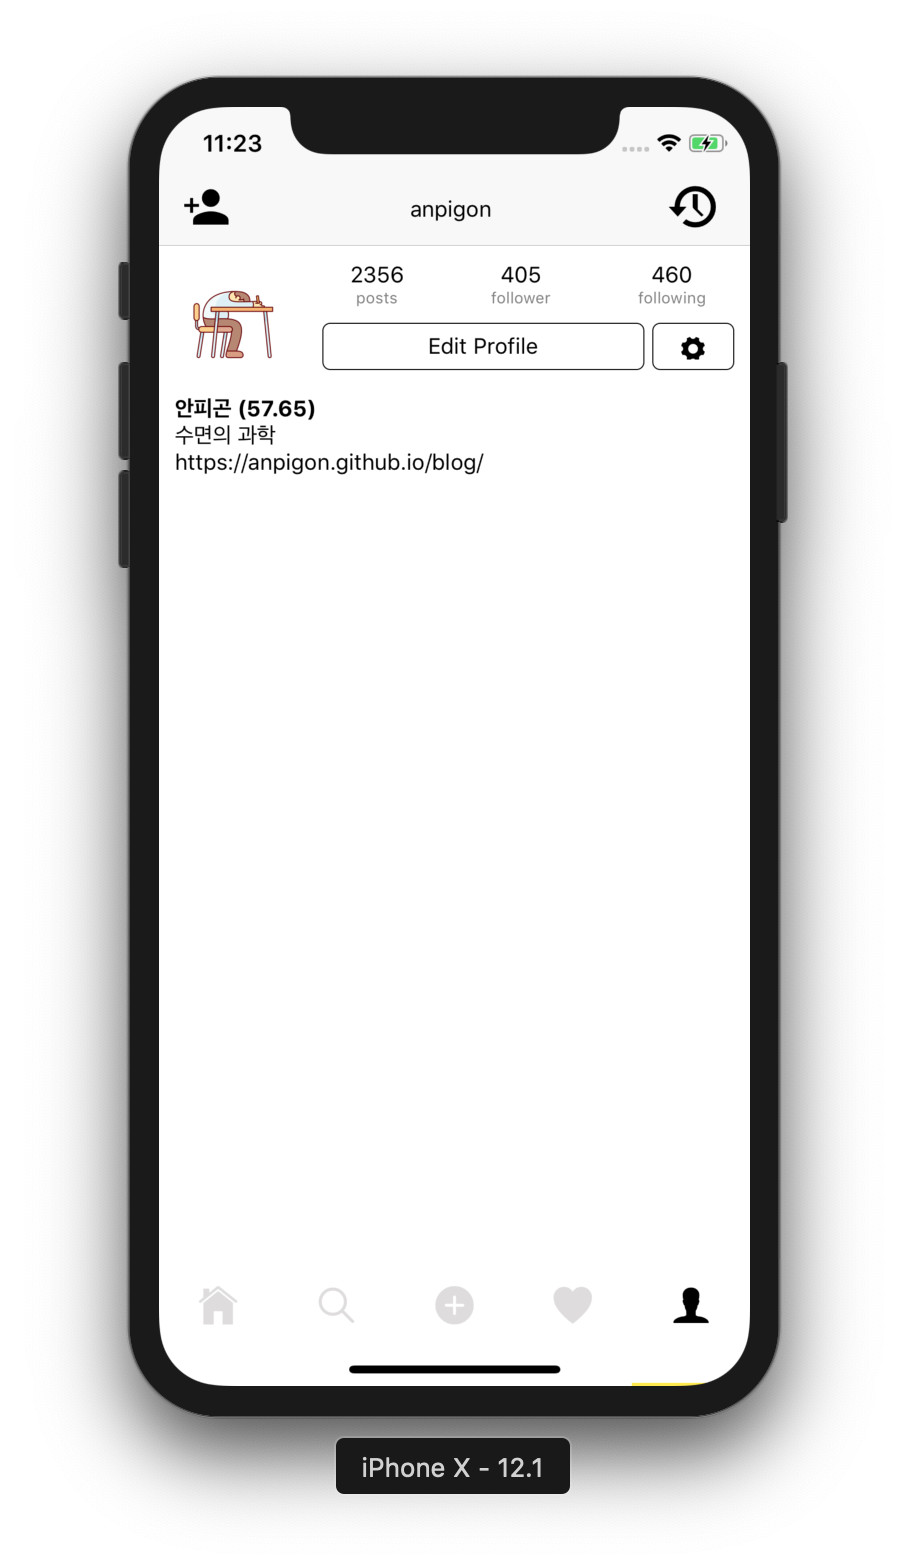
그다음 componentWillMount() 를 구현합니다. 그리고 방금 구현한 함수를 호출합니다. 계정 정보와 팔로우 수를 가져와서 state 에 저장합니다. 명성(reputation)도 계산하여 저장하고 있습니다.
componentWillMount() {
  const username = 'anpigon';

  this.fetchAccount(username).then(({name, post_count, reputation, json_metadata}) => {
    const { profile } = JSON.parse(json_metadata); // JSON 파싱
    const log = Math.log(parseInt(reputation.substring(0, 4))) / Math.log(10);
    this.setState({
      name, // 이름
      reputation: Math.max(reputation.length - 1 + log - parseInt(log) - 9, 0) * 9 + 25, // 명성도 계산
      postCount: post_count, // 포스팅 수
      profile // 프로필 정보
    })
  });

  this.fetchFollowCount(username).then(({following_count, follower_count}) => {
    this.setState({
      followingCount: following_count, // 팔로잉 수
      followerCount: follower_count // 팔로워 수
    })
  });
}
마지막으로 render() 함수를 수정합니다. 앞에서 가져온 정보들을 출력하기 위해 데이터를 맵핑합니다.
render() {
  const {
    name,
    reputation,
    profile,
    postCount,
    followingCount,
    followerCount
  } = this.state;

  return (
  <Container style={{ flex:1, backgroundColor: 'white'}}>
    <Header>
      <Left><Icon name="md-person-add" style={{ paddingLeft:10 }} /></Left>
      <Body><Text>{name}</Text></Body>
      <Right><EntypoIcon name="back-in-time" style={{ paddingRight:10, fontSize: 32 }} /></Right>
    </Header>
    <Content>
      <View style={{flexDirection:'row', paddingTop:10}}>
        <View style={{flex:1, alignItems:'center'}}>
          <Image source={{ url: profile.profile_image }}
                 style={{width:75, height:75, borderRadius:37.5}}/>
        </View>
        <View style={{flex:3}}>
          <View style={{flexDirection:'row', justifyContent:'space-around'}}>
            <View style={{alignItems:'center'}}>
              <Text>{postCount}</Text>
              <Text style={{fontSize:10, color:'gray'}}>posts</Text>
            </View>
            <View style={{alignItems:'center'}}>
              <Text>{followingCount}</Text>
              <Text style={{fontSize:10, color:'gray'}}>follower</Text>
            </View>
            <View style={{alignItems:'center'}}>
              <Text>{followerCount}</Text>
              <Text style={{fontSize:10, color:'gray'}}>following</Text>
            </View>
          </View>
          <View style={{flexDirection:'row'}}>
            <Button bordered dark
                    style={{flex:4, marginLeft:10, justifyContent:'center', height:30, marginTop:10}}>
              <Text>Edit Profile</Text>
            </Button>
            <Button bordered dark small icon
                    style={{flex:1, marginRight:10, marginLeft:5, justifyContent:'center', height:30, marginTop:10}}>
              <Icon name="settings" />
            </Button>
          </View>
        </View>
      </View>
      <View style={{paddingHorizontal:10, paddingVertical:10}}>
        <Text style={{fontWeight:'bold'}}>{profile.name} ({reputation.toFixed(2)})</Text>
        <Text>{profile.about}</Text>
        <Text>{profile.website}</Text>
      </View>
    </Content>
  </Container>
);
}
오늘 작업한 결과 화면입니다.
작업한 코드는 모두 깃허브에 업로드되어 있습니다.
https://github.com/anpigon/rn_instagram_clone
여기까지 읽어주셔서 감사합니다.
시리즈
- [React Native] 인스타그램 UI 만들기 #1
- [React Native] 인스타그램 UI 만들기 #2
- [React Native] 인스타그램 UI 만들기 #3
- [React Native] 인스타그램 UI 만들기 #4
- [React Native] 인스타그램 UI 만들기 #5
Sponsored ( Powered by dclick )
눈이 많이 오던 날
올해는 눈이 많이 안 오네요. 겨울에는 눈이 펑펑 와야 겨울 같은데... 오라는 눈은 안 오고...
codingart님의 2019년 바람(Wish)
짱짱맨 호출에 응답하여 보팅하였습니다.
맛점하시고, 오늘도 화이팅입니다~^^
감사합니다. 오늘도 화이팅! 내일도 화이팅입니다.
자료 잘 받아갑니다.
변형을 시켜 볼게요.
소스코드 가져가서 잘 만들어주세요.
오 이게 스팀잇을 인스타UI처럼 만드는 것인가요? 멋지네요~ 조만간 joceo00님 연재대회 꼭 신청하시구요. 보통 선착순 마감했던듯.
스팀잇앱이 다양한 형태로 나왔으면 좋겠어요. 트위터 스타일, 페이스북 스타일, 인스타그램 스타일 다양하게요.
그리고 연재대회 알려주셔서 감사합니다. 경쟁률이 높을 듯...ㅋㅋ
와우 이건.... 즐겨찾기 감인데요 ㅋㅋ
올해 개인적인 목표로 웹페이지를 하나 만들어 보고 싶거든요 ㅠ
참고할 수 있는 리액트라 -_-b 즐겨찾기 해둬야겠습니다!
감사합니다. 요즘 리액트 열심히 배우고 있는데, 너무 재미있네요. 특히 리액트 네이티브가 재미있습니다.ㅎㅎ
Hi @anpigon!
Your post was upvoted by @steem-ua, new Steem dApp, using UserAuthority for algorithmic post curation!
Your UA account score is currently 2.875 which ranks you at #11872 across all Steem accounts.
Your rank has improved 123 places in the last three days (old rank 11995).
In our last Algorithmic Curation Round, consisting of 364 contributions, your post is ranked at #95.
Evaluation of your UA score:
Feel free to join our @steem-ua Discord server
매일 1포스팅 보팅남깁니다. 편안한 밤되세요~
오늘도 디클릭!
감사합니다. 씨네님도 편안한 밤 되세요~