[React Native] 인스타그램 UI 만들기 #5

리액트 네이티브(React Native)로 인스타그램 UI를 구현하는 다섯번째 강의입니다. 이번에는 프로필 화면의 블로그 영역을 구현합니다. 이 포스팅은 아래 무료 동영상 강의를 참고하여 작성하였습니다.
동영상 강의는 이번이 마지막 입니다.
ProfileTab에 세그먼트 버튼 만들기
ProfileTab.js 를 수정합니다. 프로필 화면에 버튼 4개를 만듭니다.
<View style={{ flexDirection: 'row', justifyContent:'space-around', borderTopWidth:1,borderTopColor:'#eae5e5' }}>
    <Button transparent>
        <Icon name='ios-apps' />
    </Button>
    <Button transparent>
        <Icon name='ios-list' />
    </Button>
    <Button transparent>
        <Icon name='ios-people' />
    </Button>
    <Button transparent>
        <Icon name='ios-bookmark' />
    </Button>
</View>
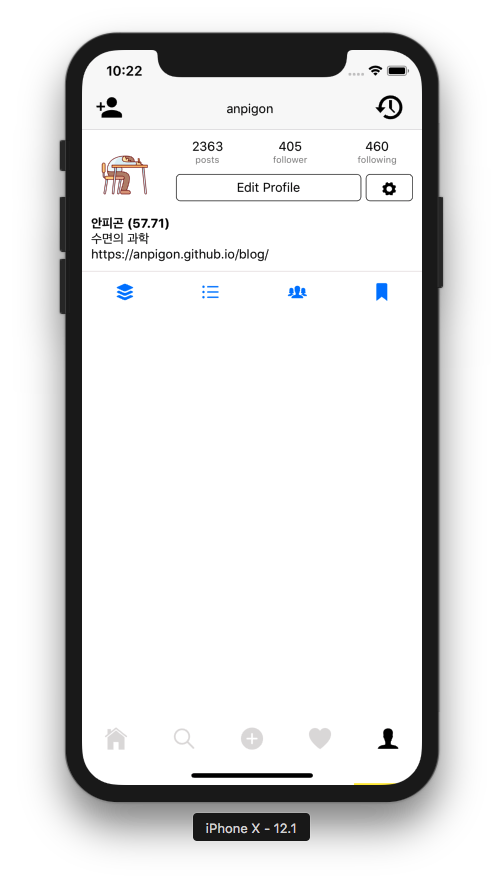
아래와 같이 프로필 화면에 아이콘 버튼 4개가 나타났습니다.
세그먼트 버튼에 이벤트 만들기
그다음은 각 버튼을 누르면 버튼이 활성화된 상태로 보이도록 구현합니다. 우선 state에 activeIndex를 선언합니다.
state = {
    // ... 일부 코드 생략 ...
    activeIndex: 0,
}
그리고 senmentClicked() 함수를 입력합니다.
senmentClicked = (activeIndex) => {
    this.setState({
      activeIndex
    });
}
senmentClicked()함수가 호출되면 전달된 값으로state.activeIndex가 업데이트됩니다.
그다음은 버튼을 선택하면 senmentClicked() 함수가 호출되도록 합니다.
<View style={{ flexDirection: 'row', justifyContent:'space-around', borderTopWidth:1,borderTopColor:'#eae5e5' }}>
    <Button transparent
        onPress={() => this.segmentClicked(0)}
        active={this.state.activeIndex === 0}>
        <Icon name='ios-apps'
              style={[ this.state.activeIndex === 0 ? {} : {color: 'grey'} ]}/>
    </Button>
    <Button transparent
        onPress={() => this.segmentClicked(1)}
        active={this.state.activeIndex === 1}>
        <Icon name='ios-list'
              style={[ this.state.activeIndex === 1 ? {} : {color: 'grey'} ]}/>
    </Button>
    <Button transparent
        onPress={() => this.segmentClicked(2)}
        active={this.state.activeIndex === 2}>
        <Icon name='ios-people'
              style={[ this.state.activeIndex === 2 ? {} : {color: 'grey'} ]}/>
    </Button>
    <Button transparent
        onPress={() => this.segmentClicked(3)}
        active={this.state.activeIndex === 3}>
        <Icon name='ios-bookmark'
              style={[ this.state.activeIndex === 3 ? {} : {color: 'grey'} ]}/>
    </Button>
</View>
각 Button의
onPress속성에{() => this.segmentClicked(0)}를 입력합니다.segmentClicked()에는 각 버튼에 해당하는 인덱스 번호를 전달합니다. 그리고 선택된 버튼은 active 속성이true가 됩니다. 그리고 선택되지 않은 버튼은 아이콘이 회색으로 표시되도록 하였습니다.
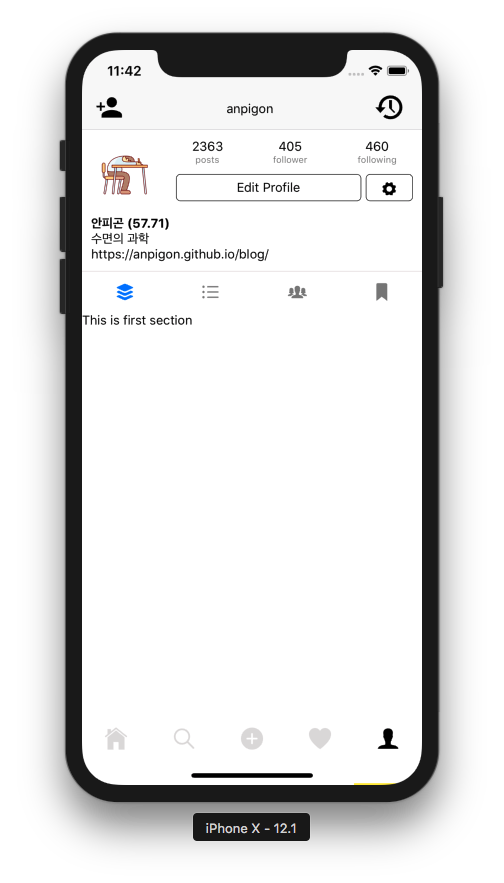
여기까지 작업하고 앱을 확인해봅니다.

선택한 버튼이 활성화되는 효과가 보이나요?
선택한 버튼에 따라 세그먼트 화면 전환하기
이제 선택한 버튼에 따라 화면에 다른 내용이 보여지게 합니다. renderSection() 함수를 입력합니다.
export default class ProfileTab extends Component {

    renderSection = () => {
        if(this.state.activeIndex === 0) {
            return <View><Text>This is first section</Text></View>
        }
    }

    // ... 일부 코드 생략 ...
우리는 버튼을 선택하면 해당 버튼의 인덱스를
state.activeIndex에 저장하였습니다.state.activeIndex값에 따라서 다른 화면 내용이 보여지게 합니다.
버튼 영역 바로 아래에 { this.renderSection() } 코드를 입력합니다.
<View style={{ flexDirection: 'row', justifyContent:'space-around', borderTopWidth:1,borderTopColor:'#eae5e5' }}>
    <Button transparent
            onPress={() => this.segmentClicked(0)}
        active={this.state.activeIndex === 0}>
        <Icon name='ios-apps'
              style={[ this.state.activeIndex === 0 ? {} : {color: 'grey'} ]}/>
    </Button>
    <Button transparent
            onPress={() => this.segmentClicked(1)}
        active={this.state.activeIndex === 1}>
        <Icon name='ios-list'
              style={[ this.state.activeIndex === 1 ? {} : {color: 'grey'} ]}/>
    </Button>
    <Button transparent
            onPress={() => this.segmentClicked(2)}
        active={this.state.activeIndex === 2}>
        <Icon name='ios-people'
              style={[ this.state.activeIndex === 2 ? {} : {color: 'grey'} ]}/>
    </Button>
    <Button transparent
            onPress={() => this.segmentClicked(3)}
        active={this.state.activeIndex === 3}>
        <Icon name='ios-bookmark'
              style={[ this.state.activeIndex === 3 ? {} : {color: 'grey'} ]}/>
    </Button>
</View>

{/* 아래 코드 추가 */}
{ this.renderSection() }
이제 첫번째 버튼을 선택하면 아래와 같은 화면이 표시됩니다.
첫번째 세그먼트 화면 구현하기
아래와 같이 이미지 더미 데이터를 입력합니다. 이미지 URL은 pixabay에서 임의로 가져왔습니다.


그다음 Dimensions를 import 합니다. 그리고 window 에서 width 와 height를 가져옵니다.
import { View, Text, StyleSheet, Image, Dimensions } from 'react-native';

const { width, height } = Dimensions.get('window');
renderSectionOne() 함수를 입력합니다.
export default class ProfileTab extends Component {

    renderSectionOne = () => {
        return images.map((image, index) => {
            return (
                <View key={index}
                    style={{ width: width/3, height: width/3 }} >
                    <Image source={{ url: image }} style={{ flex:1 }}/>
                </View>
            )
        })
    }

    // ... 일부 코드 생략 ...
renderSectionOne()함수는 Image 를 화면 너비의 1/3 정사각형 크기로 출력합니다.
그리고 renderSection() 함수를 수정합니다.
    renderSection = () => {
        if(this.state.activeIndex === 0) {
            return (
                <View style={{flexDirection:'row',flexWrap:'wrap'}}>
                    { this.renderSectionOne() }
                </View>
            )
        }
    }
state.activeIndex가 0이면,renderSectionOne()함수를 호출합니다.
앱 화면을 확인해보면 아래와 같이 표시됩니다.
내 스팀잇 블로그 글 표시하기
두 번째 버튼에 해당하는 세그먼트에는 내 스팀잇 블로그 글을 출력해보도록 합니다. 내 스팀잇 블로그 정보를 가져오는 fetchState() 함수를 구현합니다. fetchState() 함수를 이용하여 내 블로그 글을 표시해보도록 하겠습니다.
export default class ProfileTab extends Component {

  fetchState(username) {
        const data = {
            id: 3,
            jsonrpc: "2.0",
            method: "call",
            params: [
              "database_api",
              "get_state",
              [`/@${username}`]
            ]
        };
        return fetch('https://api.steemit.com',
        {
            method: 'POST',
            body: JSON.stringify(data)
        })
        .then(res => res.json())
        .then(res => res.result[0])
    }

    // ... 일부 코드 생략 ...
자세한 구현 내용은 ProfileTab.js 파일을 참고하세요.
아래는 완성된 화면입니다.
작업한 코드는 모두 깃허브에 업로드되어 있습니다.
https://github.com/anpigon/rn_instagram_clone
여기까지 읽어주셔서 감사합니다.
시리즈
- [React Native] 인스타그램 UI 만들기 #1
- [React Native] 인스타그램 UI 만들기 #2
- [React Native] 인스타그램 UI 만들기 #3
- [React Native] 인스타그램 UI 만들기 #4
- [React Native] 인스타그램 UI 만들기 #5
Sponsored ( Powered by dclick )
늦었지만 그럼에도 불구하고 진전있는 스팀의 행보를 기대봅니다.
이전까지의 행보로 많이 잰걸음했지만 지금의 행보를 보며 기대를 걸어봅니다.
blockchainstudio님의 명성도 65달성 이벤트 결과 - 총상금 68스팀
짱짱맨 호출에 응답하여 보팅하였습니다.
잘 만드셨네요.
교육용으로 좋을 듯 싶네요.
감사합니다. 이제 조금씩 앱 코드를 다듬어 보려고 합니다.
재밌어 보입니당👏👏
너무 재미있습니다. 😁
Hi @anpigon!
Your post was upvoted by @steem-ua, new Steem dApp, using UserAuthority for algorithmic post curation!
Your UA account score is currently 2.880 which ranks you at #11835 across all Steem accounts.
Your rank has dropped 16 places in the last three days (old rank 11819).
In our last Algorithmic Curation Round, consisting of 220 contributions, your post is ranked at #119.
Evaluation of your UA score:
Feel free to join our @steem-ua Discord server
와...! 멋지고 재밌어보여요
관심가져주셔서 감사합니다. 실제로도 재미있습니다. ㅋ