Digital art Tutorial 01: How to Design Wifi icon in adobe illustrator by @kawsar
Today I will share with you every step of how to design a wifi icon. I hope you like my design. And if you like it and want to get a post like this, then say in the comments, I will share such design tutorials after this.

Design Tutorial Process:

Step-01: First I will open Adobe Illustrator, after opening I have taken an artboard.

Step-02: Then I will take a circle and keep its circle black and turn off its fill color.

Step-03: I will copy this circle and make it a little smaller than this circle. I will keep the small circle inside the big circle.

Step-04: I will copy the circle again and make it smaller. I will put this circle inside the big circle.
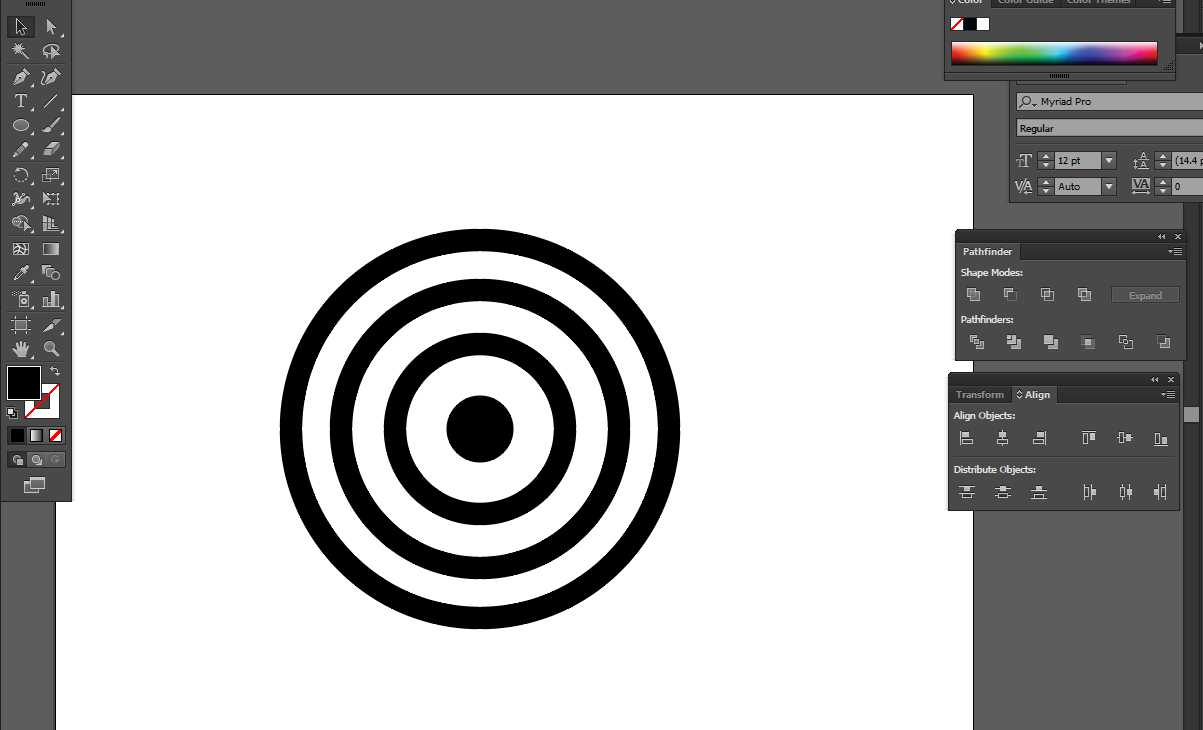
Step-05: This time I will draw a circle inside it. I will stroke it off and black the fill color.

Step-06: This time I will middle align all the objects.

Step-07: I will then draw a line from the smallest circle to the top at a 45 degree angle.

Step-08: Then I will copy the line I took earlier and put it on the opposite side.

Step-09: This time I will select all the objects. then click shape builder tool and delete the outer part below the line I have taken.
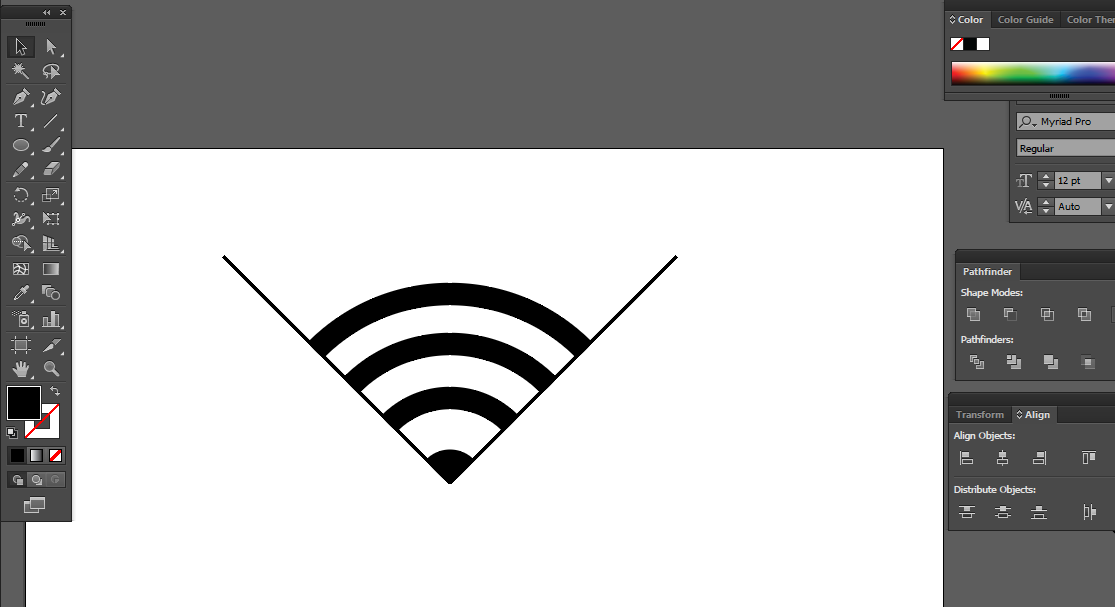
Step-10: After deleting the parts, I will also delete both the lines.

Step-11: Became our WiFi icon design.

Step-12: This time I copied the WiFi icon and put it next to it.

Step-13: This time I will color one gradient so I have selected the right side and gradient the right side.

Step-14: This time I have selected the color on the right side of the icon like me.

Step-15: Became our WiFi icon design. This time I put a shadow under the two WiFi icons.
Many thanks to everyone for reading this post carefully

Simple to follow @kawsar thanks for sharing your graphic design skill.
well design tutorial for designers. thank you very much for sharing.
Thanks for sharing this tips with us.