How to Make a Camera App in Android Studio!

Hello and welcome to this new Android Development tutorial. This is part one of How to Make a Camera Application for Android.
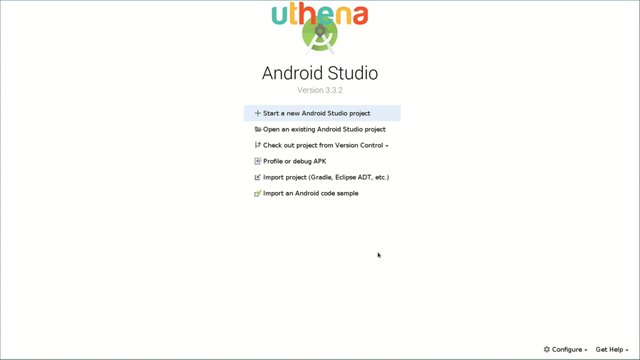
So we will start by opening our Android studio IDE and then we will click on ‘Start a New Android Studio project.’
We will select ‘Empty Activity’, we will click on ‘Next’.

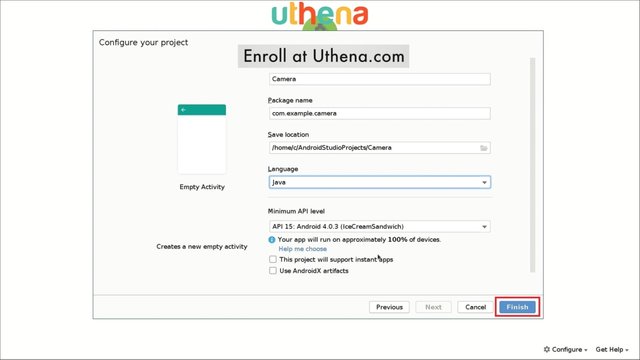
And as the name for this application we will write ‘Camera’, okay? We make sure the selected language is ‘java’ and the minimum API level will be 15. We can change that later though.
So we're going to click on ‘Finish’ right now.
We will wait for the IDE to load the project so we can start working on our project. I will use an emulator to run the apps so you can see what I'm doing and changes it takes when I code.
If you will enjoy reading and contributing to the discussion for this post, will you please join us on the YouTube video above and leave a comment there because I read and respond to most comments on YouTube?
If you find anything helpful in this video or funny, will you please leave a like because you will feel great helping other people find it?
So basically we will be using the API 1 of camera as the first camera course, because it is easier, is less complex and gives you an overall idea on how a camera works on Android.
There's also camera 2, but it's way more complicated so we won't dive a lot in that.
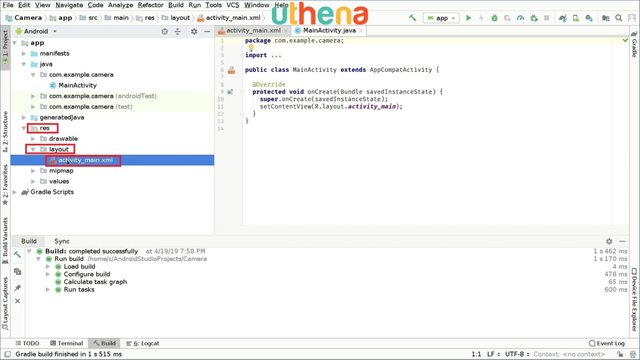
So now that the project is loaded, what we will do is we will change the default layout file with new one. To do that we will open the ‘res’ folder here on the left side then we will go and open the ‘Layout’ folder and we will delete the ‘activity_main.xml.’
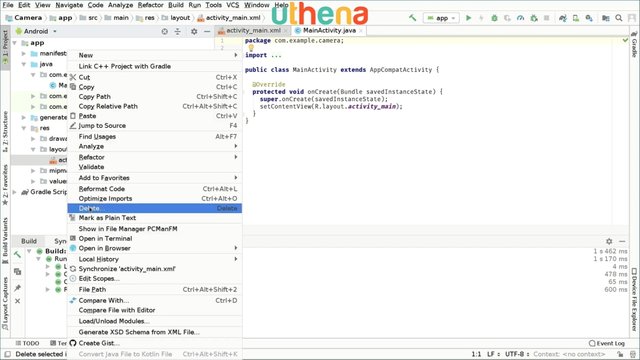
To do that we right click on this file and click on ‘Delete.’
If we have these options checked we will uncheck them and then click in ‘OK.’
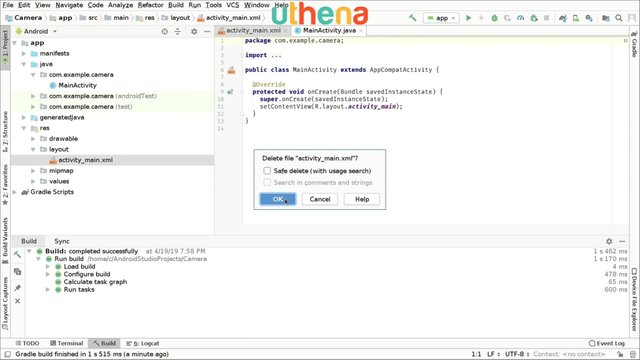
So now the file should be deleted.
We will actually create that file again, but with a different structure. To do that we will right click on ‘Layout’ folder go to ‘New’ ‘Layout resource file’.
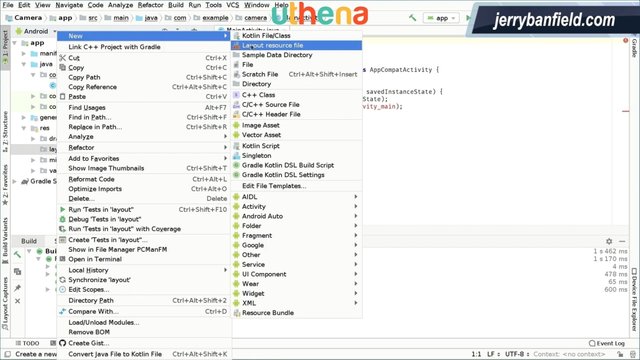
And here we will type name as ‘activity_main’. So the same name it was previously. But on ‘Root element’ we will change the card 1 with LinearLayout. We will click on ‘OK’ and now the IDE has generated this new file for us.

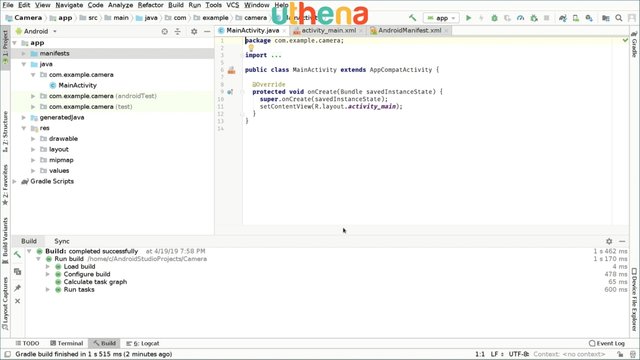
We will switch this file to ‘Text’ right here and here is where we will code the UI of our application, okay?

So in Android if we want to access hardware features like the camera, we need to ask for permission. So we're going to open our manifest or android manifest.xml file and we will write uses-permission and we'll type CAMERA.
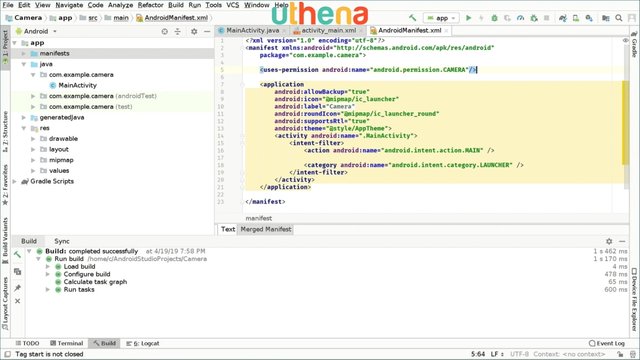
After we do this, we are telling the system that we will use the camera permission for our application. Right now we have to ask for permissions actually in code. So what we will do is we will go to our MainActivity.java file and we will start checking for permissions at runtime.
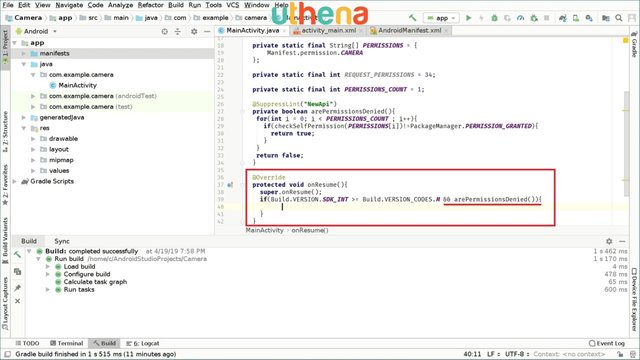
So what we will do is we will overwrite the onResume method. For that we’re going to type @Override protected void onResume(). We will open the method and we will type super.onResume(); which is basically calling the super method of the class.
Next we will check if the current version is the same as or greater than Android Marshmallow. To do that we will do the following we type if(Build.VERSION (Make sure you import Build right here) and .SDK_INT. If this version is greater or equal than Build.VERSION_CODES.M).
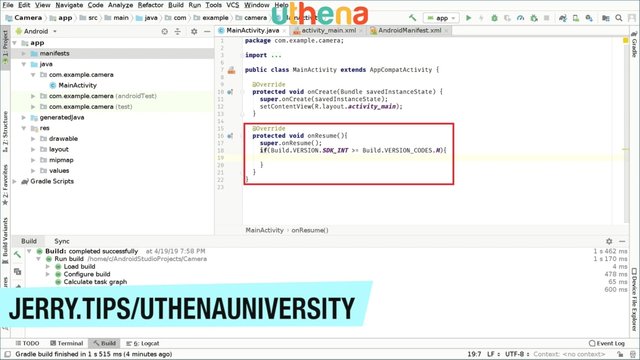
This is basically saying if this version is greater or equal than Marshmallow. Why do we check that? Well, because Marshmallow and layer require us to ask the user for permission.
So only if this if statement is true we will ask for permissions. So as you may think, we have to define the permissions that we will be asking for. So to define the permissions the Android operating system requires us to define an array of strings. To do that we’re going to create it as a global variable
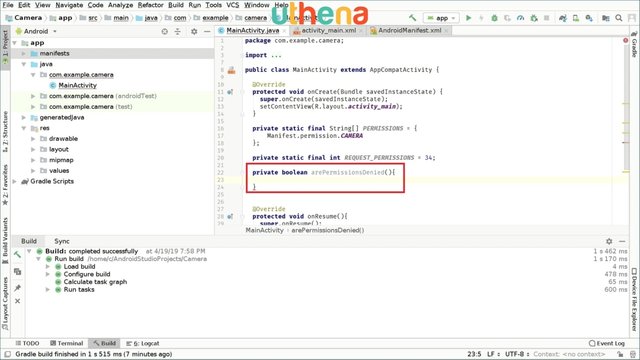
So we will type private static final String [] and we'll call it PERMISSIONS and inside these we will specify the permissions we want to ask for. In this case is the camera permission. So just one. To specify permission we will do the following. Manifest.permission.CAMERA. So we have now our permissions specified as you can see, but we also have to specify a request permissions code. For that we are going to say private static final REQUEST, this is a int type so we can say private static final int REQUES_PERMISSIONS. We will set this to basically any number it can be 3 or 34 for example. It doesn't really matter. It's just a code identifier.

So after we've done this what we will do is we will check only if the permissions are denied.
Because as you may know the OnResume method is called every time the user returns to the app so we won’t want to be asking permissions if we don't need to. So we have to create a method that will check if the permissions are denied and only then we will ask for permissions.
To create a method we will write the following, private boolean arePermissionsDenied(). We open the method and we create a for loop.
In this case we have only one permission so it's way easier, but we will write the method in a way we can extend it later for more permissions. For example, we want to write the image to the device storage so we will also need storage permission in the future.
So right now we will specify an a global int variable that will store the number of permissions. To do that we're going to say private static final int PERMISSIONS_COUNT, and this case means we have only one so we will set this to 1.
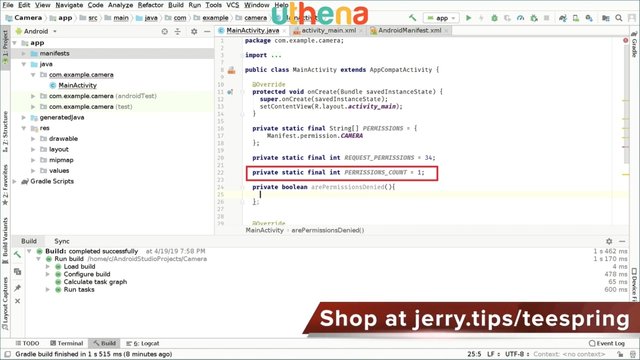
Okay, so we go back to our permissions denied method and we don't have to end it with a semicolon. So right here we will create a for loop that will check if the permissions we want are denied or granted.
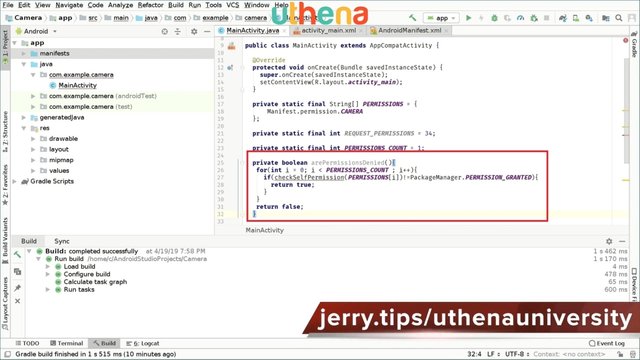
Okay so you're going to go and write for(int i = 0; i< PERMISSIONS_COUNT ; i + +). Now this will be run as a for loop every time we're checking for each permission and what we'll do every time will be if(checkSelfPermission we will pass PERMISSIONS[i]. So if that checks out permission returns something that is different than permission granted we will know that permission has been denied. So PackageManager.PERMISSION_GRANTED. If it's different than PERMISSION_GRANTED we will return true; which means permissions are denied. And if the for loop ends without returning we will return false; which will mean permissions are not denied.
As you may notice we have a warning right here that says ‘Call requires API level 23 (current minimum is 15).’
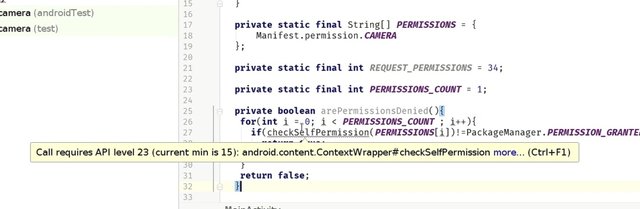
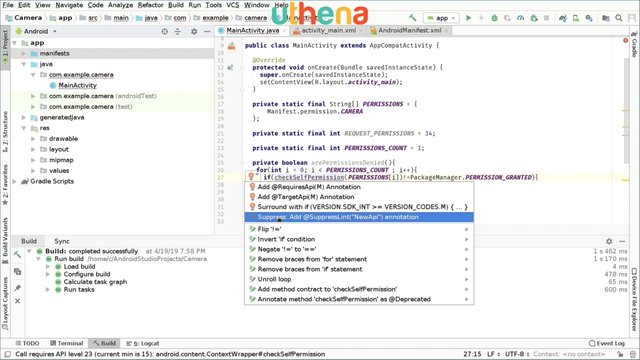
We don't really care about this, because we are calling these method only when API level is 23 and above. So we can click on this warning icon and we will click on ‘Suppress:Add @SuppressLint(“New Api”)annotation’ and this basically ignores the warning, because we are calling it only when it's safe.
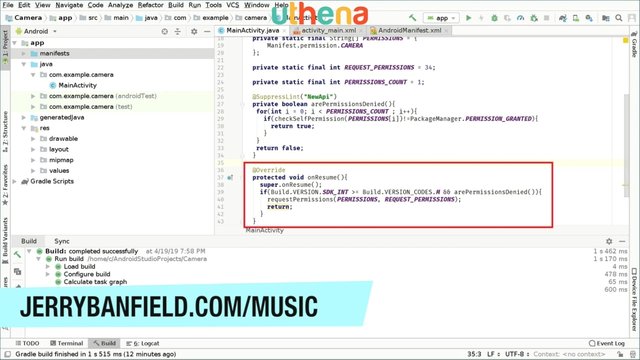
Okay so right here if(Build.VERSION.SDK_INT >= Build.VERSION_CODES.M), so if it's Marshmallow or greater, we will also check if permissions are denied. So we have two conditions here and if both conditions are true, we will ask for permissions.
So we're going to say && arePermissionsDenied(). So if those both checks are true we will ask for permissions.
So how do we ask for permissions?
Well, simple. We only say B. We will pass the permissions we want to request and the REQUEST_PERMISSIONS code which we called REQUEST_PERMISSIONS. And after this we will return because we don't want to keep initializing the app if we don't have permissions.
So these request permissions will show the user a dialog in which the system will ask the user for permissions and the user can either tap and allow permission or not. But the result of that dialogue is what we will handle right now.
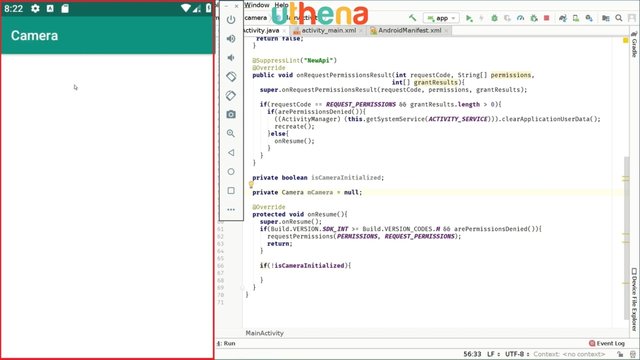
To do that we going to write @Override and then we're going to say public void onRequestPermissionResult. And the parameters of these will be the following. The first one is an int which contains a request code. Next one is actually the permissions. So these parameters are passed when these method is called. So the first was requestCode the next one is string [] permissions. The next one is grantResults which are the results that will tell us if the permission was granted or not. So it is an int array which will be called grantResults. We open the method and we'll call the super method too so we're going to say super.onRequestPermissionsResult and we will pass the parameters we receive from the method call. So the first one will be requestCode in the same order of course. The next one will be permissions and the next one will be of course grantRresults.

Now right here we’ll check if the permissions were accepted or not by the user. So to do that we first want to check the request code we sent is the same that we are receiving here. So you can say if(requestCode = = REQUEST PERMISSIONS and we will also check if we don't have an empty result. So we’re going to say if grantResults.length > 0). So if these two conditions are true then we can go ahead and check the permissions state. To make our lives a lot easier we will call the method we already created. To do that we are going to say if(arePermissionsDenied()). This means the user has denied the permissions otherwise the user has accepted them.
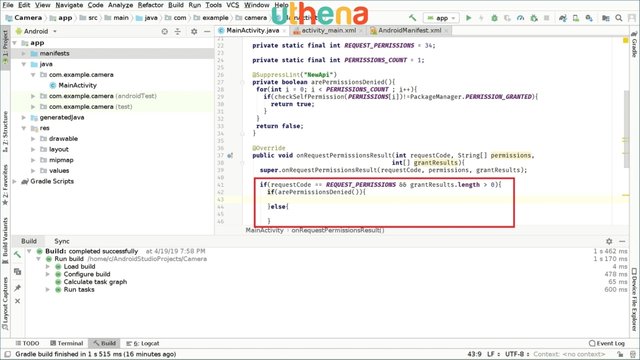
So what we will do if the permissions are denied so since this is a camera application and the permission were asking is camera, if the user denies that permission then the app is not usable at all. So basically we cannot do anything. We cannot go forward if the user doesn't accept the permission. So we will close the app and enable the app to keep asking for permissions when the user opens the app again.
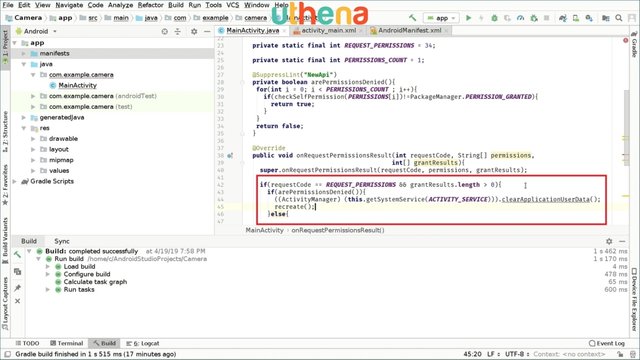
To do just that we will do the following, we'll open two parentheses right here and in the inner one will type ActivityManager. Then we go to the outer parentheses, we'll open another one, because we are using this ActivityManager to cast the result of (this.getSystemService(ACTIVITY_SERVICE))). And after these three parentheses we will write .clearApplicationUserData(); which will of course clear the user data as you can see. And after we do that we can say recreate(); which is basically accept the app or something like that and that's it.
As you can see we have a warning right here which says ‘Call requires API level 19’ but again these will be only called if API level is 23 or above.
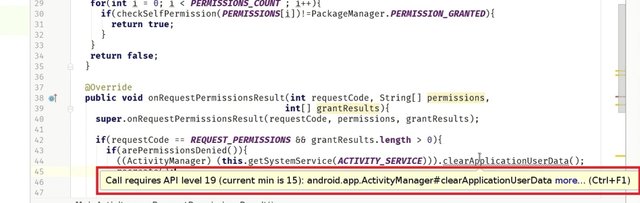
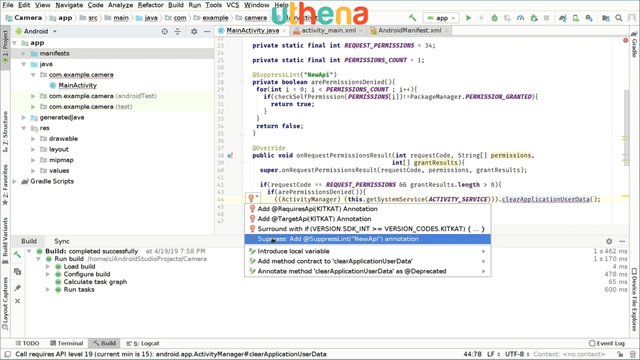
So we're going to ignore the warning by clicking in this icon and then on SuppressLint(“NewAPI”) annotation.
As you can see the warning is silenced and now that was if the user denied, but if the user accepted or allowed the permission we will call the onResume method. So onResume method will be called again and this time the permissions will be actually allowed. So we can continue with the initialization of our application which is great.
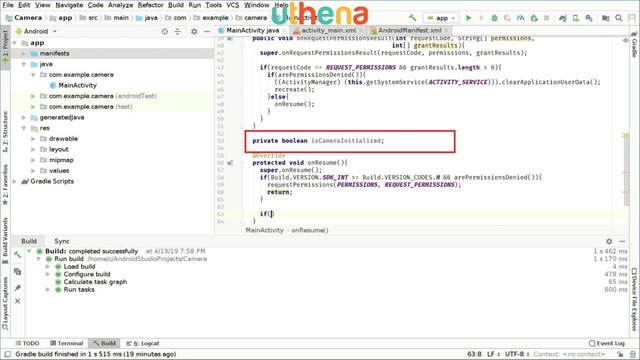
Now in order for us to know if we have initialized it previously, we will create a global variable. So we're going to type private boolean isCameraInitialized and this as default is set to false.
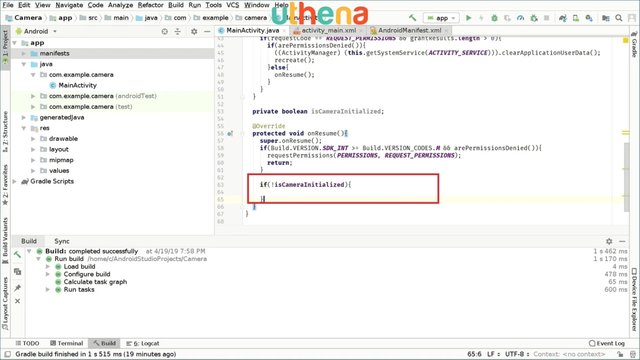
So after this if statement right here we will check if(!isCameraInitialized) is false. So if camera initialized is false we will initialize the camera.
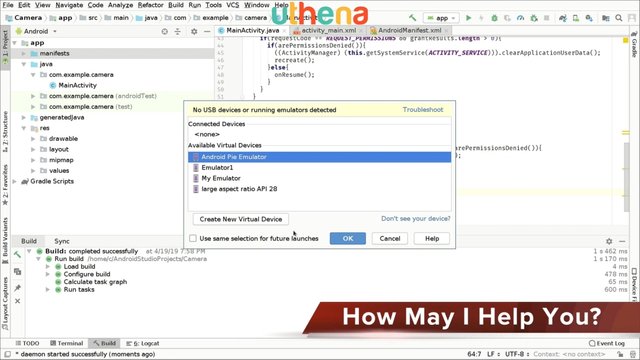
Great so right now I will run the app on my emulator so we can see that the permissions requests are working.
Okay, while this is loading I will talk a bit about how the camera will work. So basically the camera accesses an API that is made available by the Android operating system. Which enables us to access the camera object, to open the camera, to close the camera, to take photos, to change the modes of the camera and to request some features of the camera like filters, exposures, auto focus in the case the camera has auto focus and that sort of stuff.
So basically what we want to do here is create a camera object on code that will enable us to use the real camera of our device. So to do that we have to create a camera object, right? To create a camera object we will use Java, but we will also use the XML file in which we will display the camera preview to the user. So the user of course needs that to check if the camera is working as expected.
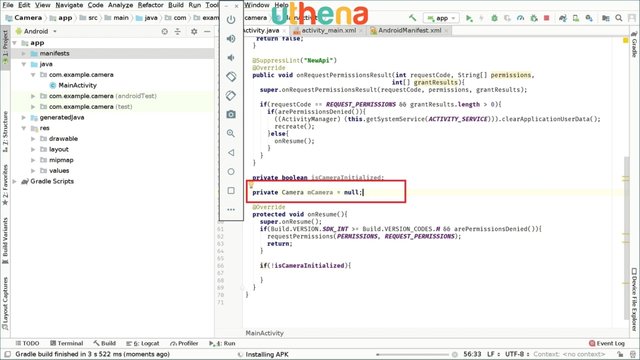
So as I was telling you, we want to access the camera object from code, okay? So to access it we will use the camera API level 1 in this case which as I told you is way, way more simple and easy to use, okay? Okay the emulator is being restarted now and we will wait for it again a bit to see if we can continue. Okay while we wait for that we will go to our Android Studio project and we will go to our MainActivity.java and we were on the onResume method as you might remember right here. And we were checking if the camera was initialized. So the camera object I was talking about can be accessed as follows. So we’re going to say private Camera and let’s import this Camera of hardware, and I will call this mCamera and for safety reasons I will set this to null. Sometimes another app may be using the camera so we cannot open it so we declare it to null. So that's the object we will use.
So if I run the app right now hopefully it will work this time. Okay let's see. ‘Installing APK’ and ‘Launching activity.’ And as you can see, the camera application has launched right now.
So it is working as we expect. So for the camera we will use this mCamera object right here, okay? So that's basically it for this video. In the next one we will actually initialize the camera and continue experimenting and learning how to set up a camera.
Part two of How to Make a Camera Application for Android.
In the previous tutorial, we initialized the permissions and we did some of the UI and also solved some problems we found along the way. Right now we will continue to initialize our camera. For that we will go to our MainActivity.java file and on the onResume method we will go to the if(!isCameraInitialized). If that is false we will go to that if statement and we will get and initialize our camera, okay?
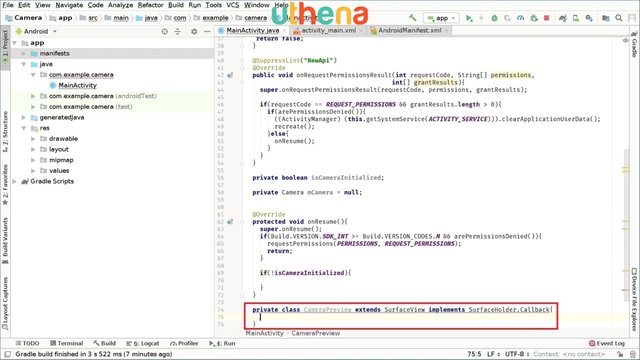
So basically our camera object will use the following global variables. We already have the mCamera object,but we also need the preview of our camera. For that we are going to create the following, private CameraPreview.
Apparently we cannot create a CameraPreview. Let me see what's going on here. Actually I think we have to implement that ourselves if I'm not wrong. Maybe we have to create the preview ourselves, because Android doesn't have kind of a default way of doing a camera preview apparently. So we have to create that class ourself.
We will do it as follows. After the onResume method, we're going to create a new class. Private class CameraPreview. So this is the CameraPreview. This will extend SurfaceView. Okay, we have to import this and we'll implement the SurfaceHolder Callback, so implements SurfaceHolder.Callback. Great. We then open this class.
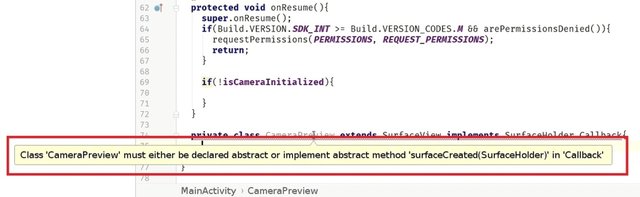
And as you may see we have these errors that will be fixed as we continue typing.
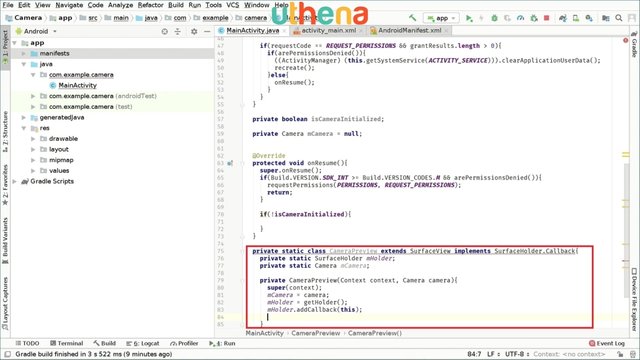
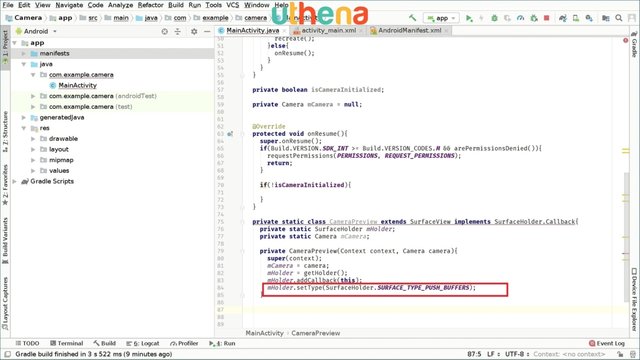
Okay so to improve performance in this we can make these classes static. So we're going to make static and inside this we're going to say private static SurfaceHolder mHolder which will be our SurfaceHolder and we also create a local camera object. So private static Camera mCamera which is our camera object and of course we have to create our constructor method which will be private, because this in their class. So Private CameraPreview and as parameters we'll need the contexts which we will also call context and a camera and we will also call camera,okay? We will open the constructor method and we will call it super and we'll pass our context and we will set mCamera to the camera we pass we get. So mCamera = camera. Great. We continue and go and set mHolder to getHolder right here and also mHolder.addCallback to this because we're implementing the Callback in the SurfaceHolder class.
Okay. We also have to set the type. So we’re going to say mHolder.setType (SurfaceHolder.SURFACE_TYPE_PUSH_BUFFERS), okay? Great. So this is for our constructor class right here.
Now we are extending the SurfaceView class. For that we have to create a couple more methods. The first one being public void surfaceCreated and we'll have a parameter SurfaceHolder we will call it holder.
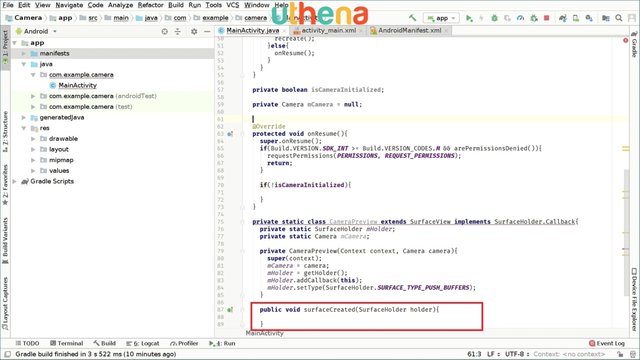
We'll open these method and set our global holder to this. So we will have to set a global class holder. So remember when we were defining the classes out here on the Camera mCamera class? We also have to define a holder outside it, okay? So let's do it right now.
So basically this my holder thing right here we will set will be the holder that will be accessed by our outside class. So since this is in the static class, we are going to say private static SurfaceHolder we will call it myHolder, okay?

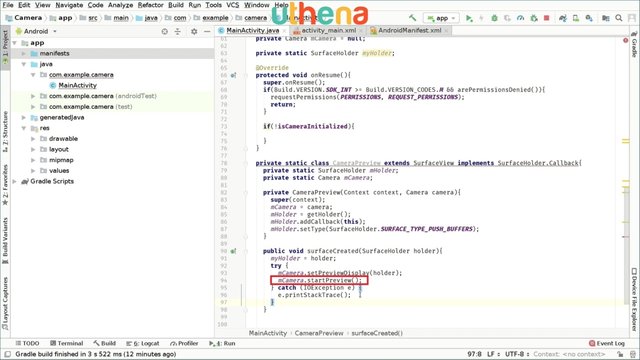
So we have now created our holder and we can go back to our CameraPreview class. So we go back to our CameraPreview class and we will continue writing it. So in the SurfaceCreated method, we’re going to set myHolder will be set to holder. And here we will set the preview display of our camera so we will show the user the actual CameraPreview. To do that we are going to say mCamera.setPreviewDisplay and we'll set this to holder. And we will also say mCamera.startPreview();.So as you can see here we have to handle this exception so we will click in here and click on ‘Surround with try/catch’.
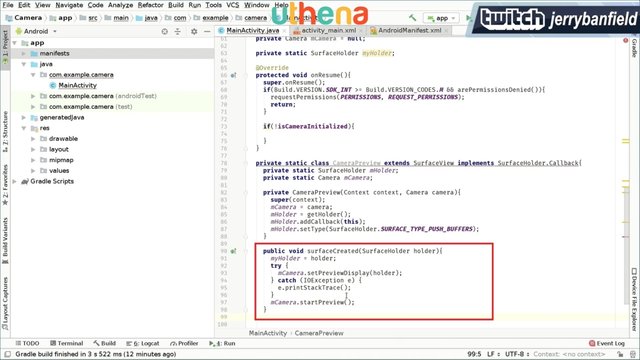
Great. let's make this look a bit better. We will put these lying inside the try block right here. And that's it for our SurfaceCreated method.
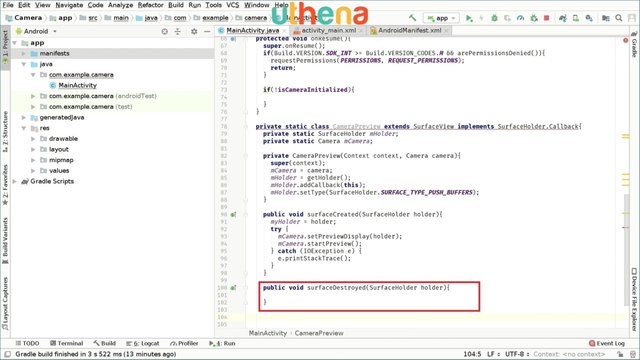
We will also have to create a surfaceDestroyed method. So we’re going to say public void surfaceDestroyed. And again it will have surfaceHolder of name Holder. And for now we won't be using this method, okay? We won't be using the method.
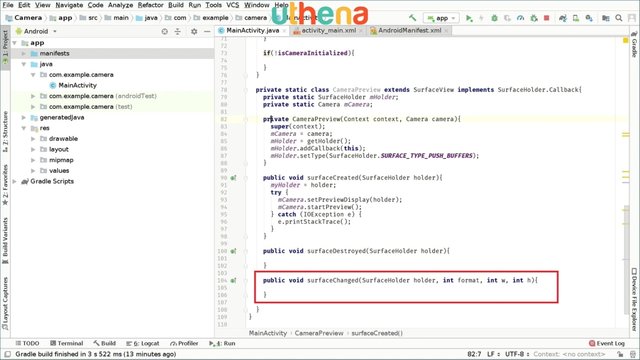
Now we will go and create another method which will be public void surfaceChanged and as parameters will be SurfaceHolder holder. Then we will have int format, we have int width and int height we can just write int h. And we again won’t use this for now, because we don't really need it.
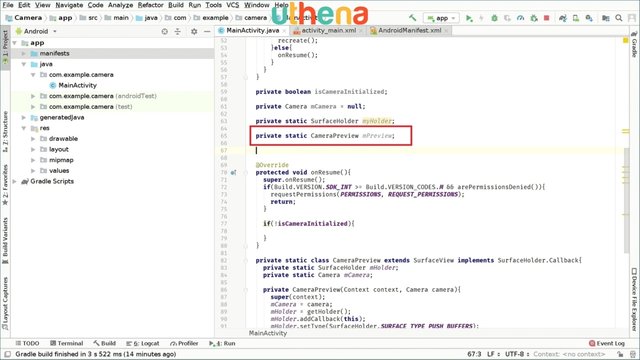
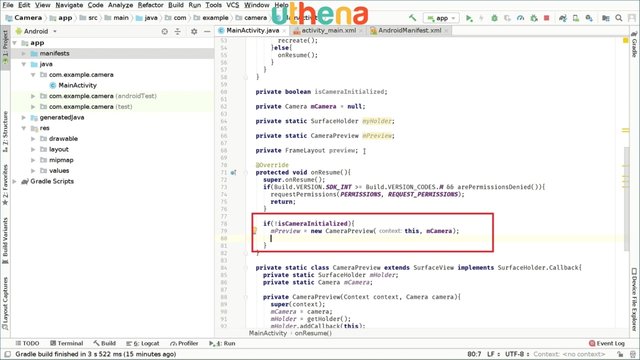
And now we have created our own CameraPreview class. We will use these class to show the camera content to the user, which is awesome. So right now we have done this and we will go and initialize our camera. And as I told you we will have to define some global variables right here. So after we define the holder, we will access the preview in this case the preview we just created. So we're going to say private static CameraPreview and we will call this mPreview. Great.
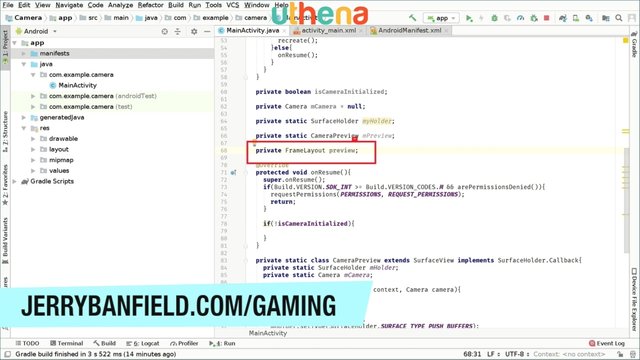
But we will also want to create a kind of preview as a layout so we want to display to the user right? So for that we’re going to say private FrameLayout and we call this preview.
Great. Okay so right now we have a couple of variables that are quite useful for us and we will do the following. So in the onResume method, in this if statement that checks if camera is not initialized we will initialize it as follows. So we will set mPreview which will be set to new CameraPreview this, mCamera.
And we also have to create a preview in XML the frame layout which is this right here.

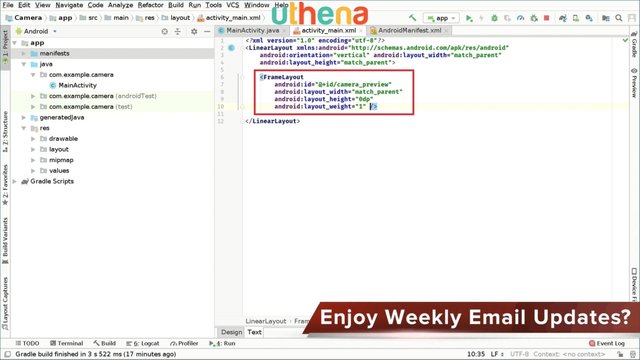
So to do that we will go to our activity_main.xml file and here we will do the following. We will do FrameLayout the width will be match_parent, the height we will set it to 0dp but we will set weight to 1 for now. We can change this later of course if we need to. So we have FrameLayout and the id of this will be camera_preview which is awesome. We close this element and I think we're now ready to continue.
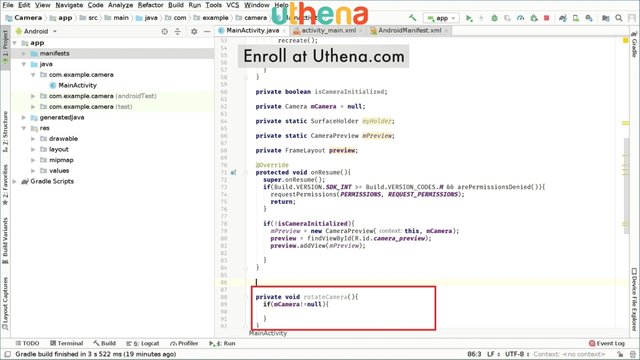
So we will go back to our MainActivity.java file and here after we initialize the mPreview we will initialize also the FrameLayout with our preview. So we are going to say preview will be set to findViewById(R.id.camera_preview) which is great. And now we will add the preview of our code to the preview of our XML file. To do that we will do preview.addView and we'll pass mPreview. So we have added our preview to the XML layout.

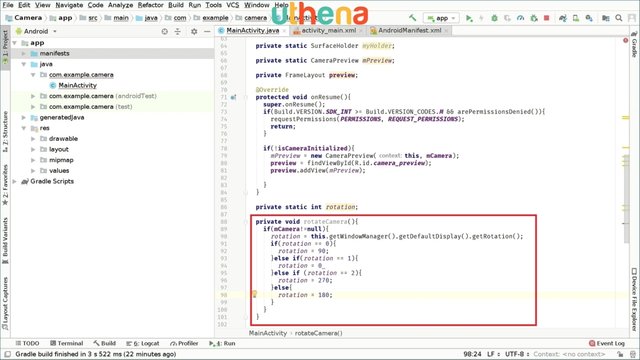
Now sometimes the camera in some devices won't work as easy as we might expect. So maybe the camera has some rotation internally that we have to take care of, okay? So we will call a method that we will call rotateCamera. So we'll create a method right here saying private void rotateCamera(). And this is also useful when we are switching between front and back cameras. So first of all in this rotateCamera we have to check if the camera object is not null. For that we’re going to say if mCamera is different than null, so if mCamera is different than null, we will get the rotation of it.
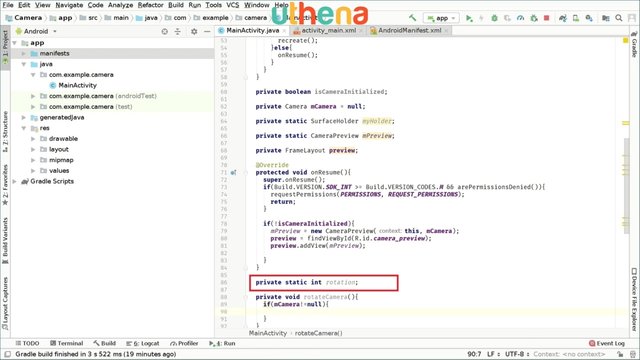
The rotation of the camera is a useful parameter we will use later so we will set that as a global variable. So private int rotation. And the rotation of the camera will be a value that will contain the rotation of our camera okay? So we will just call it rotation okay? So for performance we can also use static here which would be better, not really important, but you know, kind of better.
Okay so we have rotate camera. If camera is different than null then we will get the kind of the rotation of this play. So you can say rotation = this.getWindowManager().getDefaultDisplay().getRotation(). Now we'll do some checks right here that we have to know if we are setting the rotation right or not. So first we are going to say if(rotation = = 0) then we'll change rotation to 90. Why? Because 90 is the default. And then we're going to say else if(rotation = = 1) this will be set to rotation 0 actually. So we’re can go anti-clockwise. So else if(rotation = = 2) we will set rotation to 270 which is 360 minus 90, and else if it's 3 it will be 180. So rotation = = 180. So this basically enables us to know about the rotation of the device and also the rotation of the camera itself.
do you
where to see more.
Would you like to continue learning about How to Make a Camera App in Android Studio? If you are prepared to advance your career as a mobile app developer please buy the complete course, How to Make a Camera App in Android Studio, on Uthena and learn or improve your skills in Android development.
You can also get the first hour and a half of the course completely for free on YouTube.
Thank you for reading the blog post or watching the course on YouTube.
I love you.
You’re awesome.
Thank you very much for checking out How to Make a Camera App in Android Studio and I hope to see you again in the next blog post or video.
Love,
Jerry Banfield.
Posted from my blog with SteemPress : https://jerrybanfield.com/make-camera-app-android-studio/
Congratulations @jerrybanfield! You have completed the following achievement on the Steem blockchain and have been rewarded with new badge(s) :
You can view your badges on your Steem Board and compare to others on the Steem Ranking
If you no longer want to receive notifications, reply to this comment with the word
STOPTo support your work, I also upvoted your post!
Vote for @Steemitboard as a witness to get one more award and increased upvotes!