How to: Spooky Jack-o-Lantern (Modeling)

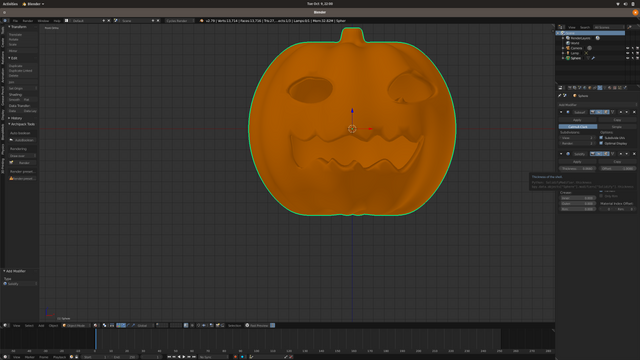
Today we're going to be making a 3D printable Jack-o-Lantern similar to the one pictured in the rendering above. We will be using the amazing Open Source 3D authoring suite Blender for the modeling, and will be going step by step to create a model similar to the ones above. This is intended to be a entry level tutorial so if you are familiar with blender feel free to just pull out the good parts and go nuts.
If you happen to have a 3D printer or know someone that does you can download the STL file and print these guys yourself. In my prints, and in the students prints we used PolyLite's translucent orange filament, but really any filament will do.
Resources
- Blender 2.79
- 3D printer (optional)
- filament (optional)
Blender is a two handed application, with one hand on the keyboard and the other on the mouse. I would recommend you use an actual mouse with at least 2 buttons but three is ideal. It is also worth noting that blender uses the numeric keypad found on full sized keyboards for certain operations. -- Ben
Step 1
Open blender and delete the cube. press the x key and confirm
Step 2
Press the 5 key and then the 7 key on the numpad (Numlock Doesn't need to be on) to switch the view to top ortho you will see this in the top left hand corner of the view area.
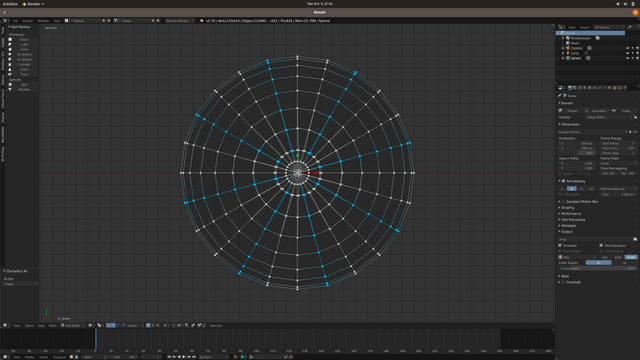
Next we will create a UV sphere which can be found under the "Create" tab on the left hand side of the interface. (see fig. 1)
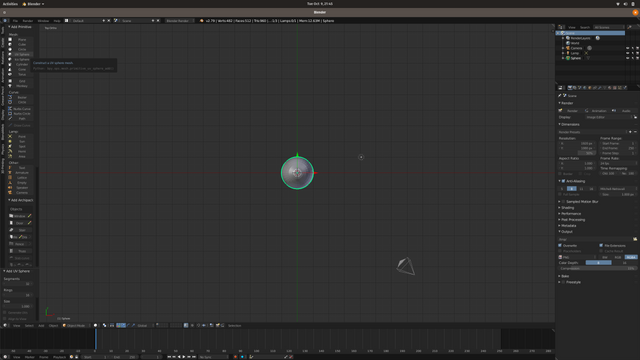
fig.1
If you can't find the create side tab you can also hit the space bar and type "add uv sphere" and hit enter
On the left hand side near the bottom of the view you should see a tool box that says "Add UV Sphere" with a bunch of numbers. Change the segments number to 24 by clicking on the number and typing in the new value. Hit enter to make the change.
Step 3
Once we have our Sphere we need to make it less spherical so for this we need to change the view by pressing 1 on the numpad, and zoom in. middle scroll wheel - or - however you scroll up and down on your computer.
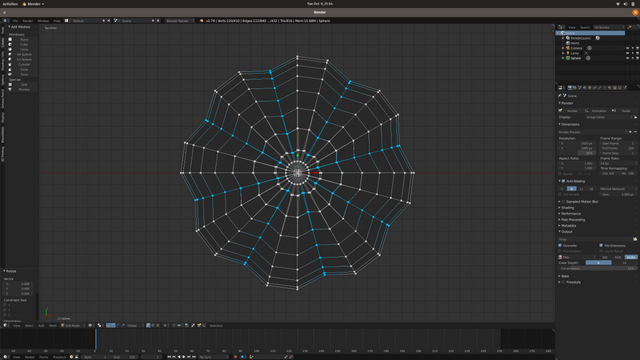
Once you're happy with the zoom you will need to hit the Z key as well as Tab. The Z key changes view modes ( in this case from filled to wire frame). (See fig. 2)
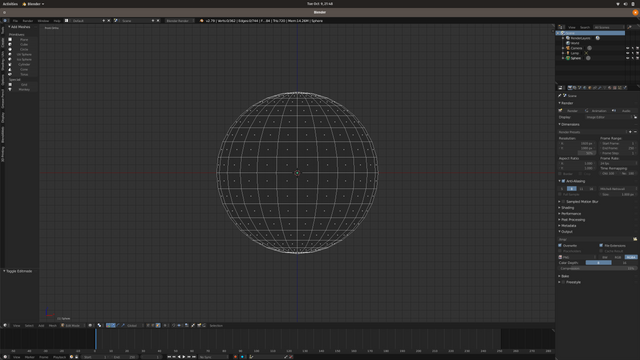
fig. 2
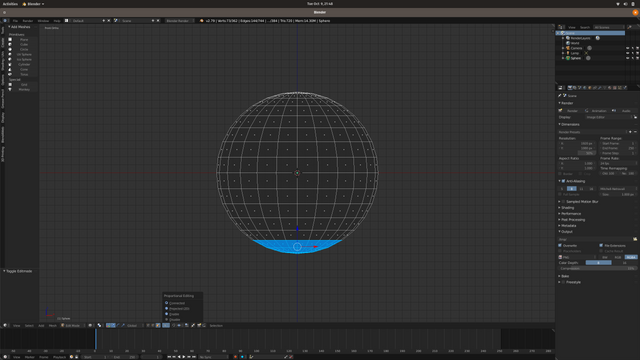
With that done we need to squash the top and bottom parts of our pumpkin. To speed this process up we will be useing the proportional edit features found along the bottom row of the main view. If you're having trouble finding the tool fig. 3 has it highlighted
Now this step is rather subjective so there is no right or wrong way to make the bottom and top of the pumpkin as long as it creates a pumpkin-y shape. So here are the general steps to creating the shape and I will leave it to you to find the right one for you pumpkin
Note that in this screenshot I have it on "face select mode" you can change the edit modes using the three options next to the proportional edit button. Also note that if you make a mistake while editing you can usually hit Esc to disregard the edit. If you have already locked in the change by clicking or by hitting enter you can still reverse the mistake with Ctrl+z
- B Key : goes into box select you can then use the mouse button to highlight the area you want to affect.
- G Key : The G key is used to translate (move) object around. As you noticed when you hit G a circle appeared on your screen. This circle represents the area of effect the proportional edit has on the model. Using your scroll wheel you can change the size of the circle to affect more or less of the model.
- A Key: Toggles the selected area so when you are done editing a certain area you can use this key to deselect the area to do the next.
Toggling proportional edit on and off leads to a pretty good pumpkin shape just remember to turn it off when you aren't using it, and assume it needs to be off for any steps that don't directly say we are going to use it.
Once you have the model looking pumpkin like its on to the next step.
Step 4
In this step we're going to make a basic stem. Press Numpad 7, then Z key ,then A key, to get back to the top of our model where we can see all the rings and segments. Using the C key you can go in to circle select mode and with the left mouse button down you can highlight areas just by crossing over them. With this tool enabled high light the inner most ring on the top of your model. Similar to the proportional edit tool a circle appears around you mouse cursor, you can change the size of the circle by using the scroll wheel.
Note the Circle select tool requires you to hit escape to get out of the tool. While its active you can't use any other commands.
Once you have the center most ring and the point at the very top highlighted hit the _E key to create a new ring (the E key is a short cut for extrude) and hit enter.
Next hit the S Key to scale the new ring. It needs to be the size of the stem on the top of a pumpkin, but I leave it up to you to decide what that is. Once you have the right size hit enter or use the left mouse button. Your model should look something like fig 5.
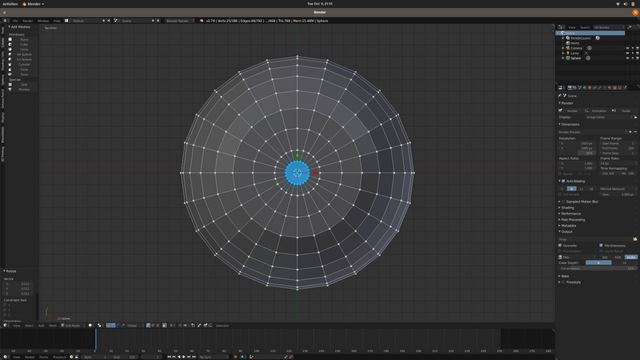
fig. 5
Next hit NumPad 1 to switch from top view to front view. Hit the E Key to extrude again and instead of hitting enter move your mouse upward or use the arrow keys on your keyboard to create the stem. As before hit enter or use the left mouse button to lock in the placement of the new addition.
Step 5
Next we're going to stay in top view but hit the Z Key to see right through our model and switch the edit mode to vertices. (See Fit.6)
Once in this more use the C Key as in the last step and highlight every other or every third line of vertices paying close attention to not include the stem.
I messed up in this step when creating the howto. If you leave the stem and the next ring out from the stem unhighlighted you create a better finished product. imo
Once you have them selected we will use the S Key to scale the ribs, moving them in slightly by mouse movement or the arrow keys. When you're happy with the look hit enter or left mouse button to finalize the change.
Congradulations! You now have a pumpkin model!
Now lets color it.
Step 7
Blender has an amazing array of rendering engines built in or available as plugins. In this tutorial we will use Cycles. To change the rendering engine see fig. 8
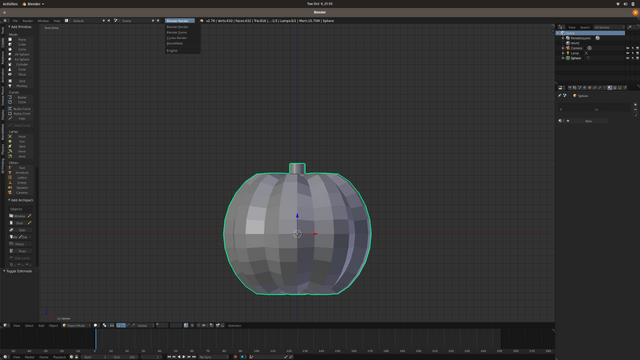
fig. 8
With cycles now selected we need to apply a texture to our pumpkin. On the right hand side of the screen you should see a tool bar that starts with a camera looking icon and end with a bouncing ball...thing. WE need the materials section but feel free to click on each one to find out what they do.
After you have found the material tools you can add a material to the object by clicking "New". Now just click on the white box next to where it says "color" and select the most pumpkin orange you can manage. Once you have select the color you'll notice that nothing happened to your pumpkin. In fig. 9 you can see I have the "Viewport Shading" menu open. Changing this to material will present your pumpkin in all its glory.
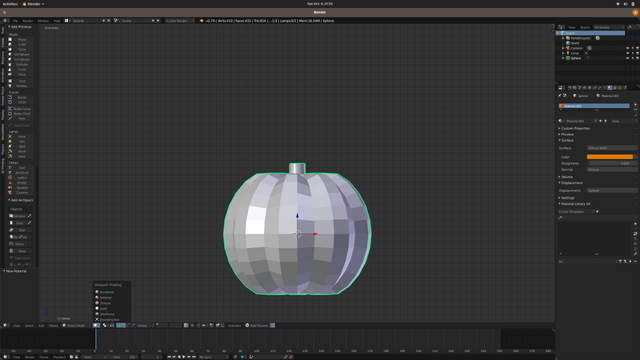
fig. 9
Step 8
Lets make sure we're in front view by hitting numpad 7 and lets get ready to cut this gourd.
From the front of the Pumpkin use the left hand tabs to find the knife tool which is of course found in the tools tab near the bottom. If it doesn't show up hit tab to enter edit mode and it should appear. Selecting this tool will allow you to cut from line to line or vertex to vertex. Don't worry too much about things looking angular as we will be fixing that in a later step. See my example in fig. 10
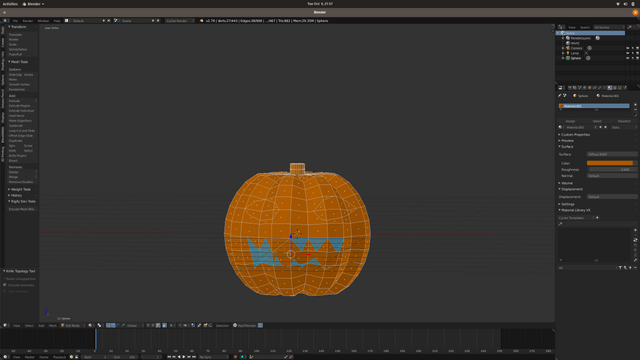
fig. 10
Beautiful isn't it?
So now with our eye mouth and possibly nose cut into the available faces we need to remove the faces to make holes. We do this by holding down shift and using the right mouse button to select all the faces within the areas we want to remove.
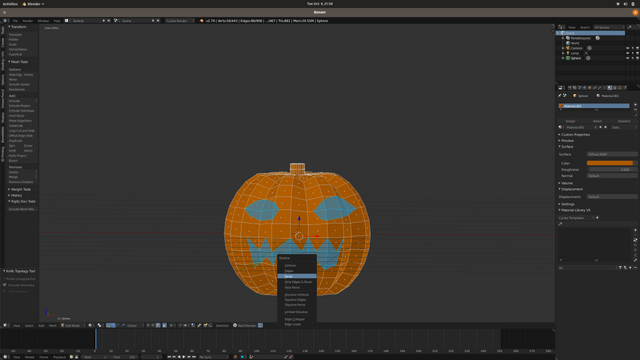
Then we hit the X Key to pull up the delete menu and select "Faces" from the list.
Finishing up
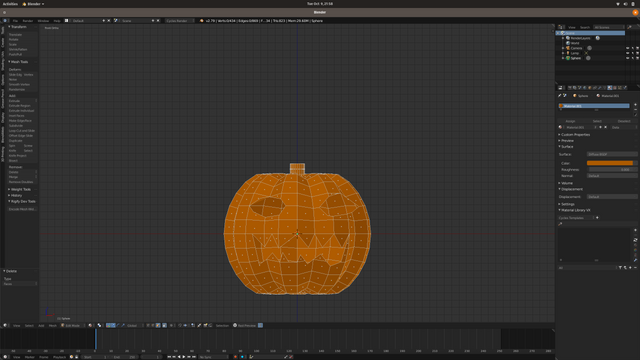
Now we have our Spoopy Jack-o-Lantern, but there is something not quite right. First off it isn't very smooth and a good eye would notice that its also very flat on the inside. So lets fix those issues.
In the tabs on the right hand side of the screen where we found material is a area for modifiers. Here are some great and useful automagical tools that you can use to make things easier.
To smooth our model we're going to and the "Subdivision Surface" modifier also known as subserf. Once you have added it to your model you should see the change almost instantly. Play around with the numbers on both render and view to figure out what looks best. Fig. 11 shows an example of how it works
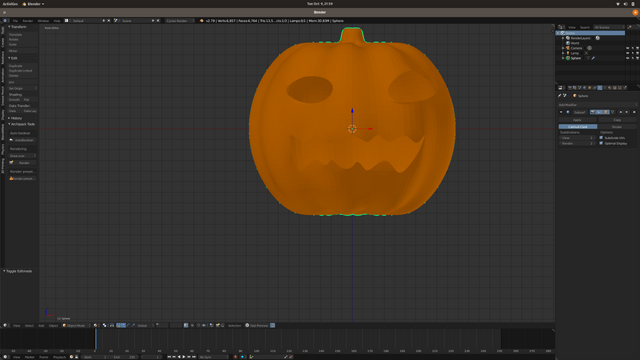
*fig. 11
Next we need to add some inner walls to this creation and for that we're going to add the "Solidify" modifier, and again play around with the numbers to find the depth you like best. Fig. 12 shows an example of the Solidifer's effects
Notice how there is a strange bump on the eye that wasn't there before. It is a bug in the code for solidify that when applied goes away.
Some modifiers can be left in as is, but if you want to apply the math directly to the model (which is wise in the case of solidify) you can hit the "Apply" button. When you do the modifier will disappear and any effects that it made on the model will become permanent.
Now the final touch, notice how the stem is the same color of the pumpkin? That's not right! Here's how to change it.
Go back to the materials tab on the right hand side. Select all the faces on the stem by going into face select in edit mode. Be careful to select all of them, if you don't have it in wire frame mode you will need to hold down the middle mouse button or using 4 and 6 on the numberpad to circle the model to verify all the faces are selected.
Once you are sure the entire stem is selected click the plus button across from the first material you made. It should add a new empty material under the first.
Now where it has a plus sign next to an X press the plus and it should add a new white material.
You should also see a button that says "Assign" clicking this will assign all selected faces to that material.
Now all you have to do is pick the right green. For a sample see fig. 12 below.
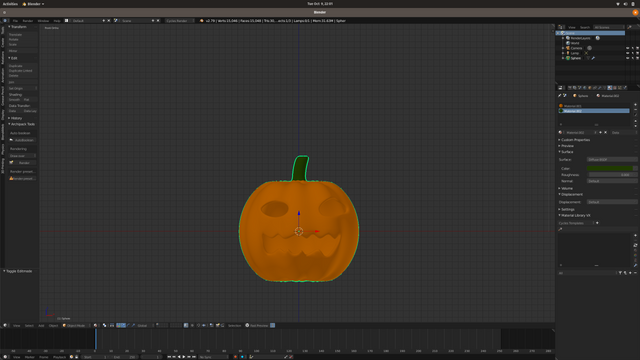
fig 12
DONE
That's it, if you happen to go through this tutorial leave me a link to your creation or drop it in the comments. In the next tutorial I'll setup the rest of the scene, and share some of the works that have been made following this tutorial.
File
Till then,
Happy blending
Thank you for this cool tutorial, I always thought it's much harder to create a model for a 3D printer.
The urge to buy a 3D printer is growing ... xD
I just have to convince my gf that we really need one. Maybe it works when I tell her that we can print a little sad Keanu Reeves to put on our shelf.
There is an intermediate step that isn't in the post of running it through the slicing program but it's trivial. Speaking of I forgot to add the file. Will edit later.
I have him for when I need him. 3D life sized would be way awesome. TY in advance.
Hi bflanagin,
This post was nominated by a @curie curator to be featured in an upcoming Author Showcase that will be posted Late Saturday/Early Sunday (U.S. time) on the @curie blog.
NOTE: If you would NOT want us to feature your post in the Author Showcase please reply, email, or DM me on Discord as soon as possible. Any photos or quoted text from your post that we feature will be properly attributed to you as the author.
You can check out our previous Author Showcase to get an idea of what we are doing with these posts.
Thanks for your time and for creating great content.
Akpan (@curie curator)
[email protected]
Sorry for not getting to this sooner. Yesterday was hectic. I'm honored by the nomination and how to see the article when it comes out.
OOOOOH! Blender is great! I had heard of it but never used it. Thanks for the tutorial, I'm going to put it in my favs 💘
On the other hand, your pumpkin looks really scary, so it is perfect.
Its got a learning curve too it, but its an amazing application. I'm working on a few other tutorials based around the same pumpkins. So feel free to follow me if you haven't yet. If you're interested of course. :)
Yeeeeei! I would like that :D
Hi bflanagin,
Visit curiesteem.com or join the Curie Discord community to learn more.
Hi @bflanagin!
Your post was upvoted by @steem-ua, new Steem dApp, using UserAuthority for algorithmic post curation!
Your UA account score is currently 2.716 which ranks you at #13027 across all Steem accounts.
Your rank has dropped 22 places in the last three days (old rank 13005).
In our last Algorithmic Curation Round, consisting of 227 contributions, your post is ranked at #215.
Evaluation of your UA score:
Feel free to join our @steem-ua Discord server
Those are so awesome! I downloaded blender months ago and still have not taken time to use it. You just reminded me I still have mine sitting there with the big cube lol.
Heh, 2.79 is loads easier to use than 1.8 was back when I first started, but yeah getting past that first cube was a huge step for me too. I'll be posting more tutorials as time goes on. Was there something in particular you downloaded it for?
Yeah I actually got mine the same time as I got on Steemit. Got a bit distracted as learning this place was more time consuming than anticipated.
I will definitely follow along and check out some tutorials. Nothing in particular I am just one of those wannabe artsy types always on the lookout for a way to be creative.
I did see a youtube tutorial that I may be able to follow if I pause and rewind a lot.
It was a block of wood being chiseled into words. Perfect use with the Etsy shop where I sell wood products.
I'm not a big fan of the video tutorials for that very reason, but it does sound like a cool one. Best of luck!
Congratulations! Your post has been selected as a daily Steemit truffle! It is listed on rank 8 of all contributions awarded today. You can find the TOP DAILY TRUFFLE PICKS HERE.
I upvoted your contribution because to my mind your post is at least 8 SBD worth and should receive 151 votes. It's now up to the lovely Steemit community to make this come true.
I am
TrufflePig, an Artificial Intelligence Bot that helps minnows and content curators using Machine Learning. If you are curious how I select content, you can find an explanation here!Have a nice day and sincerely yours,

TrufflePigCongratulations! This post has been upvoted from the communal account, @minnowsupport, by HumbleBeaver from the Minnow Support Project. It's a witness project run by aggroed, ausbitbank, teamsteem, someguy123, neoxian, followbtcnews, and netuoso. The goal is to help Steemit grow by supporting Minnows. Please find us at the Peace, Abundance, and Liberty Network (PALnet) Discord Channel. It's a completely public and open space to all members of the Steemit community who voluntarily choose to be there.
If you would like to delegate to the Minnow Support Project you can do so by clicking on the following links: 50SP, 100SP, 250SP, 500SP, 1000SP, 5000SP.
Be sure to leave at least 50SP undelegated on your account.
Timely post for the upcoming Halloween! This is worth doing especially with a free software. I gotta hope for 3D printer but at least try it the software of these days. Thanks for sharing that as I did not know about it!
Indeed, its a fun project to start using blender, and even if you can't 3D print them you could still use them in a e-card. (that might be a clue to my next post)
E-cards, wall decors for regular 2D or linear printing and more. I believe there are certainly more ways to utilize the photographic end-product.
Wow, that is incredible to create such lantern at home with 3d, the technology is moving with great paces. I remember few years ago for my son in his primary school we needed to do lantern and I had to buy separately crepe paper, wires, some colorful craft paper, glue and of course we had to make a scheme first of all. At the end it was really nice and steady. With such computer program of course it may take sometimes till you set up everything, but at the end you have such beautiful, stable result that you would be really proud to show in school. Thank you for sharing your work :)
I'm really happy with the result. When I taught this lesson in class the students created some pretty cool looking jack-o-lanterns, and you're right it used to be a lot more work to get a nice looking craft project finished.