Phoenix... (The Progression Of A Portrait)
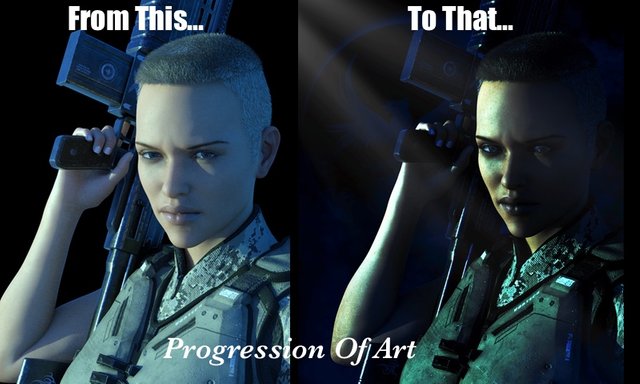
Hi all! Thought I'd try a portrait today, and break down the process a little. Although I render 3D models, I always take the finished render into an image editor, like any other photographer, to add depth, colour variants, and elements such as smoke, light beams, and other background objects using separate layers. I would create a video, but the process for me is quite intense, with lots of trial and error, and a non-stop, no backing up attitude. Always forward until finished. Sometimes this can take a few hours, so even breaking this part down wasn't all that easy. So, I decided to keep the layers active and turn them on little by little to show the process better. Hope this works. Anyway, lets get started...
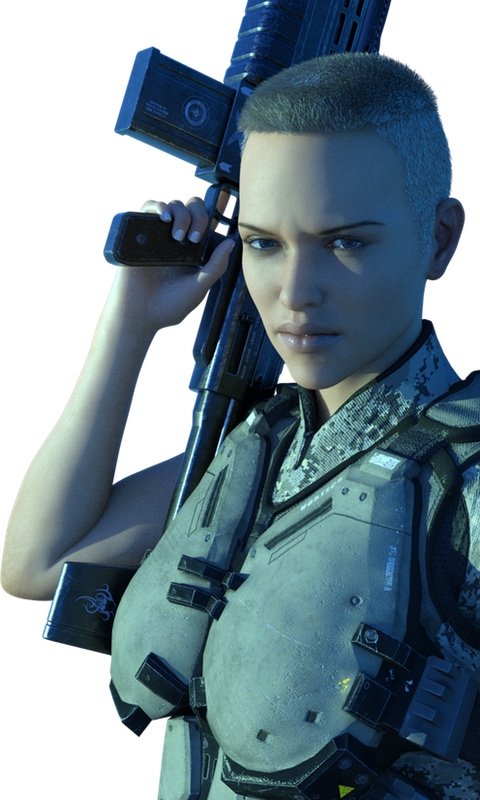
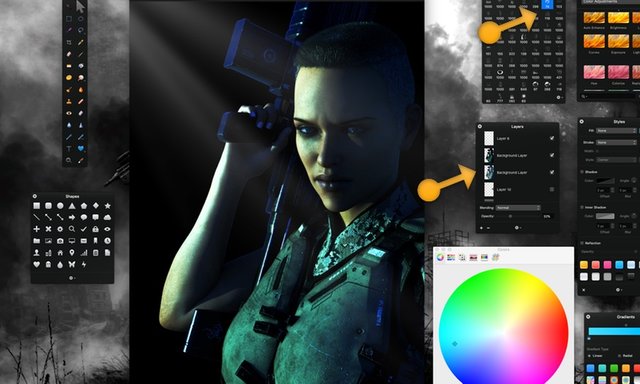
The first thing you need is the base render. I created this in DAZ Studio using IRAY render engine with a virtual sun for lighting. You can get much better renders out of DAZ Studio, especially with a good lighting tutorial, but since I was taking the rendered image into my photo editor for further processing, what I had was fine.
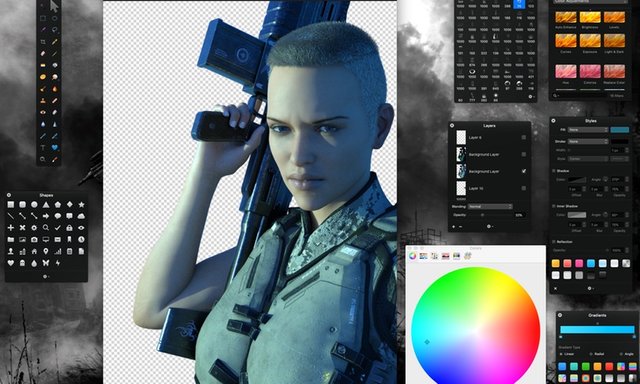
Once the render has been imported into my Pixelmator image editor, I start to fool with the colour levels, brightness, exposure, and curves to get something a little richer.
At this point, I wasn't sure where I was going to take it. So I ended up deciding on a basic portrait image. That being the case, I added a black background and used a light beam brush to show and enhance the direction of light. The arrows represent the brush sets used and the necessity for layers, one on top of the other to create the image as a whole.
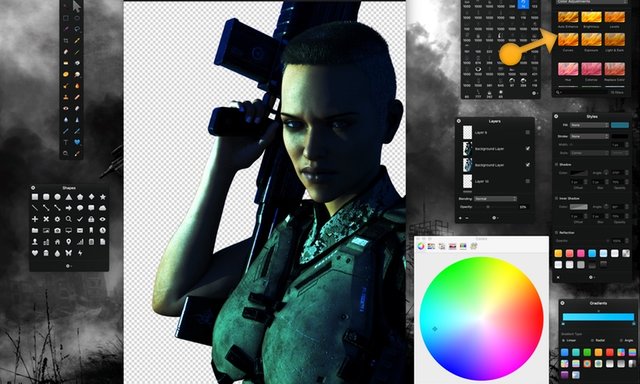
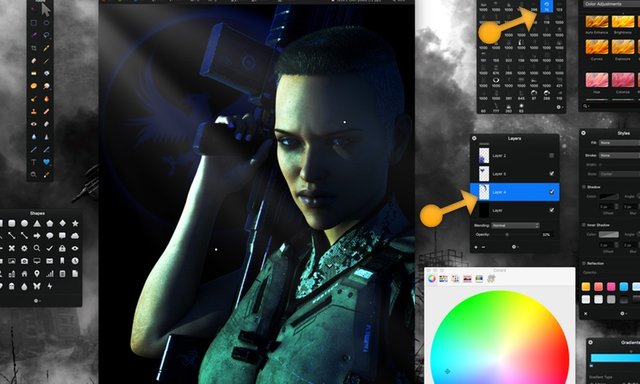
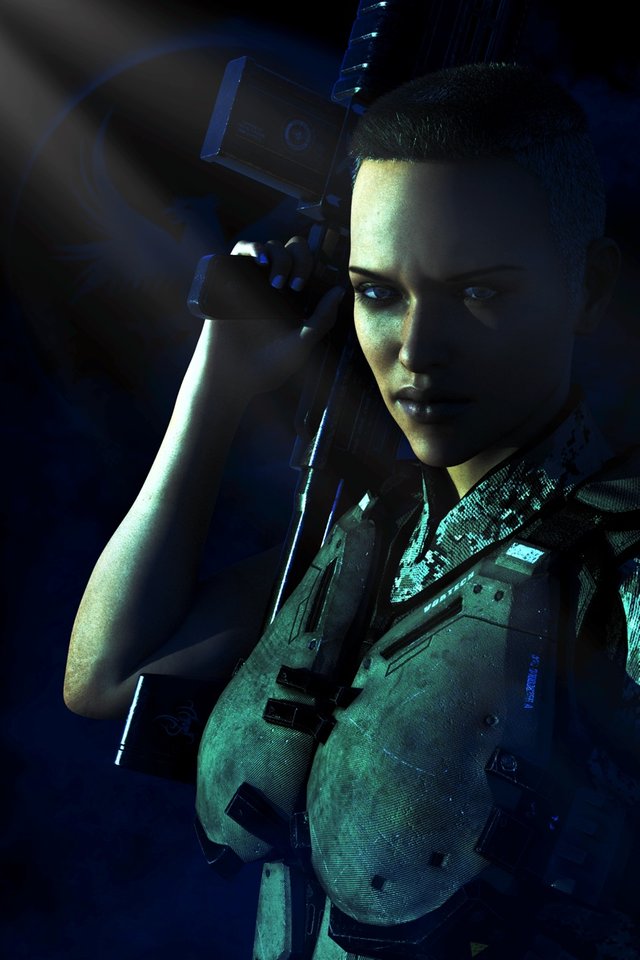
Once done, I searched my brushes for some accents and found the phoenix and a black sun..... Now we were cooking with fire, stacking the layers as I went.
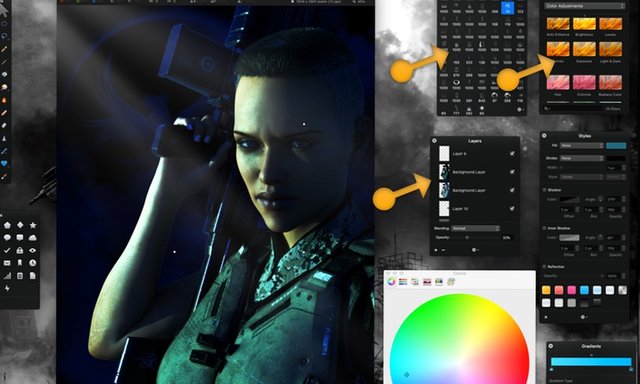
Only thing left to do then was to add some smoke, using both midnight and black colours to add depth. I then merged all layers and returned to the colour options to adjust brightness and curves to get the final image.
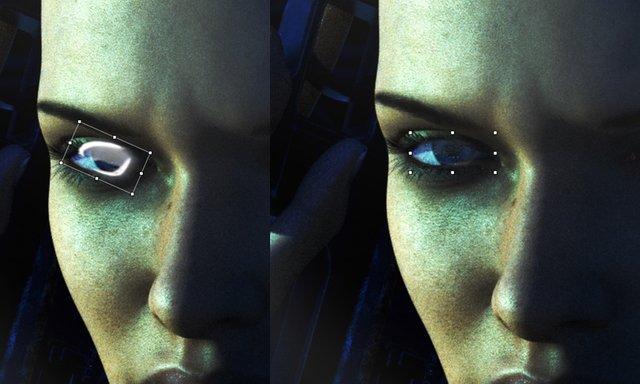
Again, there were still some things to do, and to show the power of layers, here is a little bit of an example. The eyes were too dry or flat. So I used a brush layer from a set called hydration, fit the layers to the eyes, and then used opacity settings to achieve a better look. Just a sample of why each layer is important to the whole.
And here it is, the final image. Thanks for looking, and have a great day!
Sponsored ( Powered by dclick )

@dutybound, thank you for supporting @steemitboard as a witness.
Click on the badge to view your Board of Honor.
Once again, thanks for your support!
i find myself saying "oh wow" a lot on your creations! LOLOL
but - its amazing what you can do! that scowl on her face changes SO MUCH. it totally goes from a bland, standard image - to something that pops with life!!!
great job :)
Thanks! Glad you liked it. I don't do a lot of portrait style stuff, so it was fun to try. I see your Monkees event went well, awesome!
Congratulations @dutybound! You have completed the following achievement on the Steem blockchain and have been rewarded with new badge(s) :
You can view your badges on your Steem Board and compare to others on the Steem Ranking
If you no longer want to receive notifications, reply to this comment with the word
STOPTo support your work, I also upvoted your post!
Vote for @Steemitboard as a witness to get one more award and increased upvotes!
Sup Dork?!? Enjoy the Upvote!!!