How to apply Color or textures to the material of Render scenes (3ds Max)

The Render is a digital image that is created from a 3D model or scenario made in a specialized computer program, whose objective is to give a REALISTIC appearance from any perspective of the model.
This 3D model is subjected to various processes, which with the use of material texturing techniques, lighting, distribution, as well as photographic techniques, create a series of optical effects that resemble a specific situation in the real world, giving as Result a photorealistic image, that is, that appears to be a photograph (the most common goal of 3D artists).
A render is worth a thousand words. When we render images or animations, there is no better way to tell the story of your designs through the materials you have used. The materials also have an impact on your audience at a subconscious level. Add to your interior design a colorful and patterned wallpaper and your audience may react in a very different way to how they have done with a wooden interior.
Steps to place the textures or colors to the materials:
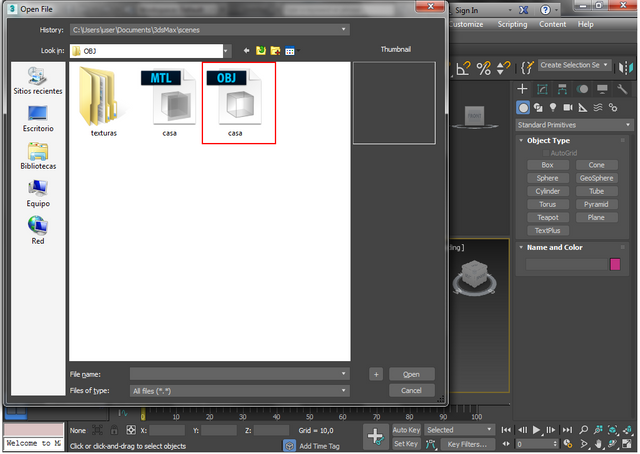
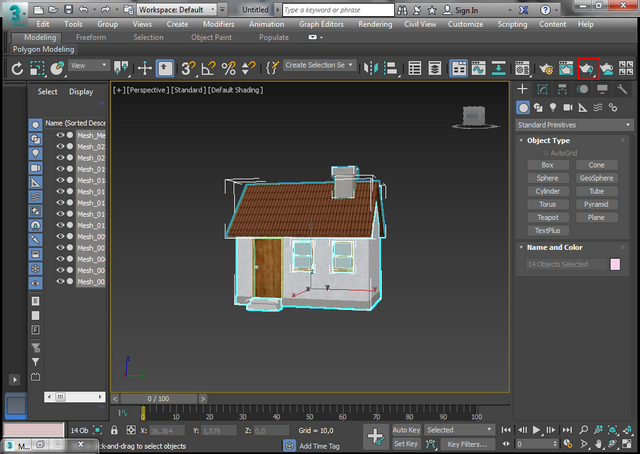
1. First and then to open our 3ds max program, we proceed to look for our model or scene. In this case, use a house.
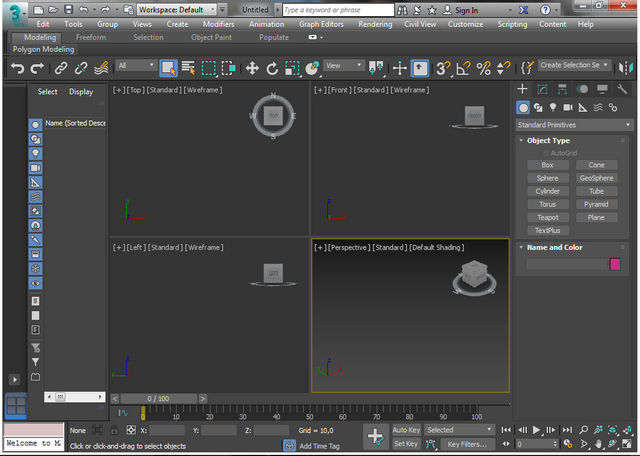
- We look for the folder where this contains our model of the house.
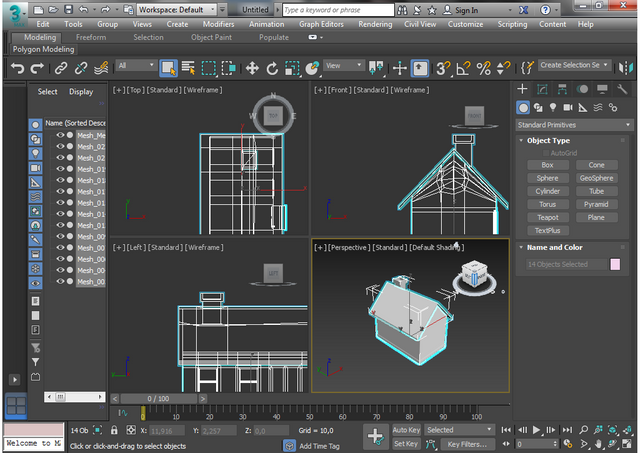
2. Already with the model or the scene made or previously downloaded, we proceed to place the texts to our materials, for this we must do the following:
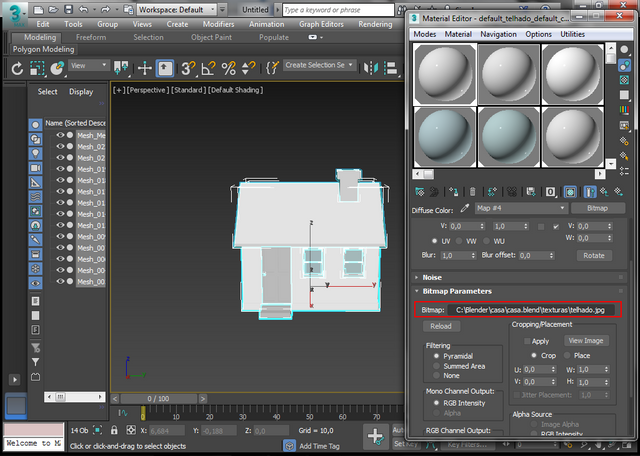
- We must open the material editor:
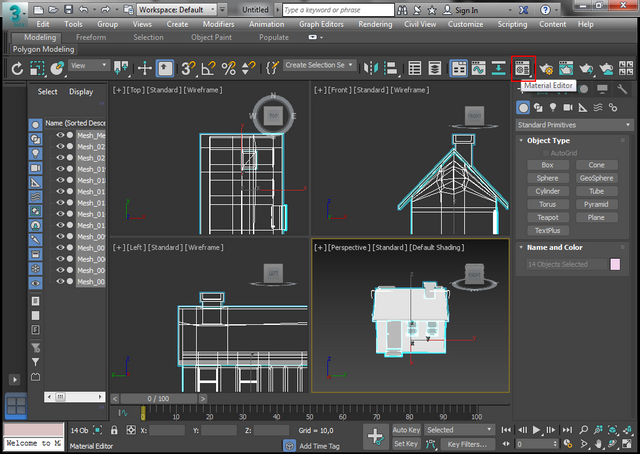
- Using our object selector we start to select the materials.
For this we can point with the dropper selector directly to the model of the scene and click on each of the materials to select them or we can select them directly in the material editor.
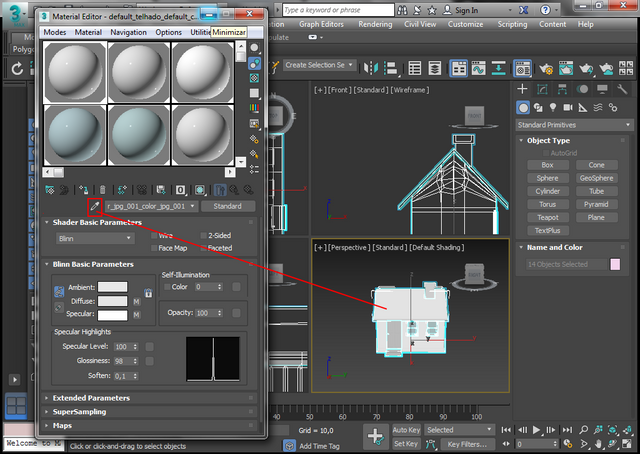
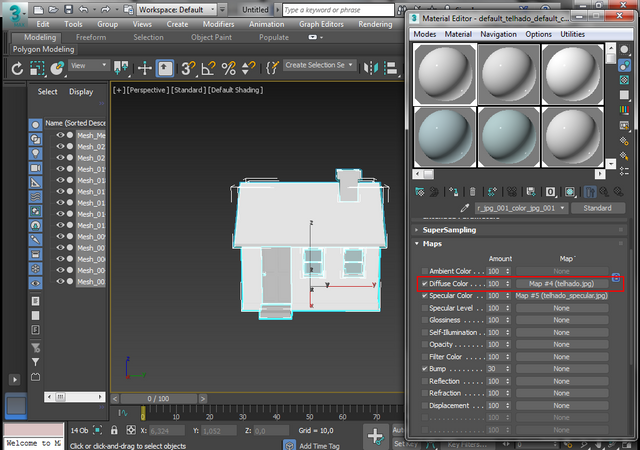
- First we will place an image (Texture) to our roof of the house, for it with the object selector dropper we point to the roof of the model by clicking, then there will be some options in the editor material where we will open ** Maps **.
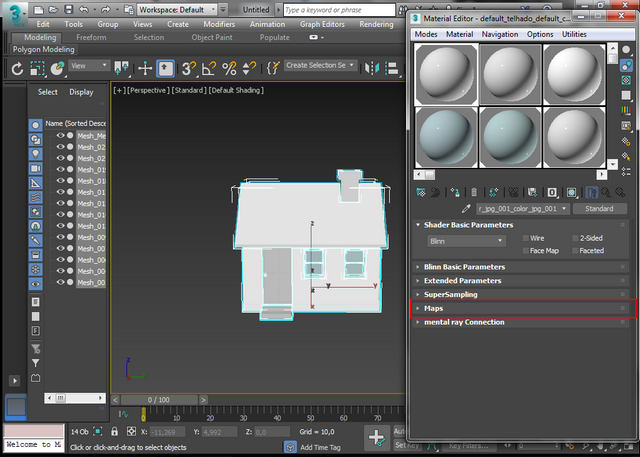
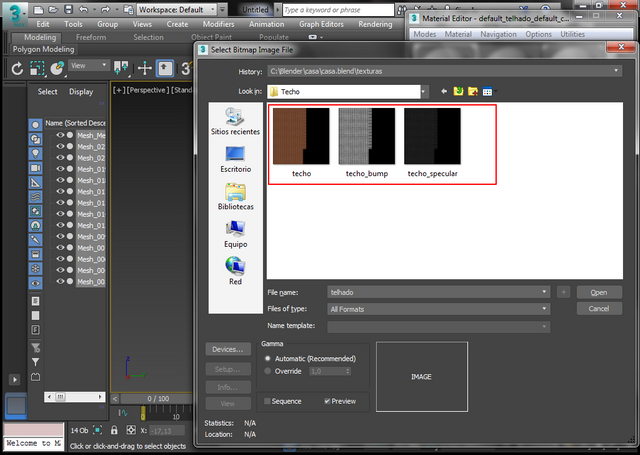
- Next we put the images to Diffuse color, Specular color and Bump respectively, in the same way as I showed them in my previous post how to attach an image or a design made previously with a program (in my case photoshop) to a 3d model.
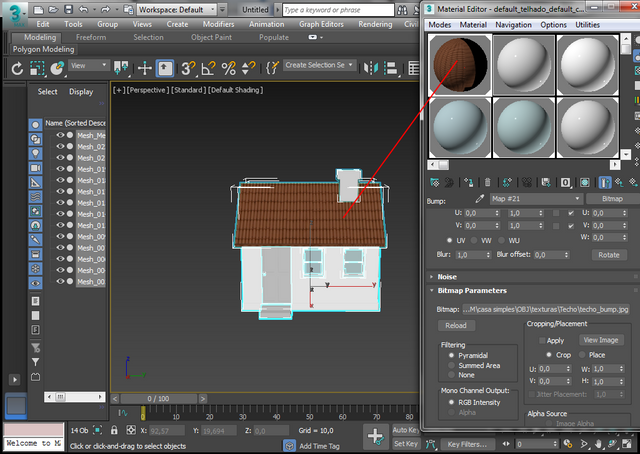
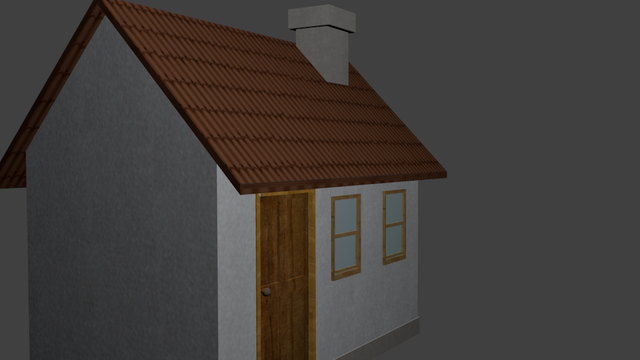
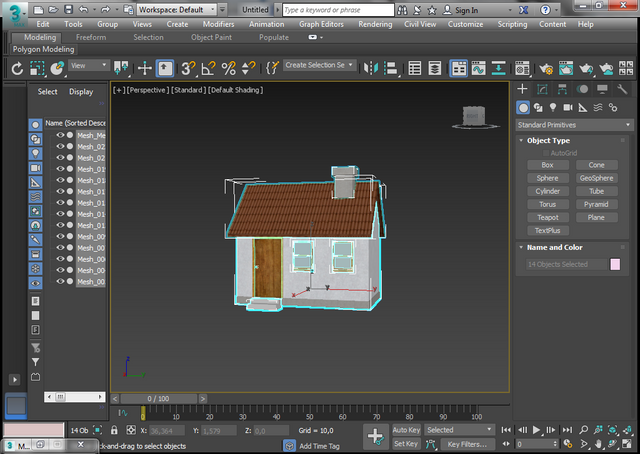
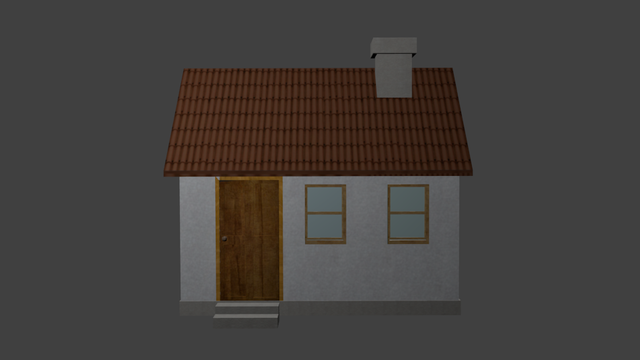
- Exactly as we did previously when placing the texture (image) to the ceiling, we must do it with the walls, the door, the chimney, the windows and all the materials contained in our scenes, in order to have the result shown in the following image:
3. By having our model ready with all its textures, we proceed to do our render, we must wait 100% of the rendering.
4. Finally we have our final result.
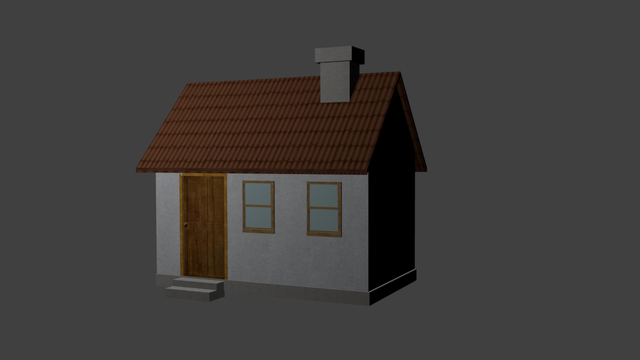
Now we visualize our house in a more realistic and interesting way but we still lack some ambience, for that we can use the Photoshop program for a quick and simple way or we can create a more attractive and artistic image with the same 3ds program, which I will teach them in the next tutorials on these topics.
- All images in this Post were made by @franz54.
Text separator taken from the post: Text Separators By @carlos-cabeza
Here I share with you another Phrase about art and design:
Design is where science and art come to a point of equilibrium. - Robin Mathew
UNTIL A NEXT OPPORTUNITY!
Without saying more, your friendly server says goodbye.
Best regards!

Image Source
Congratulations! This post has been upvoted from the communal account, @minnowsupport, by franz54 from the Minnow Support Project. It's a witness project run by aggroed, ausbitbank, teamsteem, someguy123, neoxian, followbtcnews, and netuoso. The goal is to help Steemit grow by supporting Minnows. Please find us at the Peace, Abundance, and Liberty Network (PALnet) Discord Channel. It's a completely public and open space to all members of the Steemit community who voluntarily choose to be there.
If you would like to delegate to the Minnow Support Project you can do so by clicking on the following links: 50SP, 100SP, 250SP, 500SP, 1000SP, 5000SP.
Be sure to leave at least 50SP undelegated on your account.