Arts & Craft #1 - Paper Quiling for Teacher's Day
Arts and crafts has never been my strong suit and if I had to draw to save my life I would probably be dead by now. Hahaha! Anyway, I decided to number my posts as I hope to do more arty and crafty stuff with my little ones.
A couple of weeks ago, after he had came back from school and unpacked his bag, I started looking at his school schedule and notes, I realised that there was a request for us to do something simple like make a card for Teacher's Day. I panicked of course, as Teacher's Day celebration in his school was the next day!! Horror of horrors! I didn't want my little guy to be the only one at school that didn't do anything just because his Mom forgot! My brain worked furiously to think of something that we could make easily and within a few hours. I scoured Pinterest and came across a cute little card with paper quilling elements on it. Mind you, I had NO IDEA that it was paper quilling at that time. Suddenly, I remembered that during the Team Malaysia Chinese New Year event, @elizacheng had stuff for the kids that looked similar so that. I quickly hunted high and low for the trinket and breathed a sigh of relief when I found it somewhere on my office desk. I scrutinised it and decided that it looked easy enough to do and was so happy that I would be able to go home and do it with Chapati. Once again I had NO IDEA whatsoever that this was paper quilling!
I happily got together my supplies for the project and this was the list I got:
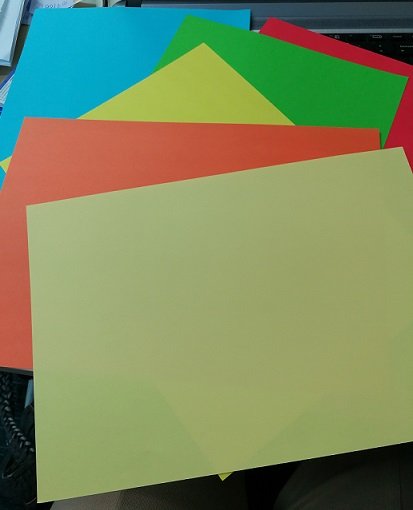
- Sheafs of coloured A4 Paper - I got the bright, neon and pastel ones
- Long ruler
- Two pair of scissors - big one for me and little one for Chapati
- 1 liter bottle of white liquid glue
- A few pieces of white A4 paper
- 1 piece of cardboard or drawing block paper (I used drawing block paper)
It is a pretty simple list of supplies and I got most of them cheap at the MR DIY shop in Mahkota Cheras. The bottle of glue was under RM10 and the pretty strings were RM2 per roll. Everything else was stuff that I bought before and they were just lying around the house. So here is the steps that I took to make them.
Step 1:
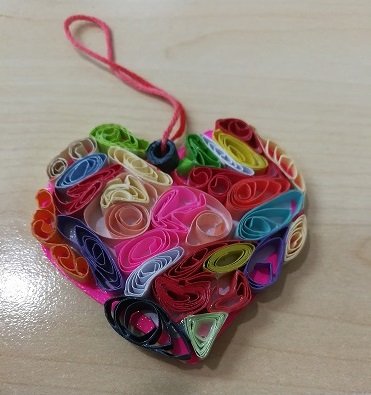
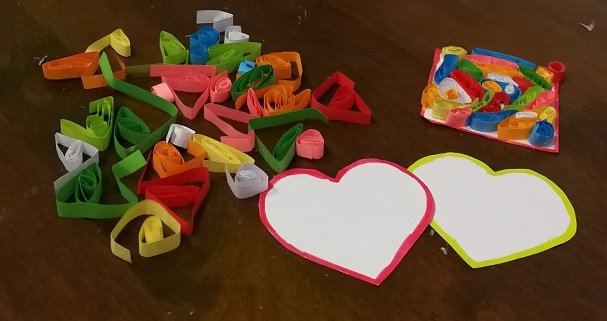
- Pick a shape that you like, my son choose a heart and a square. He wanted to make three for his favoured teachers. We decided on two hearts and one square. I measured a square that was 6 cm x 6 cm on a white piece of A4 paper and drawing block paper .
- The heart shape I just traced from the example that I had. Basically you can have any size you want but I wanted to make one that his little hands could carry easily.
- Stick the A4 piece and the drawing block piece together with glue to make it stiff.
- Then I outlined the shape with brush markers. I guess you could use colours pencils or
painpaint I mean. Just go crazy and make it pretty.
Step 2:
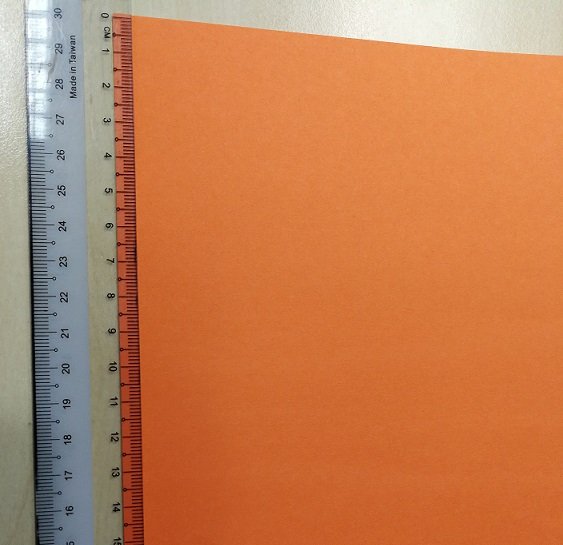
- Draw lines on the coloured paper approximately 0.5 cm. I used my ruler to estimate so I didn't bother to measure.
- Cut out the strips of measured paper of various colours.
Step 3:
- Roll the strip however you like. It is a pretty arduous task and it takes forever to roll them. Towards to the end, my fingers were starting to cramp and I was happy when I had just enough for the shapes I cut out. My little champion was rolling strips of papers like crazy. Towards the end, he was tired and needed to rest! Hahaha
Step 4:
- Pour out the glue on a flat surface and so that you can dip your rolls on it.
- Spread the glue thickly on the shapes and stick the rolls directly on. I had to hold them there for a while for them to adhere to the surface of the paper
Step 5:
- Once all your shapes are filled with paper rolls, thread a paper string through one of the rolls and voila! You have a little heart on a string to give someone!
Step 6:
- Turn behind and write down a little message to that special person!
The next day he happily carried all three shapes to school and gave them out proudly whilst I nursed a funny feeling in my finger and an achy neck! I decided to chat with @elizacheng and tell her how I managed to do it. She laughed when I told her everything I had done. 😆 She said, "That's paper quilling my dear and there is actually a tool to roll the paper and you can even buy pre-cut paper in all colours!" I laughed like crazy and nearly strangled her! 😱🤪😤 Oh well, it was a good two hours sitting with my son doing something together! It was so worth it!
Thanks for reading my first arts and craft post! We have some pretty awesome and talented Mamas in arts, crafts and needlework! Come, join us on discord and follow our community account if you want to find something to do together with your little kiddos!


Ooooh I love these @khimgoh! I’m so proud of you for quickly getting your ideas and supplies together to help your little guy! I love how simple yet sooo cute these are! I also like that they take minimum supplies.
Lol that’s so funny that you found out through @elizacheng you could have gotten some tools
to make it easier. But as you said you enjoyed spending all of that quality time with your son...who is such a cutie pie btw! He looks so proud and pleased with his teacher projects! Great job Mama!! Now go and rest your neck and fingers lol!! 😄😉
Love it! So good for those little fingers!
Hey @sweetpea thanks for dropping by here. Yeah good for little fingers but my fat fingers were wasted at the end of it! Hahahaha
Great idea @khimgoh! I will be trying this out with the 30 kids I teach arts and crafts to this summer. Thank you!!
Wow, 30 kids! Good luck! Thanks for dropping by and reading my post! Really appreciate it!
Thanks you @steemiteducation! Will definitely check you all out!
Nice work! I wanna try this with my little one too. Tks for sharing.
Thank you for your kind words! Appreciate you dropping by here to read my post. Definitely fun to do with the little ones, though I would suggest getting the tools for it! Hahahaha
Great Idea!
Thank you! Inspired by another fellow Steemian! So much that we can learn from each other.
Quite nice ah.
Your heart is your strong suit.
You put so much of it into your craft I can feel it coming out off my smartphone screen.
Thank you so much @buzz.lightyear for the encouragement! Hahahaha, yes I thought it was pretty nice too. Thanks to Eliza's great example, I just tried to follow it as closely as possible!
I remember you making these and saying you didn't know they were quilling, but I didn't know you had done EVERYTHING by hand down to cutting the little strips of paper! Wow you!
And congratulations for being curated by @steemitmamas
Hahaha! Yup something to really remember. Doing everything from scratch!
Oh geez, I know the days of last-minute school projects well. Sounds like you had a few unnecessary steps that could have been avoided, but hey, you got to spend more time with your little one. Lol. They turned out great. :)
Thanks @inalittlewhile for dropping by my post. Yeah, quality time indeed plus achy fingers and neck! Hahahaha! Thanks for the kind words!
You've been upvoted by TeamMalaysia community. Here are trending posts by other TeamMalaysia authors at http://steemit.com/trending/teammalaysia
To support the growth of TeamMalaysia Follow our upvotes by using steemauto.com and follow trail of @myach
Vote TeamMalaysia witness bitrocker2020 using this link vote for witness