I recycled my old notebook - Step by step || TUTORIAL: REMOVAL COVER FOR NOTEBOOKS AGENDA STYLE
I was wondering how could I rescue
my old half-used notebook and make it look new...
Here a solution.
ADVANTAGE
- You’ll be recycling also old information, possibly useful. I have heard that it is healthy to refresh old knowledge, which, by the way, gets more sense when we become more mature and wise. It makes a better alternative to recover this old stuff, than let it pass out.
- If that information corresponds with a previous stage or you’re about to course the next part of your studies in a certain area, it’ll be just as if you didn’t finished but continued your class or classes.
- You’ll be spending less money and will not be wasting un-used and necessary resources.
- You will learn to optimize your methods for systematization (notation, marks, highlighted,…) and, in general, your ways to condense your notes (synthesis, analysis, graphics,…).
- You might be eventually developing more ecologist and healthier financial habits.
Spanish Versión: TUTORIAL: ¿Cómo reciclar tus CUADERNOS? Paso a paso || MANUALIDAD

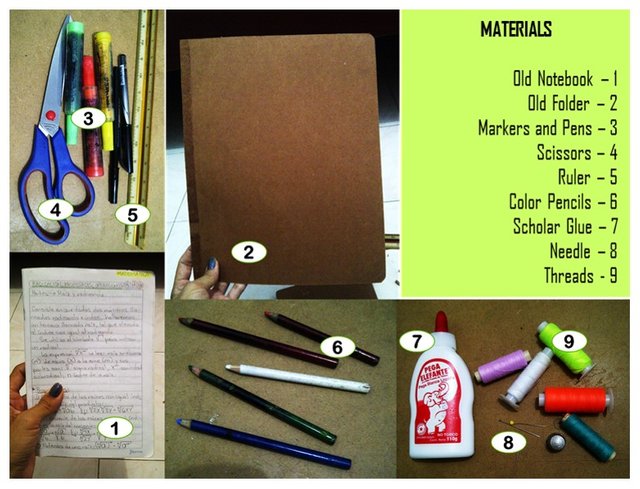
MATERIALS
OLD NOTEBOOK:
You could manage to make coincide both contents, old and new. It is not necessary, of course. You just need an old notebook, but have you ever think of your annotations as pieces of work? Like your books. They are your texts. Even though we are taught to study in a particular way in our childhood, it doesn’t mean there is only one. We should make our own notes, and express the information through our own point of view in order to keep inspired and motivated by it as longer as it could be necessary for us to assimilate it.
OLD FOLDER:
It is practical a regular brown folder, because they’re made of a resistant carton. Besides, they have a dark tone, not so homogeneous, which means it will also resist dust of surfaces. It will also give a-esthetically-standard look, guarantee of a nice visual result.
MARKERS, COLOR PENCILS,...:
This is what you will need to decorate your cover. You must consider the color of your old folder. Mine is dark brown, and that is why I used thread to add embroidery details.
RULER, SCISSORS, GLUE:
This is what you need to adjust your old folder to the size of your pile of sheets which you want to turn in notebook. Choose your design. You could make a conventional cover, or add a closing mechanism as I did,… Depending on your design, consider that you night be needing some lace, buttons, maybe, Velcro, elastic,…
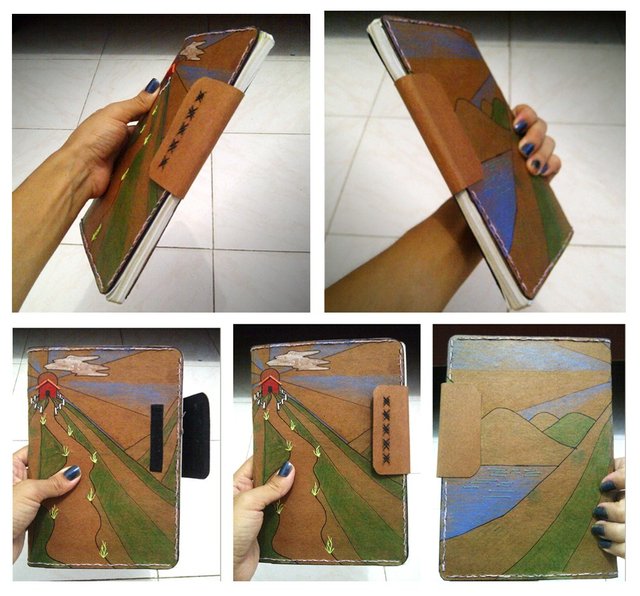
CAUTION! It won’t be an easy process, but it might surely be fun. What should you take into account? The design or shape of your old notebook. Spiral designs allows you to put used sheets aside, but recycle spirals means that you will have to mark the same holes of the old cover using itself as a guide. With sewed or stapled, in the other hand, it is more practical to keep them wholes, but you will still need to choose between take out the staple and reuse it to put it all together with your new cover. The other option I suggest is the one I took, which was to create a removable cover, agenda style, with compartments in the inner faces of both sides with the precise size to hold your old notebook with the old cover and everything.
Plus! I am not covering my new cover with vinyl or anything because I like y result, which is more ecologist. Avoiding vinyl to protect your cover of water, I only have to be careful about the place where I leave my notebook.
MY PROCESS
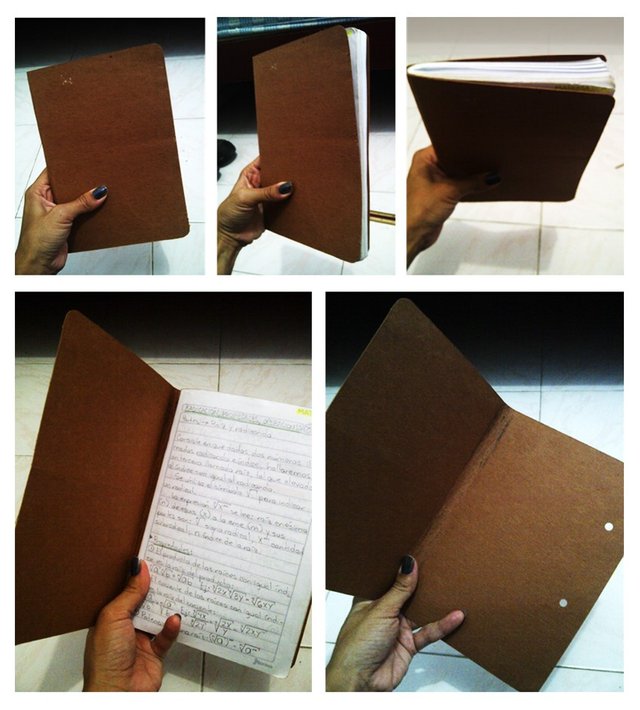
► ADJUST CARDBOARD: You must make coincide the sizes of both your folder and notebook, or make your folder with a convenient size depending on your design. The way to do it is, of course, opening your notebook over the folder and mark all over the borders. One important thing to consider is that your folder is going to contract or stretch a little bit when you fold it over the notebook, so remember adding a couple of millimeters so it doesn’t happen.
I didn’t have a plan traced, so I went by little.
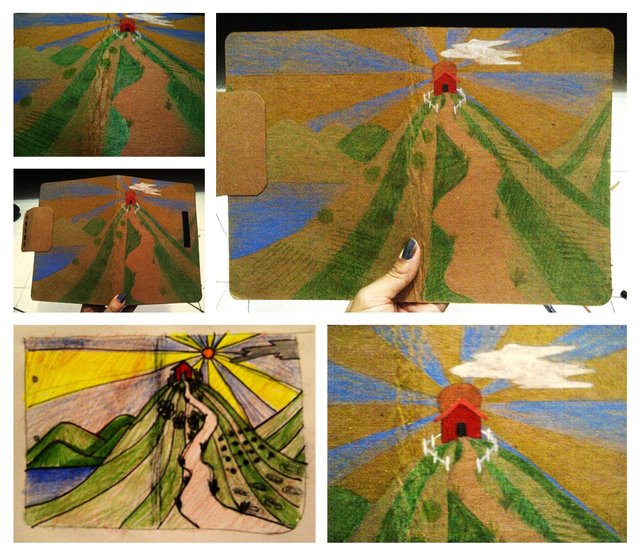
► ILUSTRATE YOUR COVER: I made my sketch of what I wanted for my cover. My mistake was painting on a white sheet, because when I brought my design to my cover, I lost a couple of colors in the darkness of my folder. I should have made my design on a dark surface to fix those details. Which ones did I lose? Yellow, and it is so sad because is one of my musts in my paintings, most if they’re nature scenes.
To paint your cover you must first trace with pencil, then color the spaces with markers and color pencils, and finally go by the borders with pens in different calibers.
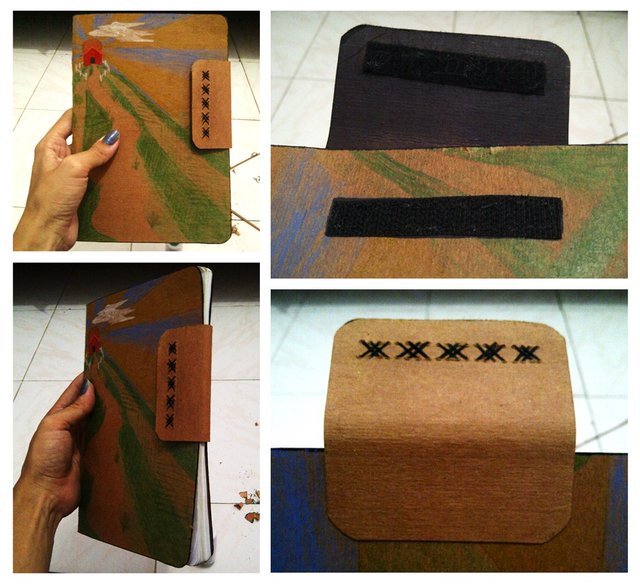
► VELCRO: CLOSING MECANISM AGENDA-STYLE: When I was marking the size of my notebook in the folder, I didn’t quite realized I was leaving the usual pair of holes of those particular office folders, so when I finished my paint, I decided to cover them. How? I traced a rectangle long enough to attach to one side of the cover and reach the other to close my notebook. I took care of adding enough space for my Velcro. But I didn’t only use glue. I also sewed my Velcro. As you can see, I took the chance to design a pattern because I knew my thread was going to be visible. I considered necessary to sew my Velcro because I had scholar glue, but if you are using silicone maybe you don’t need to do that. It is always your choice.
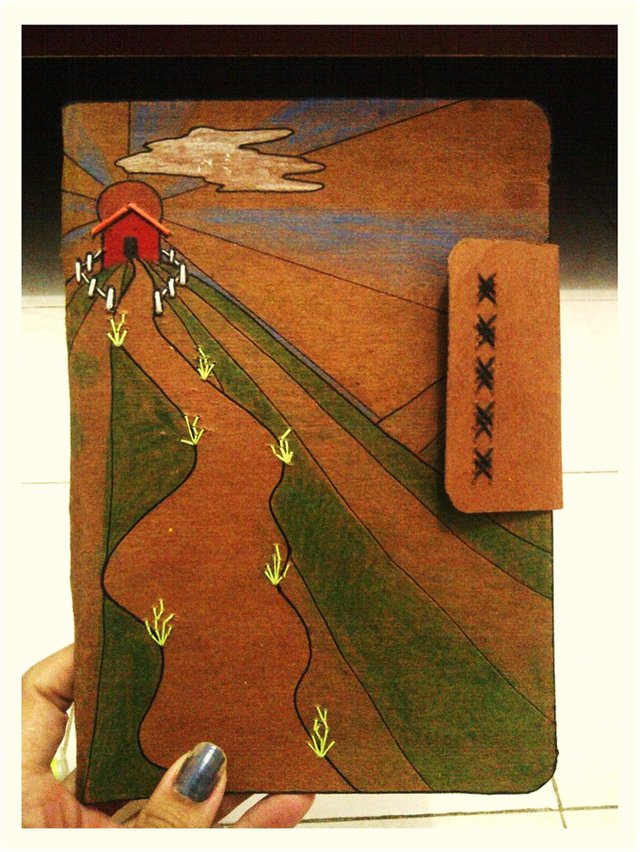
► DETAILS MATTER (CONTOURS AND EMBROIDERY): I needed to bring more colorful my cover by adding embroidery. For example, I made the celling of the house with a fluorescent orange, I used white thread for the fence, blue for the lake, and fluorescent green for the grass.
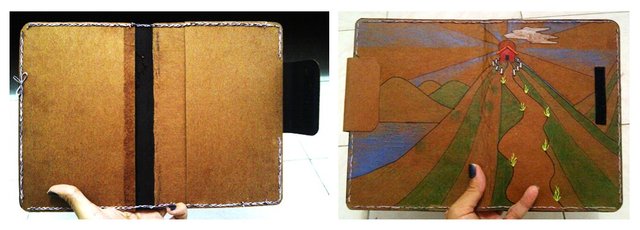
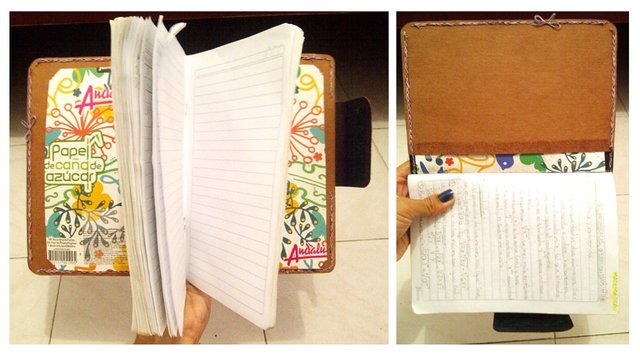
► INNER POCKETS OR COMPARTIMENTS: Their function would be to fit the cover of your old notebook into the pockets. That way your new cover would be removable and reusable.
You have to take care of making your pockets almost the same size of the cover of your old notebook, because you want it to fit most of the surface of your cover. It must seem irremovable. I tried to get it that way because I want to remove mine only when I am finished with my notebook.
I measured, cut, added a fine line of glue, and secured with paper-tape. I waited for glue to work and then made wholes all along a half centimeter from the borders with a needle and sewed.
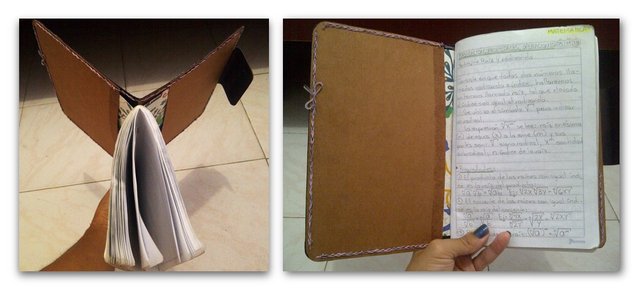
► FINALLY: To fit my notebook into my new cover and magically get a new notebook I opened my new cover wide enough to expose the pockets.
YOU DON’T HAVE TO MAKE THIS MISTAKE
Maybe you noticed, maybe you didn't. There is a detail I didn't prevent and I will tell you. Originally, I wanted to disassemble the old notebook by taking out the staples and using it to put it all together. However, I thought that was going to be such a waste, so I gave it a turn making a removable cover. The bad thing is that I had cut my folder already and left no space enough to fit my old cover into this new one. So! Make this new cover bigger then your old one if you want to reproduce this design correctly.
VARIATIONS
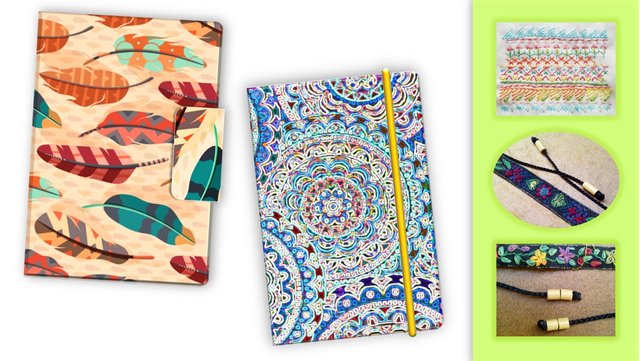
Here I present you some alternatives.
- Substitute work of illustrating or painting covering your cardboard with a fabric or collage. It could have a special print, or be unicolor so you could add also embroidery or any details you want to. For this alternative, first cover with the technique of your choice and add your Velcro, so to frontal side of your cover as to the wing of your Velcro-closing-mechanism. Last, cover also the wing as you prefer, the same as the cover.
- Another choice would be use a piece of elastic with the tall size of your cover. To add it, aline the ends of the elastic in the top and bottom of the backside of your cover. Make sure you hide the ends of the elastic adding it in the inner face your cover, and try to put them close to 1.5 inches from the vertical (external or right) border of your cover, where you open your notebook.
Hope you like it!
Have you done something similar?
Show me!

Instagram: @Siomarazulay
Twitter: @Ssiomy
Youtube and
Dtube


Congratulations @siomarasalmeron! You have completed the following achievement on the Steem blockchain and have been rewarded with new badge(s) :
You can view your badges on your Steem Board and compare to others on the Steem Ranking
If you no longer want to receive notifications, reply to this comment with the word
STOPDo not miss the last post from @steemitboard:
Vote for @Steemitboard as a witness to get one more award and increased upvotes!