How to Paint Tokyo City Skyline | Step by Step Tutorial | Water Colour Painting
Hi dear Steemians! Today I would like to share a tutorial on how to paint the Tokyo city skyline using water colours. Well, I have never been to Tokyo but I was inspired to paint it after watching this art tutorial by Makoccino. My painting is not exactly like her's as I have chosen different shades of colours and I went for a warmer looking sunset city skyline compared to her.
Tools and Materials
- A good quality artblock that can absorb water
- Buncho water colours
- Paint brushes
- 2 containers of water (one to mix paint and one to clean brush)
- A tissue paper - important for lifting technique and to absorb excess paint / water
Step by Step Tutorial
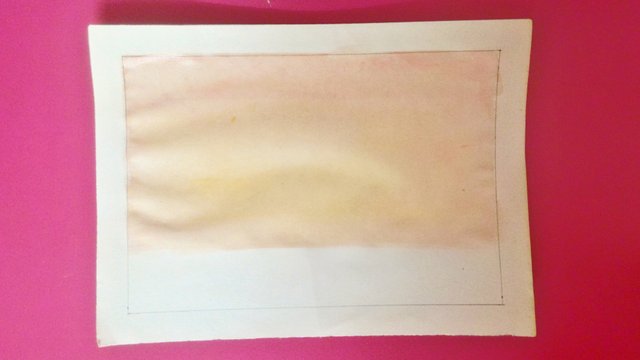
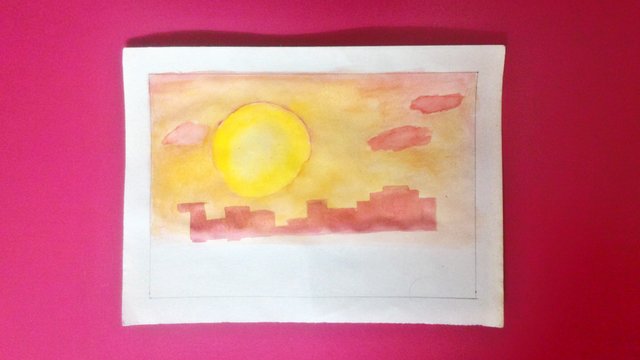
FIrst of all, I mixed some diluted red colour and painted it on the paper as a background layer using a medium flat brush. Then, I added some diluted yellow as well to create a subtle orange-yellowish background. I kept most of the red at the top part and yellow below that. This must be done quickly and shouldn't take too long because we don't want the red colour to dry off before there is adequate time for it to mix with the yellow. In the event where it has dried, you might end up with blotchy areas. If that happens, just paint some water on the area and re-activate the dried paint. Keep in mind that I didn't paint the entire paper because I wanted the bottom part to be clear so that I can paint the skyline later. The clear area is around one fourth (1/4) of the paper. You are free to choose any ratio you would like based on your preference.
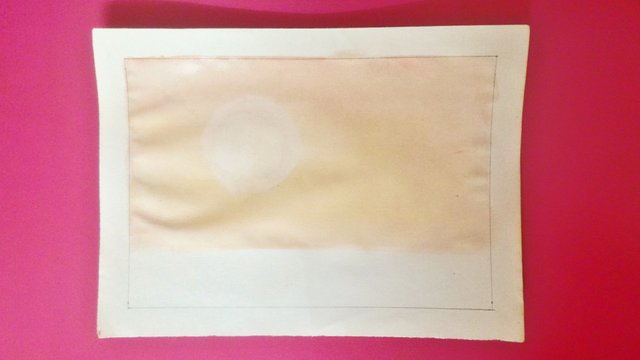
Now, it is time to create the sun on the sky. I used the lifting technique to do this. Quickly get a tissue paper and wrap it around something round in shape. I used a cellophane tape. Then, place it on the paper and lift the paint off. This way, we don't have to struggle trying to create a circle and at the same time, we can eradicate the risk of mixing up the paints into a muddy colour when we paint the sun. Take note that this must be done before the paint dries off. In case the paint dries off before you lift it up, don't worry. Just use a clean wet brush and paint a small amount of water on the area where you want your sun to be and lift the paint up. Since I used a cellophane tape which has a hole in the middle, I went back in with a clean wet round brush and a tissue to lift the rest of the paint up.
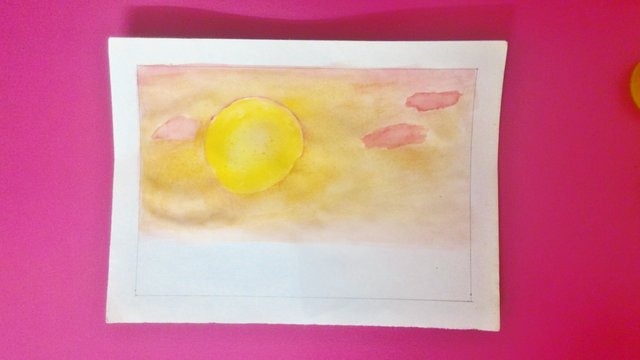
I added some clouds using some red paint. You can use a piece of tissue to lift the paint in some of the areas if you like to give the clouds a shape. Then, I painted the sun in yellow. I also added some red and yellow to the areas around the sun to add some warmth and light.
I painted my first layer of buildings in a light red paint using a small flat brush. I chose to paint them light and not too dark because the part that is the furthest must look the lightest. The buildings that are located closer to our view will look better and more vibrant. In case you are wondering, the extra line you see on the left is a mistake that I made but I will correct it later on.
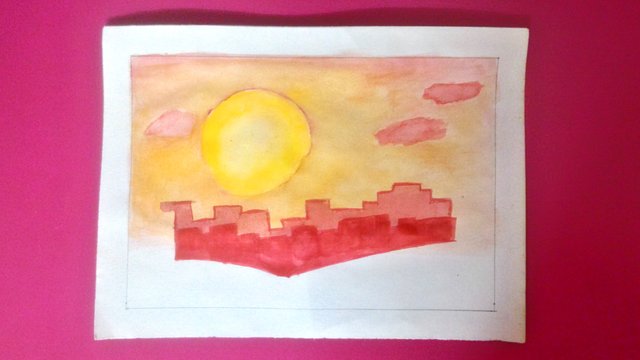
As you can see, I used a darker shade of red to paint the second layer of buildings below the first layer. I used this shade because the buildings in this row are closer to us. Then, I used the same darker shade of paint to outline the first layer of buildings.
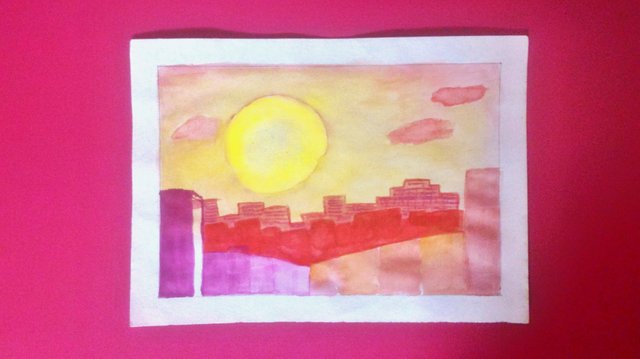
While waiting for the second layer to dry, I painted some windows on the first layer of buildings. Then once it was ready to paint again, I painted more buildings on the third layer. I also painted bigger buildings which are the buildings that are located closest to our view. I did mix some colours up, for instance purple and red for the large building on the left and some orange and red for the other buildings.

I started adding some details here like the windows on the buildings of the second row. Then, I outlined the front row buildings and added some details to make them appear in certain angles.

I have added more details here with a lot of windows. It is totally your preference how you would like your buildings to appear.
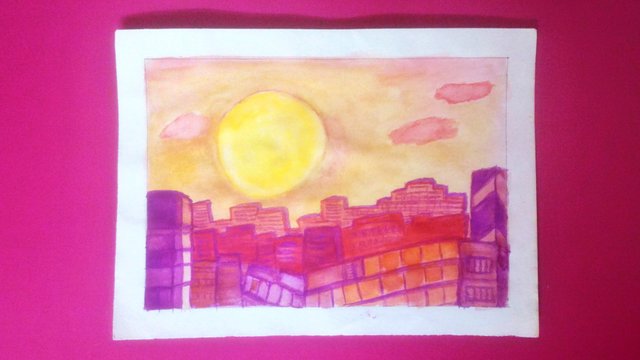
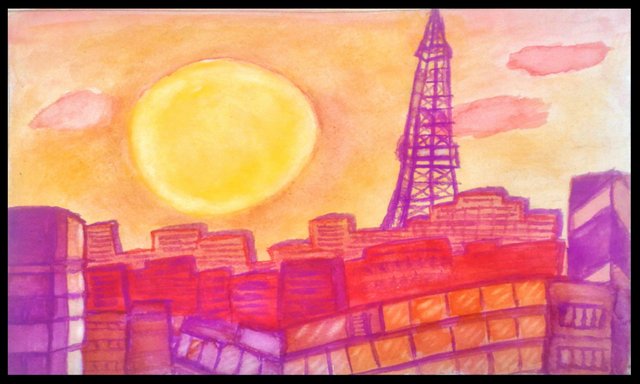
I am done adding details to all the buildings at this stage. I added some orange to a portion of the windows on the skyline because I wanted them to look more vibrant. I also made some changes on the sun. I went over it using a clean wet brush and moved some of the paint to the center area. I also used the lifting technique at the edges to lift some of the paint up. Then, I added some 3D like details on the top and right side of the buildings.
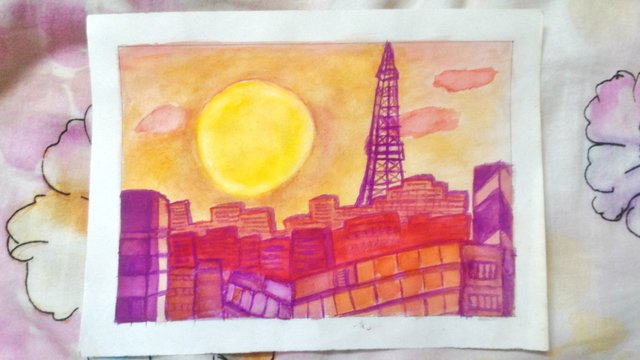
The Tokyo skyline is not complete without the Tokyo Tower. So, I painted the Tokyo Tower. I also made more adjustments on the sun and added some light orange on the surface of the sun and some yellow, orange and red around it.
I made some final touch ups on the windows using the lifting technique to create some highlights. I did the same thing on the edges of the windows of the building located on the left. The artwork was complete. Thank you for reading my post. I hope that you enjoyed reading it and I will be glad if this tutorial is helpful to you. Have a great weekend. Love and blessings xx

If you like this post, please upvote and leave your feedback below.
If you would like to see more posts from me, follow me.
Stay tuned! xx

Click the Images to View My Recent Posts:
How to Draw a Realistic Eye | Step by Step Details | Time Lapse Video
How to Paint Fall Trees | Step by Step Tutorial | Water Colour Painting
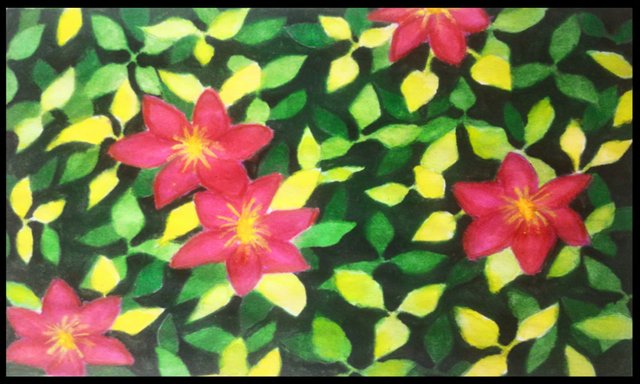
How to Paint Clematis Flowers | Step by Step Tutorial | Water Colour Painting
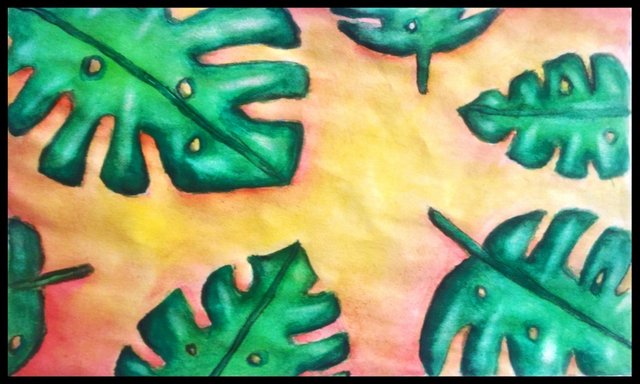
How to Paint Monstera Leaves | Step by Step Tutorial | Water Colour Painting
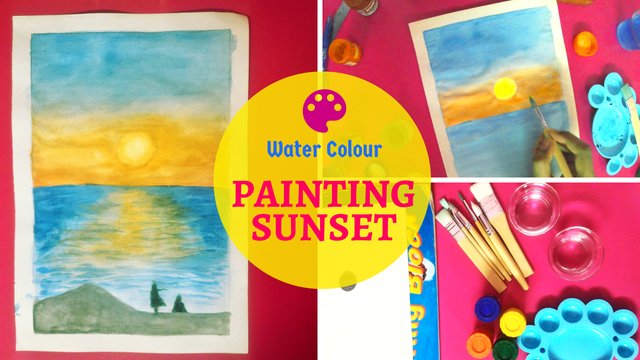
Sunset Painting | Step-by-Step Tutorial | Water Colour Painting

Follow me: @yashny
My Dtube Channel: Yashny
About me:
I'm a chill, happy go lucky person. I am a feminist. I love food, art, books, numbers, psychology and occult science. I am in the process of healing and diving into spirituality. I think life is a gift and we should appreciate the little things of life more. Everything that I post is a little piece of my life. I believe that everyone is carrying their own cross, so don't judge anyone and be kind!
♥♥♥♥♥♥♥♥♥♥♥♥♥♥♥♥♥♥♥♥♥♥♥♥♥♥♥♥♥♥♥♥♥♥♥
Thank you for your support and encouragement
♥♥♥♥♥♥♥♥♥♥♥♥♥♥♥♥♥♥♥♥♥♥♥♥♥♥♥♥♥♥♥♥♥♥♥
If you would like to see more posts from me, follow me.
Stay tuned! xx
Click the Images to View My Recent Posts:
How to Draw a Realistic Eye | Step by Step Details | Time Lapse Video
How to Paint Fall Trees | Step by Step Tutorial | Water Colour Painting
How to Paint Clematis Flowers | Step by Step Tutorial | Water Colour Painting
How to Paint Monstera Leaves | Step by Step Tutorial | Water Colour Painting
Sunset Painting | Step-by-Step Tutorial | Water Colour Painting
Follow me: @yashny
My Dtube Channel: Yashny
About me:
I'm a chill, happy go lucky person. I am a feminist. I love food, art, books, numbers, psychology and occult science. I am in the process of healing and diving into spirituality. I think life is a gift and we should appreciate the little things of life more. Everything that I post is a little piece of my life. I believe that everyone is carrying their own cross, so don't judge anyone and be kind!
♥♥♥♥♥♥♥♥♥♥♥♥♥♥♥♥♥♥♥♥♥♥♥♥♥♥♥♥♥♥♥♥♥♥♥
Thank you for your support and encouragement
♥♥♥♥♥♥♥♥♥♥♥♥♥♥♥♥♥♥♥♥♥♥♥♥♥♥♥♥♥♥♥♥♥♥♥
Thank you for your support and encouragement
♥♥♥♥♥♥♥♥♥♥♥♥♥♥♥♥♥♥♥♥♥♥♥♥♥♥♥♥♥♥♥♥♥♥♥
Very nice colors and composition. I like the sun and those pinkish clouds. Thank you for the progress details as well!
Thank you for your feedback. I am glad that you like it! ☺
Congratulation @yashny! Your post has been recently featured on #TeamMalaysia's Daily Pick Series! We would love to see more of your work here 😊
Have a nice day and STEEM to the moon!

Thank you so much, I really appreciate it! ☺
This post was shared in the Curation Collective Discord community for curators, and upvoted and resteemed by the @c-squared community account after manual review.
Very nice, @yashny :D I think you captured a feeling of sunset over Tokyo skyline well :) The step by step is also well explained <3 And I like the colour palette you chose to work with, here <3
Thank you for your feedback @veryspider =) Yes, I was going for a sunset city view and I am happy to hear that I did it! I'm glad that you like it and that makes the two of us, I like the colour palette too and always wanted to use them and finally did it with a suitable artwork ☺
Dear Artzonian, thanks for using the #ArtzOne hashtag. Your work is valuable to the @ArtzOne community. Quote of the week: Art, freedom and creativity will change society faster than politics. -Victor Pinchuk