Juniper Nana Highlights transformation and detialed video. "measure twice,cut once"
It's been 26 days since my last blog, seems like an eternity. But not to worry I'm back and I have finally shaken off the holiday mood. Today I want to share the work that I did on the Juniper in the feature image. This tree was my first juniper I owned and one of my first cascade designs. It has come a long way but due to lack of knowledge the tree has developed at a very slow pace. The tree could have been further developed if I knew more about the species and if I started with the correct techniques and a clear vision of what the end product must be.
Enough about that let's get into the work I did. First off the tree has been trimmer and formed regularly. It was also fertilized and treated for pests weekly. In the middle of last year I removed all the wire off the tree and I just focused on the health of the tree. I saw that the tree was doing great and knew that the time to work on the tree was now. I thought that I would be a great idea to take the tree with me to a social event at a fellow bonsai artist house to discuss the tree. Well I could not have asked for more input that's for sure. The tree was looked at from every angle and the new design was decided on.
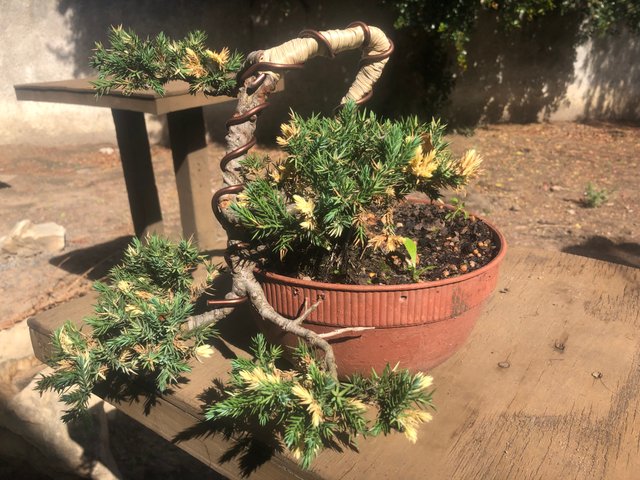
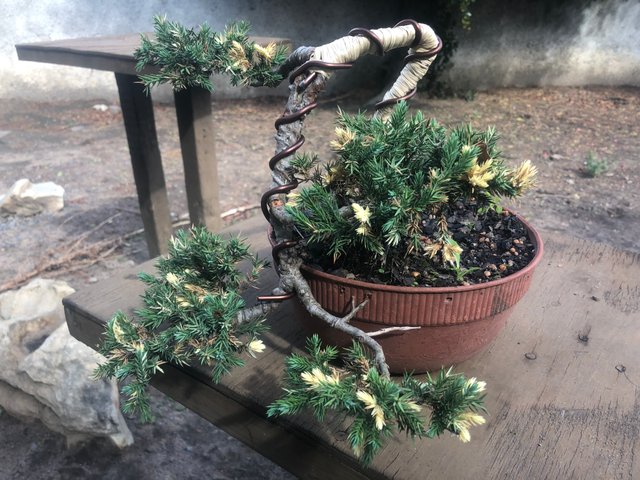
Here is a photo of the tree before I started working on the tree. 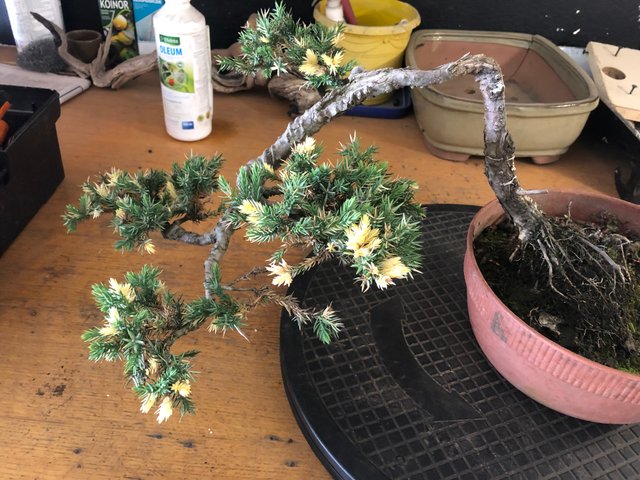
As you can see in the image above the tree's foliage moves away from the trunk and there is a big empty space between the trunk and the foliage. Another thing mention is that you can not see the deadwood that was carved away if you look at the image taken from this angle . This does not look good and you can not see all the features of the tree from the front.
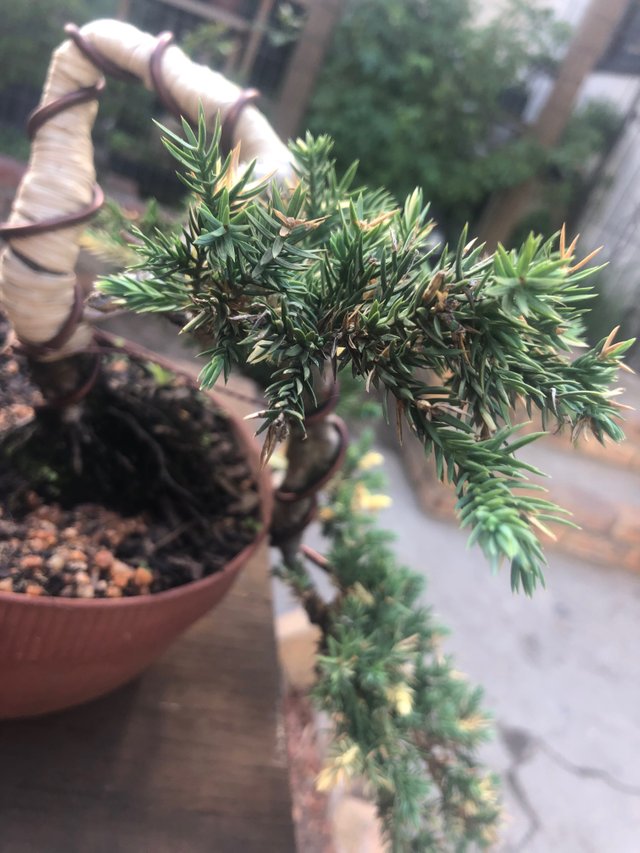
A few photos of the tree's deadwood before I started carving it.
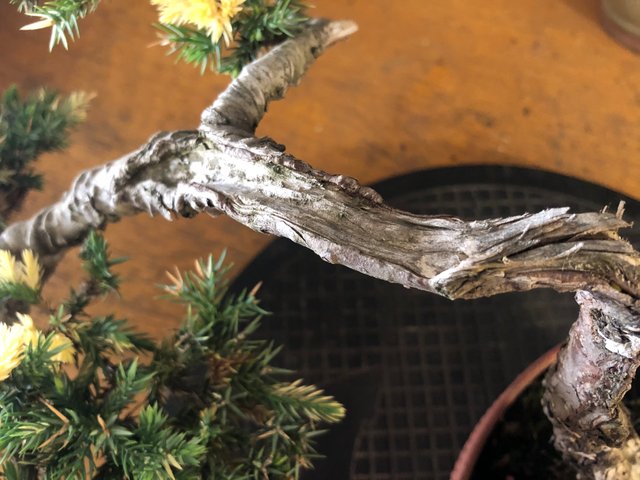
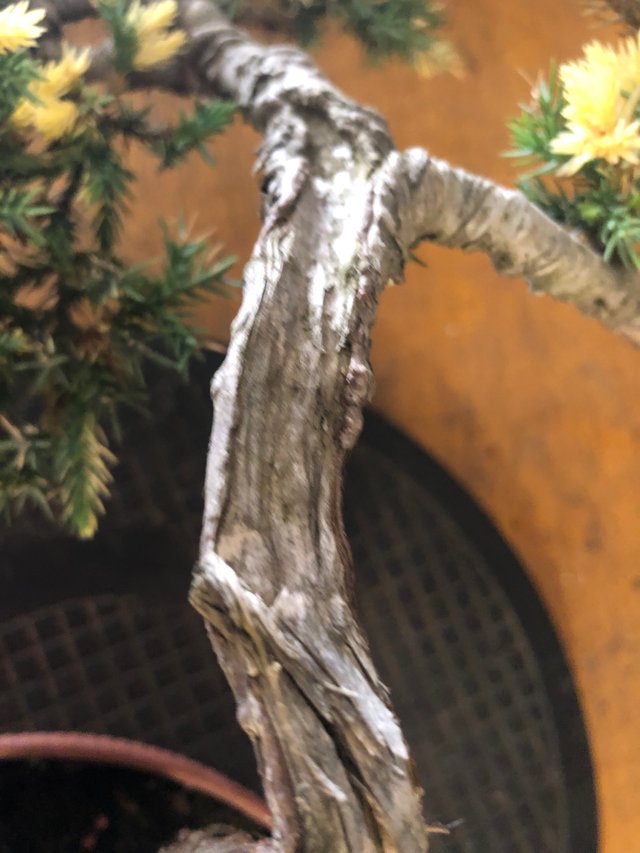
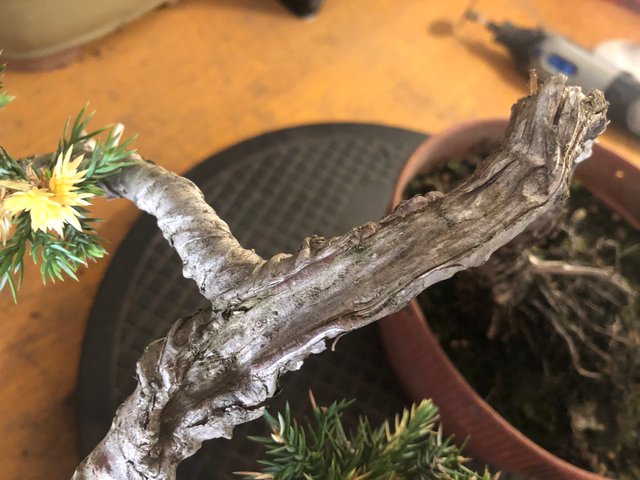
I carved the deadwood on this tree over a long period and I needed to take away more of the deadwood to be able to bend the tree into the shape I need for me to see the deadwood and the foliage from one side of the tree. In doing this I would be compacting the design of the tree more.
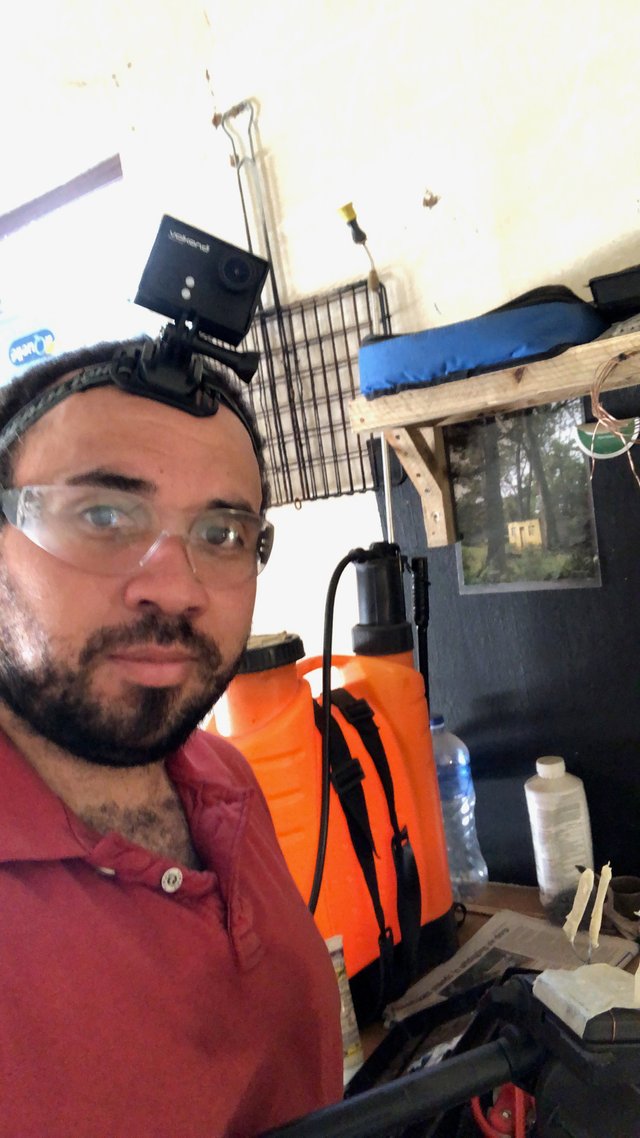
Before we start with the carving let's just put on our safety gear and add a camera to see from all angles. 😂 #hardatworkselfie
Okay... now that that's all done let's do this.

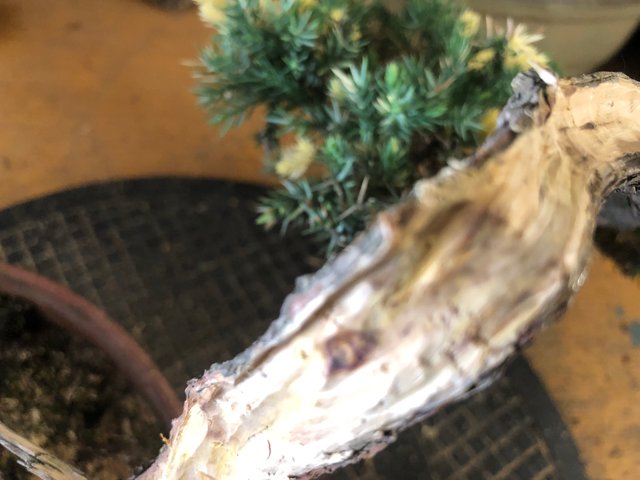

I ended up just hollowing out the deadwood more and extending the length of the deadwood more so that it starts a bit lower down. I also carved into one of the roots close to the surface of the trunk as this root already died off it just made sense to include this into the design instead of removing it. If there is one thing I learnt in last year it is to include as much of the material you have to start with into a design and only remove things once you are done with the design or once you know what you want to do with the tree. If you remove something to soon you can not duct tape it back on! As a wise man once said measure twice, cut once.
After I carved the wood I added a piece of thick wire in the carved area to support the tree so that it does not snap off during the bending process. 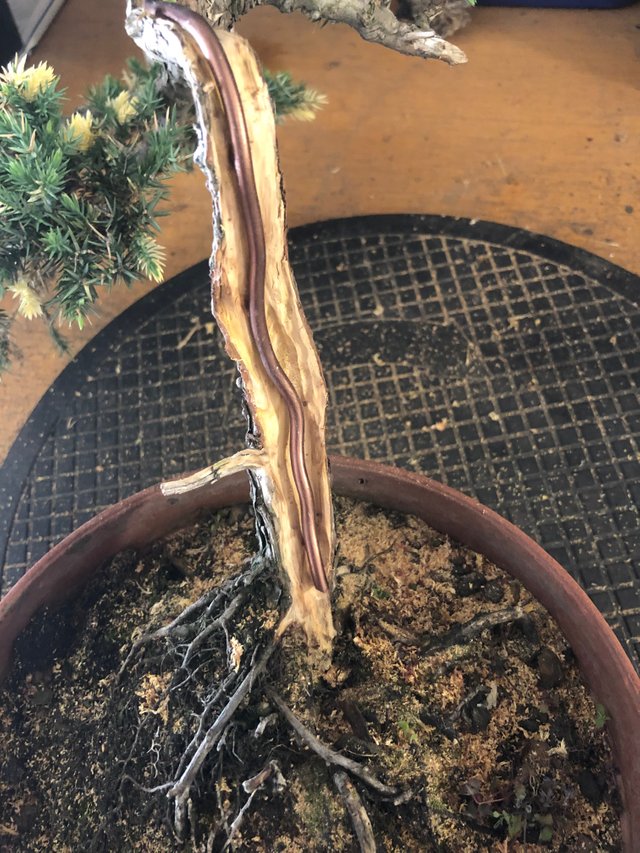
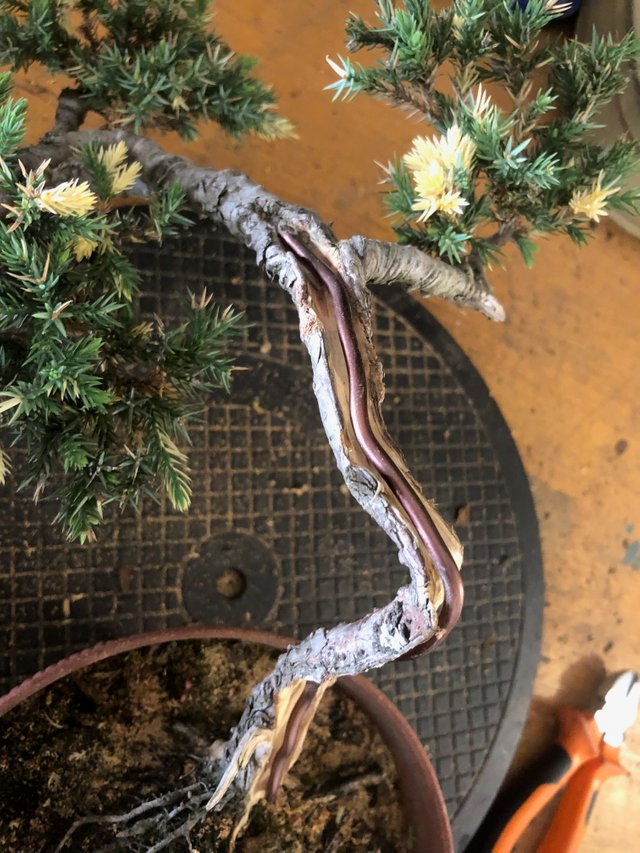
Please note that it is very important that the wire needs to be bend to follow the curves of the tree. The tighter the fit the better.
I then continued by preparing my raffia.
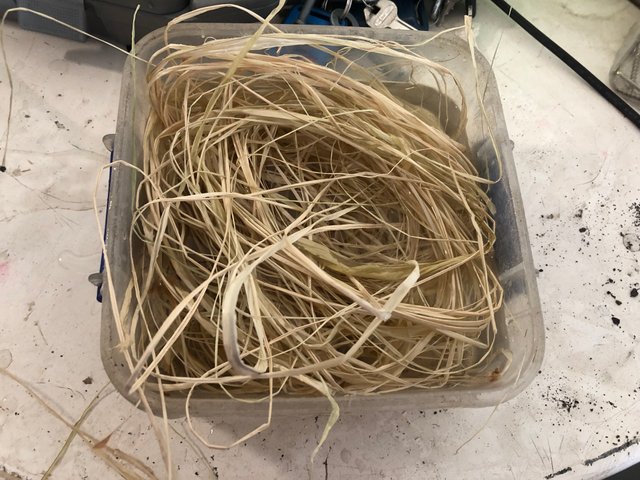 I placed my raffia in water so that I can work with it much easier. If the raffia is wet it does not break when you are applying it as you need to apply a lot of pressure to wrap the raffia tightly around the tree. We use raffia to keep the live vein from separating from the wood or tearing apart during bending thus not allowing sap to for past the section.
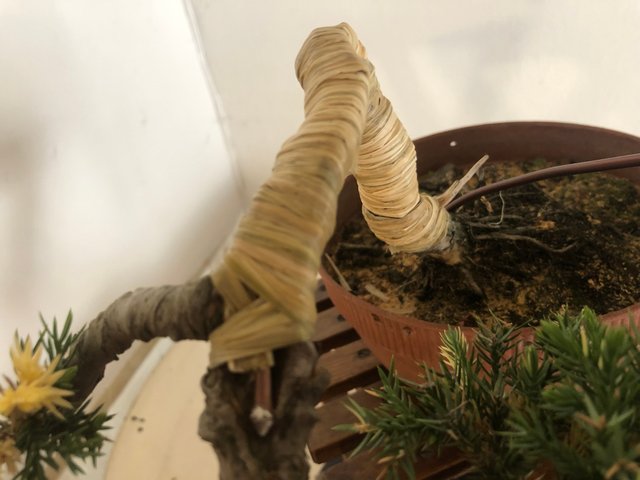

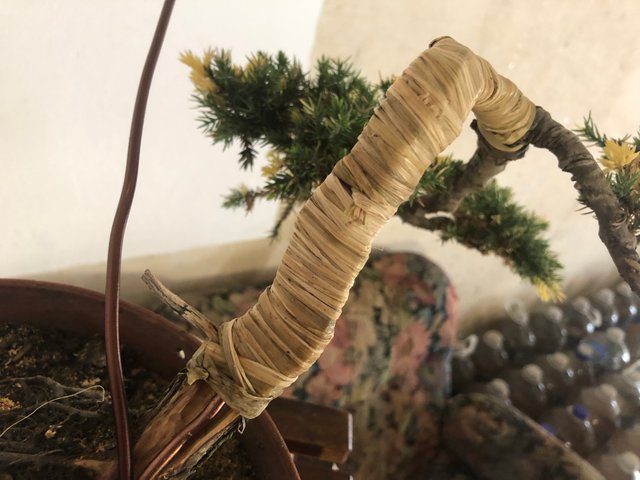
After the raffia was nicely wrapped around the tree I applied the wire to the trunk. I then bend the trunk and repotted the tree as the trunk was pushing against the container. I only worked on the trunk line of the tree and will still have to place the branches. Doing all this in one go might just be to much for the tree to handle. Even if the tree is strong enough to handle all the work at once the recovery will be slower than doing the transformation over a longer period.
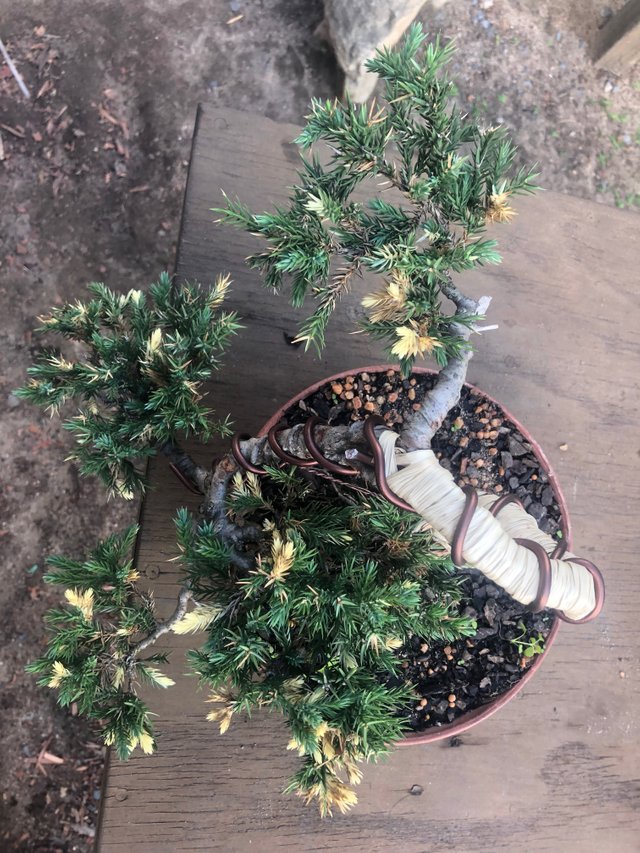
This was the tree after it was repotted and bend into place.
Here is a video with more detail on the tree's transformation.
Thank you for taking the time to read my blog. Hope you enjoyed it. If you have any comments or feedback please feel free to post them in the section provided below.

That was incredible. I had no idea such procedures could be performed on trees. It's a like a mechanical implant in humans.
This changes the saying about a tree born twisted is hard to strighten up :)
I thank you sir for the compliment. It’s all in a days work. Do you have bonsai trees or are you just curious about the art?
If you have and further questions please feel free to contact me.
I love plants of all kinds. I wish to learn how to make bonsais one day. I have dwarfed some plants "accidentally" (not having a spacious plot to plant them). I used to graft different varieties of hibiscus, for instance and had one plant once that bloomed in 3 colors. That was cool.
Hi romanolsamuels,
Visit curiesteem.com or join the Curie Discord community to learn more.
Congratulations @romanolsamuels! You have completed the following achievement on the Steem blockchain and have been rewarded with new badge(s) :
Click here to view your Board
If you no longer want to receive notifications, reply to this comment with the word
STOPDo not miss the last post from @steemitboard:
Wow, super pro treatment with the raffia. Barely a knot or twist visible. Any tricks for starting and ending the wrap?
Yess! For you any day. Once your piece of raffia is coming to an end insert the new piece of raffia and wrap a few wraps with the old raffia over the new piece. Just before the old one runs out start wrapping with the new one. This way you do not have any unsightly knots/joints.
Once the entire area you want to wrap is covered with raffia. split the end in two and continue wrapping with one of the two ends twice or so and then tie it off in a neat knot.
Hope that makes sense.
Yes that does make sense. Thank you @romanosamuels.
I have always been a fan of this art. I am now starting my own bonsai garden here in the Philippines and hopefully grow my trees as beautiful as this one on the post. Thank you for sharing!
Howdy from Texas romanolsamuels! this is factinating! I've never seen work done on a tree like this, by the time you got the dead wood removed it didn't look like it had enough to survive! That's amazing and using the wire is a brilliant idea! Will the trunk grow thicker again and grow around the wire?
@janton thank you for your comment.
The wire will be removed with in the next few years. I am just waiting for the trunk to be strong enough to support the foliage. It is unlikely that the bark of the this tree will grow over the deadwood. I will also be keeping the deadwood clear and will be applying lime sulfur to preserve the wood. It is part of the feature now so it will be maintained regularly with the rest of the tree.
Howdy again romanolsamuels! That is so interesting, you must have tons of patience!