Camping Crafts, Handmade Feathers
Out camping for a few days but got stuck staying inside because of bad weather?
Well here is something you can make using yarn and materials from the outdoors.
This is something you can do with the kids but it will test their patients so a parents help could be required.
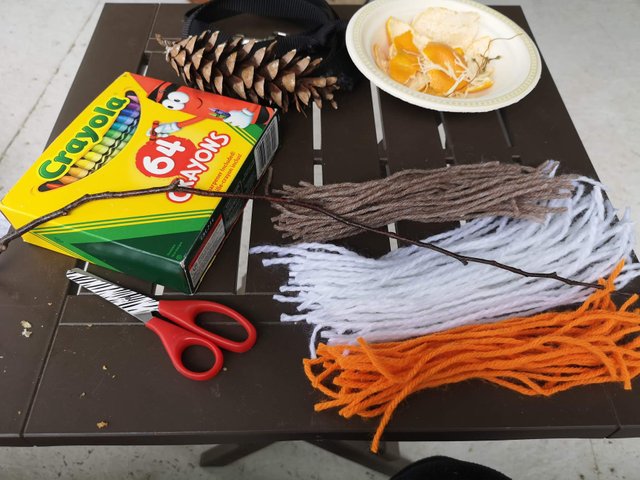
Your materials needed:
No need for crayons.
- Yarn
- Scissors
- Thin sticks
- A snack
- Other items from outside to help decorate.
On a nice day, grab the kids and go on an adventure to go find anything you need and want to make this happen just like the acorn I found.
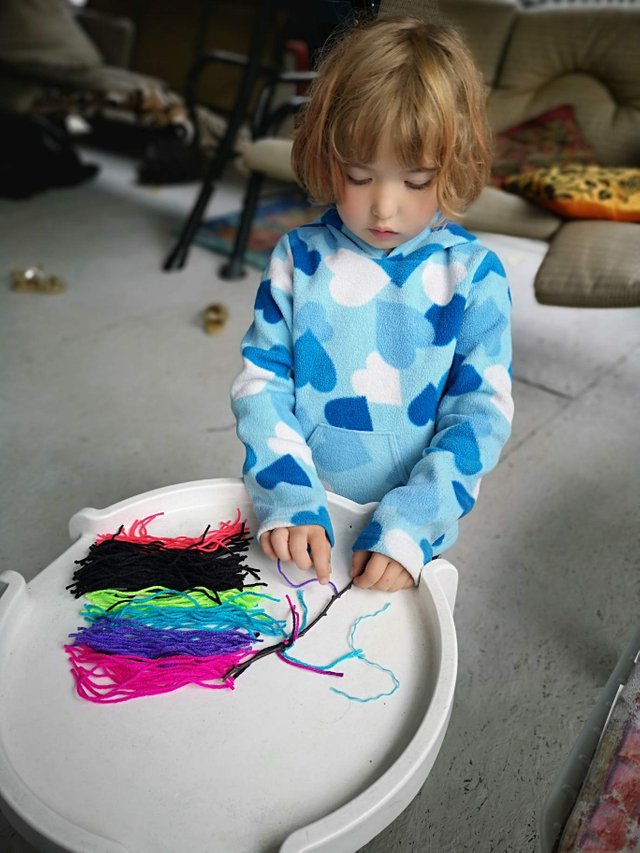
The next step is to cut strands of yarn. A lot of it. For the length, it all depends on what kind of feather you want.
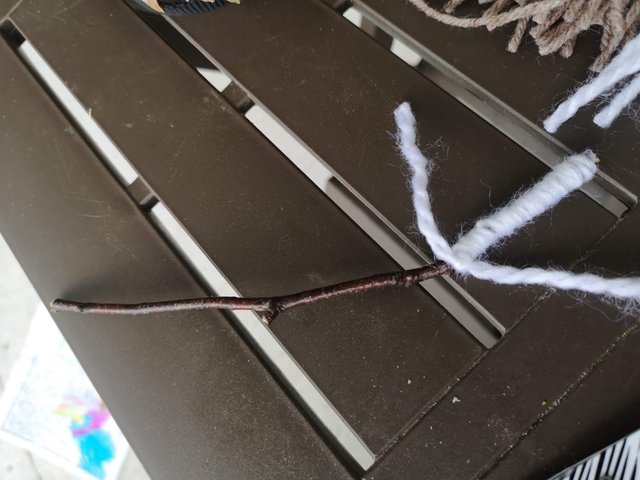
Take some extra yarn to wrap around the "stem" area.
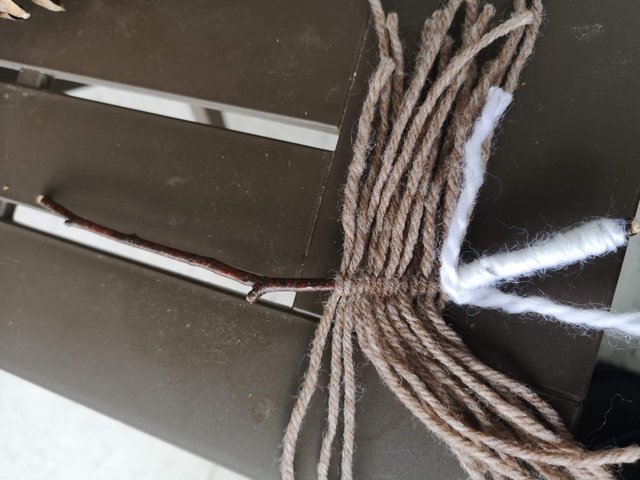
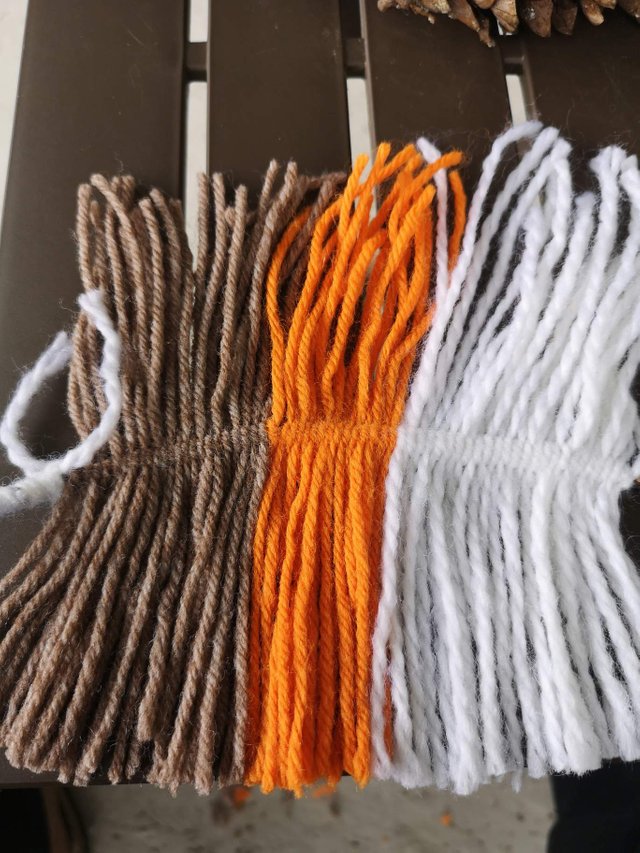
Then all you got to do next, the part the kids think is the longest part, tie your strands on the stick like so. Just a regular knot. Do it in the colors and patterns you see fit.
Once you've finished it'll look something like this. I know it doesn't look much like a feather right now but just wait, you'll see.

Next, trim the sides so they are equal I'd needed or if you think it needs to be smaller. I snapped it a bit to give you an idea.
Here are some the kids were in the process of making.
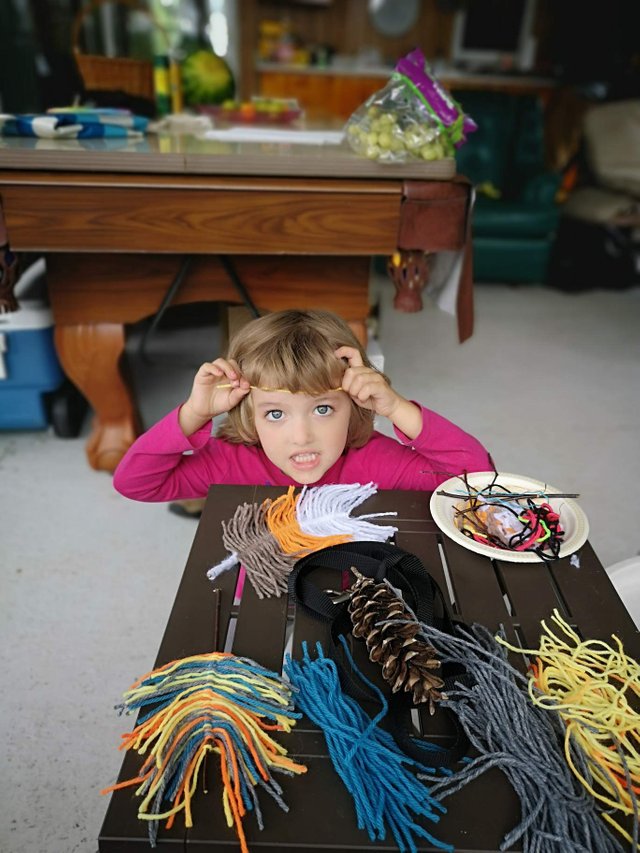
I seem to have not taken a picture of my son's feather in the making but I do have it in the somewhat finished product.
Part 2
Materials you will need:
- 1 1/2 cups of cold water
- 1/4 cup cornstarch
- Pot
- Whisk or spatula
- 2 containers
- Paintbrush
- Hot water
- Craft glue
- Wax paper
I don't have a picture of this process but it is fairly simple.
All you need to do is mix the water and cornstarch in a pot and heat, bring to a boil and let it get real thick. Keep stirring it the whole time till it's thick. Remove from heat, and put it in a container for it to cool down some.
Put hot water in the other container and dunk your feather in it so that the yarn is easily malleable. Lay out a sheet of wax paper, strain out the access water from the yarn and lay the feather on top.
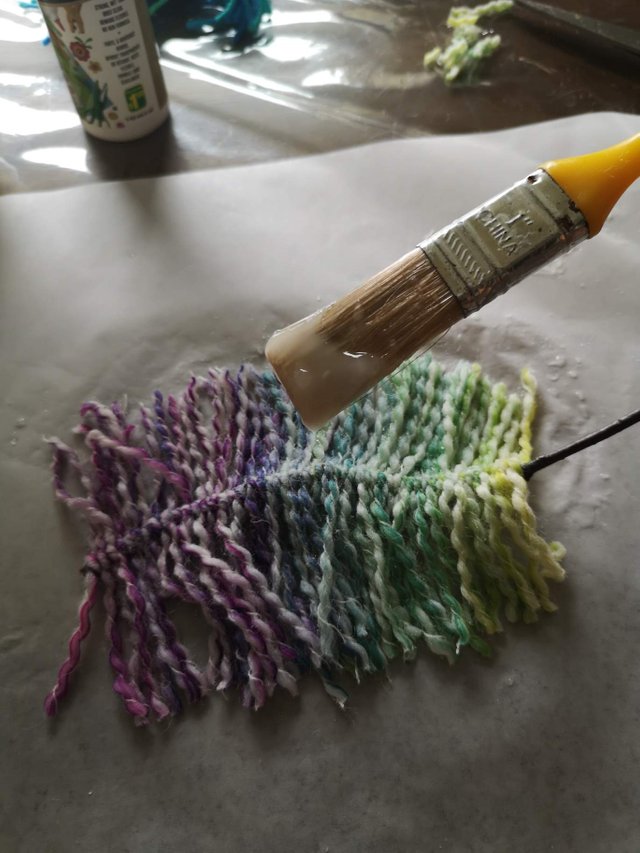
Using the paintbrush, take some starch goop, a good amount and paint it on the yarn. Slap it on all over. Do the same on the other side.
Notice
The side with the knots is the back side. You will want to starch that side first.
Starching the yarn helps to stiffen it but I found it wasn't enough to keep its shape completely, so I painted in the glue only top side. A little bit goes a long way.
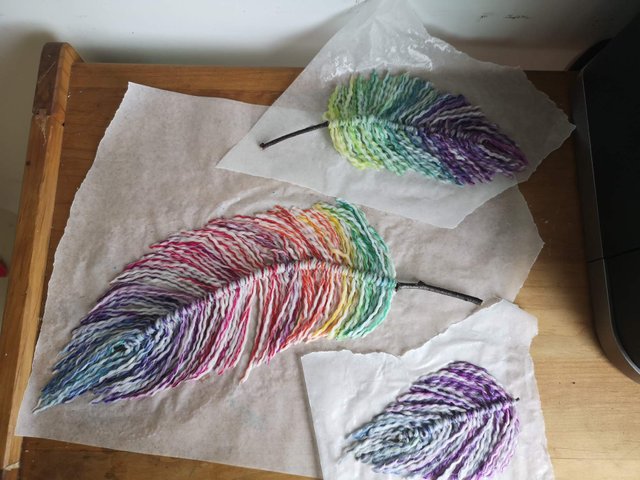
Do this with all the feathers you have made. Then shape it to how you want it to look. With these feathers I made, I left the yarn longer so it gives a whimsical look.
It helps to use another stick to comb out the yarn and to also shape it to look like a feather.
The next step is simply to let air dry or you can blow dry it so it goes faster. I let mine sit over night and it still wasn't dry so I took the dryer to it.
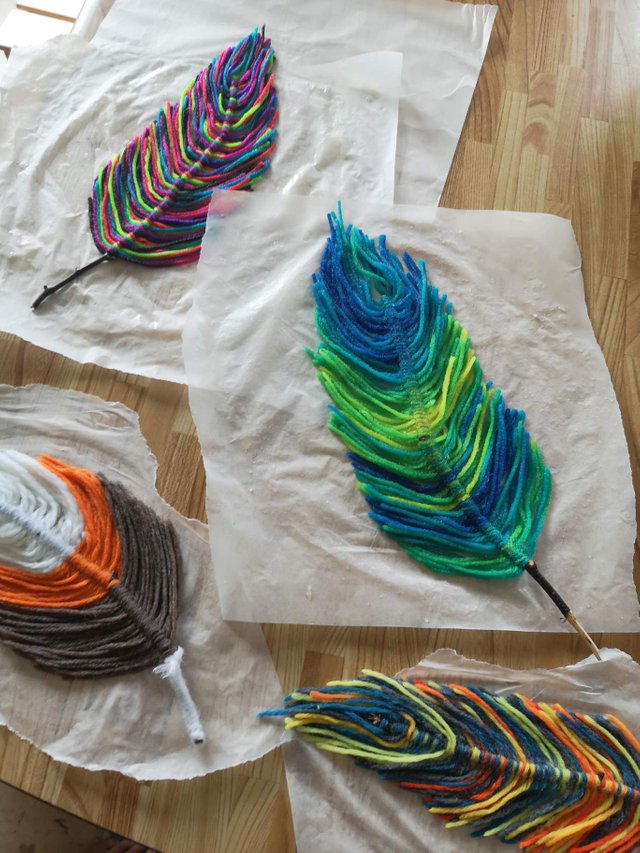
Here's the ones the kids made. My first feather is on the left, Emma's is on top, then Aaden's and then Frankie's on the bottom. I left the stems uncovered to show that we used sticks.
You can do anything with these. You can use them to decorate a wreath, make a garland, a centerpiece, anything.
For the whimsical feathers I used them to decorate a dreamcatcher.
And to make that, I used a really bendable tree branch. I'm not sure from which bush it was from, maybe suckleberry, but just test it, you'll be able to tell.
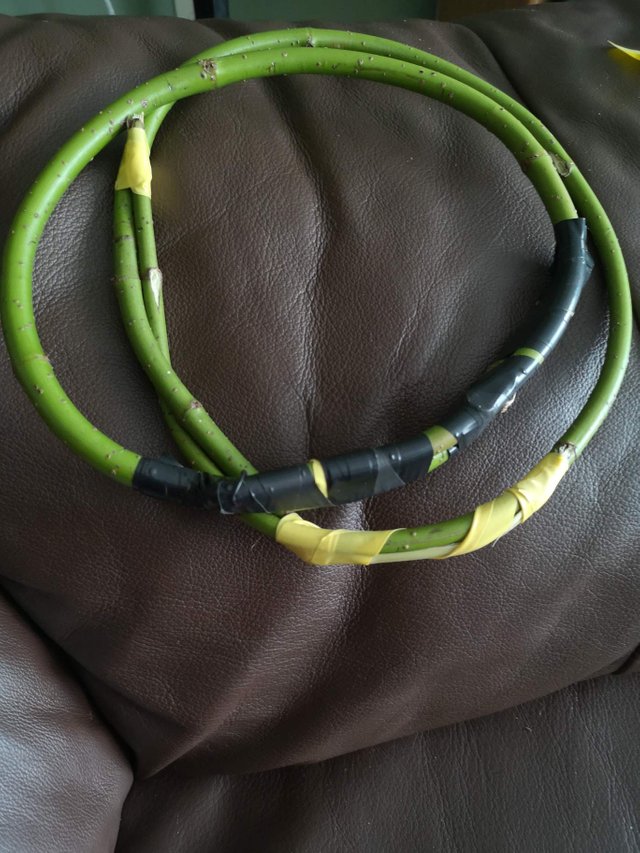
Make a hoop and intertwine it. These ones are tapped because it is the thicker part of the branch and is more stubborn to bend without breaking.
The one I used I didn't tape but I should have because of the form it naturally took.
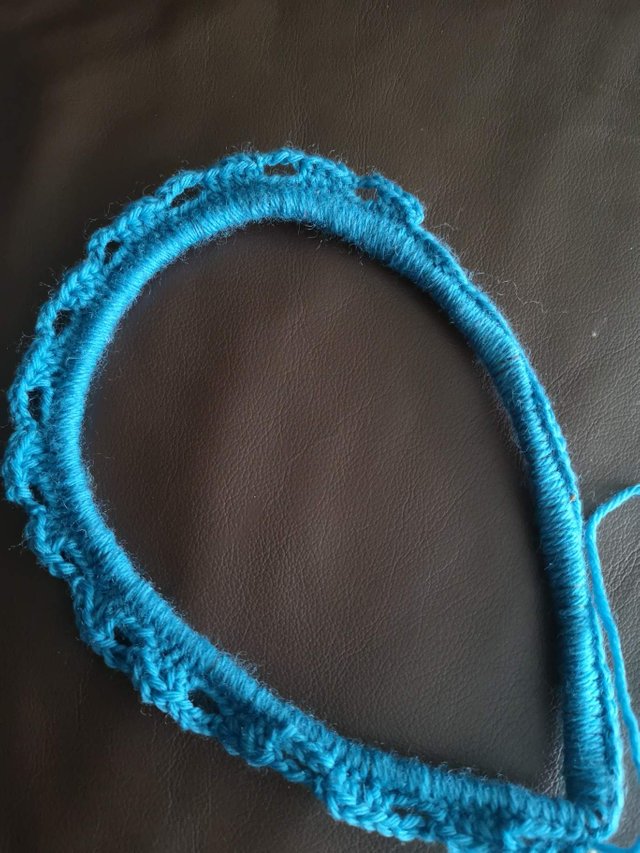
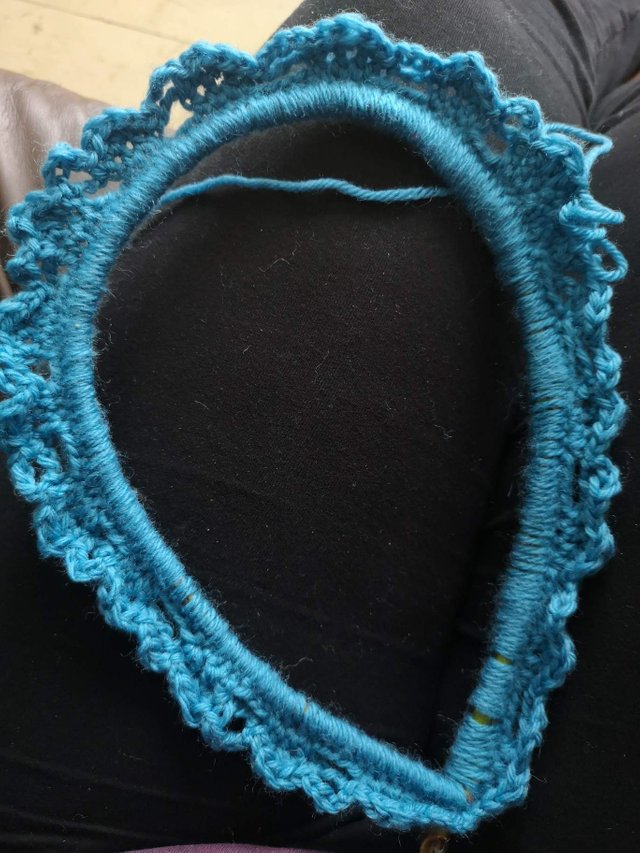
And it just bend at that point. Oh well, won't make it go to waste. I just basically crocheted around it, for those who crochet and are wondering what I did for a pattern, I didn't have one particular one in mind. I just went with it. But this is how it went:
HDC all around. Never counted how many, I just needed to cover it. Then reaching the end, connect with a slip stitch. Then HDC in the same stitch and for the next 3. Chain 4, slip stitch in the 5 stitch. HDC in the next 3 and keep going all around. 3rd row, slip stitch to connect, 1sc in the same, HDC in the next DC in the same, HDC in the next and SC in the next, chain 4, slip stitch in same spot, making like a double hole. Do that all around and voila.
I could probably have done with an actual pattern but really I just went with it.
Next part I threaded some yarn through it to make it look dreamcatcher like.
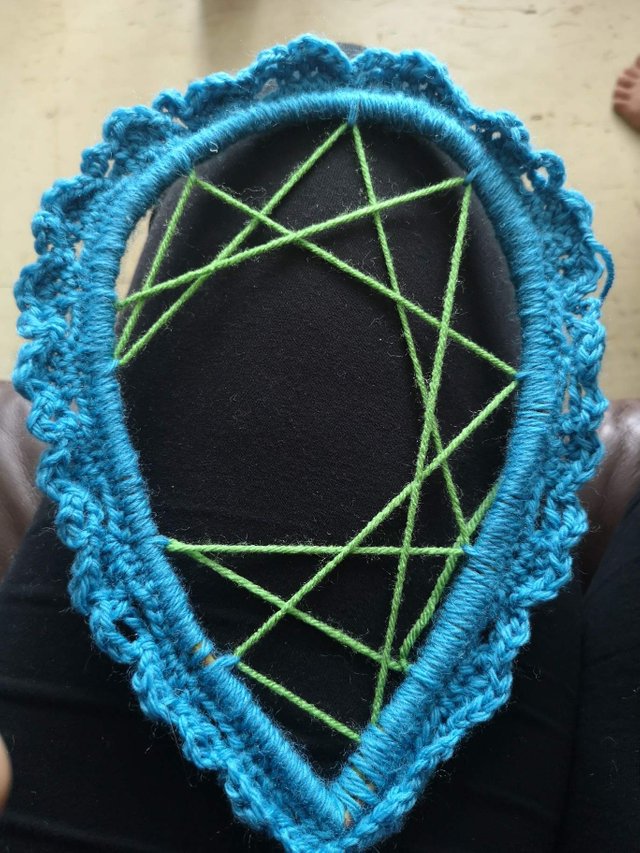
I tried to make it look like a moon in it but I never made a dreamcatcher and there's probably a good technique to it. I'll investigate that at some point in time.
The hard part here was to tie the feathers on it to look good. I had a hard time with that... Here just look and you'll see ...
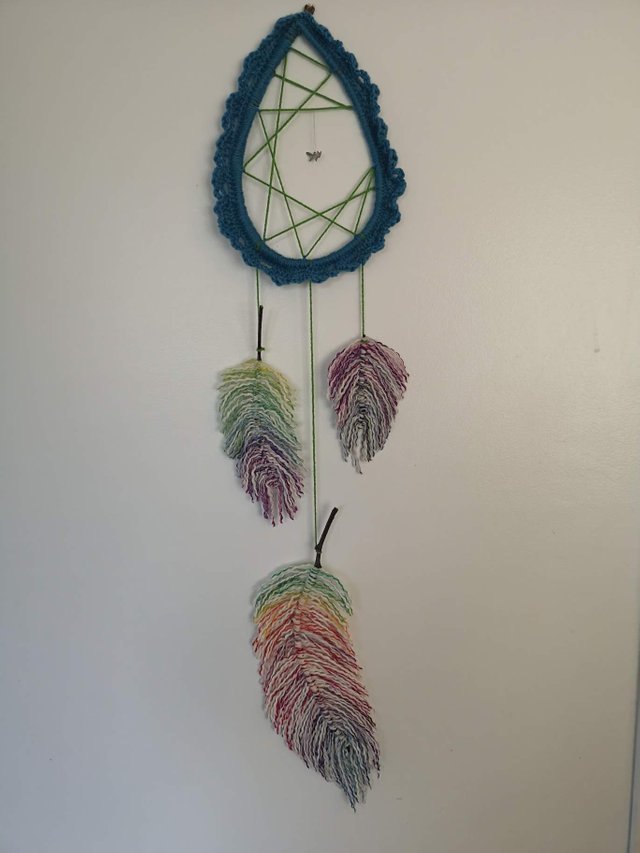
It's not what I was picturing in my head, so I'm still going to work on it till I get what I'm looking for. I didn't put on my acorn yet and I think it could do with some beading which I don't have on hand.
Maybe it would be if I rotate the top it would look better, I don't know. It's a work in progress.
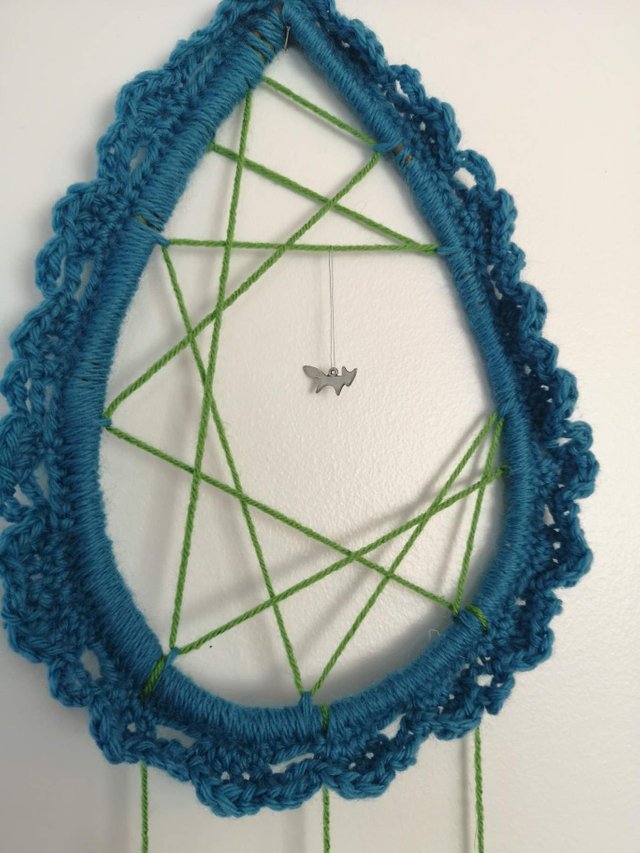
See the little fox? 🦊 😛 My little imprint.
I plan on making many of these, different styles for different seasons, Halloween, autumn, winter, Christmas, spring and all that fun stuff.
So what do you think? Interesting stuff? What could I change to make it look better in your opinion?

Posted using Partiko Android
This post was shared in the Curation Collective Discord community for curators, and upvoted and resteemed by the @c-squared community account after manual review.
@c-squared runs a community witness. Please consider using one of your witness votes on us here
Very interesting and creative, you should make more with the help of your creative family:) The feathers came out amazing, colourful and the branches give them a natural look:)
Thanks! There will definitely be more as I am planning to make gifts for family
Posted using Partiko Android
Hello!
This post has been manually curated, resteemed
and gifted with some virtually delicious cake
from the @helpiecake curation team!
Much love to you from all of us at @helpie!
Keep up the great work!
@helpie is a Community Witness.
For more information about our project,
please visit this month’s UPDATE post.
Congratulations! Your post has been selected as a daily Steemit truffle! It is listed on rank 12 of all contributions awarded today. You can find the TOP DAILY TRUFFLE PICKS HERE.
I upvoted your contribution because to my mind your post is at least 3 SBD worth and should receive 211 votes. It's now up to the lovely Steemit community to make this come true.
I am
TrufflePig, an Artificial Intelligence Bot that helps minnows and content curators using Machine Learning. If you are curious how I select content, you can find an explanation here!Have a nice day and sincerely yours,

TrufflePigOMG!!! This is beautiful! I'm a huge fan of feathers and dreamcatchers...this one is so unique, I got to try it!
Posted using Partiko Android
Sweet! I'm glad you like it. If you get the chance to try it, and if you share it on Steemit, tag me. I would love to see it ☺️
Posted using Partiko Android
Super cute!! And such a unique idea! Well done 😉
Thanks!
Posted using Partiko Android
Thank you!!
Posted using Partiko Android
An interesting idea how to take a child if there is no way to go out for a walk!)
Definitely keeps them busy
Posted using Partiko Android
Those feathers are so cute! I just love them. I sent your post to one of my daughters because she loves doing crafts with the kids. This will be amazing for the Christmas tree she is planning to decorate.
Ren
Awesome! That would be a tree I would love to see!
Thank you ☺️
Posted using Partiko Android