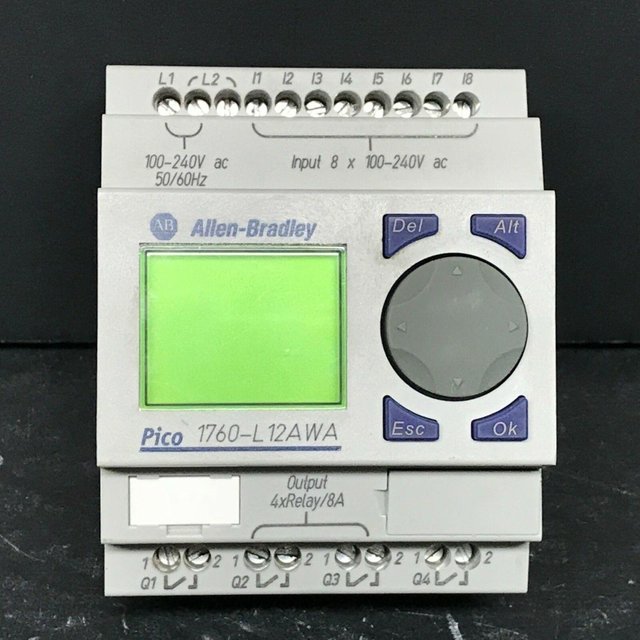
EART - Allen Bradley Pico PLR series B
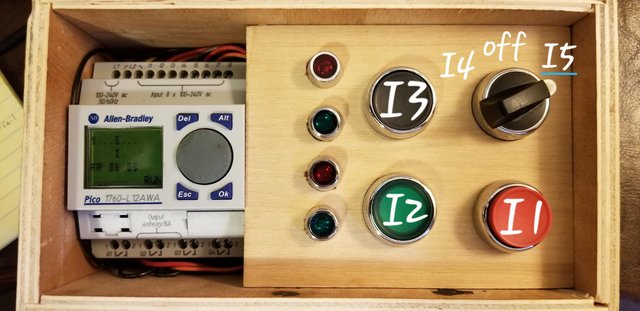
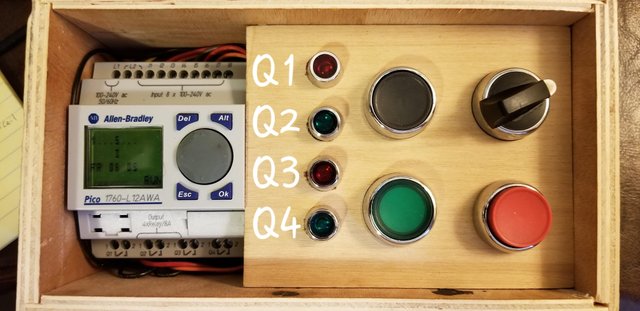
The EART Allen Bradley Pico PLR has five inputs and four outputs. I1-I5 & Q1-Q4
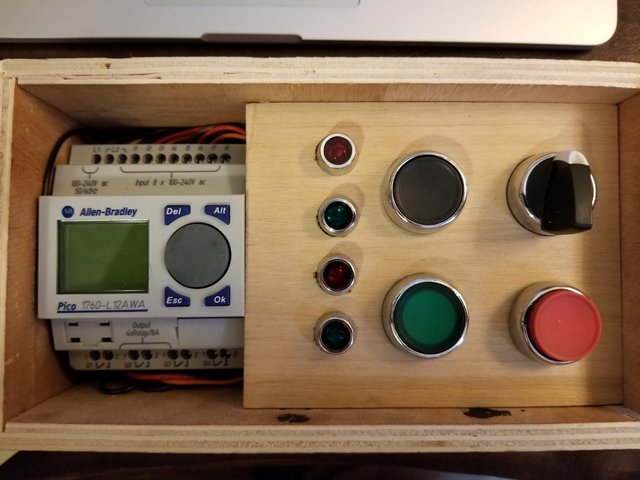
One NC stop button(I1) two NO Buttons(I2-I3) and a three position switch(I4-off-I5)
L1 & L2 Power the Pico from AC sources between 100V & 240Volts, EART uses the first 5 of 8 available inputs.
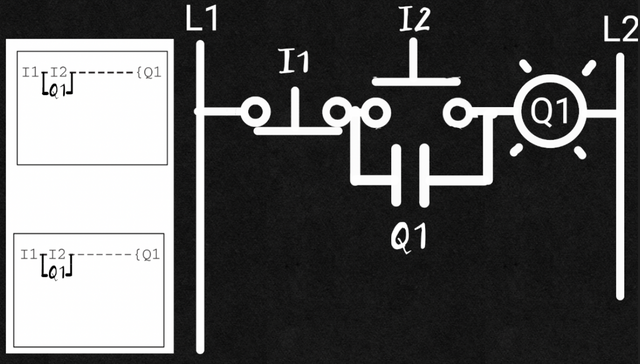
This is the ladder diagram of the EART Pico PLR.
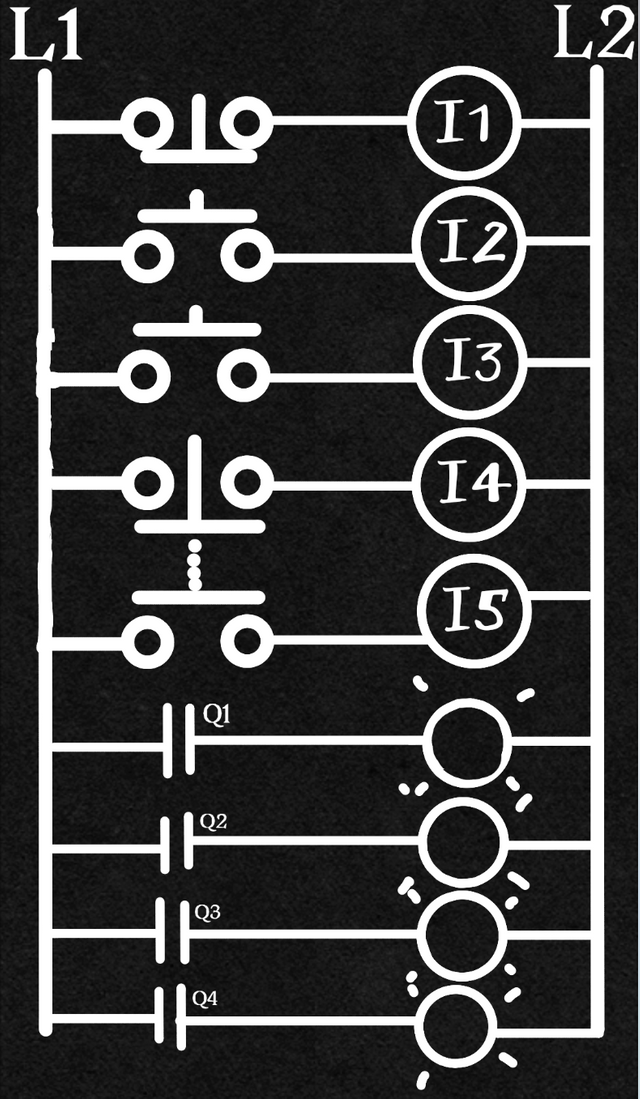
This is a schematic.
Navigating the Programmer
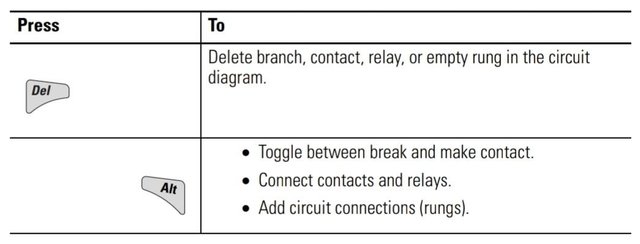
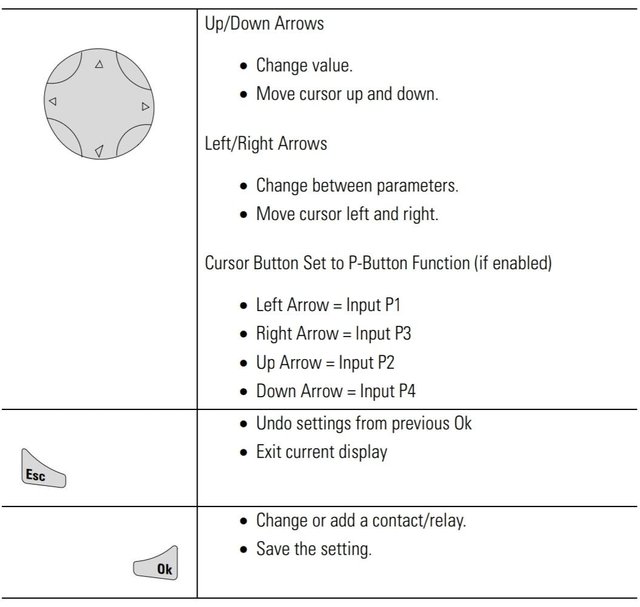
Using the 8 keypad buttons P1-P4, Del, Alt, Esc, and Ok we can navigate and program parameters into the Pico series B
When we power on the device the start up screen displays inputs, outputs, Weekday/Time and RUN/STOP Modes for testing and feedback

System must be in the STOP mode to edit Program contacts & coils. Though we can view rung activation and edit authorized parameters while RUN mode is activated.
Press ok from the start up screen to get the the main menu
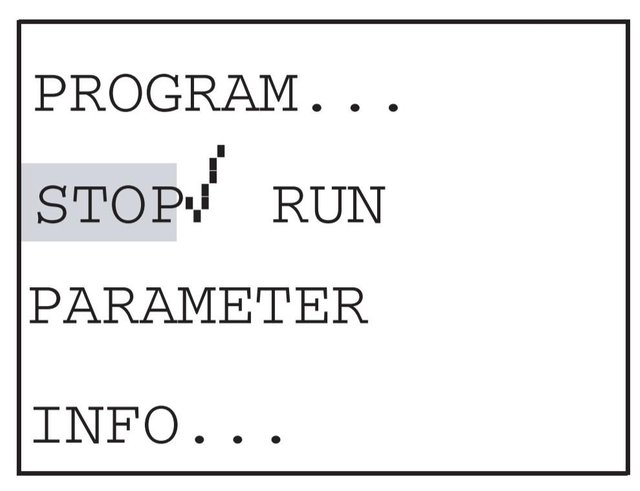
From the main menu we may choose to Run or Stop the Program. Choose STOP and Enter the Program menu by pressing OK twice to get to the programming ladder.
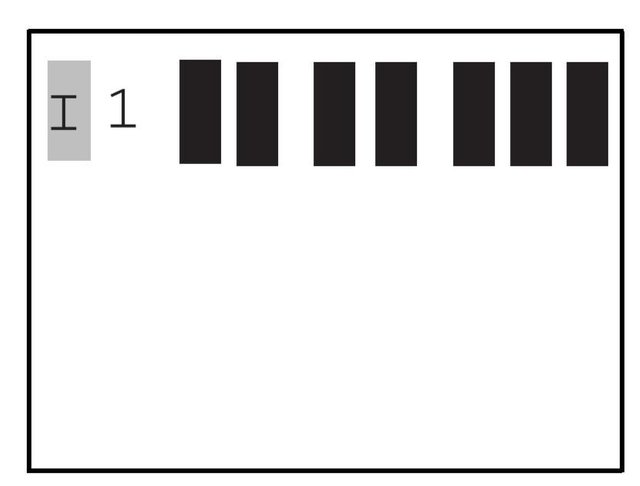
There are three contacts and one output function available per rung.
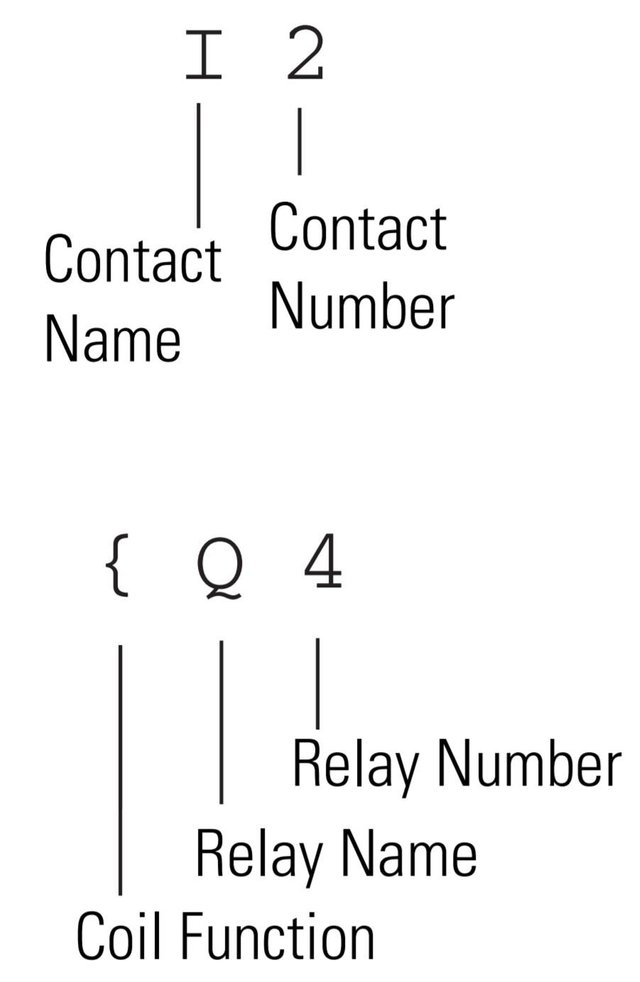
Each Contact has a type/letter and a number
Each Output has a function, type/letter and number.
Press ok in the blank programming screen to create contact I1
Newly created contacts are the NO/Make type. Letters with a top hat represent the NC/Break contact type. By Pressing alt with the cursor highlighting the contact letter it changes hats between Make and Break.

#1
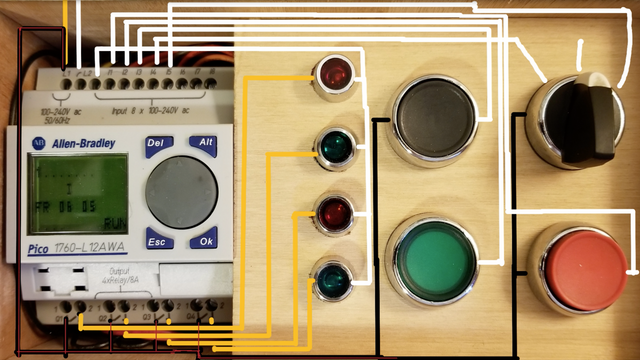
Pico suppourts 8x 100V-240V input signals(I1-I8), on our EART box I1-I5 are wired to our buttons and switch.
#2
There are 4x 240v 8Amp Outputs Q1-Q4 wired to our lights.
#3
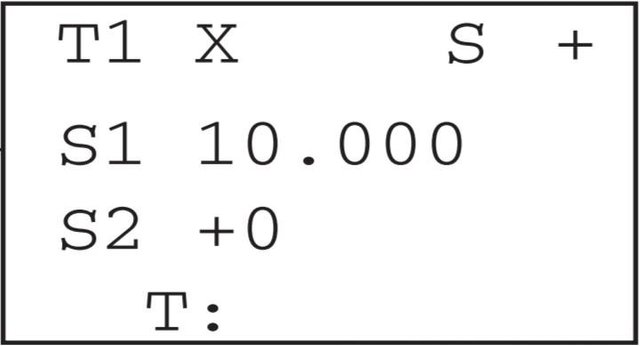
Timers (TT1-TT16) may be programmed independently as On-Delay(Random), Off-Delay(Random), Single Pulse, or Flashing pulse.
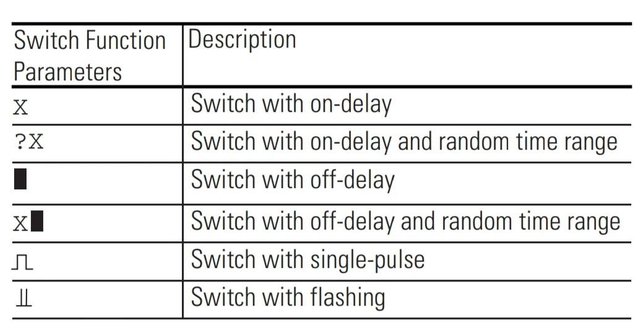
Timer Scale is set to seconds by default, but also can be minutes and hours. Plus and minus indicate timer appearence in the parameter menu. Authentication protection can be added too. Set Setpoint 1 to the desired off delay time, I set mine for 1 second, because we live in an instanious world I can't be bothered to wait longer than that.
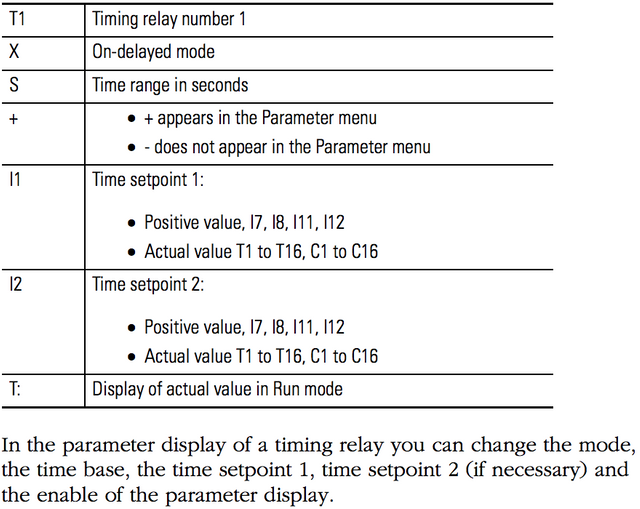
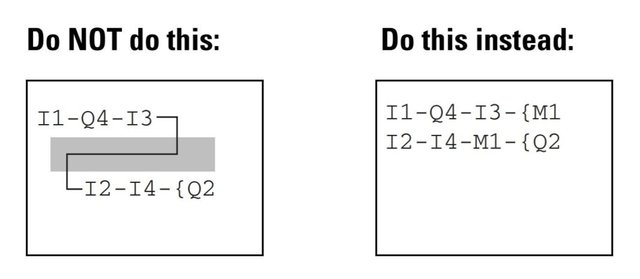
The timer relay is started via the trigger input TT1 and resets when it is turned off but can also be reset via the reset input RT1. Use each coil of a relay only once in
the circuit diagram to prevent
unpredictable switching states.
#4
Markers (M1-M16) & (N1-N16) are used like control relays.
If you need more than three contacts in series, markers are used like extra control relays to increase number of possible "and" conditions in series
#5
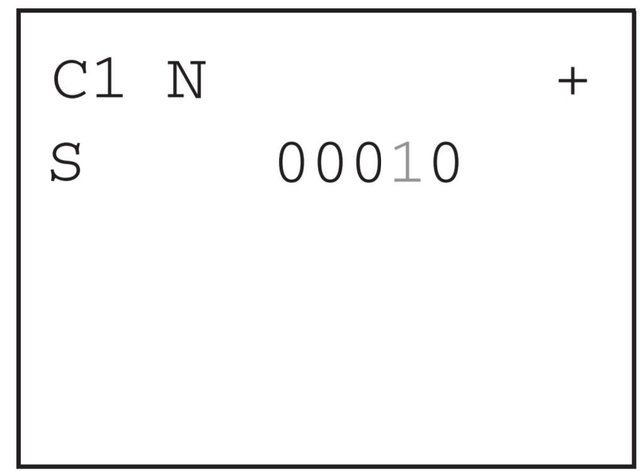
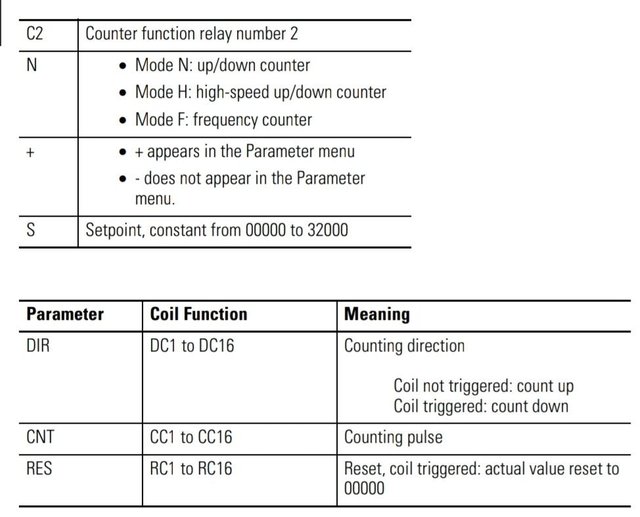
Counters (CC1-CC16) may be preset to trigger after a defined count is reached, DC1 is used to count up when deactivated, and count down when deactivated. RC1 is used to reset the count to Zero.
#6
Programmable triggering for Clock Time dependant contacts
Clock Time ()

#7
Keypad Keys can be input assigned, usually for testing convinience.
Keypad Input (P1-P4)
#8
A current senseing analog setpoint can be used to trigger contacts
Analog Setpoint (A1)
Coil Functions
There are 7 Coil Functions available: Energize({), Set(S), Reset(R) and Flip Flop( ), Negate(}), Leading Edge( ) and Falling Edge( ) Coil function types. Classical relays are the energize output type. There is also a Master Reset coil "Z".
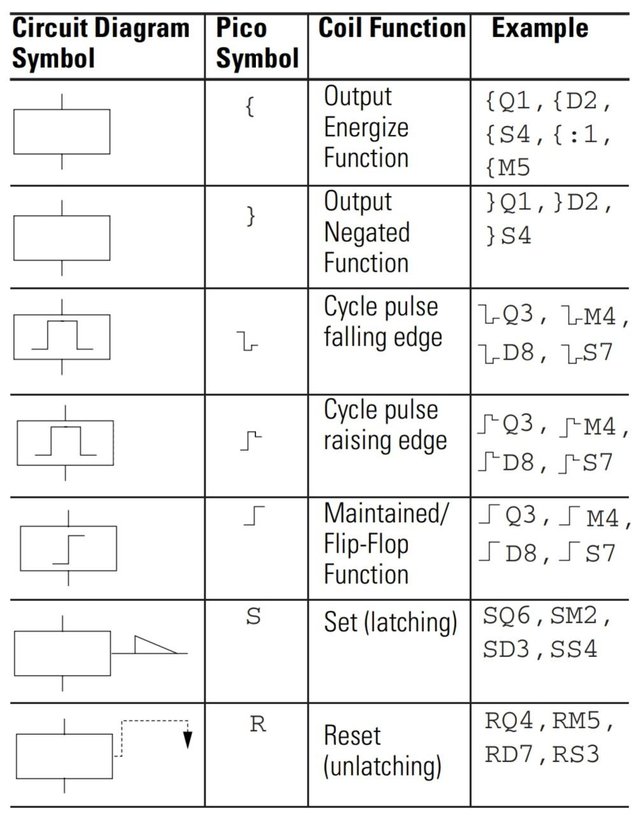
Create a new coil and then press the left keypad button to select the coil function, use the up and down arrows to select the correct symbol. Energize
Lets make a start stop station for one of our lights. Power always begins at the left side of the contacts and moves right to the coil. I1 should be first as it is NC, then I2 as our start button, press alt and arrow over to the coil field. Select Q1 and hit ok, it should send the cursor to the next rung. Move right into the field below I2 and select Q1. Then use alt to connect the contacts. You now have the basic start stop station.
We could also use the set & reset functions to obtain a start stop feature.
Connect I1 select the letter and press alt to change hat, now connect the line to the coil, select Q1, press the left key to change the coil function to (R)Reset. press ok until next rung is selected, add an NO I2 contact, add Q1 and change the coil function to (S)Set. You have another Start Stop Station: The Same, But Diffrent.
The Pico has retention capabilities, meaning it can maintain a set contact even after power is lost, though the default setting is to reset and paramenters specifically set to have retentive behavior.
I also enjoy the Flip Flop, which sets and resets per pulse.
Ok wow you made it through, I'm honored, hopefully you learned somthing, alright now get outta here and go do something about that would ya.
Thanks for using eSteem!
Your post has been voted as a part of eSteem encouragement program. Keep up the good work! Install Android, iOS Mobile app or Windows, Mac, Linux Surfer app, if you haven't already!
Learn more: https://esteem.app
Join our discord: https://discord.gg/8eHupPq
Congratulations @macmaniac77! You have completed the following achievement on the Steem blockchain and have been rewarded with new badge(s) :
You can view your badges on your Steem Board and compare to others on the Steem Ranking
If you no longer want to receive notifications, reply to this comment with the word
STOPVote for @Steemitboard as a witness to get one more award and increased upvotes!
Congratulations @macmaniac77! You received a personal award!
You can view your badges on your Steem Board and compare to others on the Steem Ranking
Vote for @Steemitboard as a witness to get one more award and increased upvotes!