SNDBOX Sandbox cookies

I actually didn't plan to make a sandbox of cookies but just SNDBOX cookies. I suddenly thought it would be a cool idea to make a sandbox as well.Not just a regular one, but a mosaic sandbox. So here it is, the first edible SNDBOX mosaic sandbox! I guess I can call this a project. Don't ask me how long I worked on this. Ok, you can ask , I worked around 12 hours. Probably you think I am crazy :-D.

Baking cookies is easy, everyone can do it. You don't need to be a chef to bake cookies or cakes. But baking straight rectangle cookies and decorate them with royal icing is something else. You need precision work and lots of patience. If you are in a rush it won't look good. I'm not saying my cookies look perfect. I am still learning to make perfect decorated cookies. It's definetely not easy. If you work with royal icing, you have to know many thing. You can't just follow the instructions on the package because royal icing dries very quick. You also need to know about the consistency of the royal icing. As you can see, the orange royal icing doesn't look as smooth as the rest because I started with the orang and found out later that I didn't use enough water. I tried to make the same shades of the SNDBOX logo, but it wasn't easy. The orange shade should be more peachy pink and I just couldn't get that colour.

3D printing cookie cutter + stamp
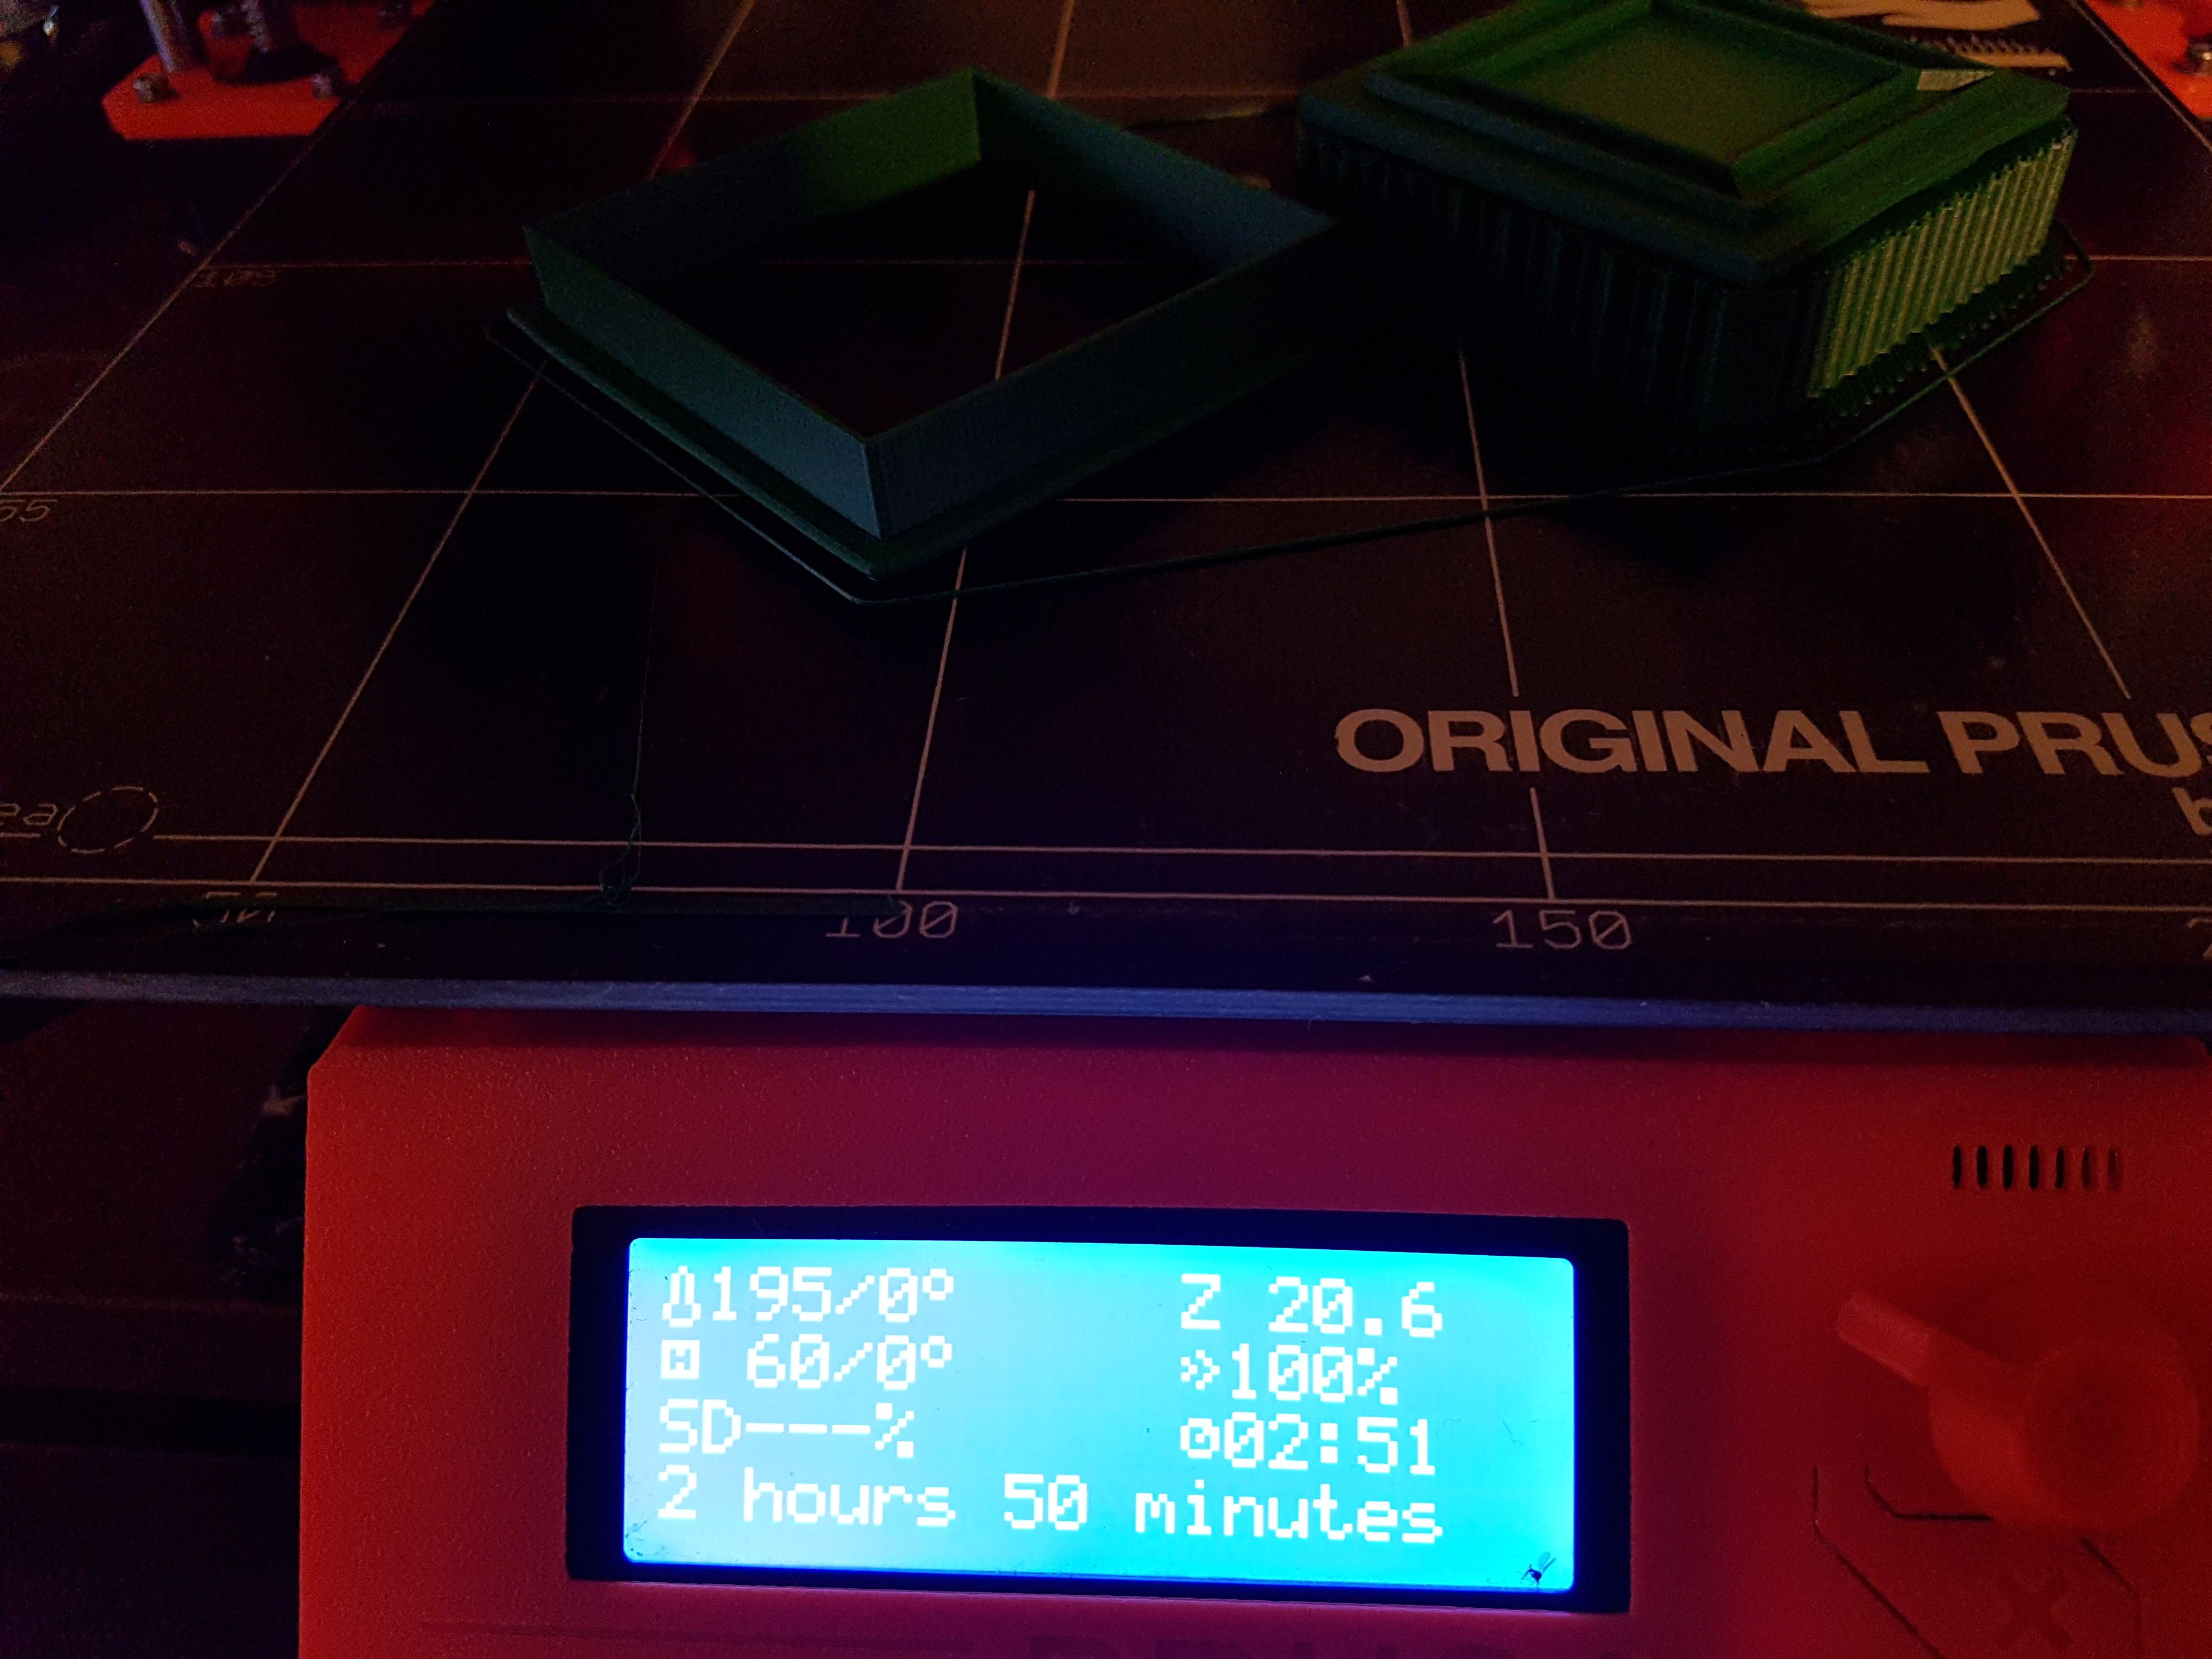
It took the Prusa 2 hours and 50 minutes to print the SNDBOX cookie cutter + stamp.
I love removing support material! It feels like eating chips, so crispy :-D.
Baking the cookies
You wil need:
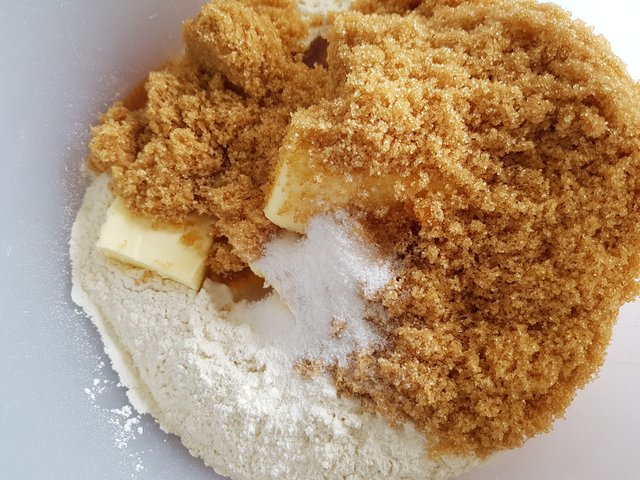
375 gram flour
225 gram unsalted butter
200 gram (brown) sugar
10 gram vanilla sugar
1 large egg
almond flavor oil
Instructions
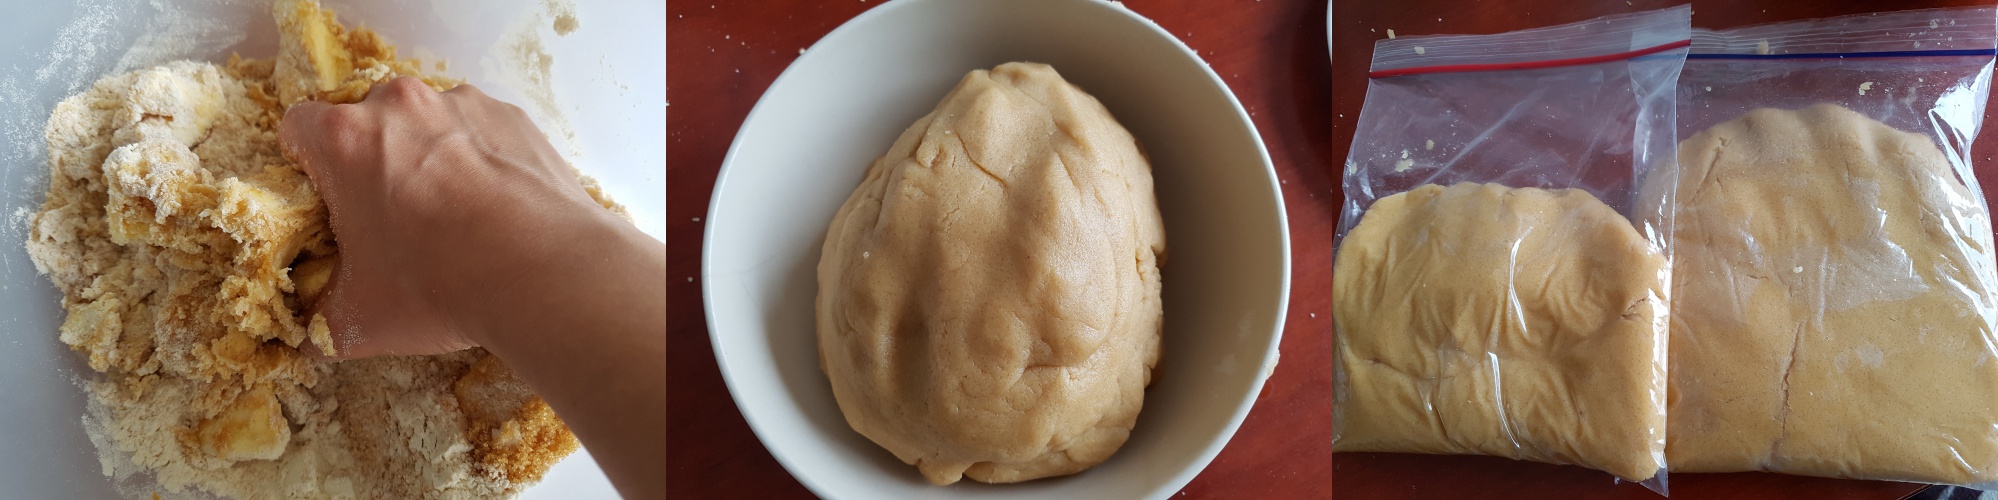
Mix all ingredients in a large bowl and knead the dough with your hands. The ingredients don't need to be at room temperature because your hands are warm. Mix everything evenly. Split the dough in two and put them in a ziplock bag. Let the bags with dough chill in the fridge for a night.

The next morning you can take out the chilled dough and knead with your hands till it's easy to roll out. To make it more easy to work with the cookies, you will also need baking paper. For even and equal cookies it is better to use a non-stick rolling pin baking tool with guide rings.
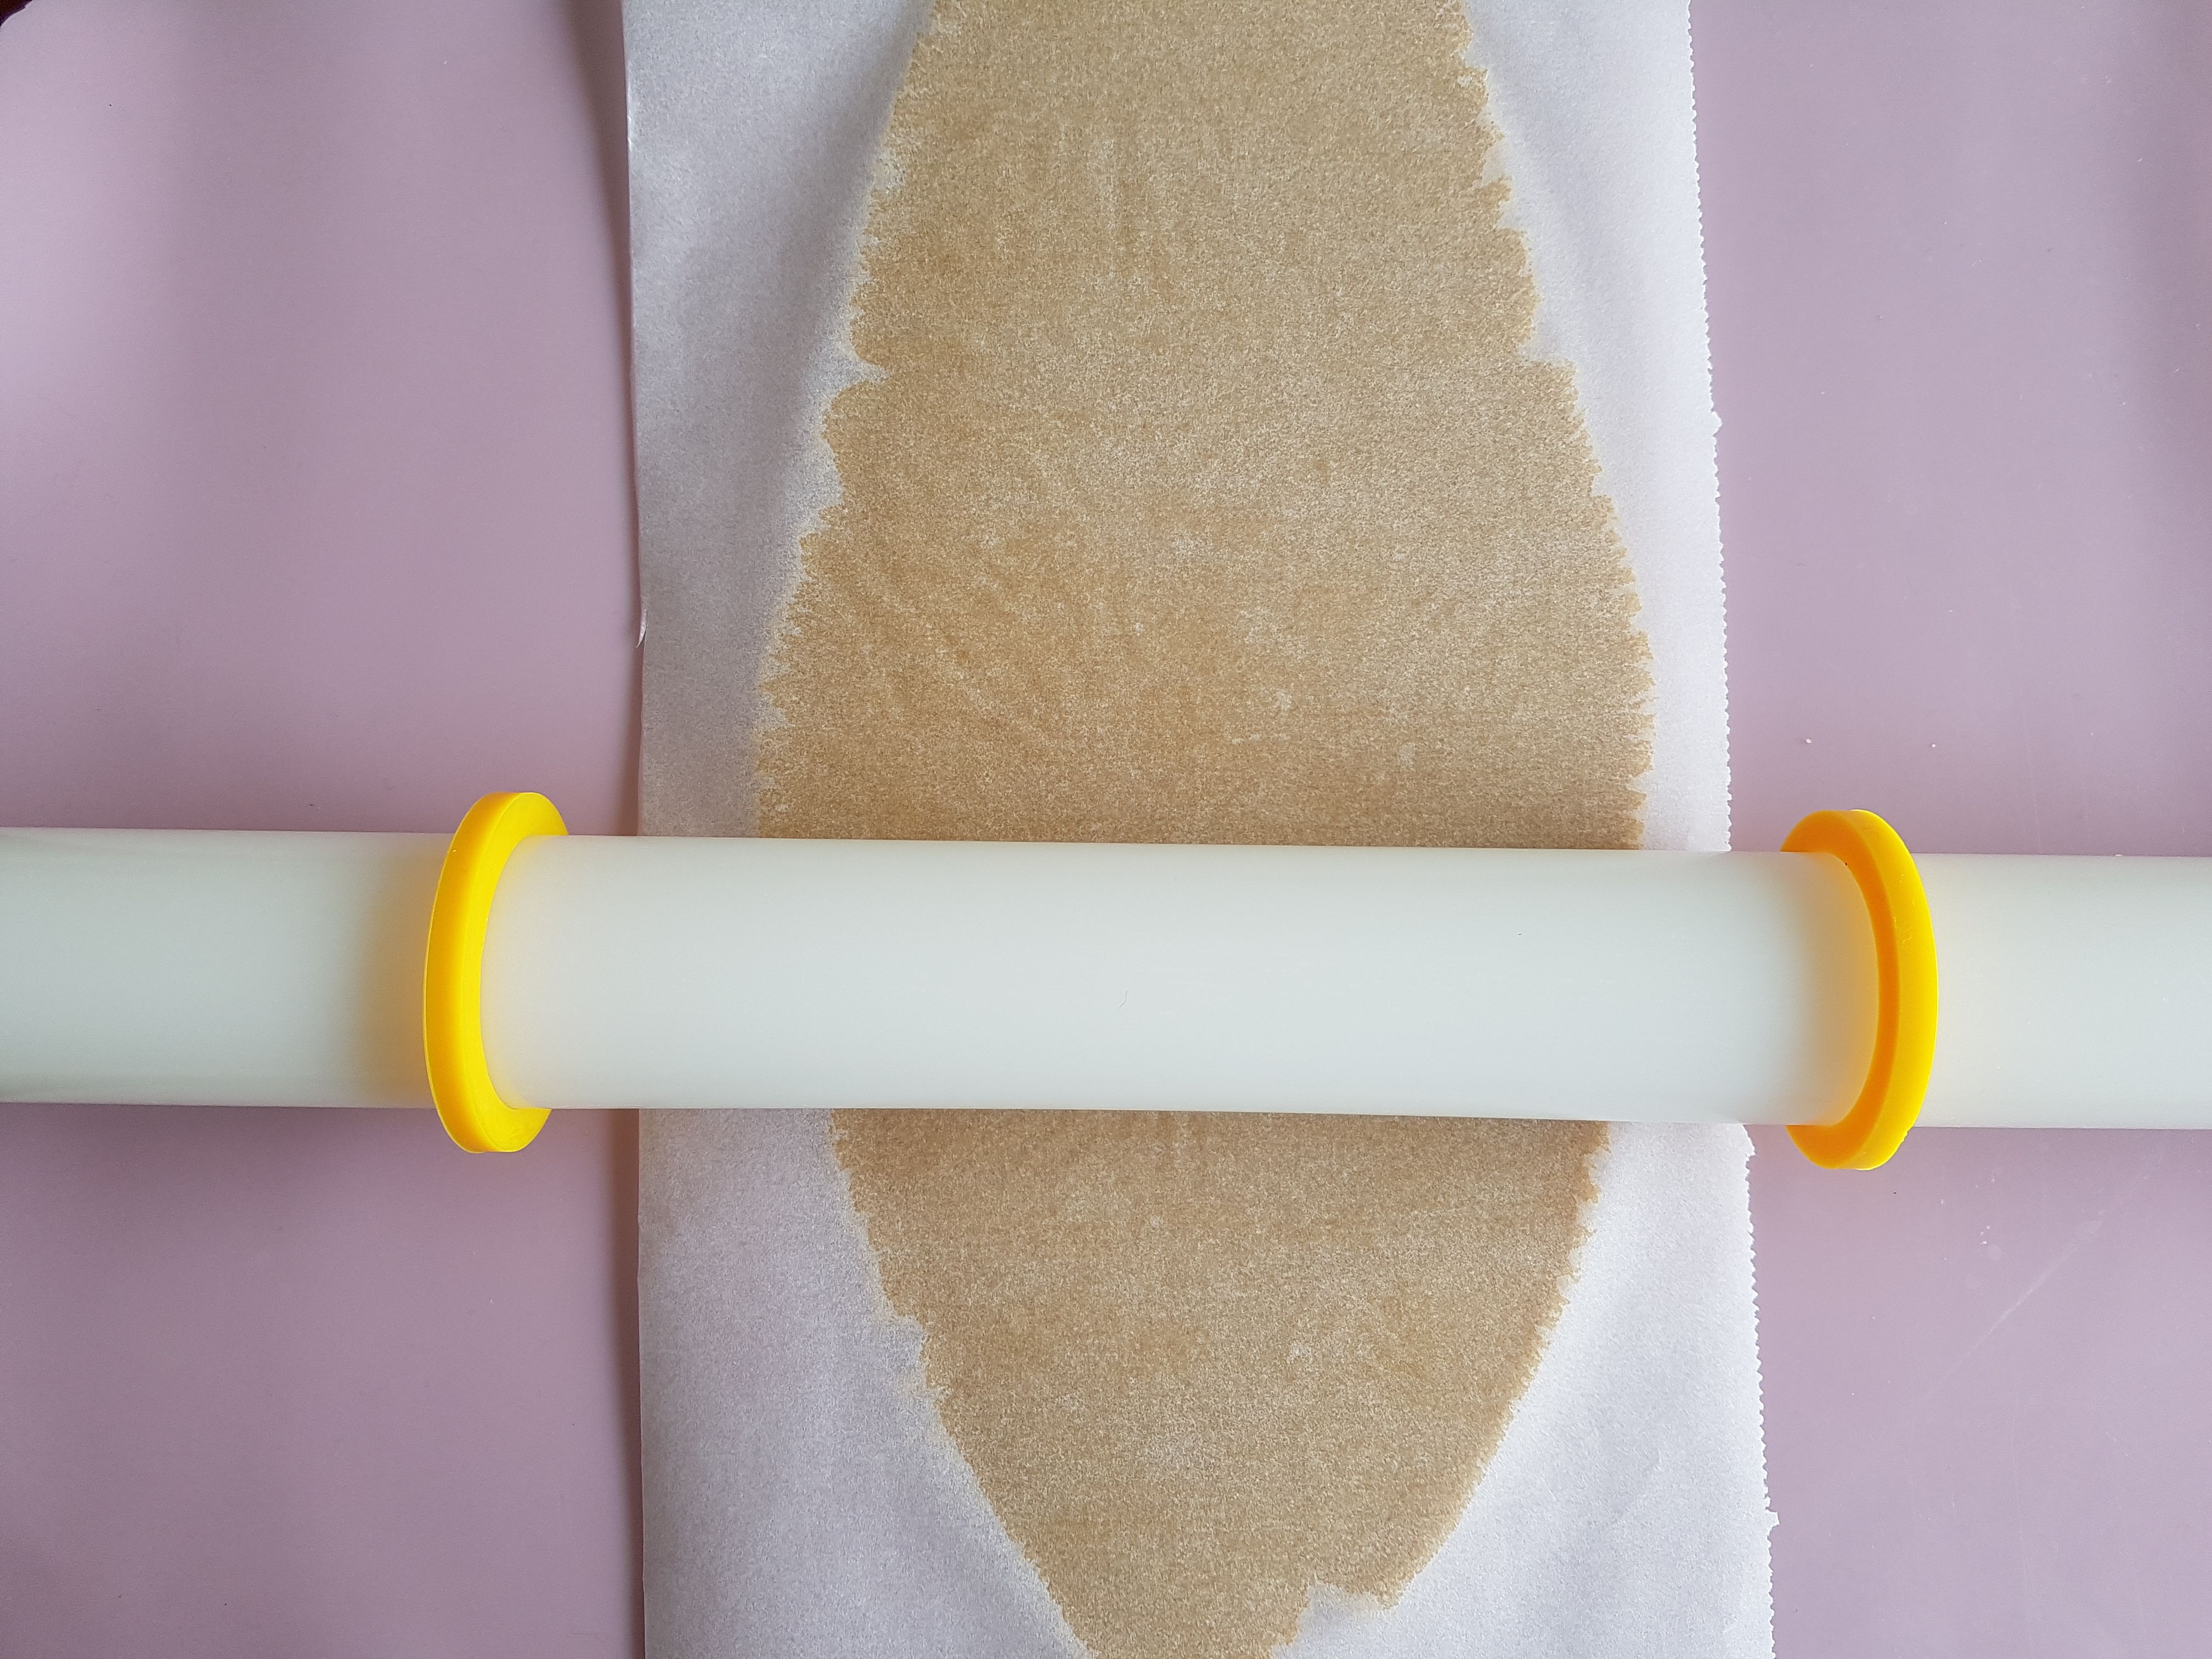
Take a large piece of dough and roll it out with a piece of parchment paper on top. This will keep the cookies smooth at the top.
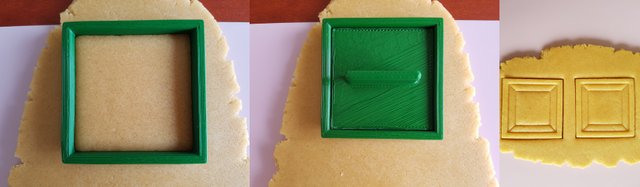
Using the SNDBOX stamp will make it easier for me to trace the lines with royal icing.
As you can see they are quite straight and even square cookies.
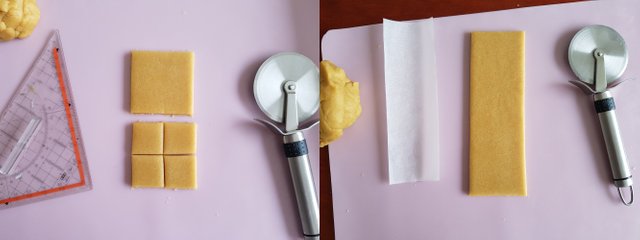
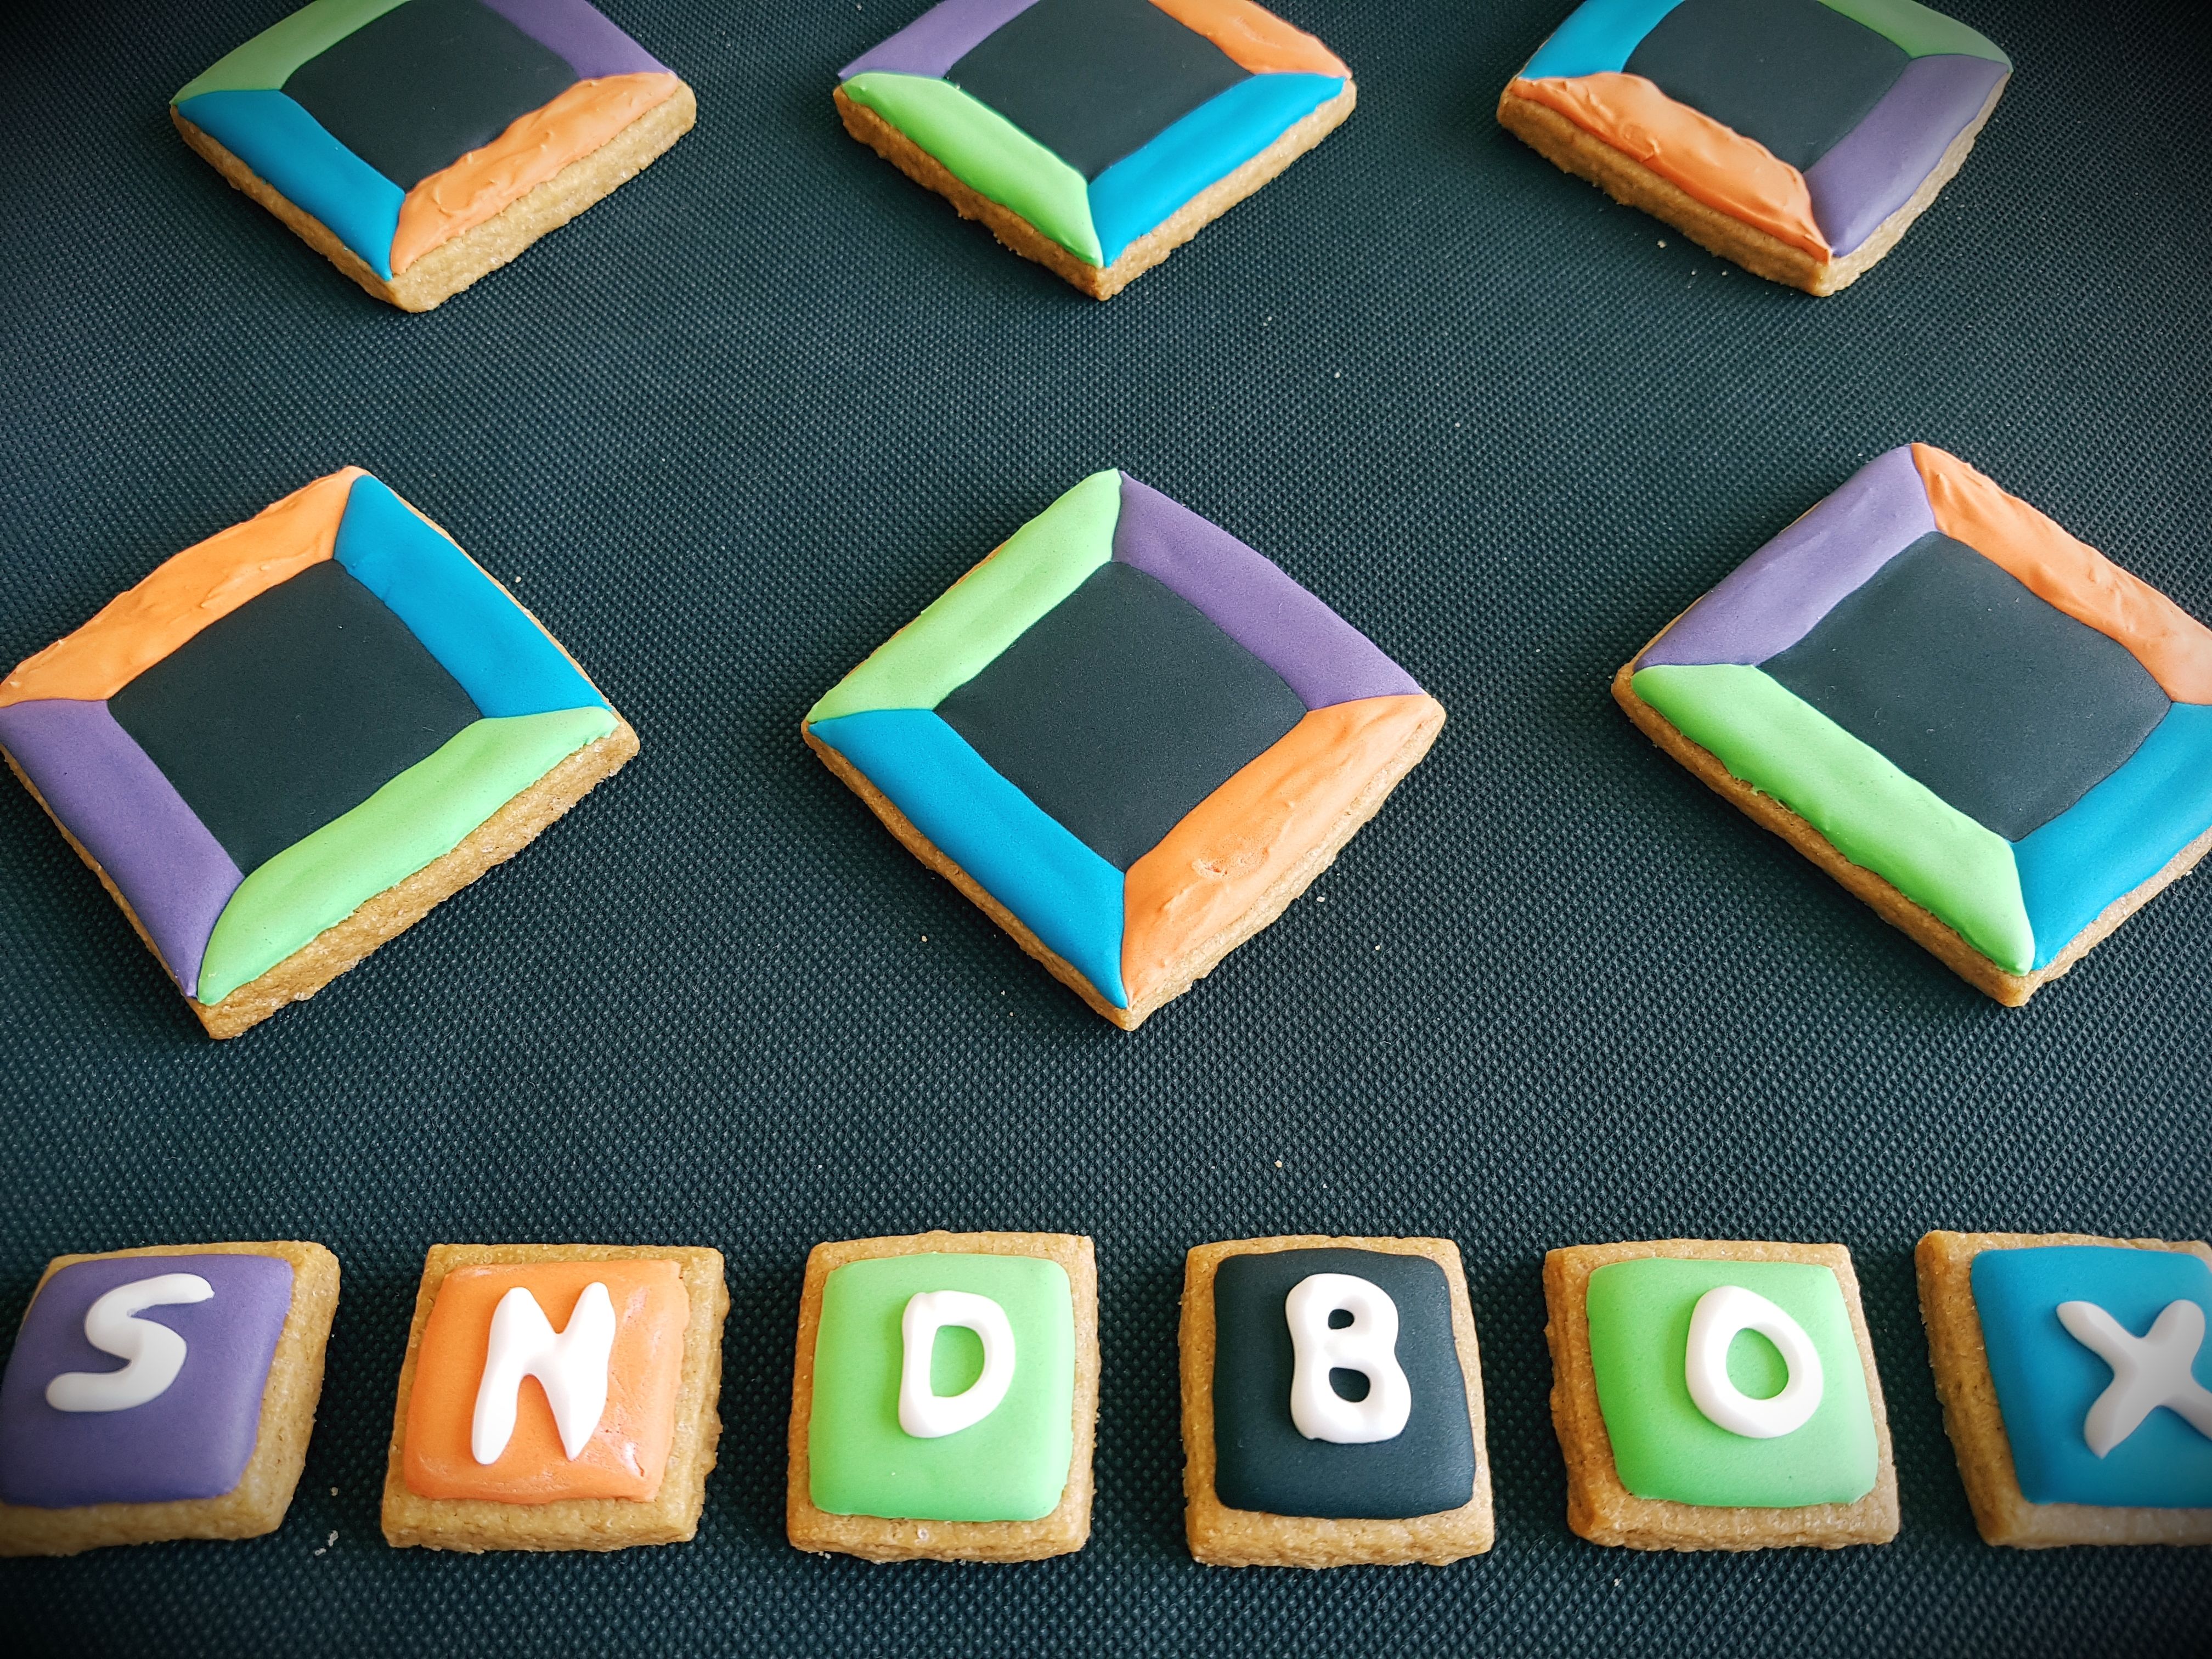
I also cut out small squares for the letters and large rectangles in two different lengths for the sandbox.
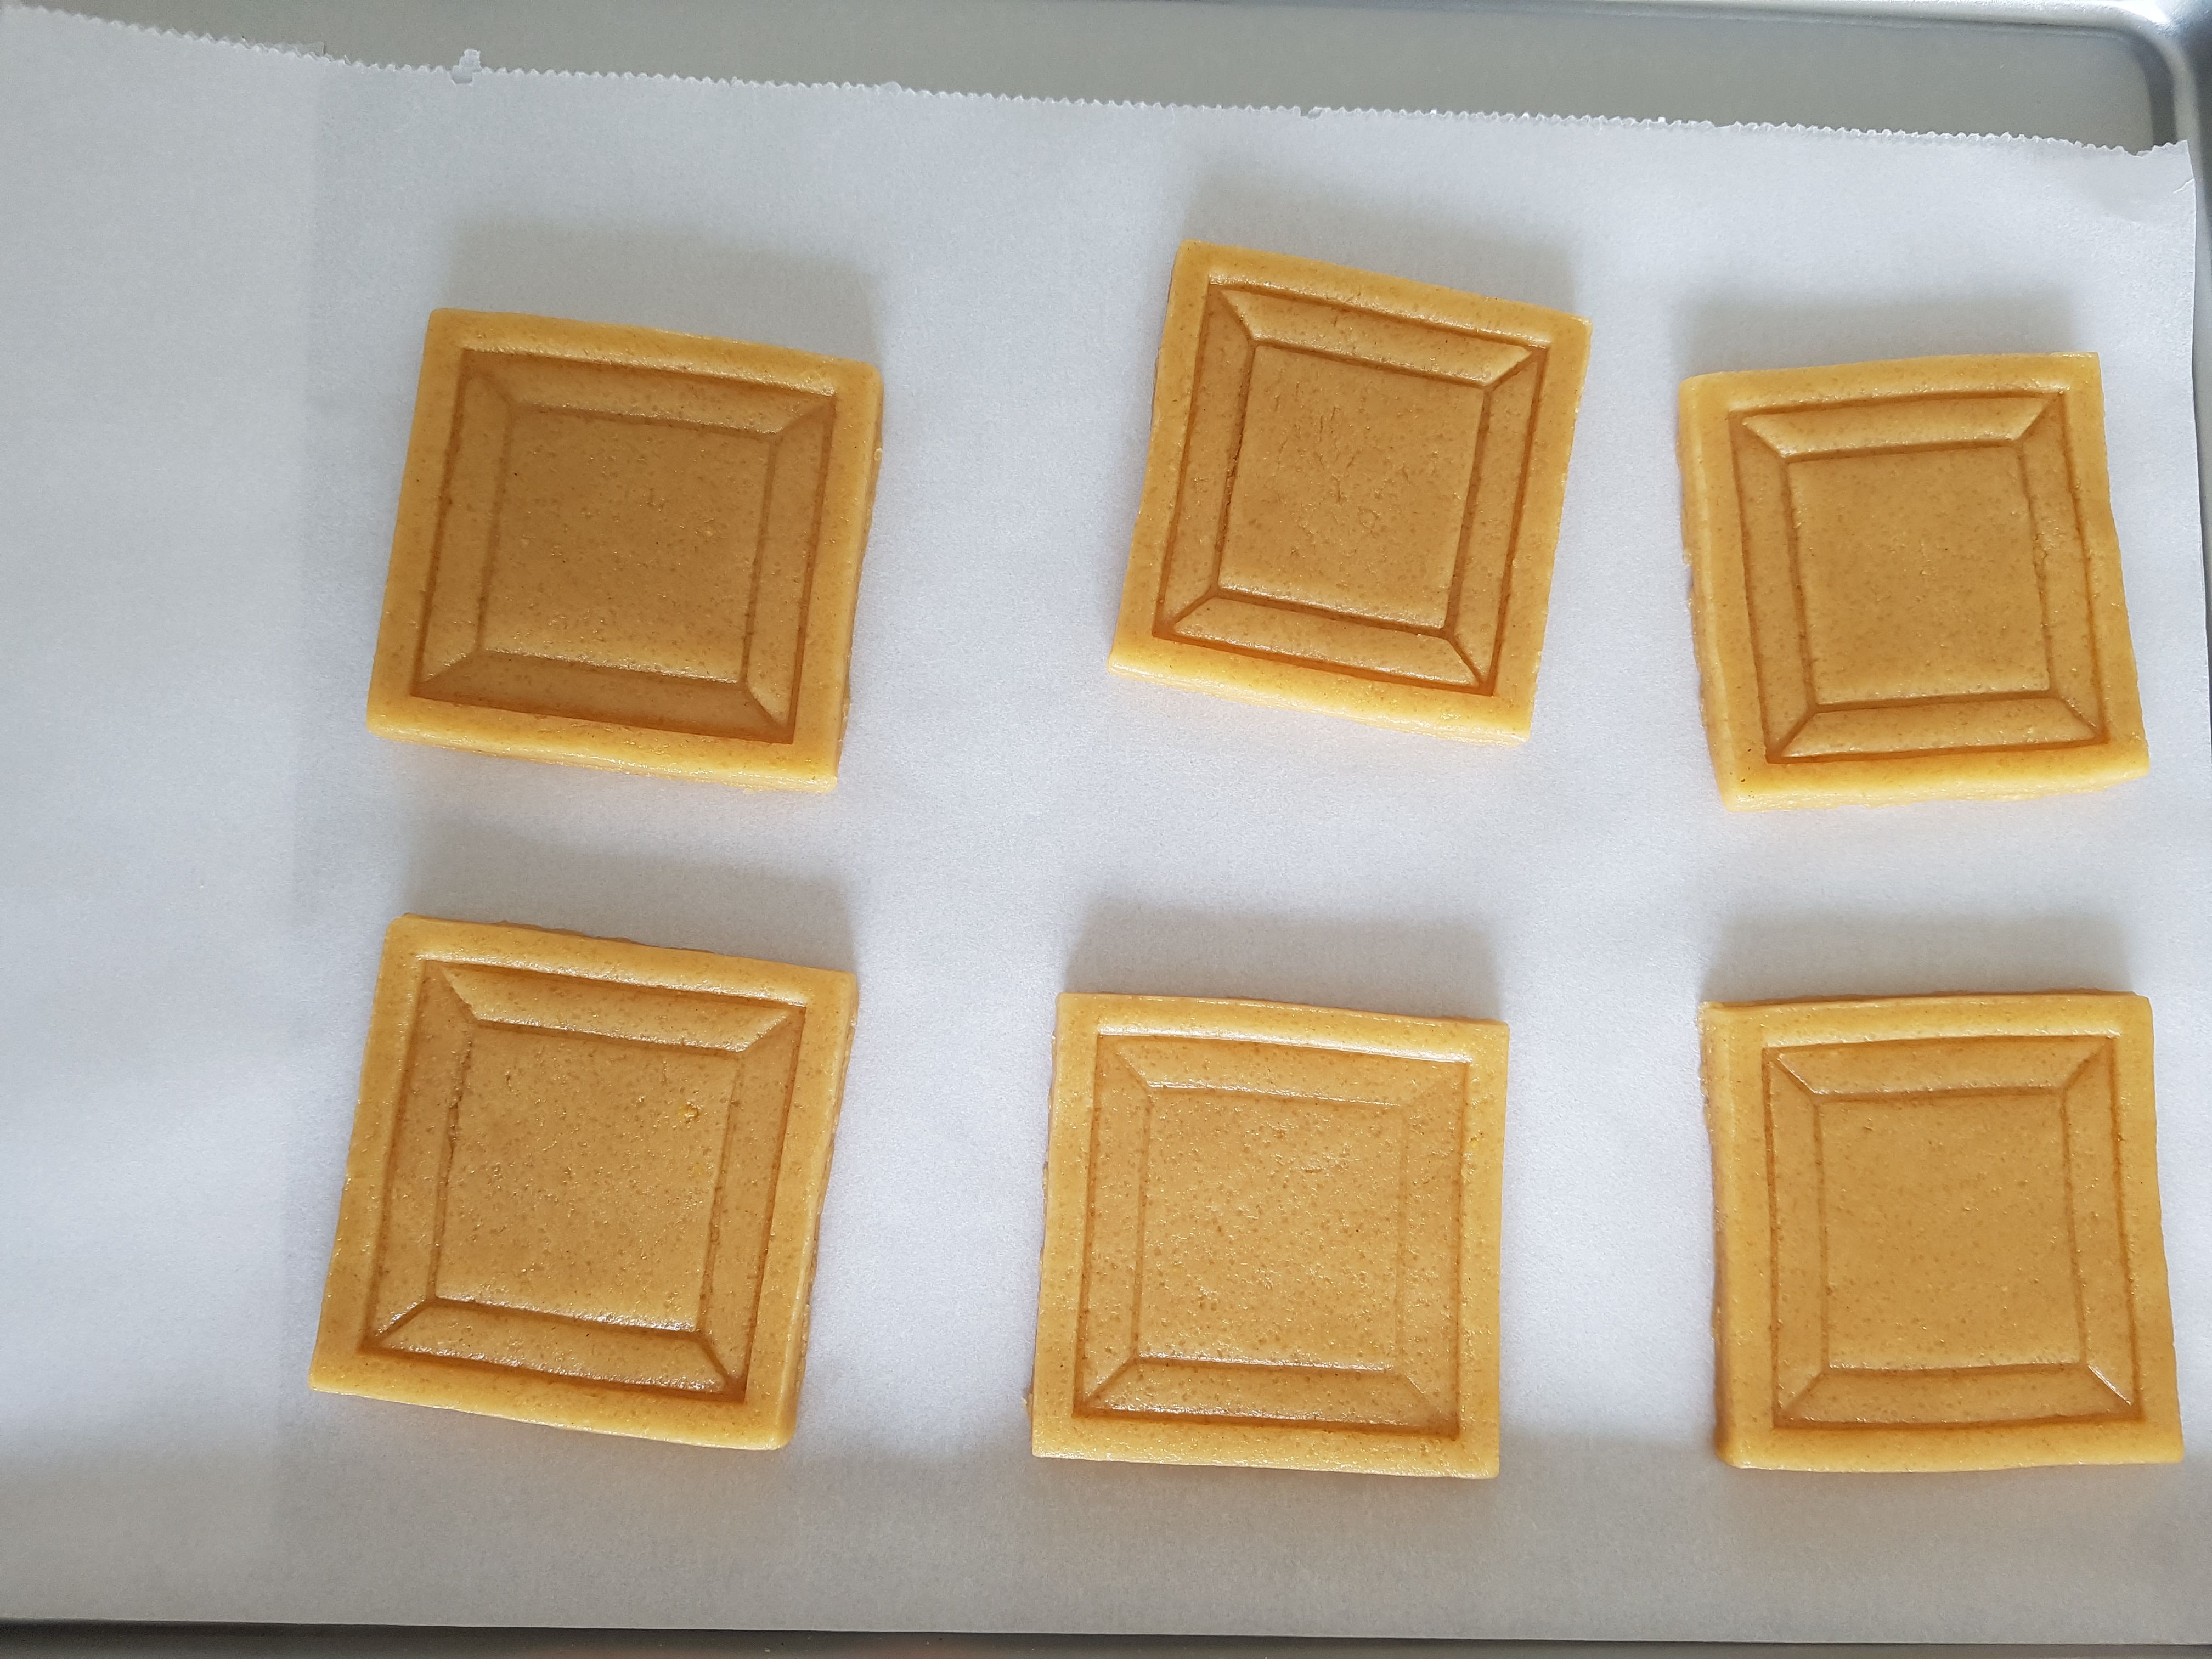
Chill the cut out cookies AGAIN in the fridge for four hours or more. This will prefend the cookies to spread.
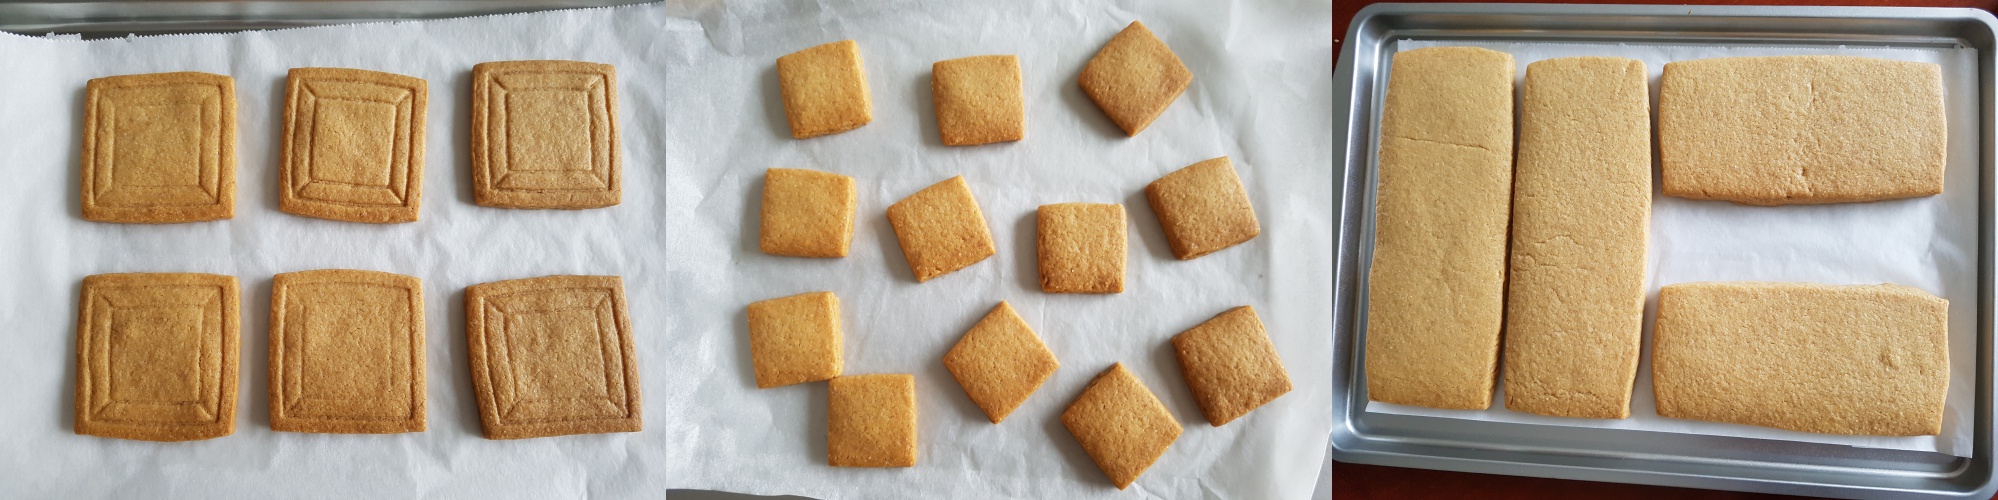
Bake the cookies at 150 degrees Celsius around 30 minutes. It depends on your oven, size of cookies and your preferences. For more crispy cookies bake them 10 minutes longer. Here you see the larger rectangle cookies didn't keep their shape. I think I should chill the larger ones few hours longer than the smaller cookies. I just cut the sides a bit with a bread knife to make them straight when I place the sandbox pieces in a standing position. The smaller cookies kept their shape quite well.

Decoring the cookies
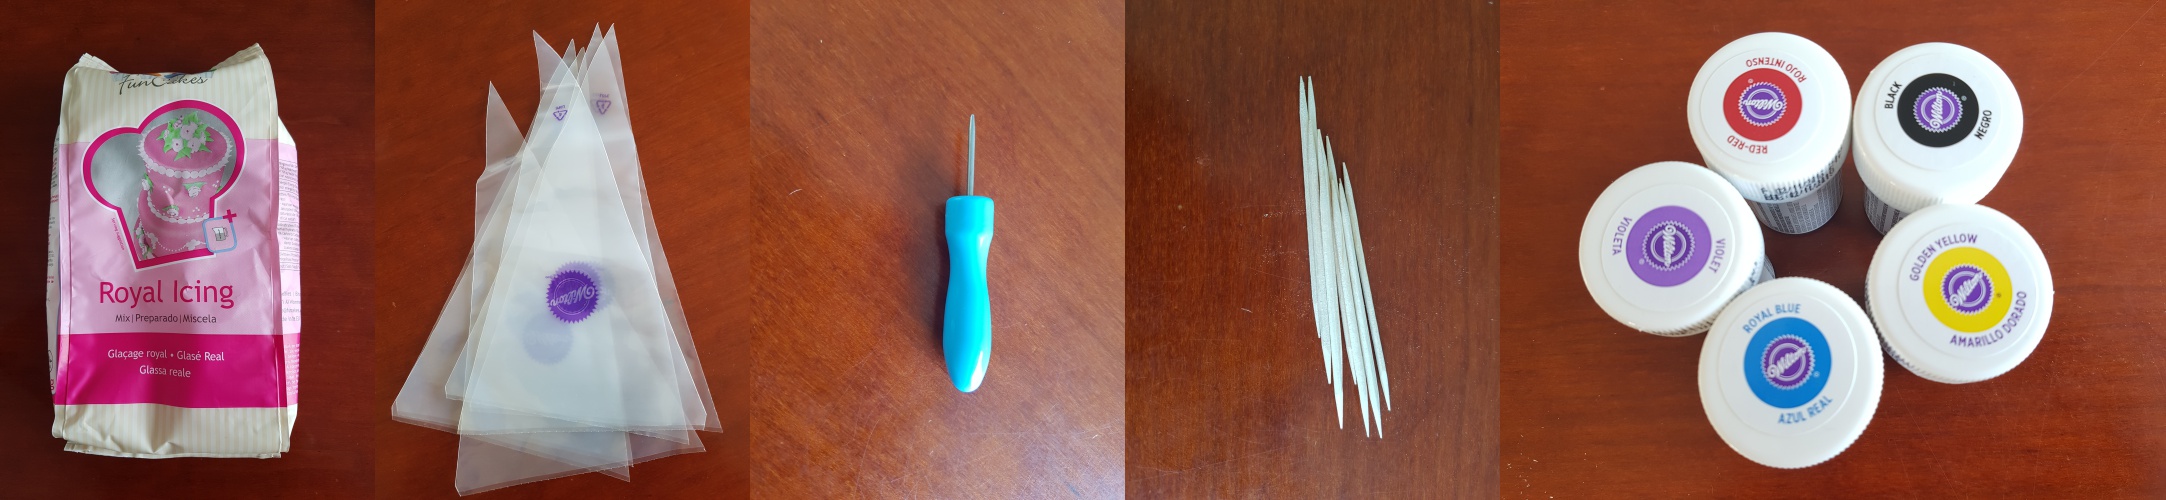
For decorating the cookies, you will need:
Wilton's royal icing
Piping bags or zip lock bags
Scribing tools
Tooth picks
Food colouring
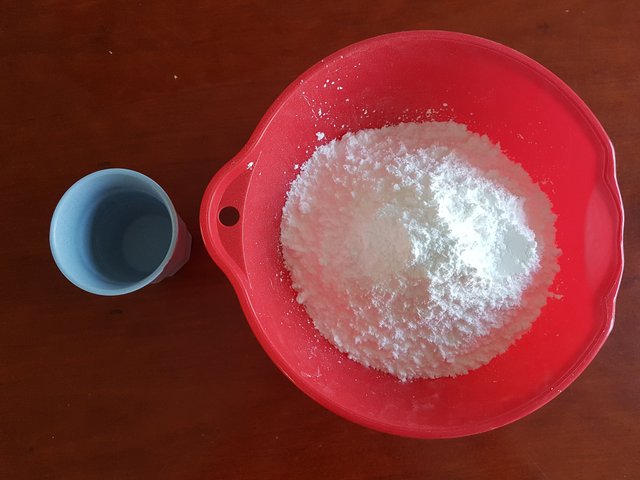
Mix the royal icing with water with a handmixer for 10 minutes at low speed. For the quantity you can check at the back of the package.
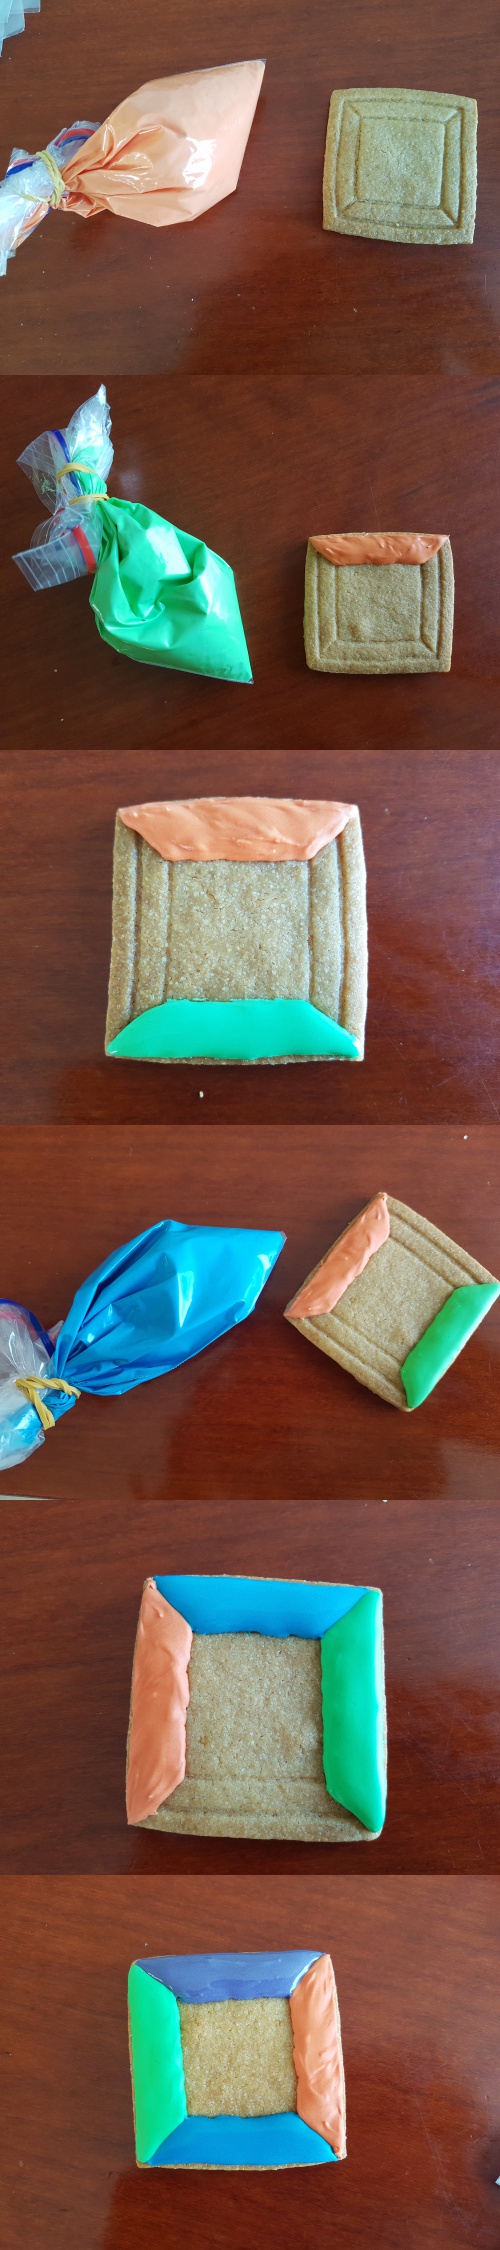
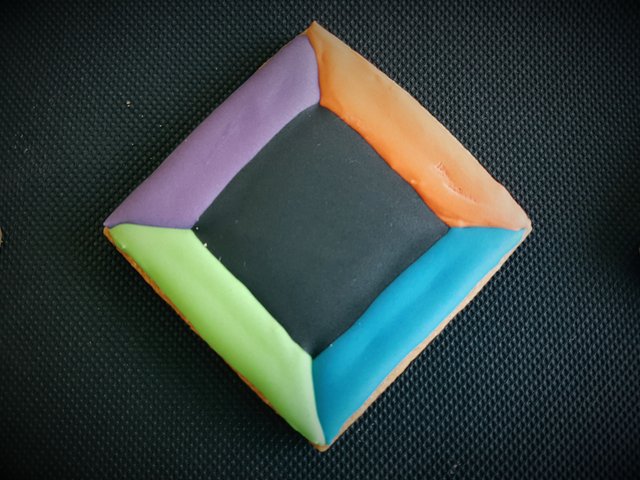
Instead of a piping bag I used a ziplock bag and cut a tiny bit of the tip for a hole. I separated the royal icing in 6 for six colours: orange, green, blue, purple, black and white. Add some drops of each colour on the royal icing and mix evenly. I decided the fill the cookies with royal icing till the sides. Spread the royal icing using a scribing tool. Make sure you do one colour first otherwise they will blend and that's what you don't want.
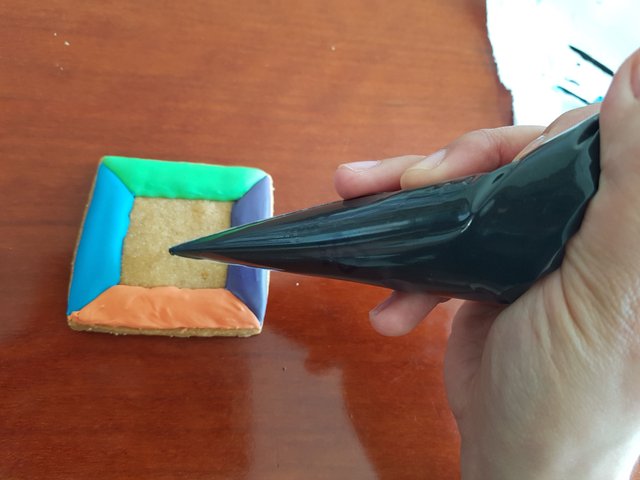
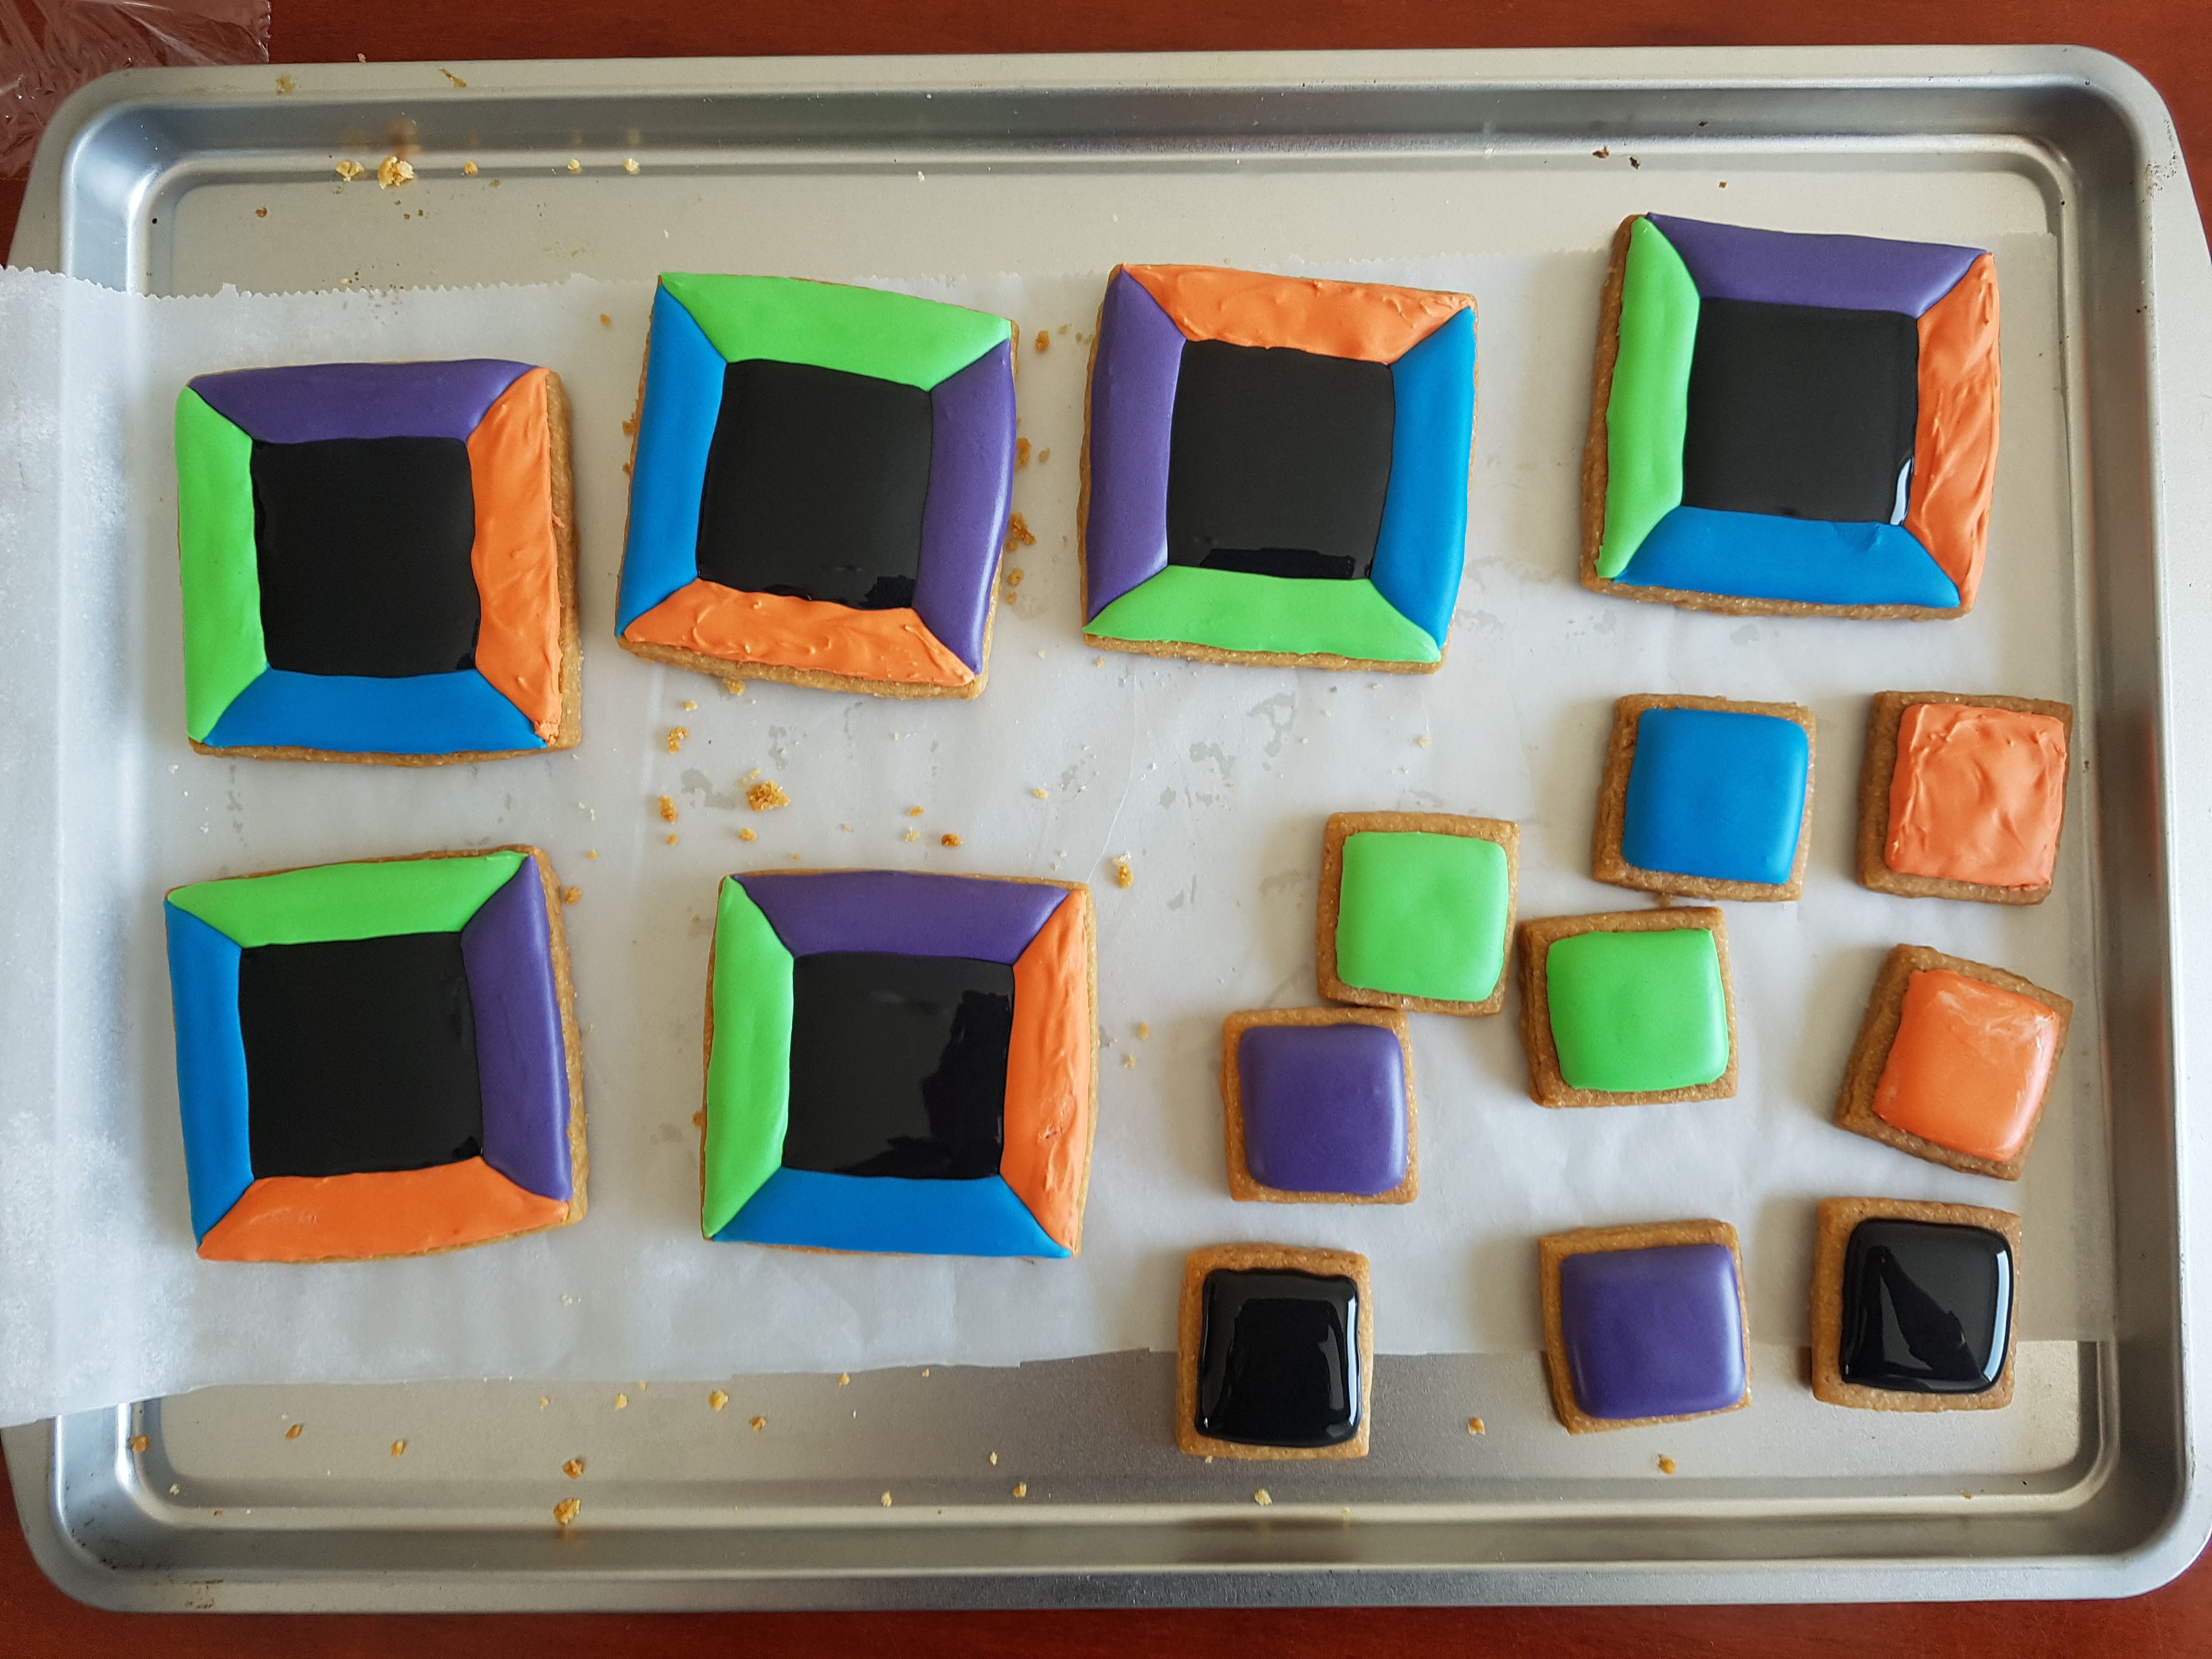
I ran out of zip lock bags, so I used a Wilton piping bag for the centre. I really needed a lot of black food colouring to get the dark black and not grey colour. I also decorated the small squares with royal icing and let them dry for at least 8 hours.
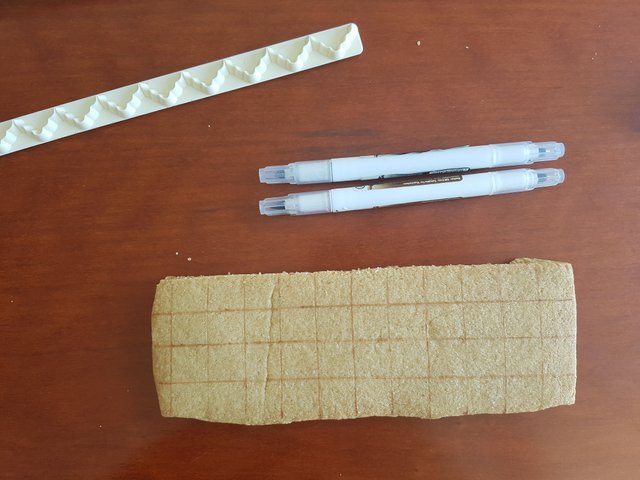
For the mosaic sandbox I drew lines using an edible food marker and a ruler.
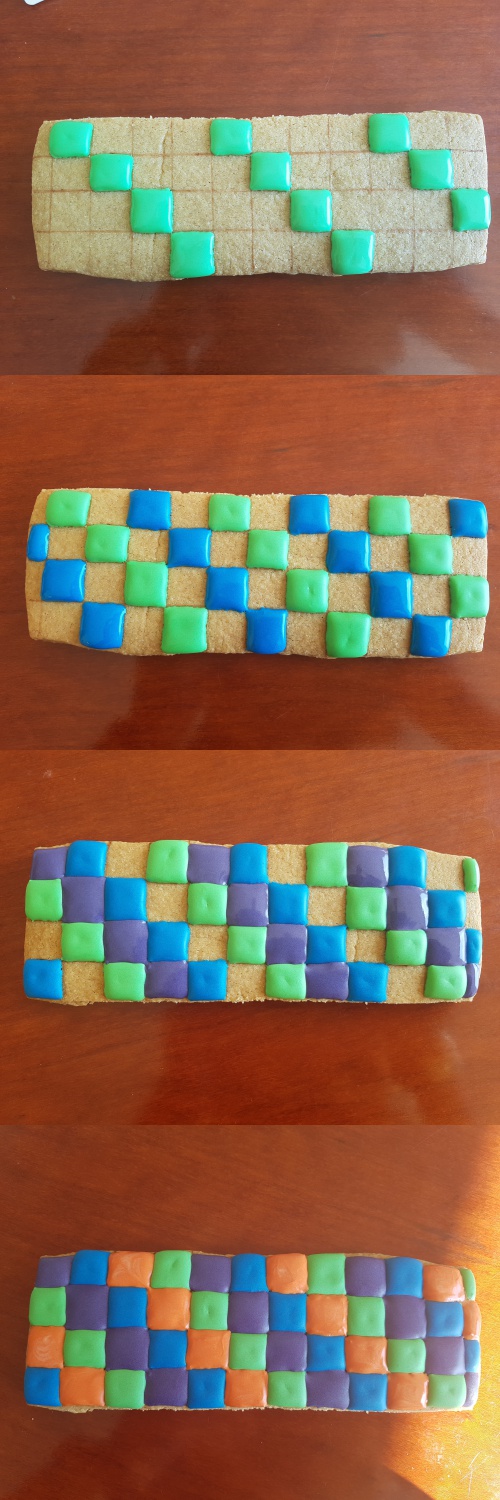
Filling the little squares took me couple of hours, so I decided to do just one side instead of 4 sides. Then I let it dry for a night.
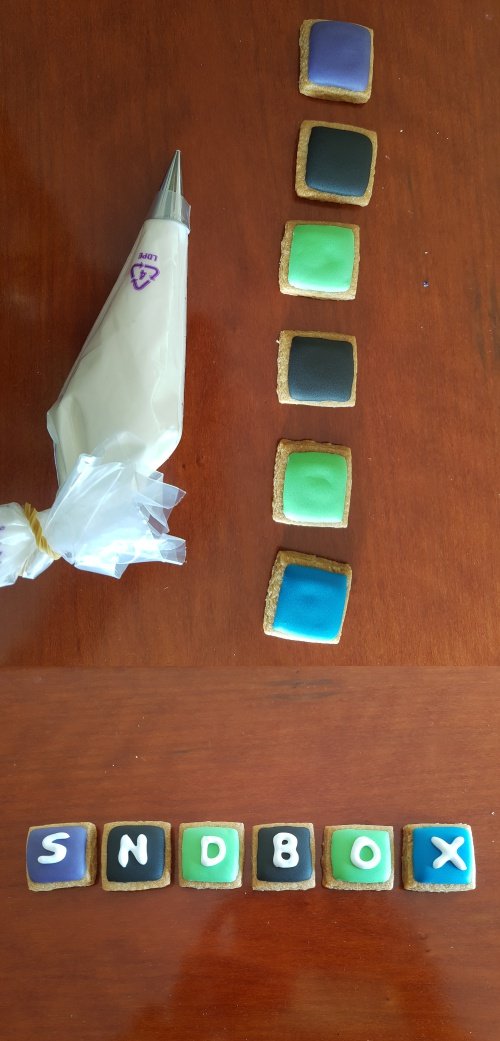
Once the little square cookies are dry, I poured (white) royal icing into a piping bag and wrote the SNDBOX letters on them and let them dry as well.
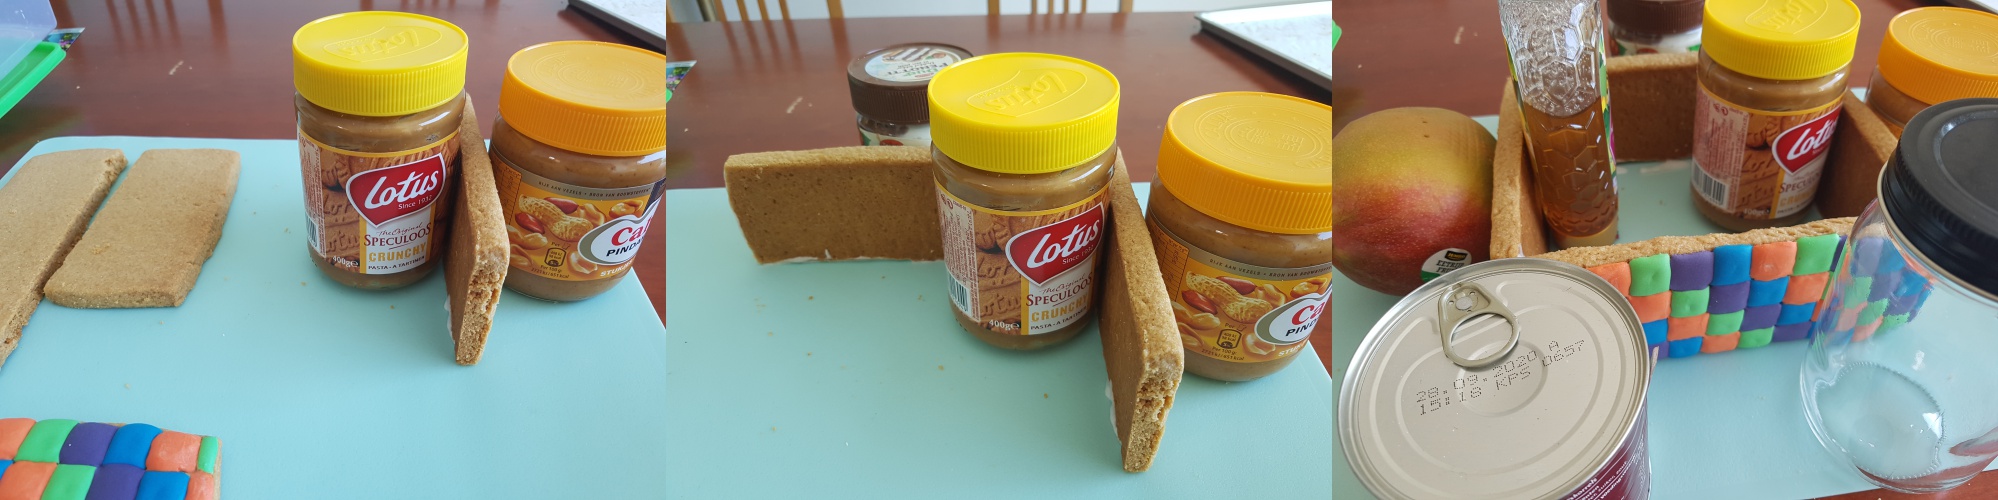
The next day which was today, I built the sandbox. I used royal icing to "glue" them together. Because it can take a few hours to dry, I needed support material. I grabbed some jars and a mango to make sure it won't fall apart and even worser, break apart.

I bought a package of tea cookies and crumbled them with a food processor. This supposed to be the sand in the sandbox.
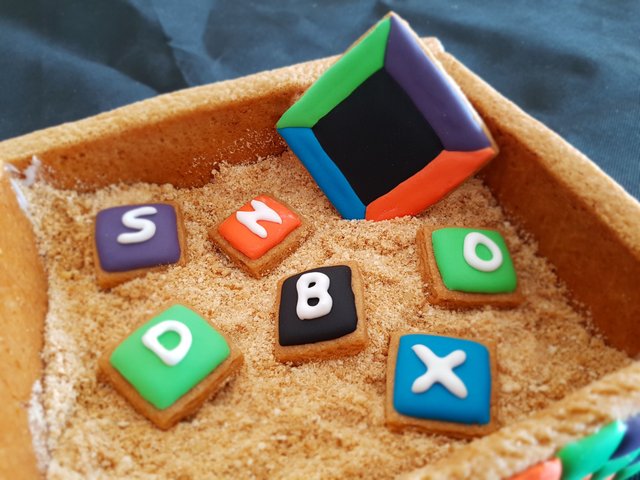
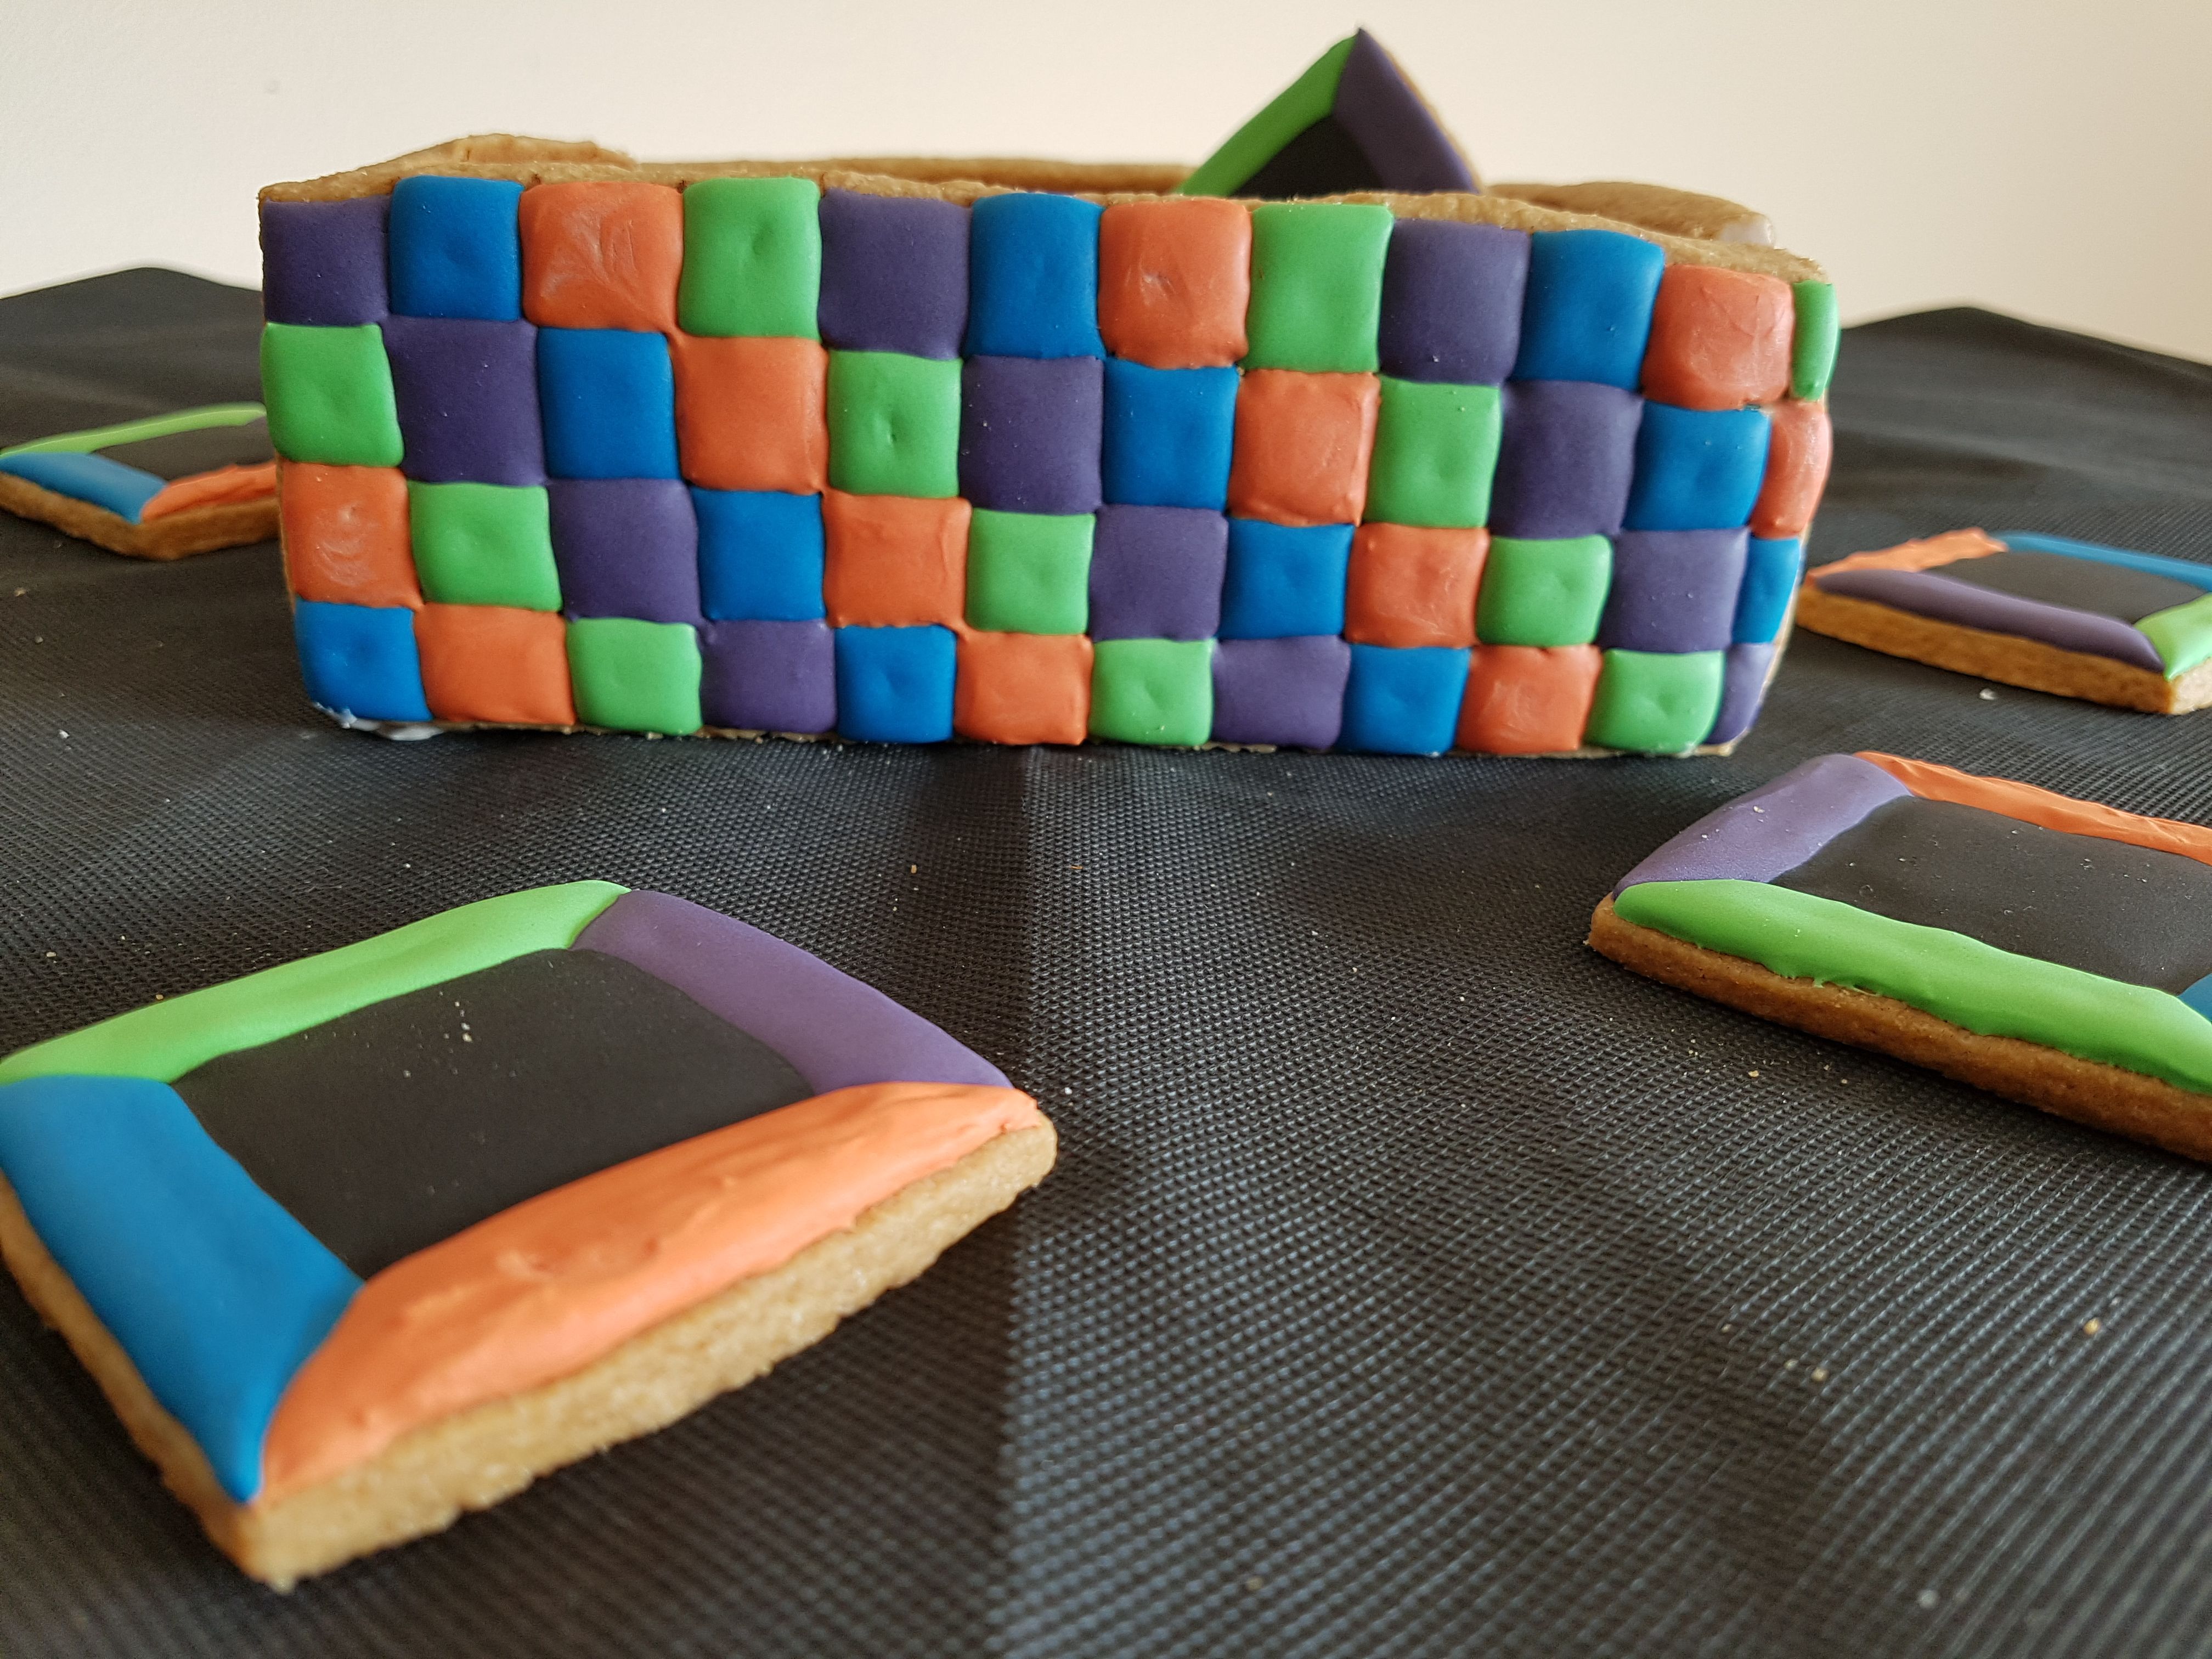
I am very happy with the result. I think it looks unique and artsy. SNDBOX in a mosaic sandbox. What do you think guys?

Amazing tutorial of Sandbox cookies.
I appreciate all your efforts. 🤗💙
Wish you a great success.
Amazing photography.
Nice content
Very well articulated
Excellent job.
Thanks @fathin-shihab for sharing this post.
Thank you for the nice comment :-).
Cake toy@fathin-shihab
Simply amazing post because you made the cookies and molds so something no common hehehe, i like to know women like you sincerely :). Regards
Yes,it's definetely not common :-). thank you for reading my post!
Those are so cool looking! That's such an awesome idea. I like the makeshift sand out of the crumbled cookies hahaha so clever.
:-D. Thanks! I also think this looks cool, especially because no one made them yet. I wanted to make everything edible, also the sand.
Ya ampun, 12 jam!! tapi hasilnya bagus banget, jadi sayang untuk dimakan hahaha....
Iya memang sayang ya :-). Maunya di pandang saja :-D
I'm wondering to see your cooking & making 3D products skills. Every day you seek various things and you don;t forget to put your steemit followers. I love your those characteristics. O.. These sandbox cookies looking very delicious. Better recipe detail sharing @fathin-shihab.
I am happy you like it :-) and yes, the cookies are also delicious.
@fathin-shihab, haha this is amazing! WOW! <3
Looks both inspiring and delicious at the same time ;)
I am happy you guys like it :-). Too bad you guys can't eat this. :-(
Your animation stages must be helpful for easily preparing every thing. SND BOX cookies better to tasted. But I don't know @sndbox will attack me after my eat cookies. :D
Well tutorial given @fathin-shihab. Great work.
Thank you! hahaha attack you? .
This is fabulous! You are very creative @fathin-shihab. I really like the sand box were the cookies are put. Sooooo cute!
Yes, the sandbox matches very well with the sndbox cookies :-). Thank you
Wow now that is deliciously awesome this looks great :)
yes, it looks awesome :-) thanks!