TASTY TREAT TUESDAY #11 - 🐚Seashell Macarons🎀
I gave you a little sneak peek a couple days ago, so I hope you guys are excited about today's post!
I wanted to make a little extra something for little miss's birthday party, something that would fit with the "undersea" theme, something gluten- and dairy-free for those friends who have food allergies, and wouldn't be able to partake in the birthday cake.
This was my first ever attempt at making French macarons. I've heard over the years how finicky these little beauties can be, so I did a bit of reading and researching beforehand, to try and get an idea of what I was in for. Despite this, I decided to follow a recipe's guidelines on the first pan, and man was that an epic fail! 😅
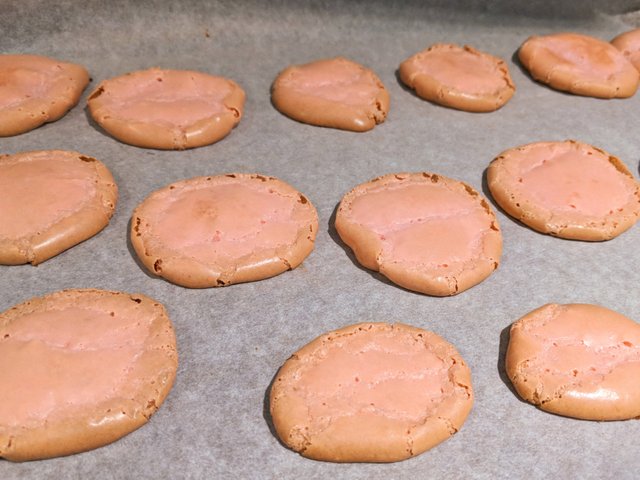
They didn't rise, but spread. They were way over-done. But they were still pretty tasty, so the kids and I snacked on them as I prepped the second pan, using the tips and tricks I'd read about. They weren't quite what I would call perfect but they definitely turned out pretty well.
The recipe itself is pretty simple, as there are only a few ingredients. So, other than being precise with your measurements, the trick to these is really in the process. Let's take a look!
Disclaimer: my food blog posts are IMAGE HEAVY!
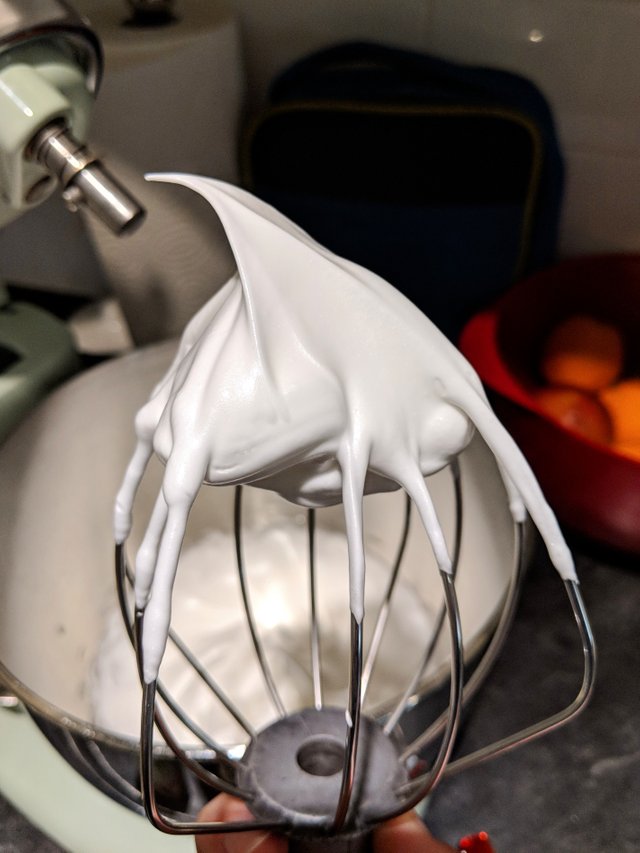
The first thing you're going to need is egg whites. Room temperature egg whites, to be exact. (So, either leave 2 eggs out for a half hour to an hour, then separate, or separate, and leave the whites out.) Some recipes even call for "aging" your egg whites, but I haven't attempted that yet, myself. Pour your whites and sugar into the bowl of a stand mixer, and beat them until they form "stiff peaks". They'll be shiny, fluffy, and when you pull the whisk out, the little peak will stand straight up, and not flop over.
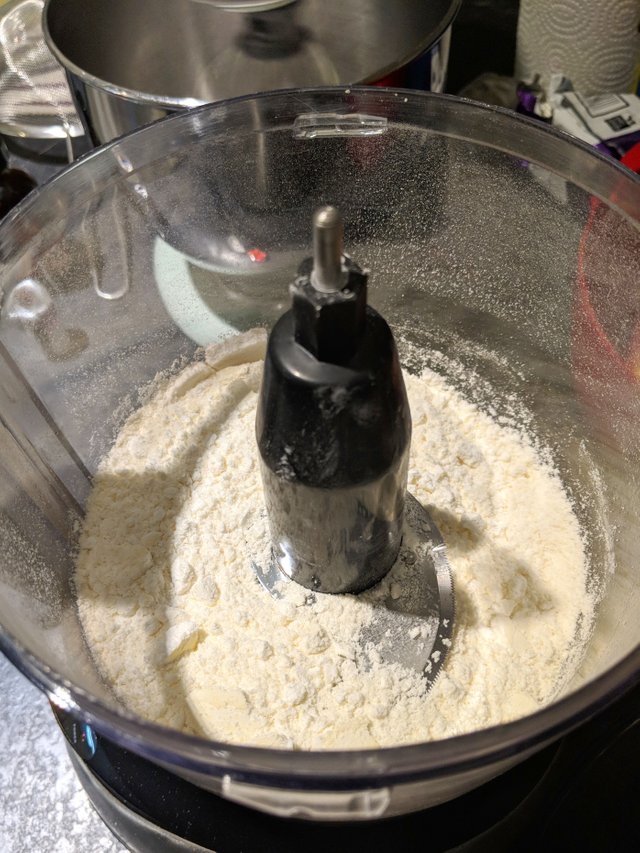
While those are beating, pour your ground almonds and powdered sugar into a food processor, and give them a good blend. You want to make sure there are no large chunks of almond left behind, and the powdered sugar acts as a buffer, to keep things floury... if you did just the almonds, without the sugar, you'd risk making almond butter instead of almond flour. No bueno.
When your whites are stiff, go ahead and add a splash of extract for flavor (I kept it simple, with just some vanilla), and a little dab of color, if you like (I used a little bit of pink gel color, because these days little miss wants all pink everything). Give it a quick whisk through, and then sift the almond flour/sugar mixture in.
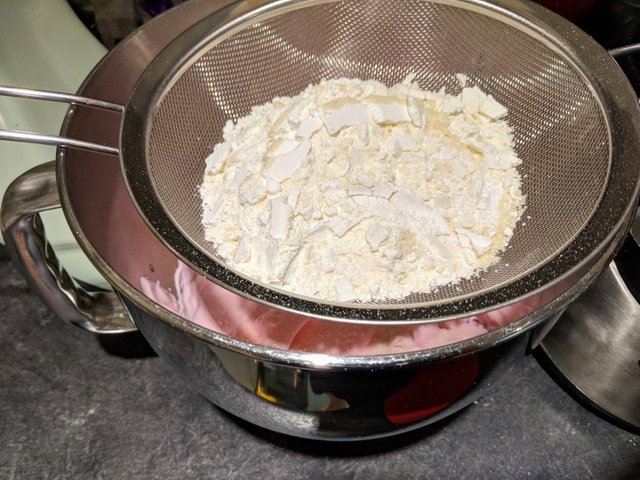
Yes, you need to sift it. No, you shouldn't skip this step. Even though we gave them a good blending, we want to make doubly sure that there are no large chunks getting through.

See? All nice and powdery, no lumps.
Now it's time to mix them together. This is where things get a little strange. If you've ever done any folding of whipped egg whites, you've probably made sure to be super careful, and basically used the edge of your spatula to gently fold things together. This is not the case here. Weirdly, you actually want to deflate them some. So, scrape around the bowl, and then instead of turning your spatula to the side, and using the edge, you're actually going to smash it through, flat, and press it against the side of the bowl.
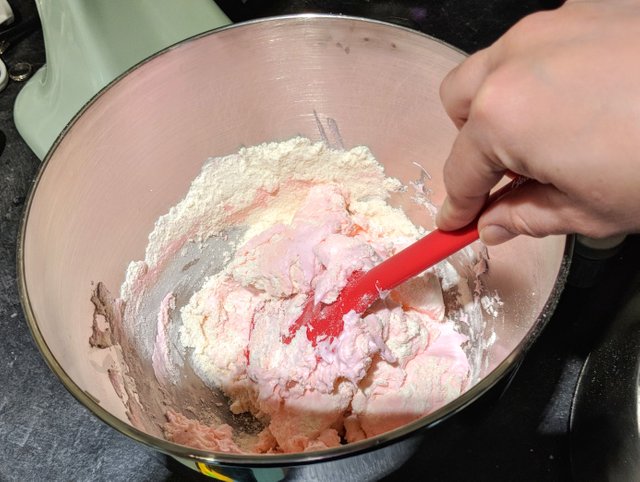
Do this 20-30 times, until everything is mixed really well, and the batter pours off like a "ribbon", or as some have described as "magma". (Because this is a texture reference everyone in a kitchen should know....? LOL)

Now that you've got the right consistency, scoop the batter into a piping bag, and squeeze out little rounds. I wanted to make more shell-like shapes, so I didn't do perfect circles. I actually wanted them to look sort of like scallop shells, but my batter was a little too runny to hold that shape, so I just went for a basic clam/oyster shape instead. (For some odd reason, the photo I took of this step did not turn out, so you'll have to use your imagination. Sorry!) Once they're piped, lift the pan about 5" off the counter, and drop it about 5 times, then rotate it 180 degrees and do it again. This gets rid of any air bubbles that might be hiding in there. You don't want hole-y cookies. 😜
Here's where I went wrong on the first batch: I did not let them rest. The recipe I tried said to just pop them into the oven. Don't do that. Leave the pan out, on the counter, for a good half hour. This is how you make sure that they rise rather than spread as they're baking.
The recipe also called for a rather hot oven, 350F. Common sense told me that would be too hot, but when I'm trying out a new recipe, I like to follow the directions the first go round, and then make notes and alter things to my liking. I lowered the oven temp to 330F. And took them out 2 minutes sooner. They still turned out a little darker than I would've liked, but still within reason. I think the next time I make them I'll go with 325F. And cut another minute or so off of the time/keep a closer eye on things.
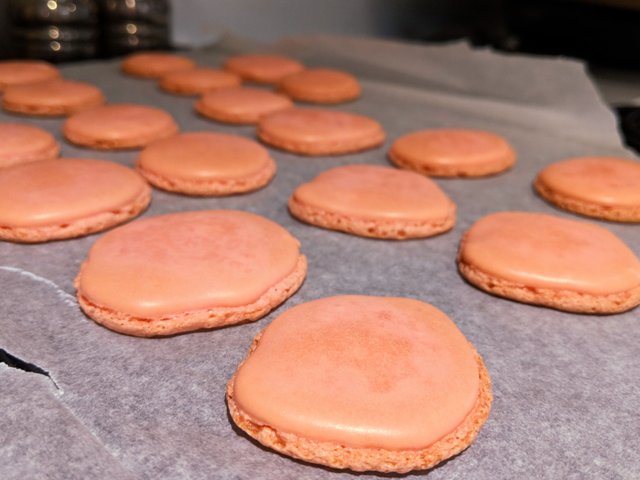
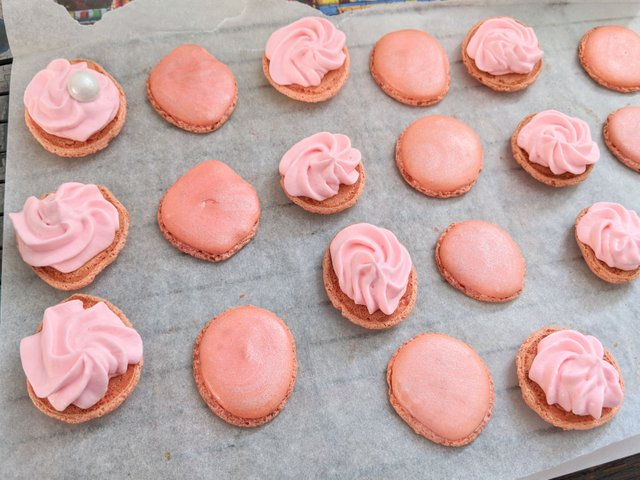
When they're done (set, so they don't move when touched, and ever so slightly golden on the bottom edge), take them out of the oven, and slide the parchment paper onto a cooling rack. Let them cool completely before you try to take them off, or they'll fall apart. Once they're TOTALLY COOLED flip over every other one, so you can fill them and make little sandwiches. 😋
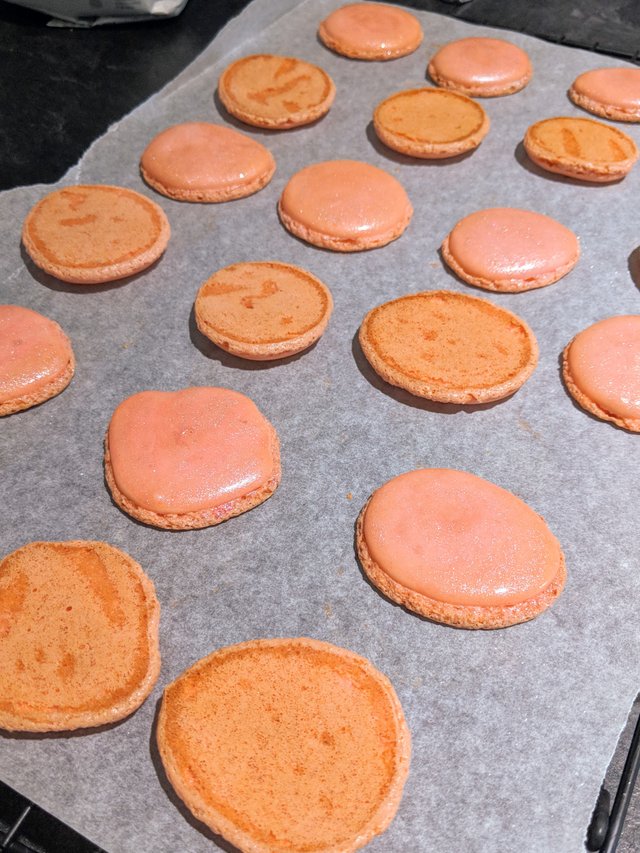
(You can see that I also painted the top cookies with some lustre dust, to make them extra pretty.)
That brings me to the filling. Typically, macarons are filled with a ganache or curd. I'd thought about doing a curd, using the leftover yolks from those eggs we had separated earlier, but I had a couple of reservations. 1. Curd recipes call for butter. I figured I could probably substitute coconut oil for the butter, but I didn't want to experiment with that and have it be a flop. 2. I was already taking on a lot, and moving in slow motion, thanks to a muscle strain in my neck/shoulder earlier in the week. I wanted to do something that would come together quickly, with a little less effort, since I still had a cake to assemble and decorate, and a shoulder that needed to be iced every few hours. So, to keep things simple, I decided to go for a whipped coconut cream filling. You just need to refrigerate a can of coconut milk (or cream, if you can find it), scoop out the solidified stuff from the top of the can, and whip it with a few spoonfuls of powdered sugar. I also added a little dab of pink food color, because I thought it'd look nice as the inside of the "oyster", and because we wanted all the pink. 😄 Scoop it into a piping bag, and give each flipped cookie a squeeze.
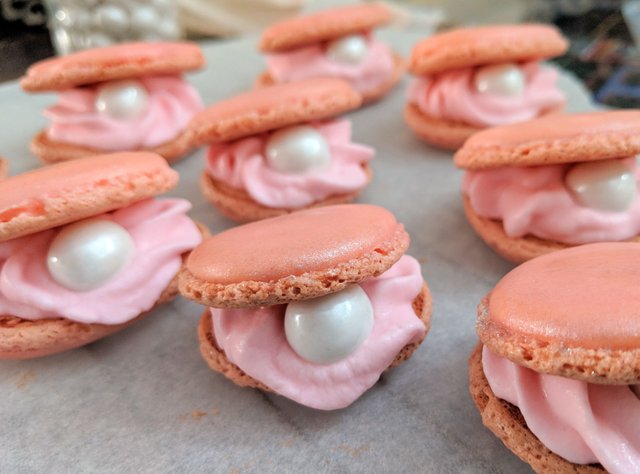
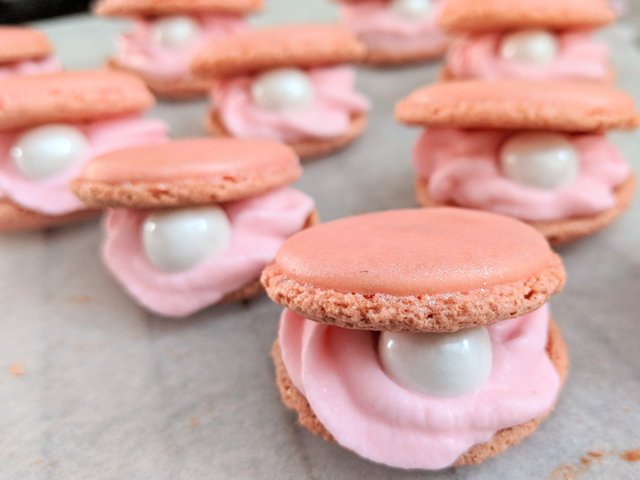
Then, to make things even prettier, and "oyster-esque" I added a little pearl. These are mini pearlized gumballs, which I found at a local bulk foods store. You could use large round sprinkles, or whatever sort of "edible pearl" you can get your hands on. Sandwich them together, without pressing too much, so they look like an open shell, revealing their treasure. Pop them into the fridge overnight, and take them out a half hour before you're ready to serve!
Are you a fan of French macarons?
Have you ever tried making them yourself?
If anyone is interested in the recipe, just let me know and I'll type it up for you.
I'm going to give these another try the next time we make dinner plans with my sister, since I'm usually in charge of dessert, and she and her wife have food sensitivities.
With all the birthday preparations, and the strained muscle in my neck/shoulder, I haven't had much time to sit and draw, but I'm hoping to do just that tomorrow, and continue with my character studies.
I'm also planning on doing up a post all about the epic pink creation that was little miss's birthday cake, so be sure to come back and check that out soon!
EDIT: You can check out the PINK-TASTIC Undersea Birthday Cake here.
Congratulations with little miss's birthday!
Oh that batter Animated Gif! 😍
But seriously I want this recipe! They look great. Gonna follow and wait till you post this!
Thanks! She had a great day.
And thanks for the great comment! Here's the recipe:
You'll need a kitchen scale to measure your ingredients
71 g almond flour (ground almonds)
117 g (approx 1 c) powdered/confectioners sugar
2 large egg whites, room temperature
53 g (approx 1/4 c) granulated sugar
Filling of your choice
(I used about 1/3 can of refrigerated coconut cream whipped w/ 2 tbsp powdered sugar)
Preheat oven to 330 degrees with the rack in the center. Place ground almonds and powdered sugar in a food processor; process until combined and as fine as possible, about 1 minute.
Whisk egg whites and granulated sugar by hand to combine. Beat on medium speed (4 on a KitchenAid stand mixer) 2 minutes. Increase speed to medium-high (6) and beat 2 minutes. Then beat on high (8) 2 minutes more. The beaten egg whites will hold stiff, glossy peaks when you lift the whisk out of the bowl. Add flavoring and food coloring, if desired, and beat on highest speed 30 seconds.
Sift in your dry ingredients, and fold together, pressing the spatula flat through the center, and against the side of the bowl. Repeat 20-30 times, until the batter flows off the spatula in a ribbon (or like lava?).
Line 2 baking sheets with parchment paper. You can use a dab of batter on the corners, under the paper, to stick it down, so the paper doesn't lift. I didn't find this step necessary.
Fit a piping bag with a med or large round tip, and fill with the batter. Pipe out rounds (or in this case, a sort of rounded triangle), spaced about 1" apart.
Once the pan is filled, lift it about 5" off the counter, and drop it straight down. Do this 5 or 6 times, then rotate the pan and do it 5 or 6 more times. This gets rid of any air bubbles that might be hiding. If you see some come to the surface but not release, you can use a toothpick to pop them.
Now leave them out to set, anywhere from 30-60 min, depending on the humidity.
Once they've set, pop them into the oven, one sheet at a time, and bake approx 12-13 min, or until risen and just set (when you gently poke them they don't move), and ever so slightly golden on the bottom edge. Be sure to rotate the pan at the halfway point!
Remove from the oven, and slide the parchment off of the pan, onto a cooling rack, and allow them to cool completely before trying to remove them from the paper.
Once they're cool, flip every other one (try to find matching "mates" for each sandwich) and pipe or spread the filling on, then sandwich it with another cookie on top.
Set them in an airtight container overnight, then allow them to sit at room temperature for 30 min prior to serving.
Good to hear she had a great day!
Many many thanks for the recipe. Will let you know how the recipe worked out for me.
Awesome! I look forward to hearing how it goes! (And remember, practice makes perfect - just look at that failed first try! hahaha)
Is there a save button? Lol. I want to make it!
lol Wouldn't it be easier if there was a way to "save" or "favorite" posts? I've gotten in the habit of bookmarking posts that have recipes I just need to try.
You'll find the recipe above. ^ 😊
This looks like sweet box for pearls @offbetbroad :) I always admire someone who has nerves for making delicate sweets.
Thanks! haha I love to give myself a good challenge now and then... if I hear a certain food is tricky, I just need to test it out for myself. I'm a little stubborn. lol
What a lovely idea - a box of oyster macarons with some pearl jewelry inside!
Congratulations! this post got an upvote by @steemrepo and was manually picked by the curator @for91days to be added on STEEM REPOSITORY, simply comment "YES" and we upload it on STEEM REPO Website.
Wants to know more about the Steem Repo project? Contact us on Discord
YES
Work of the master
Thank you!
Congratulations @offbeatbroad! You have completed some achievement on Steemit and have been rewarded with new badge(s) :
Click on any badge to view your own Board of Honor on SteemitBoard.
To support your work, I also upvoted your post!
For more information about SteemitBoard, click here
If you no longer want to receive notifications, reply to this comment with the word
STOPThis is very advanced, i plan to start learning pastry from my inlaw and i hope someday i will get to this stage of professionalism. Great job!
Yes, it's not for the faint of heart. I've been baking since I was a child, so I have a lot of experience in the kitchen to go off of. But this was my first attempt, and it worked out pretty well! Once you have some level of comfort with baking, don't be afraid to take on a challenge. You just might surprise yourself. 😉
They look very beautiful @offbeatbroad. Well done! :-)
I love that you STILL made them beautiful!!! Made me realize I don't have to make them perfectly to make them 💟👍 Thanks!!! Practicing for my sister's anniversary!