The Tale of Real Greenhouse - Part 1
I wrote a post about our attempt to build a greenhouse ourselves. You can find the post here.
The next day we decided to go find a real greenhouse. Actually we planned to check the prices of greenhouses, but in a store they had a tiny greenhouse on discount (suitable for our wallet right now) and there was only one piece left on stock - so we had to buy it straight away.
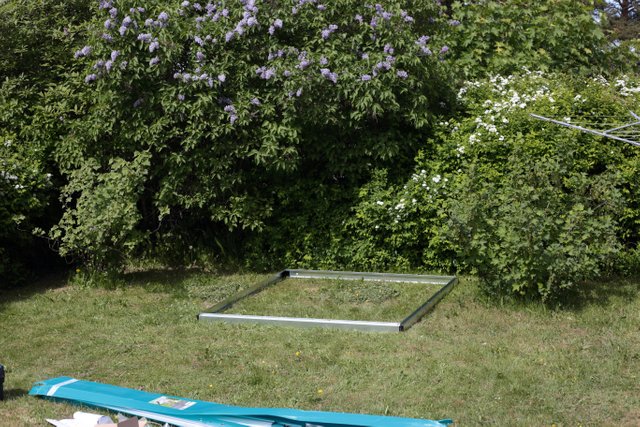
We started to build the greenhouse the same day. I managed to build the greenhouse base before we had to leave to a graduation party of my wife's cousins child.
The party was nice, not too many people and the food was good, so it didn't mind to have a small pause from the greenhouse project which barely started.

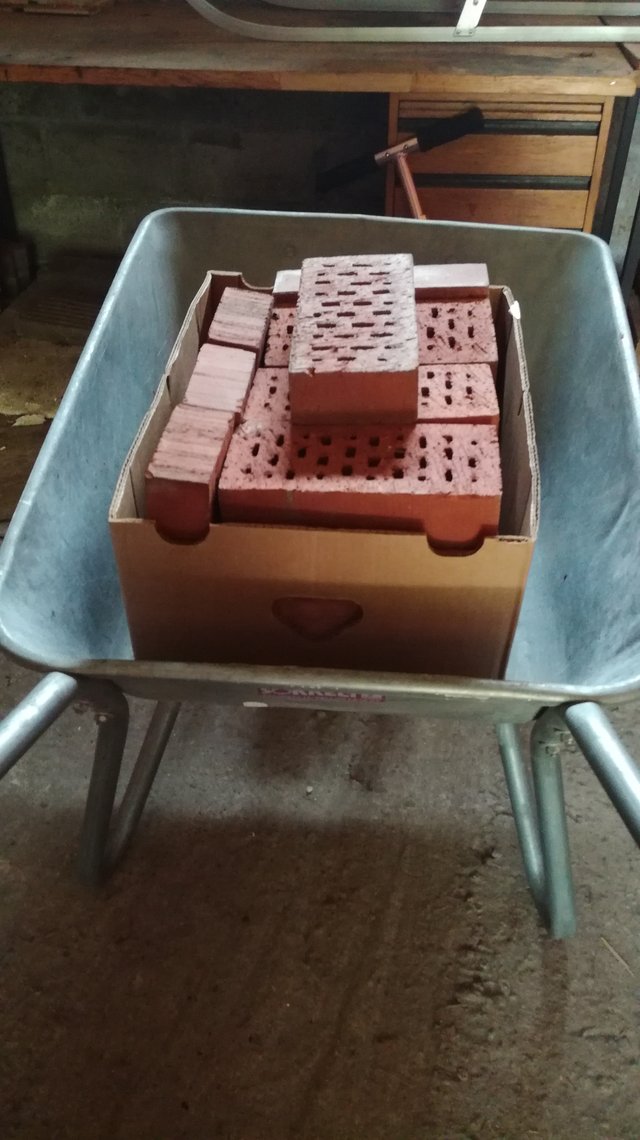
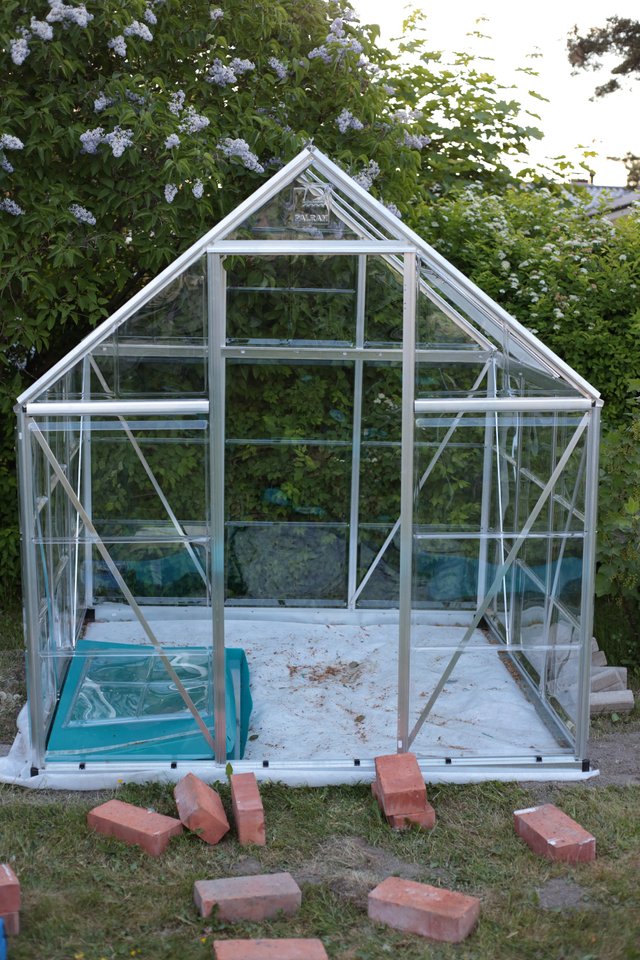
As the previous owners of the house had left some garden stones and bricks to the garage, we though we could use them on the greenhouse floor to make it look more nice. We didn't have that many stones, but it seemed like a nice idea to make a "path" in the middle and if we would ever need to get more bricks and stones, they could be put on the sides of the greenhouse.

The greenhouse was somewhat quick to construct, some phases required more than one person to be working to get everything stand in correct position when I was trying to build it up. In general, it was really nice to have good quality instructions - not only in the instruction sheet, but as all parts were numbered and it was clearly stated which parts were required in which phase.
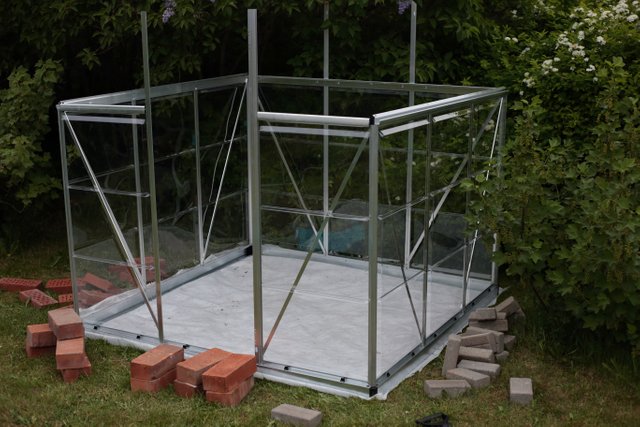

As an engineer I had to admire how they had included only one kind of screws and nuts which fit everywhere. Well, except the separate steel base, which had special screws, but otherwise they were using same kind of screws and nuts EVERYWHERE.
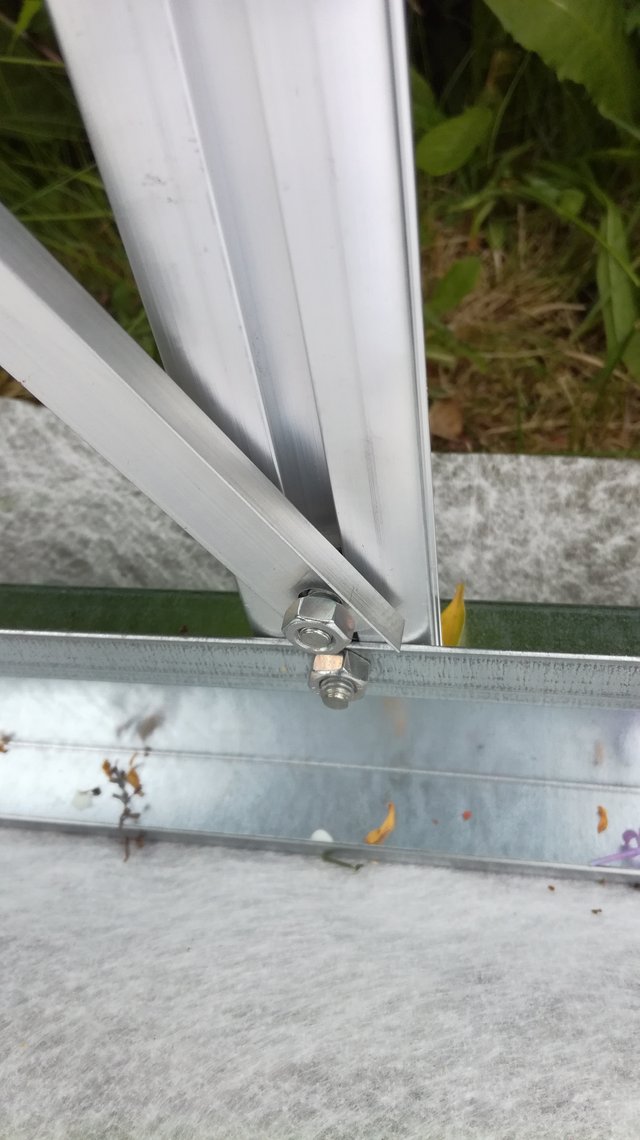
On quite many different places the constructing required sliding the screw heads in the steel frames. This was handy, as it was easy to adjust the frame during the construction to correct angles as you had only to loosely tighten the nuts and you could still slide the screw heads to the correct positions.
However... this is as far as I got on Sunday.
This is when the story starts.
On Monday, our kettlebell training in the city park started. This is something I've been waiting for a long long time, so I skipped the greenhouse construction and headed to the kettlebell training. I've have had a long pause, so I had to start with light weights and I still got really sore in my body.
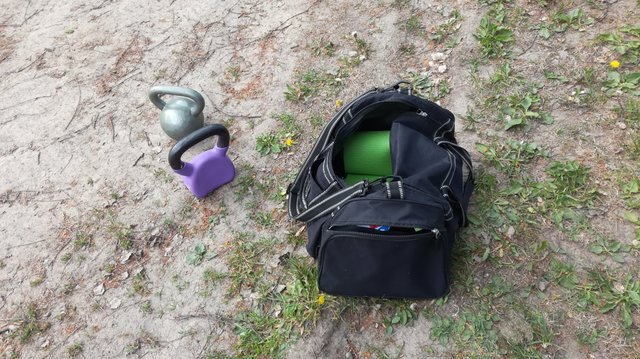
It had been really windy during kettlebell training and I came up with the fear of greenhouse flying off in a strong wind - as it was not attached anywhere. I had read you could attach it with "anchors" to the ground, but I couldn't find any anchors on Tuesday as I visited several hardware stores.
I ended up in buying "concrete anchors", which allowed me to anchor the greenhouse to concrete or solid rock. For this reason, I borrowed to large garden tiles from the neighbor. I drilled a hole in the garden tiles, dug the tiles in the ground and attached the greenhouse to the garden tile.
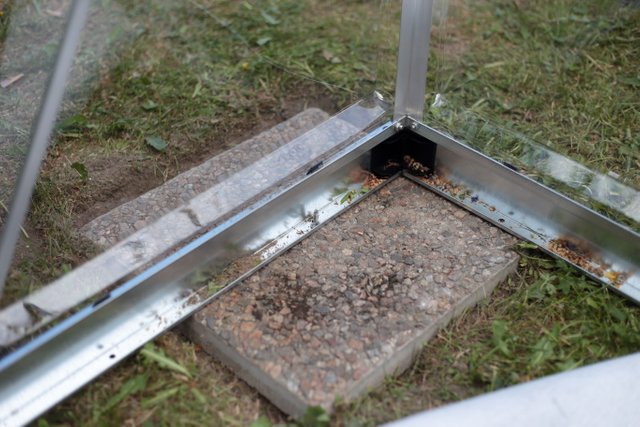
It would have been easier to first dig the tiles in the ground and then build the greenhouse on top of it..
But this was OK too. Digging was annoying though, but I survived and now the greenhouse was well anchored to the ground. It would take a hurricane to toss this greenhouse away.
I didn't have the interest of continuing with the greenhouse construction at this point, so I waited for the next day.
However, we had people visiting the next day. Including but not limited to...
Batman

My son and the son of our guest were playing with Spiderman and Batman suits. It was not the real Batman.
At this point, most of the week had already passed. On Thursday, we had a long meeting with neighbors and we didn't have time (once again) to continue with the greenhouse.
On Friday we left to our summer cottage for two nights.
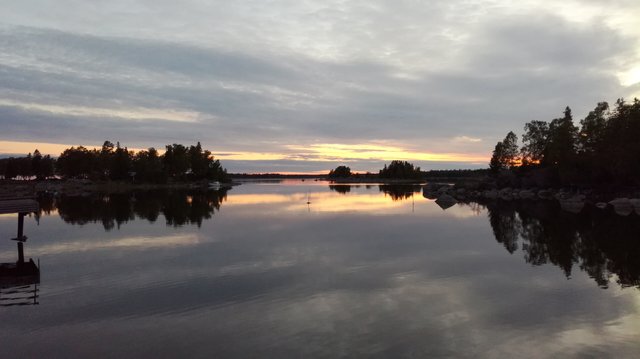
As you can see from the image above, it was far more awesome than building a greenhouse.
To have something to build, I decided to build a birdhouse for tits!
I'm planning on building 3-4 more birdhouses to our summer cottage for different kinds of birds, but as most of the birds have already found their nests for this year I'll have time for the rest of the summer to get the birdhouses built. Hopefully birds will find them next year, so they'll get good use.

Today we finally got back. I had to go grab some food from the store as our fridge was half-empty and as the greenhouse has been standing without us being able to work on it for this many days - we continued working on it as soon as we got our son to bed.
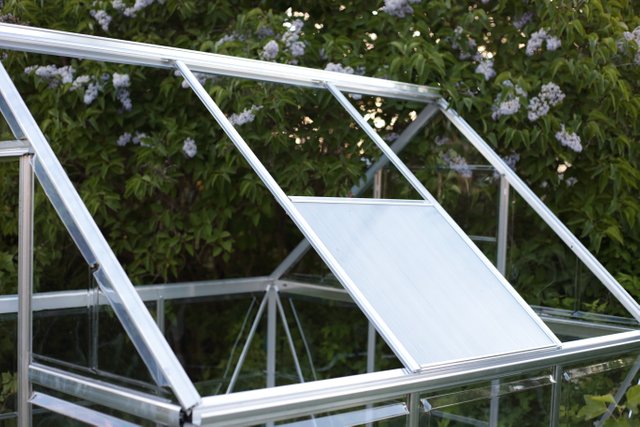
However we noticed quickly, the higher we go the slower the work is. Adding the screws in the correct rails is more annoying, trying to make all the parts slide smoothly together is difficult as we can't always see where the parts are going.
We also have an annoying tree which has branches growing over to our greenhouse. Otherwise it's OK, but trying to slide large plastic pieces on the steel frame is somewhat difficult when you have bunch of branches pushing between the greenhouse frame and the plastic "wall".
This is part 1 because this is the moment we stopped. There were far too many mosquitoes around us and I was tired and annoyed already. In worst case, I'll write the part 2 next Sunday and part 3 somewhere in the future.
I'll try to get this finished in 2 parts.
Nice job, I hope it brings you lots of good food. Cheers mike
That's the plan, let's see after a few years what it looks like!
I grow chilli 🌶 in mine mainly. Cheers mike
Looking good there, have you finished setting it up? Would like to hear more about how you like the greenhouse. How large is it, and does it have windows for ventilation or do you need to keep the door open?
Hi, I'll write a post about this shortly. Well not maybe today but I'll try to write it today or tomorrow.
It's finished now, it's less than 4 square meters and it has a ventilation window. They are selling separate add-ons so the window would open automatically, but I haven't bought one yet.
I'm dreaming of a bigger greenhouse (around 10-16 square meters) but this was the most affordable one I could find, so I'll need to save up some money first.
This situation clearly demands for a halfway party. Greenhouse almost ready party.
Oh I wish I could party. I could invite people for a party and make them finish the greenhouse. ;)
What I've learned today: Kill trees and build stuff.
#ohwait
KILL KILL KILL!
Nice greenhouse! I can feel for you, for we built a custom greenhouse attached to our house - it was suppose to be fairly easy to put together and the company supplied videos for putting it together but that was only for the prepackage ones not the custom ones that we ordered. It was a lot of effort but well worth it as we enjoy it year round!
Well it's great to hear you managed to get it finished. Quite many companies do that, they have the instructions for the standard set but if anything is different - you're basically screwed.
But if you have a strong mind, you can work your way through it and finish it despite the extra work - because why would you settle for the standard when you can get something customized for your needs?
Hopefully the thanks (treehouse) will stand at the end.
Ooh, I could lift the greenhouse to a tree and turn it into a green treehouse. Or tree greenhouse?
if it's worth the effort then why not!
STOP