Rabbit cage in the making / Creative me / Lunching my rabbit cage half way / new home for my new wearner rabbits 🐇🐇 / Handiwork (Talented) self-employed
Hello everyone,
It been few days now, thanks for those of my friends who are really concerned about me and my page so far. I am back and better with new creativity to enhance my page to make my friends learn more about handiwork.
HOW I LEARNT THIS GREAT WORK ( Talent)
- I am by name Akinlotan Matthew Omotayo. I hail from the family of four children excluding my parents. But my dad is late. (Mr Olusegun Akinlotan) but my mum is there living fine.( Mrs Comfort. ) I learnt this work while I was growing up wth my parents although I grew up to study in the higer institution ( Federal University of Technology Minna, Niger state. Nigeria) where I studied Animal Production as a professional course. But while I was growing up, I used to be a quick learner even though you did not tell me how to do, I will try in my own small wisdom and creative mind to solve it. My late dad was a Principal of a secondary SCH before his death, along the line he used to do some other minnor work aside teaching, like proper farming, slide carpentry skills and so on. So out of learning skills that I had then and because I want to know more about handwork aside education system. I always paid attention to every bit of what my dad was doing, how he nailed planks together, how he uses hand Saw to cut of woods, how he always uses his measuring tape to scale the planks accurately, I learnt all this from him. There was one day, I made a small chicken cage while he was away to another part of the country he came back and he was amaze. He gave me 2 sachets of biscuits,Lol. So I learnt from my Late Dad.
WHAT DID I DO AND WHY DID I DO IT
- As I have said earlier on, what I planned to do is this, initially I planned to do a cage of 6 compartment with a thick wire mesh ground floor with plank edges with a half wire mesh and wooden door. But later on as I was making the wooden cage I found out that I have much wearner rabbits on ground so I increased the number of apartment by one making 7 apartment . I did this wooden cage mainly for my wearner rabbits, I mean rabbits. So I call it New Wearner Rabbit Cage.
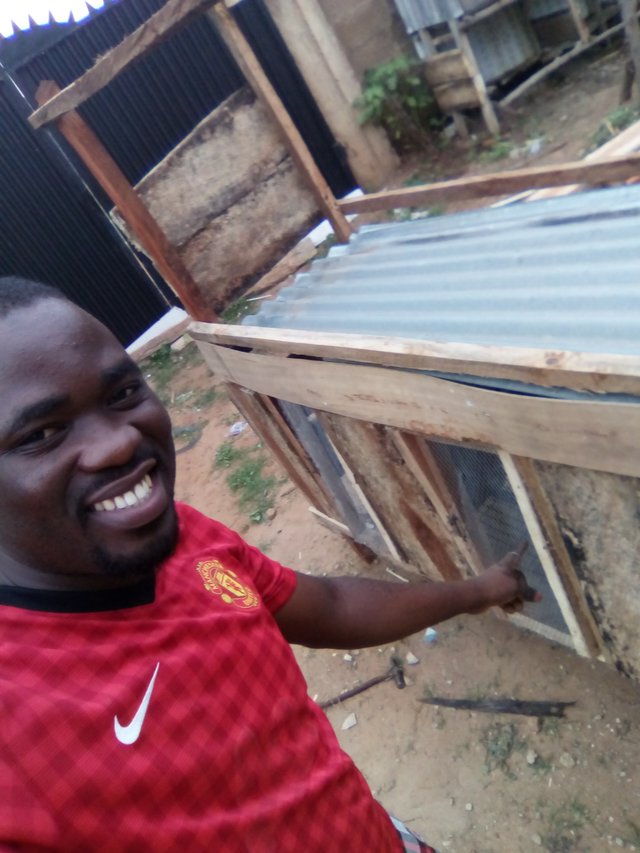
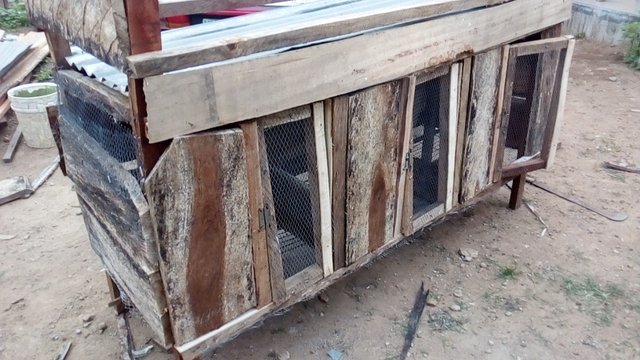
Latest update : This is my new outcome for the new rabbit cage for now.
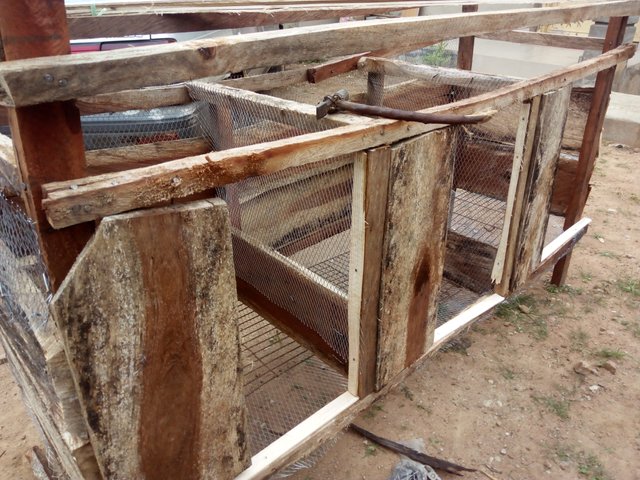
Here is the new big wooden cage for my new wearner rabbit . It has 4 apartment in the first front up, and it has just 3 apartment below it. It compares of hard black wooden plank both at the back for securing the rabbit from direct sunlight, rain and predators. Also to the front I made it with partial 2by2 frame with hard rabbit net, not chicken net.
These are what I intended making the cage for Check out some more pictures here.
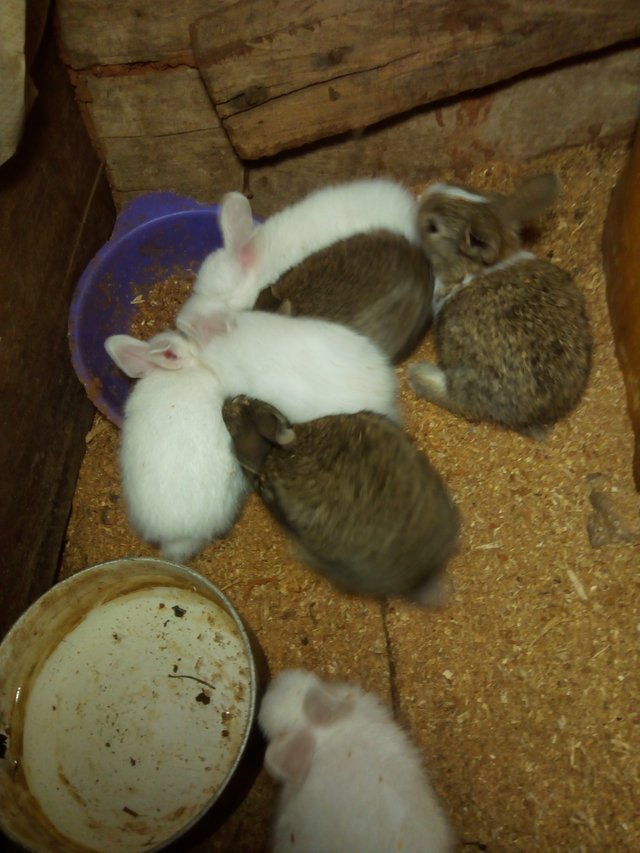
These are my new wearner rabbits. I have presently 4 New Zealand white and 3 Ash Chinchilla breed ( just 3 weeks and 3 days old )
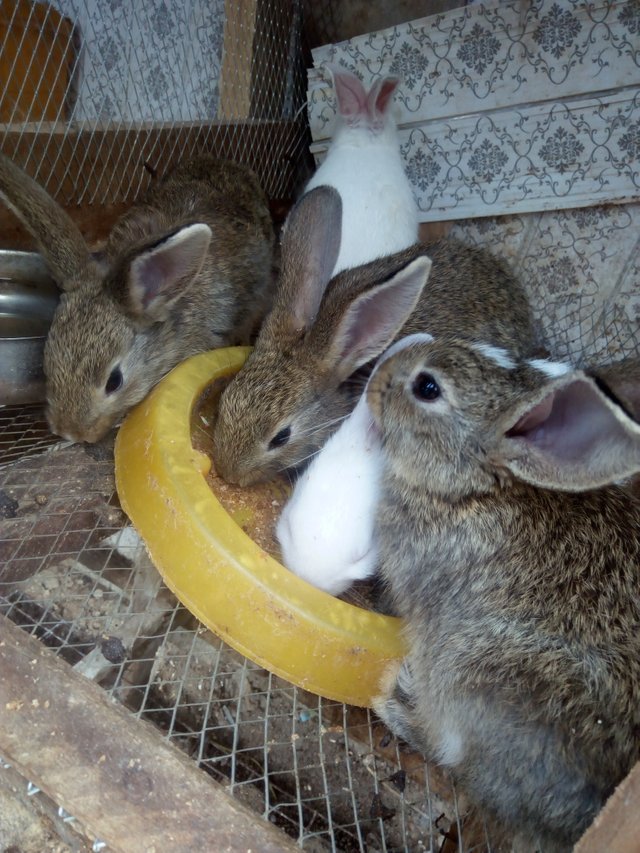
Also , I have 3 chinchilla breed with 2 New Zealand White ( 10 weeks old)
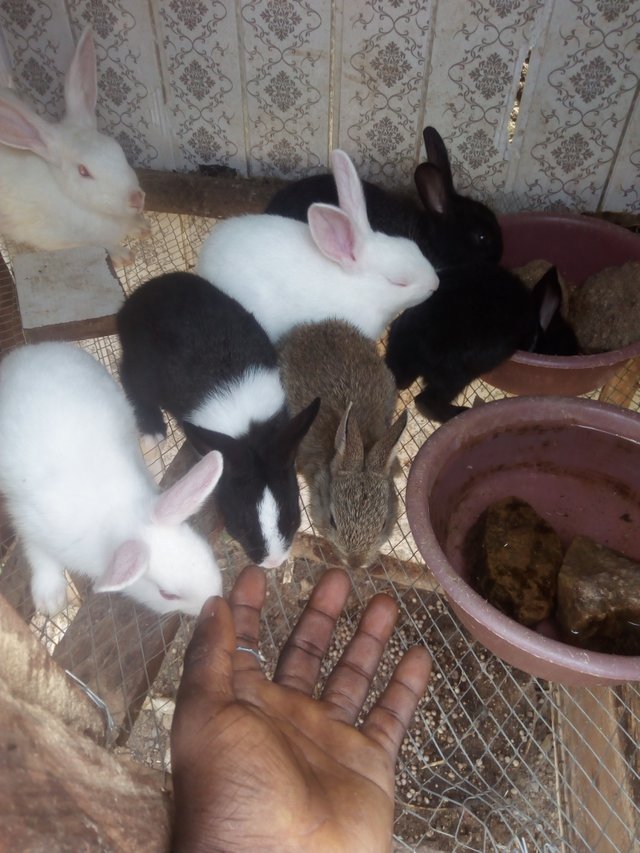
Also I have this, new ones just (4 weeks old) you can see all these new bunnies I still have some more work to do meanwhile I have some pregnant Does again.
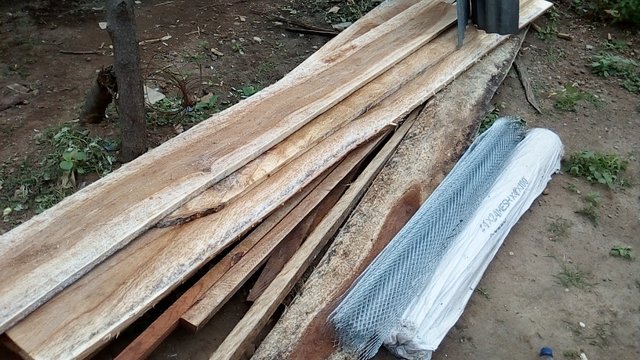
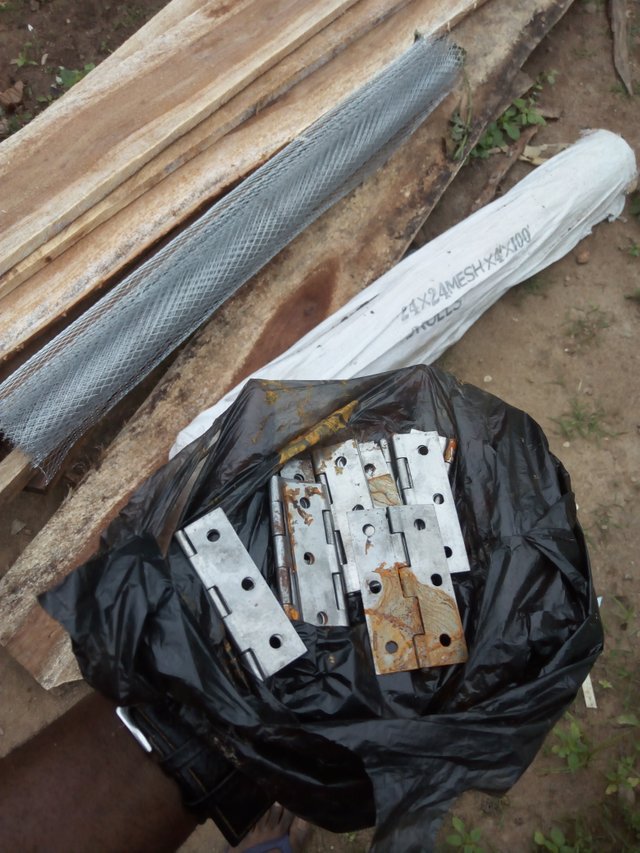
These are some of the raw materials used during the continuation of the wooden rabbit cage.
- 1 by 7 inches plank. ( 5 pieces)
- 2 by 2 inches rod ( 6 pieces)
- 1 and half roll of thick wire mesh
- 1 and half inches nail
- 2 inches nail
- 2 and ½ inches nail
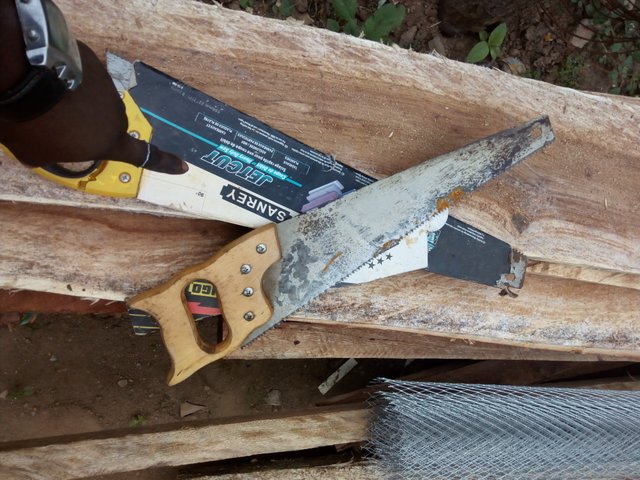
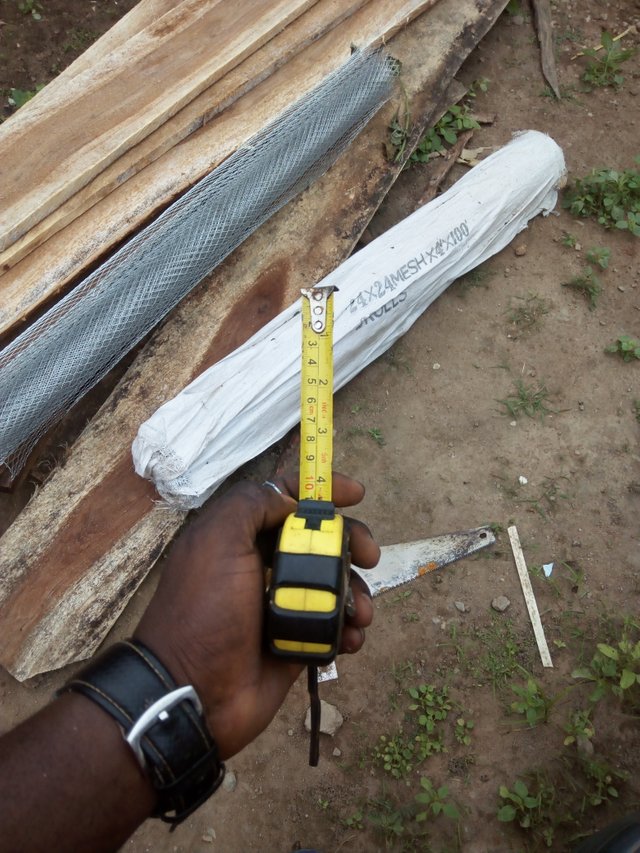
- A wooden saw
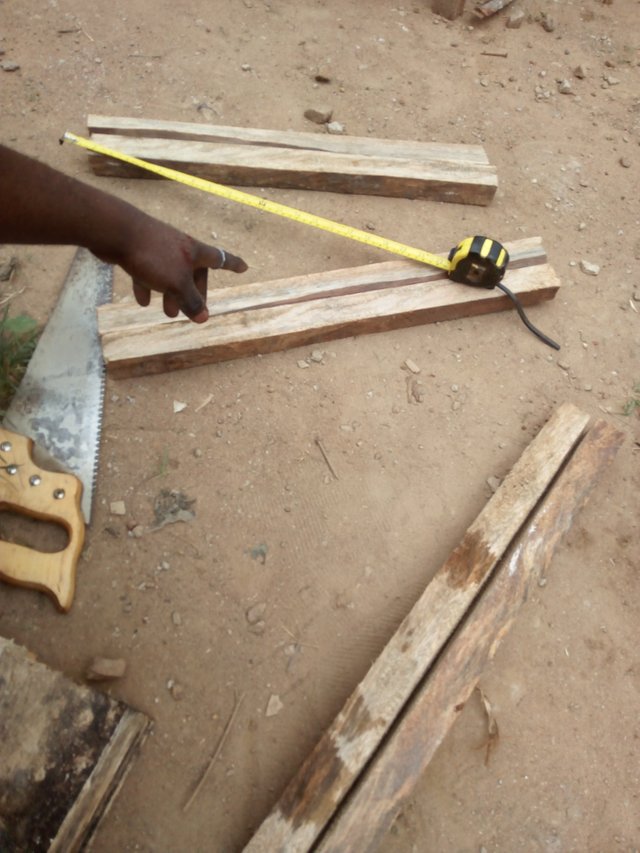
- A measuring Tape
- A wooden Tyrod ( 6 pieces)
- 2 by 3 inches wooden rod (4 pieces )
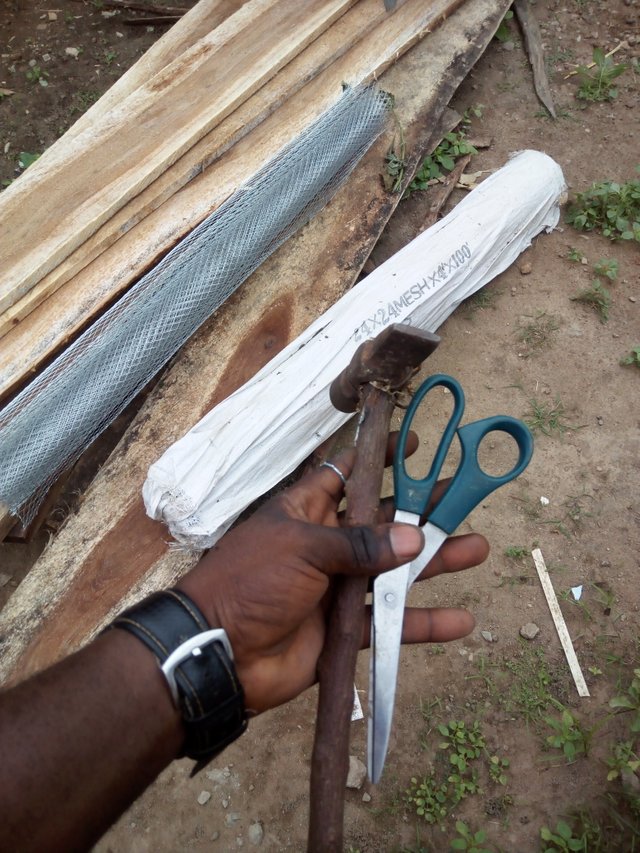
- A pair of scissor
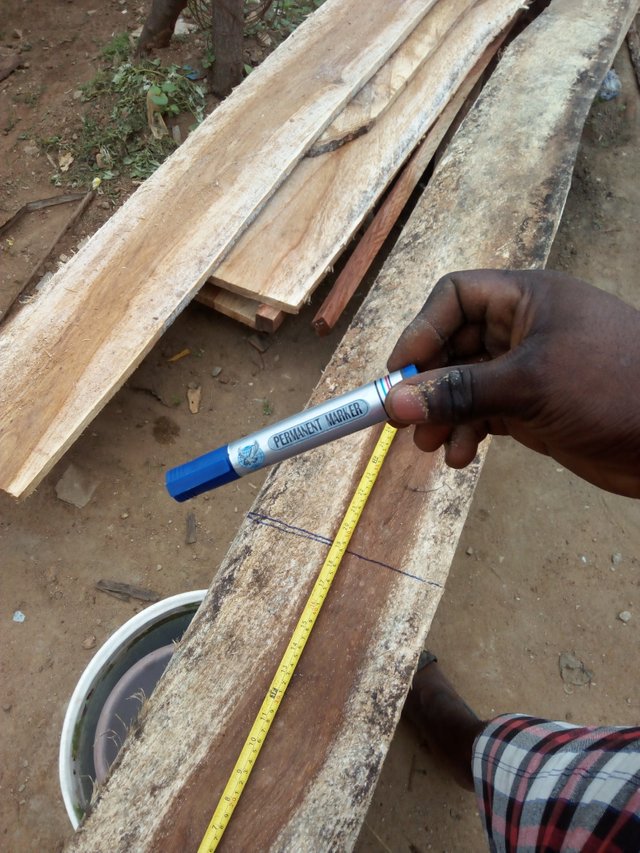
- A blue permanent marker
These are what I used to make this wonderful handiwork ( wooden rabbit cage)
Let me start with this,
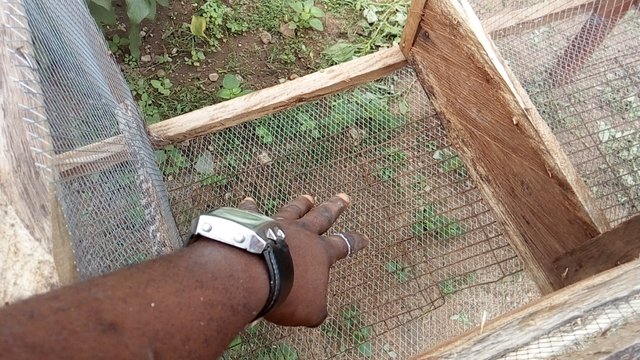 What I did here was that I used two different type of hard net to reinforce the cage bottom very well before I nailed the other hard plank to cover the cage back .
This was the wooden cage frame I did before continue with the other things .
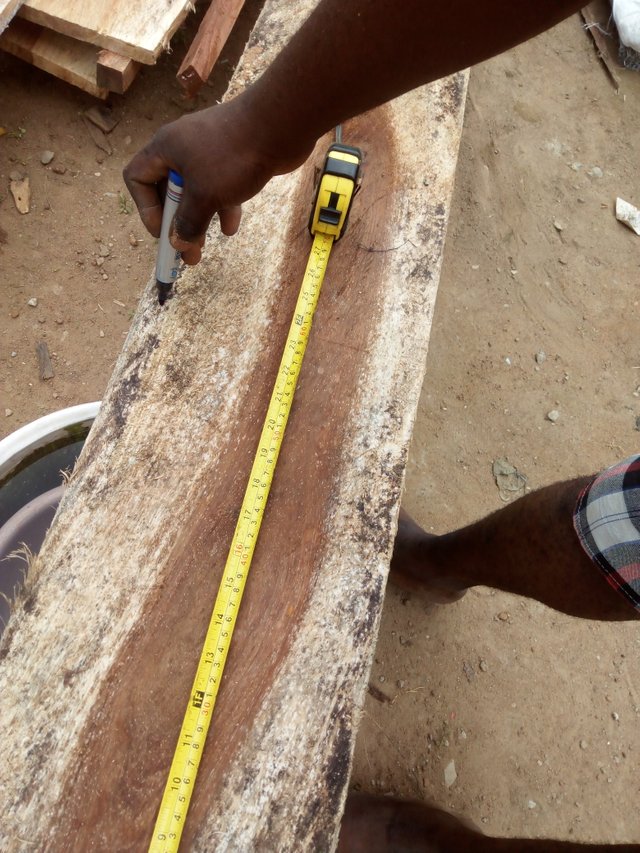
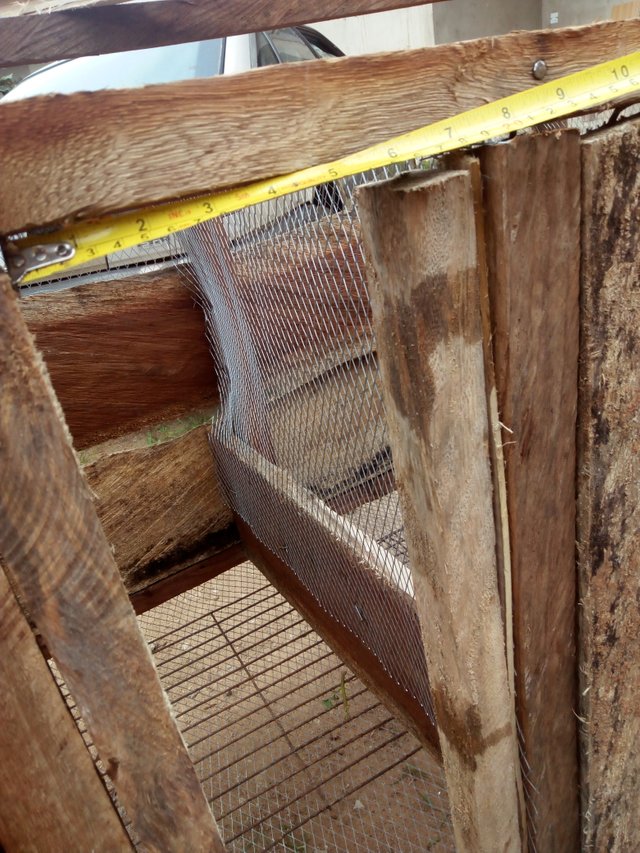
Here I had a blue permanent marker to locate where I was going to saw to cut, so I can cut accurately with requirements
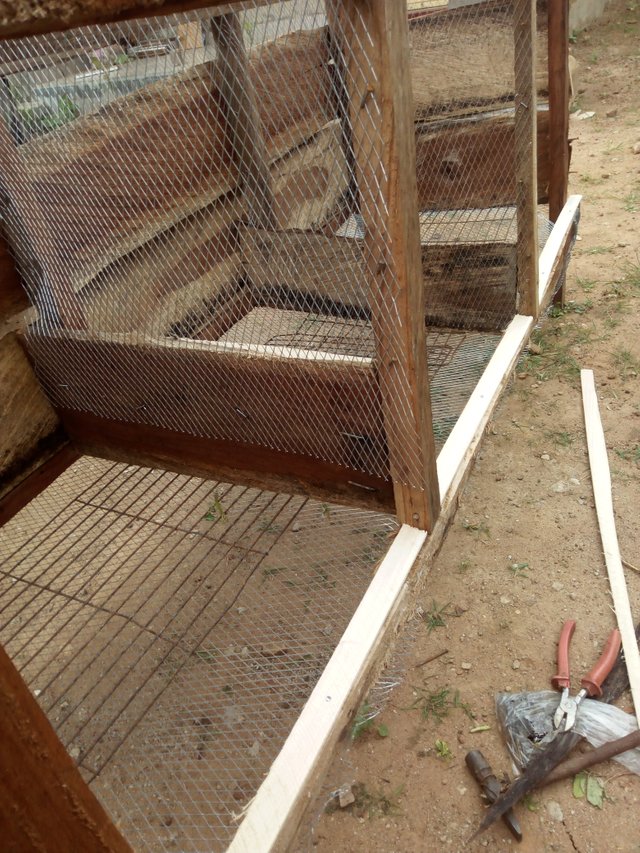
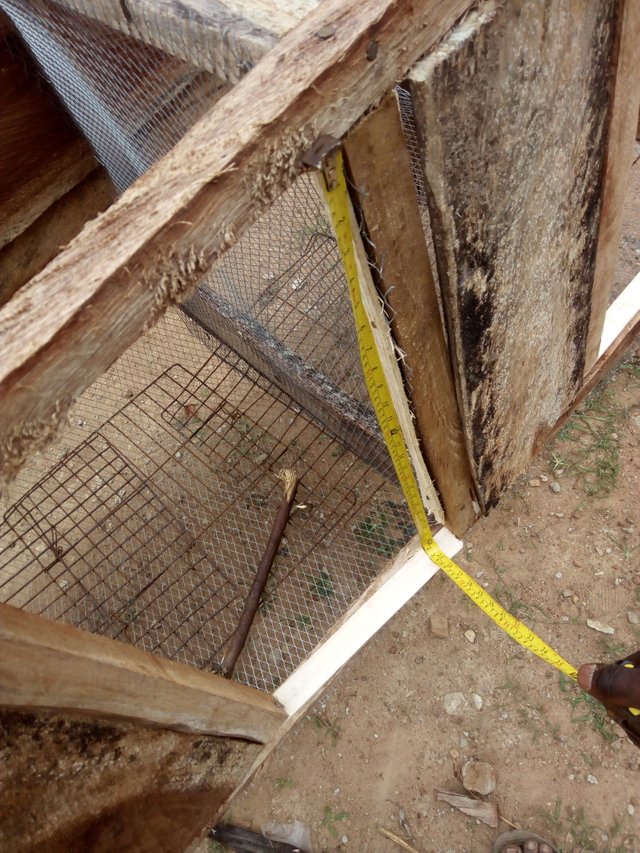
I laid the tyrod on the front first layer of the 2by 2 inches rod to make it look neat and to make the door lay down on it very well. I learnt this very long time ago but due to insufficient cash to purchase some items. I also cut the thick iron wire mesh according to it measurements to serve as a means of blockage from one cage to another. Down below the wire mesh I used cut 2ft hard plank to cover it also.
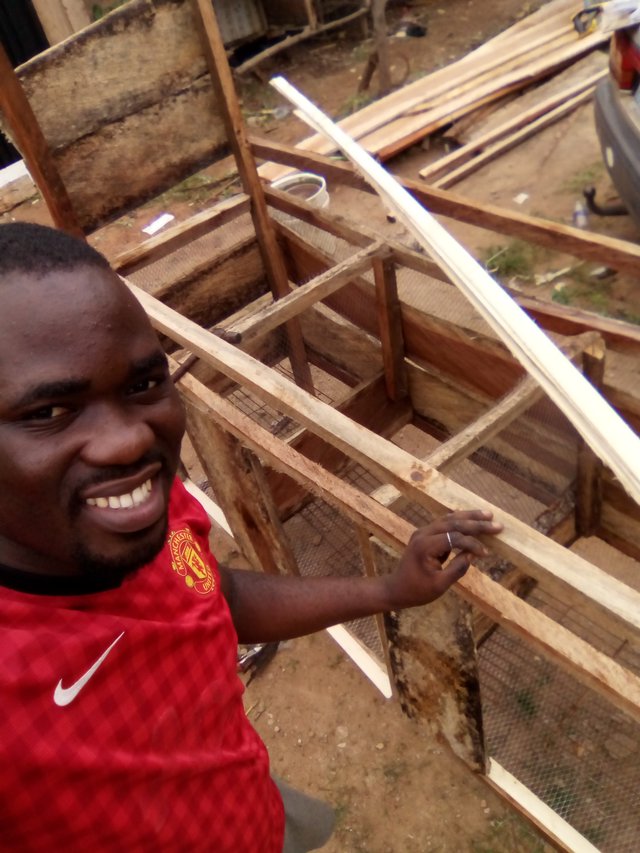
You can see how far work was really going, so faster than I could imagine.
I used a measured 2ft plank on each side of the wooden cage so as to block sunlight, rain, and to some extent predators. Meanwhile I used also a long 6ft 2by 2 inches rod to bridge the cage to make it stronger .
My blue Marker in working progress
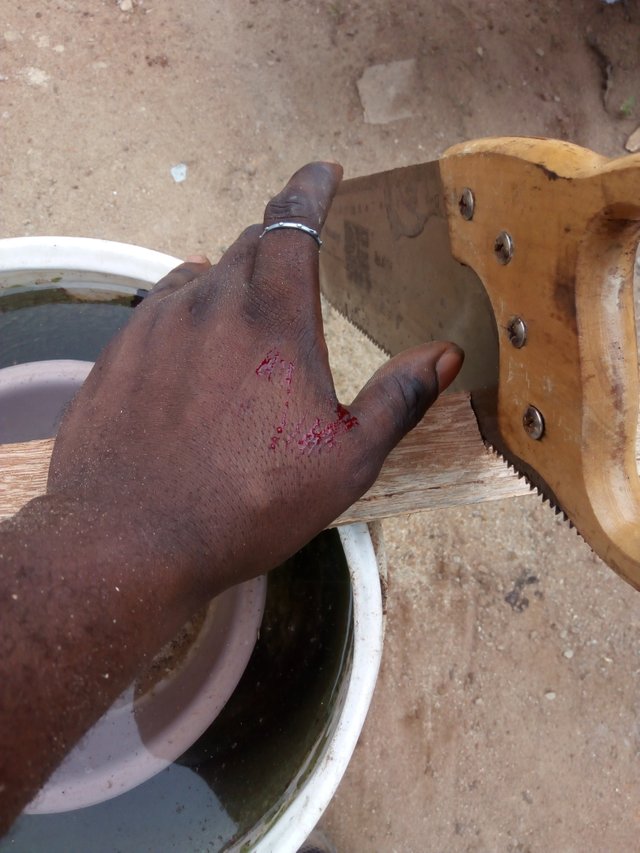
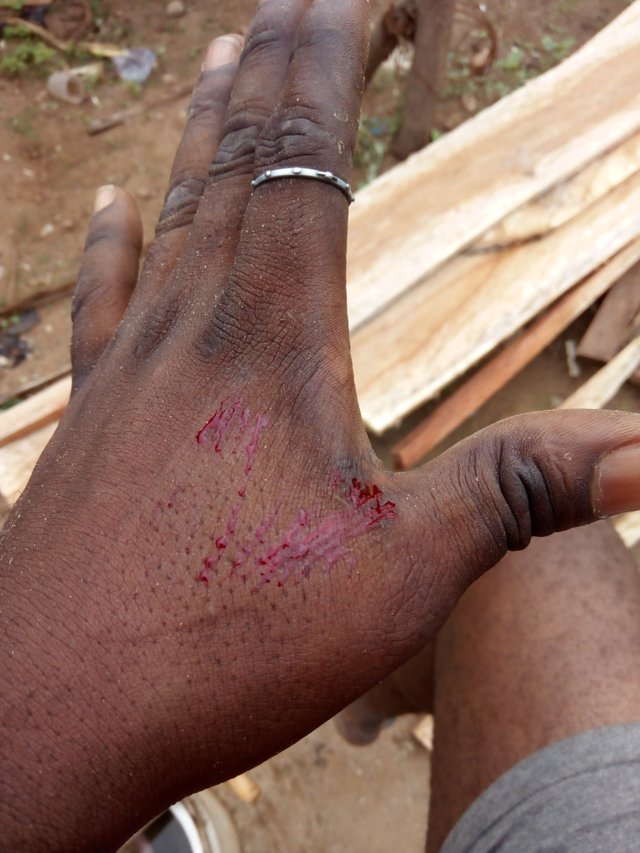
This was the injury I had during the work. I was cutting the thick long plank with the wooden saw before it slightly shake to my left hand side and it stroke my left hand, before I knew it. It was blood.
These are my 2ft measured cut 2by2 rod for the door frame, I used this particularly because I want it to be stronger than my formal rabbit cage.
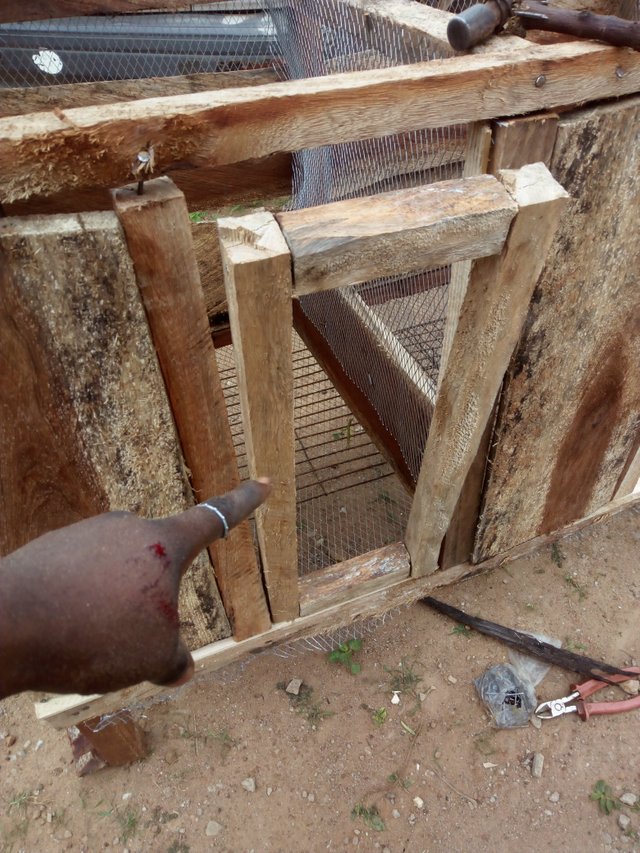
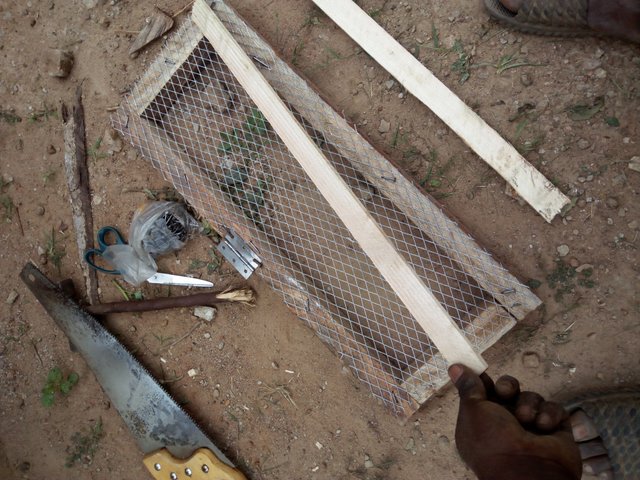
After I made the door frame, it was now the turn of the hard wire mesh to go along with it. To cover the front door space. You can see this down below.
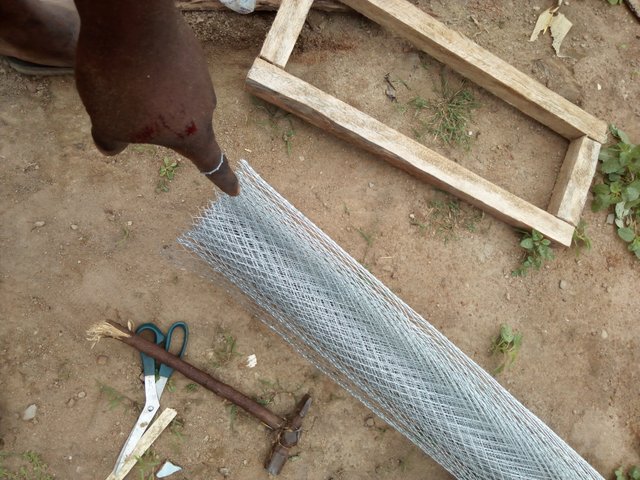
This was the hard net I was talking about.
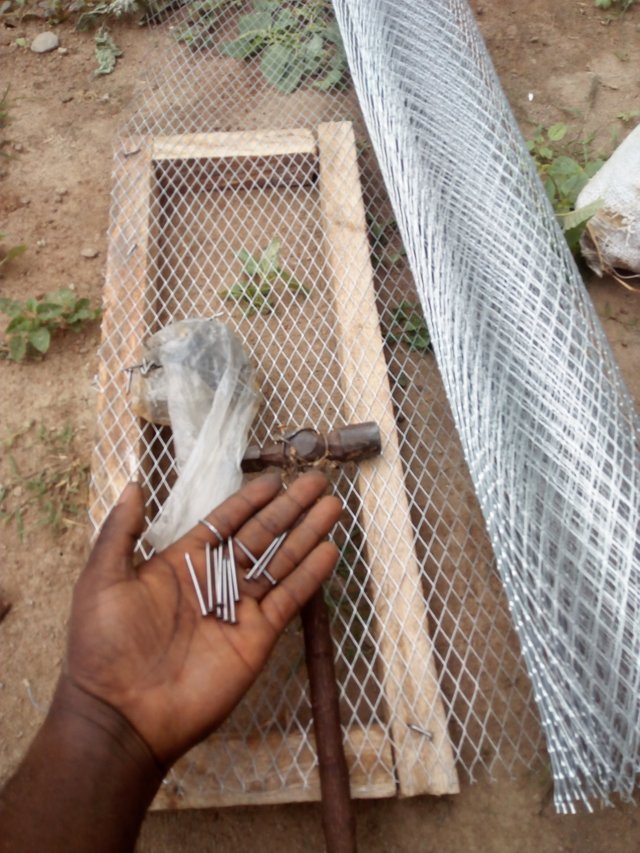
These are the type of nails I used here very different nails. It is called 2 and ½ inches nail. It is very light than the other nails I used, it is mainly for the door frame and for nailing it hard thick net to the door frame wall.
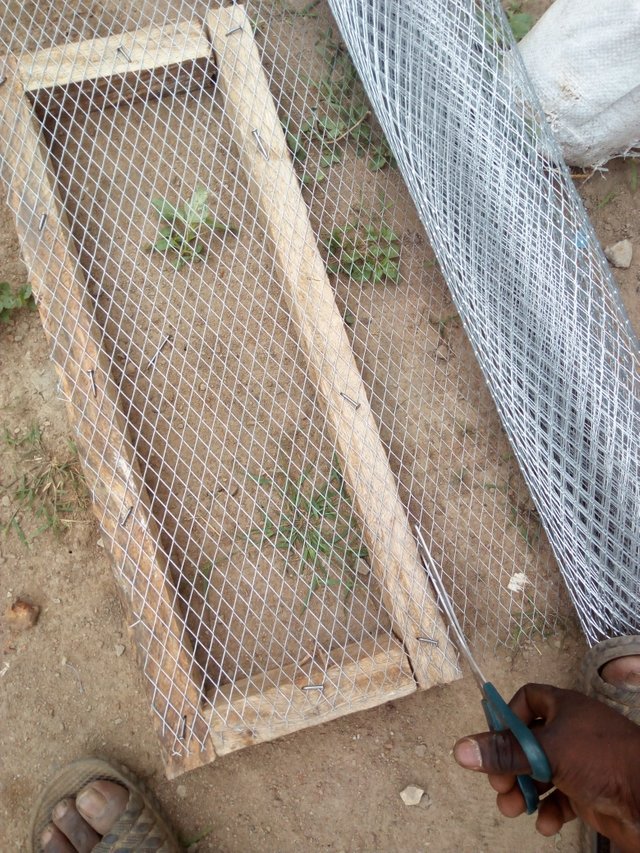
This was the cutting method I used with my little thiny-like sicssior. Though it not too thick but very sharp edges. Cutting of the hard thick wire mesh for the door frame.
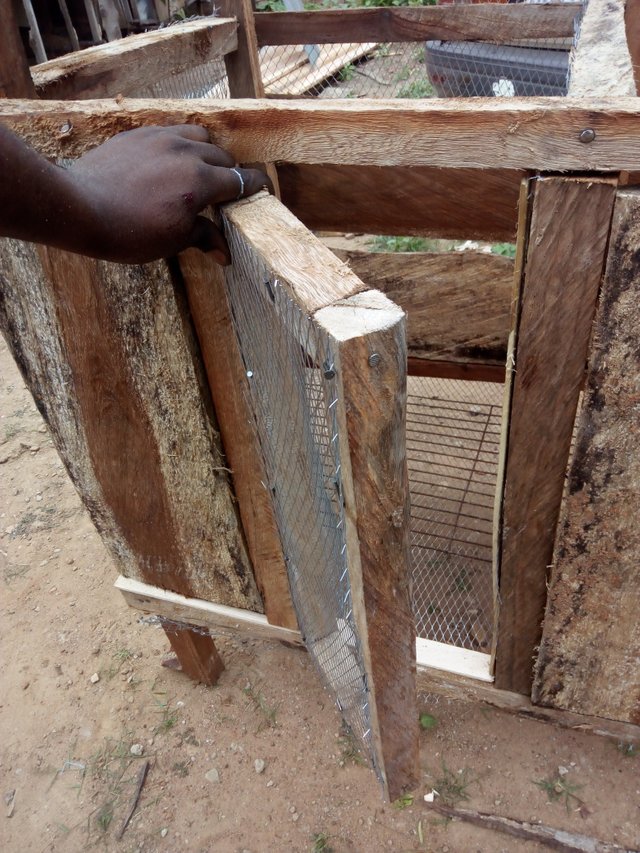
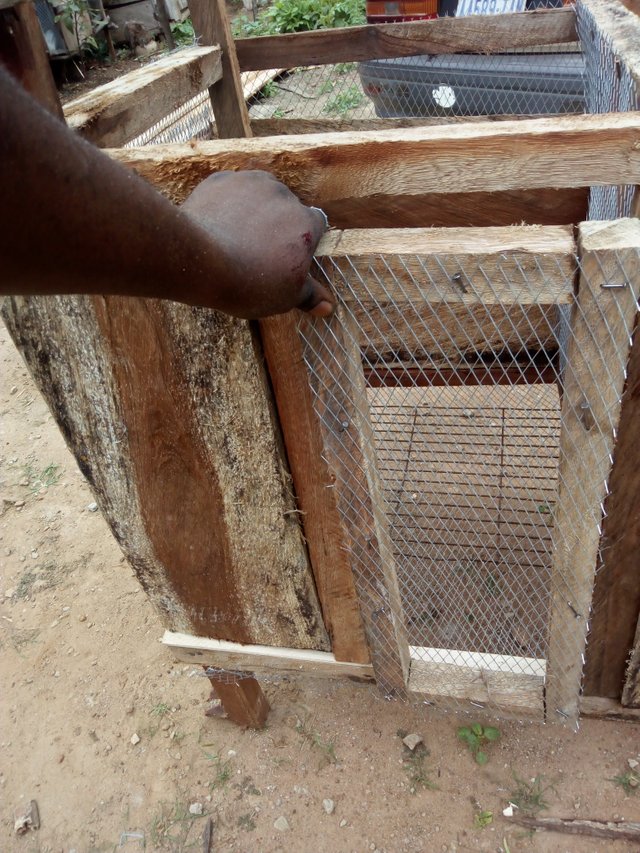
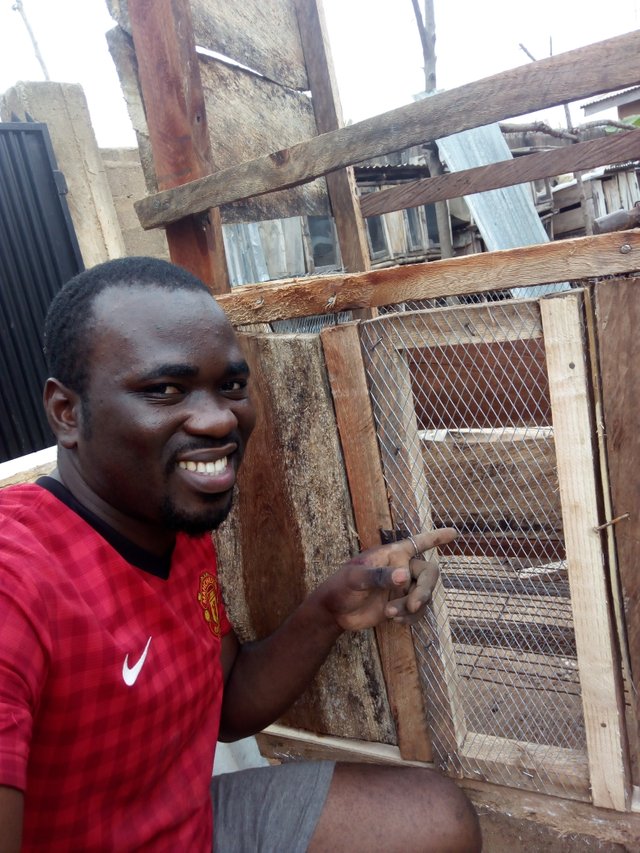
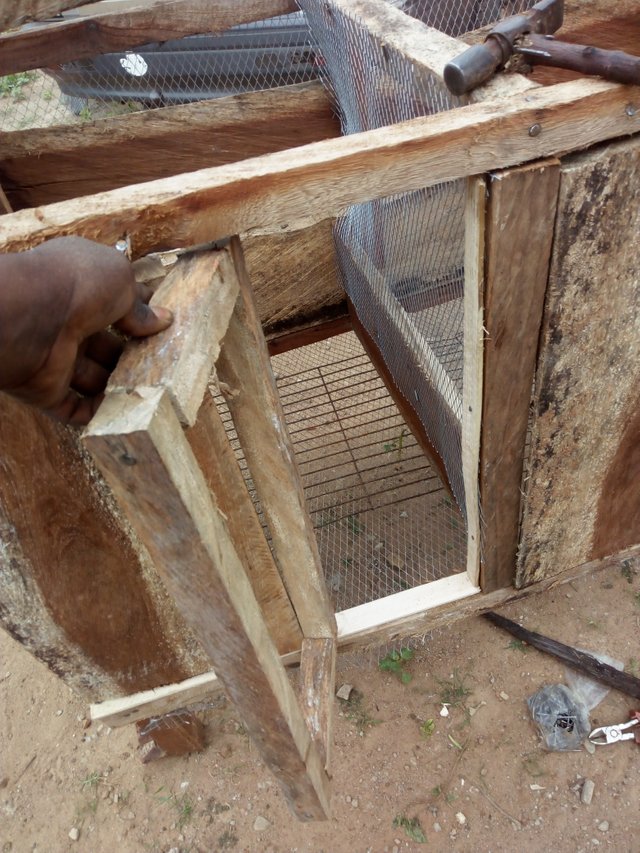
This was when I was done with the fixing of the door frame into the cage permanently. It was awesome 👍.
Door frame was 100% done.✔️
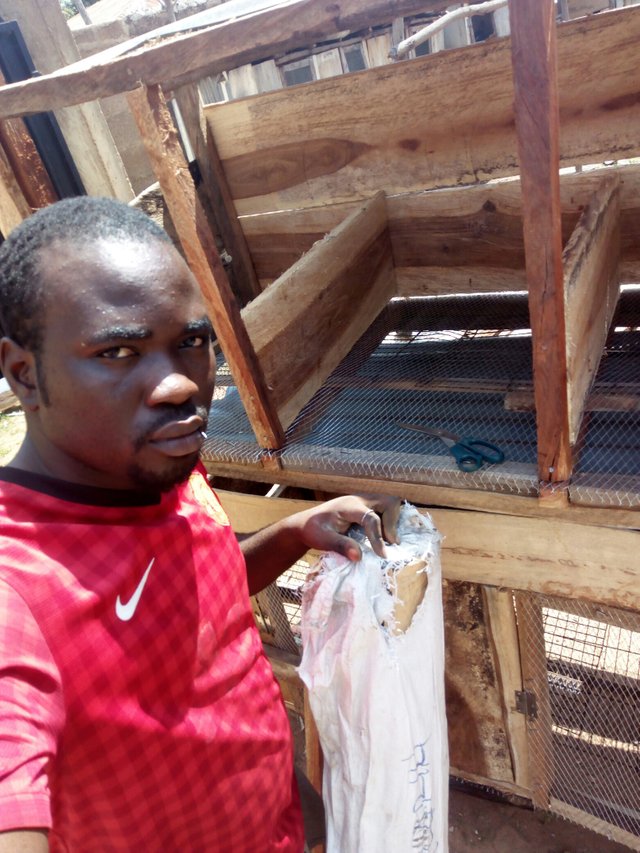
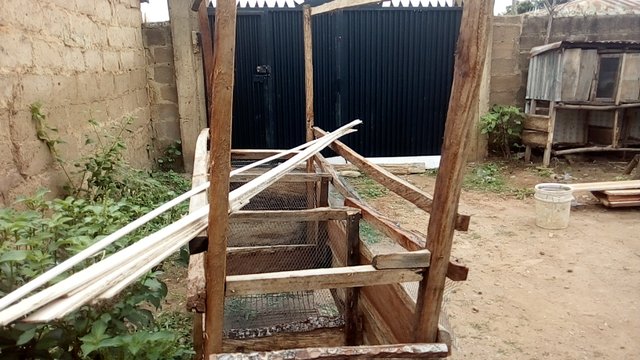
My rabbit cage is half way done now. It took me several hours to get this done o must confess, let say 4 and ½ hours to make a 3 big room compartment for my rabbit . I made this purposesly for my new bunnies because I can't afford to lose them now I have been hungry for more amd wide rabbit farm and here is the big privilege I have now. I have this new wearner rabbits close to 19 rabbits. Wow. It's a profitable business if you have capital to start bit by bit, capital for feeding, buy hay, cut grasses and legumes if possible. And you will enjoy them growing very well and healthy.
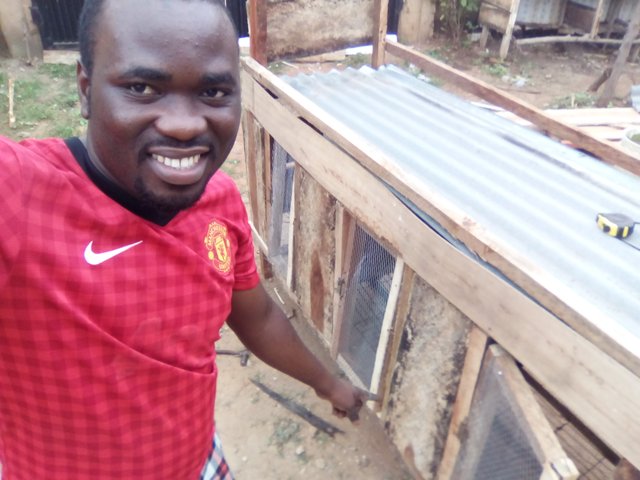
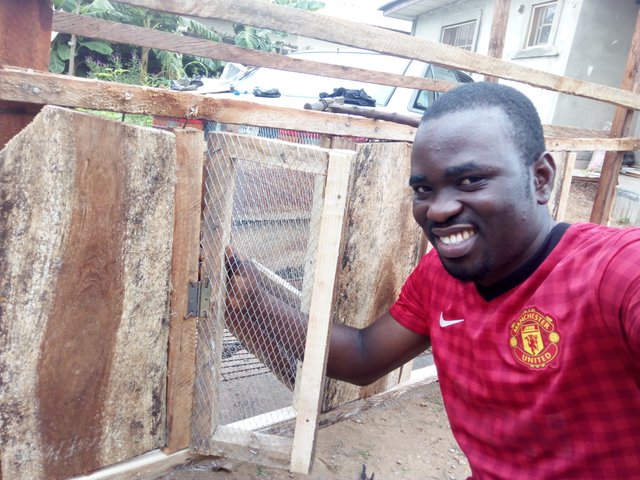
This was where I stopped yesterday because it wanted to rain but it later flew off but it really disturbed my work but it really cool I I'll continue it as soon as possible. Here is my handiwork. It is Original. It's my work. No duplication, nothing but the true work of @matthewthonyit .
All images an video shown on this page are mine.
All pictures and video are taken with my Mobile phone Feel X1.


Good working boss
Posted using Partiko Android
I really appreciate your comment.
Wow, great talent you got here sir. Awesome 👍👍👍
Thank you sir
Good rabbit cage construction. Double check ✔️
Thank you boo
Congratulations! Your work is very good an d hard to do, you even hurt yourself. I know how it is ...
Smile, that's hard work bro. I really hurt myself to gain the cage for my rabbits. Thanks so much!
Yes, I did, too, when I built something.
Hahaha, thanks anyways. Thank you for visiting my blog
As a follower of @followforupvotes this post has been randomly selected and upvoted! Enjoy your upvote and have a great day!
This post was shared in the Curation Collective Discord community for curators, and upvoted and resteemed by the @c-squared community account after manual review.