The art of creation #2: The machining of an automated roof painter part
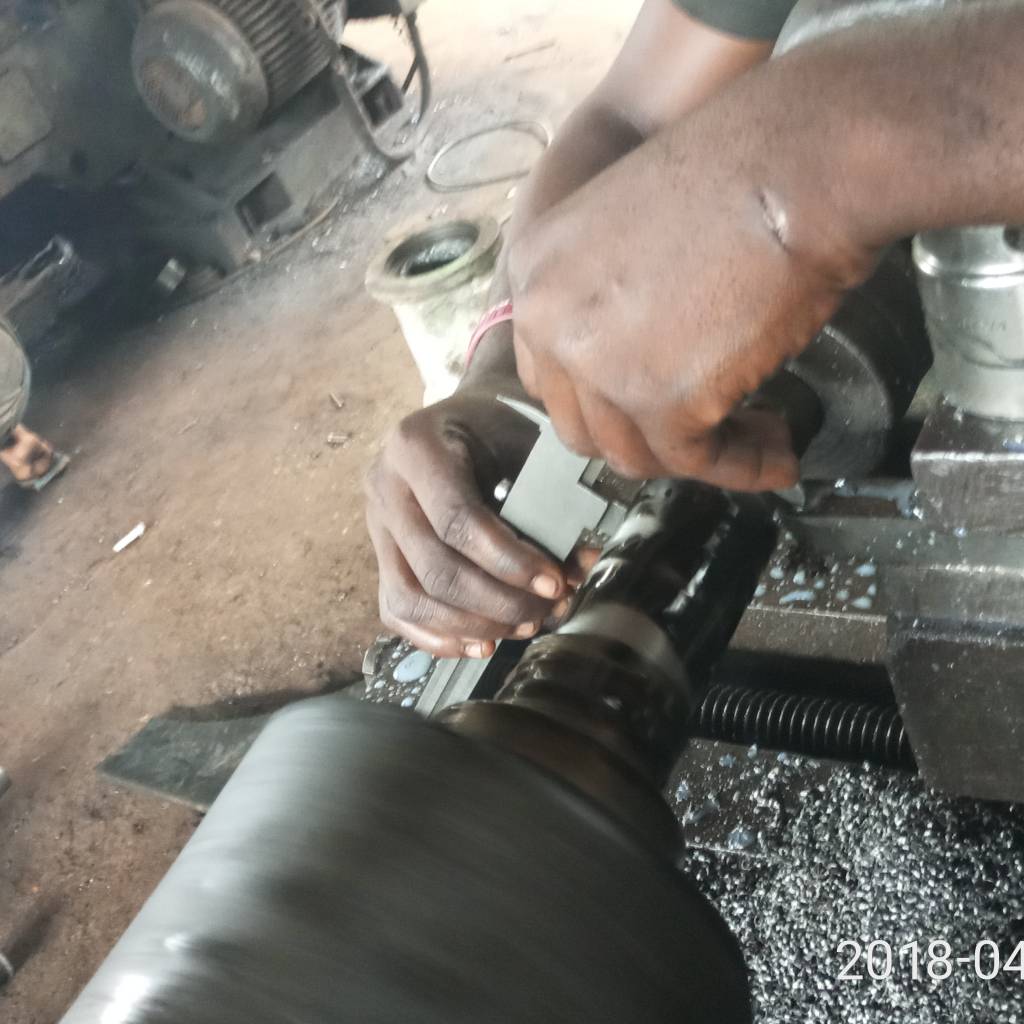
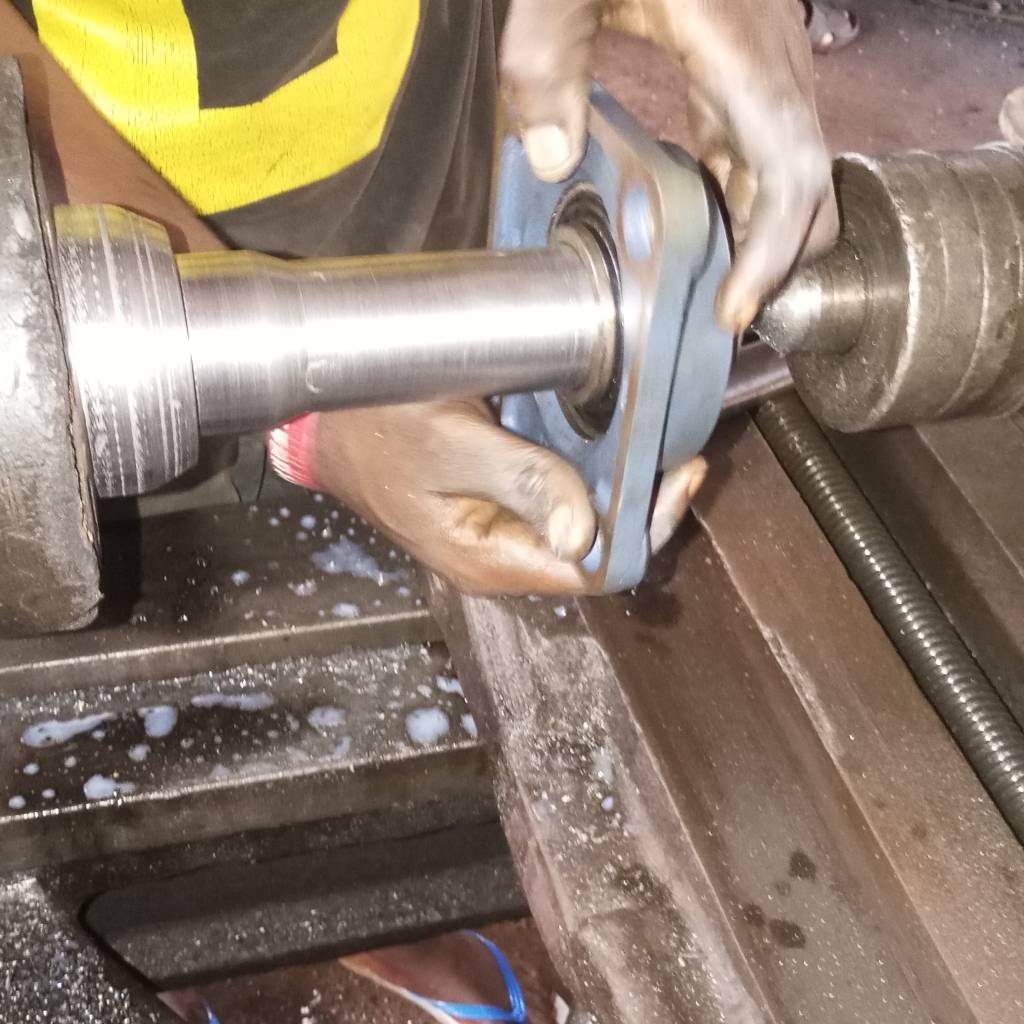 the mechanincal job: image taken by me @adetola
It is a cold morning here in Sango-Ota, Nigeria the rain had just stopped when this young man drove this truck into our workshop. Of course, it is no abnormal thing to our workshop and when such occurs, it means we have a job. He dropped two sets of big rollers of what looked like a shaft. Of course, it is but it has no wheels except for the fact that it is connected to bearings at both ends. Let's leave this part as I would be explaining in details soon enough about the job.
Upon seeing the job, I hesitated to ask at first what these were but due to my inborn curiosity, I summoned the courage to ask.
What machine parts are these? the words fell out of my mouth. What I got was a pregnant look from the man that eventually birthed a question:
"Have you ever seen where aluminum roofs are painted? "
Not that I was surprised, as Nigerians, we mostly answer questions with questions.
This question was like the hardest question I have ever come across. Not because I had no idea how to apply paints but because I have actually never seen where one was painted before. I just stood blank and told him no.
But according to my thinking, there could be one or two guys with rollers and a bucket of paint who would keep applying that to every sheet that is or had been folded. But uttering that out would have made me say a dumb and a foolish thing. Of course, it could be done that way but for a company who produces tonnes of aluminum roofing sheets daily. That would be a lame thing to do, it has to be automated to hasten production.
The man took his time alongside some hefty guys to offload this metal part to our workshop alongside a material in which he would like to replicate. He then told me it was a part of the machine used in painting aluminum roofing sheets it is usually hung with the roller (the one he brought in) covered with paint rolls over it. And just like the traditional rollers used in painting your room, it covers it with the fresh paint on it.
Well from his explanation, I can only imagine since I do not work in his company I’m just a machinist.
Let me tell you about the job.
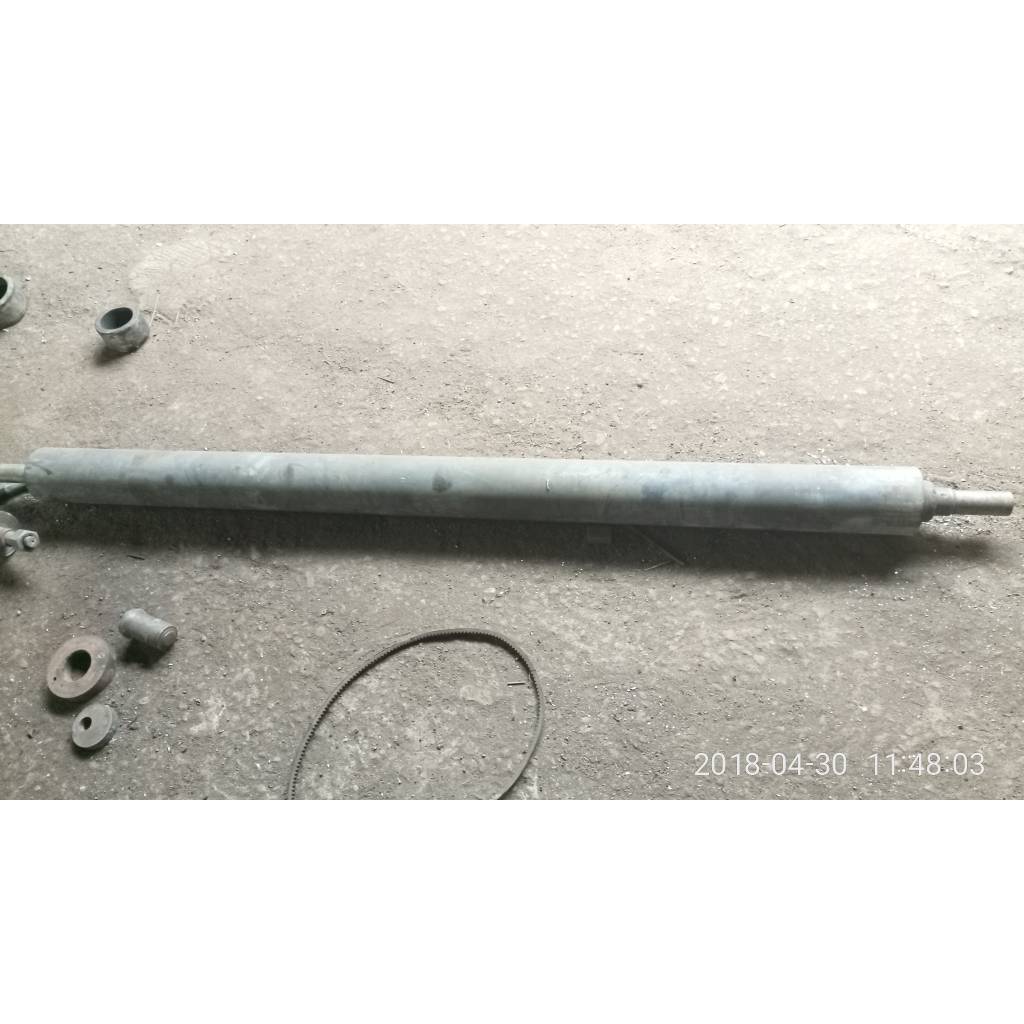
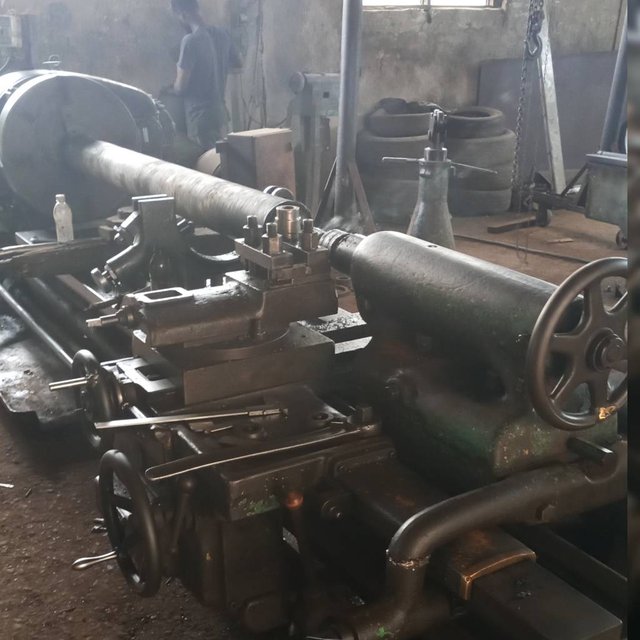
The huge heavy job
The job brought in by this man were two very heavy and long cylindrical job. It is made of mild steel and it was kind of a rusty one I guess it was a stale one in the shop where he got it and it had some rust on it. Well, I guess he was able to buy a part similar to it. All we had to do was replicate the sample he had brought along with it. Looking at both materials, I was shocked at how the machinist was going to handle or machine this job it was over 6ft long (actually that was not the original length). But from the image shown you could see how long it was, and for the first time I saw them bring out an equipment from the store called the “steady”.
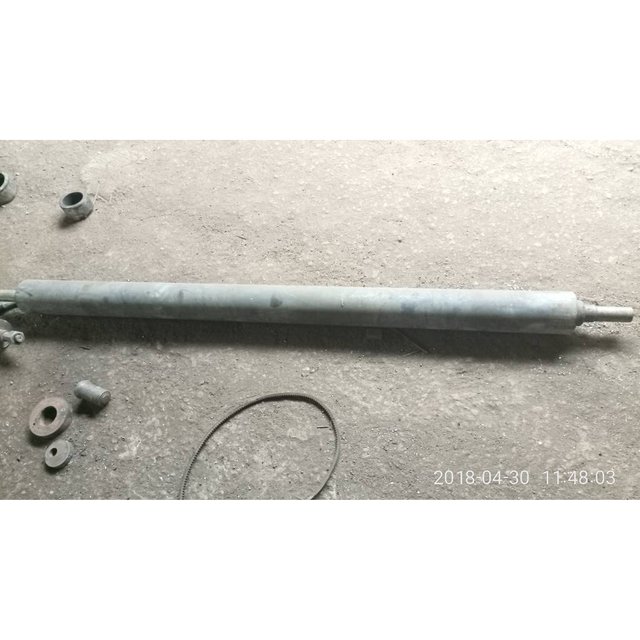
The job: image taken by me @adetola
Let me describe what the steady is
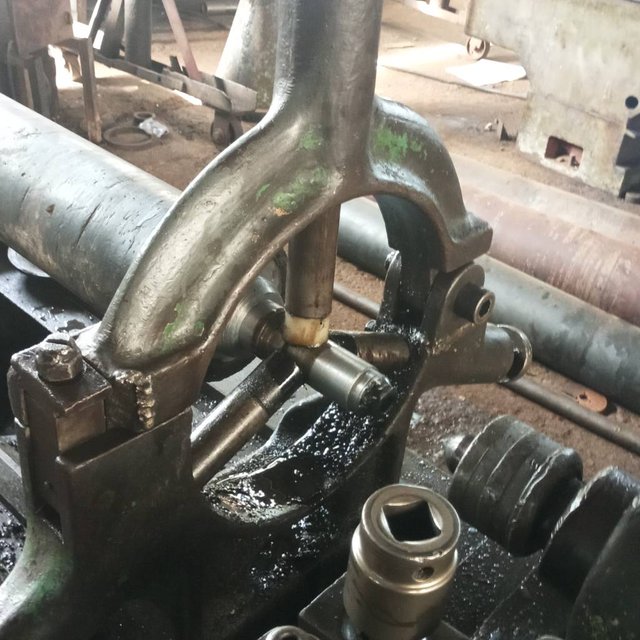
The steady on a lathe is used on lengthy materials on a lathe but it does not prevent the material from rotating but it allows rotation through it. It is round or circular with a base that sits on the lathe. This steady has a kind of adjustment in a star shape such that one comes from the top and two from the side it is these screw adjustments that holds. The long end of the three jaw chuck in place and also allows the rotation of the spindle to pass through it. Awesome if you ask me but mind you the job material must be aligned and straight to enable a smooth and balanced rotation of the workpiece.
The tools used to carry out the operation included:
- The cutting tool (H.S.S)
- The measuring equipment in the form of vernier caliper
- File and sandpaper for smoothing
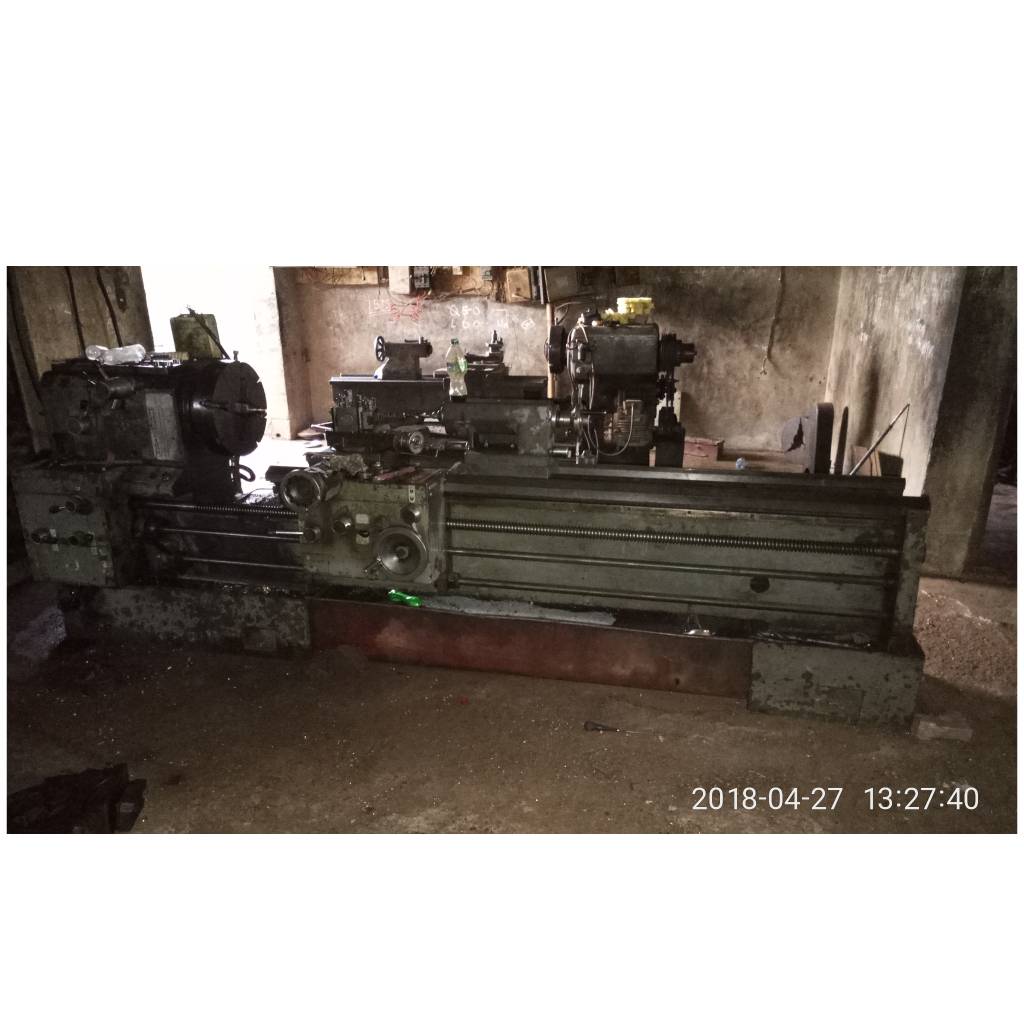
The lathe machine: image taken by me @adetola

Step by step operation
The first thing done was to mark out the center of this material and this was done automatically by the other end of the lathe called the tailstock. On the tailstock, there is a hub for insertion of different types of tools and the one which was used in this case was the center punch tool. The tool is similar to the drill except for the fact that it has its end thick and the pointed edge blunt, unlike the drill. The center punch in the tailstock was just pushed to meet the material in the three jaw chuck. And it was bolted down in a way that it wouldn't move.
Note: measurements were carried out several times to achieve precision in the work being carried out.
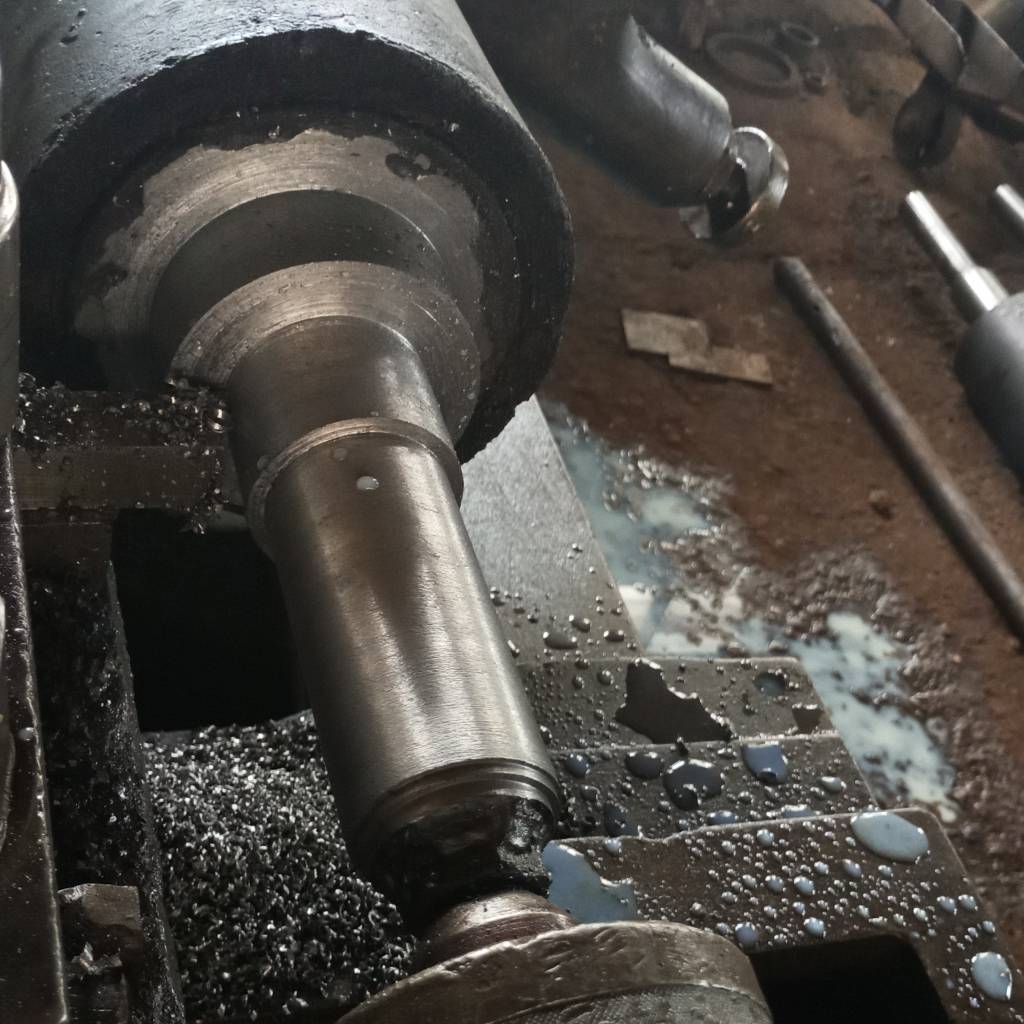
The first operation carried out was the turning operation.
Turning operation.
If you read my post on creating a bottling part of a machine. The turning operation was discussed there but I would still do a quick recap of the operation, it is like having a snake shell of its old skin or scale for a new one or just the way your hands peel off or sheds off its old one for a new one. The turning operation can be compared to that but it is different in engineering when you do such you have reduced the diameter of that cylindrical part meaning the size is no longer the same as it used to be. But with the naked eye, you barely notice it.
With the turning tool placed and tightened in the tool post. The tool post carefully is being allowed to meet with the material as the surface is being removed or torn off by the cutting tool. The outcome gives a fresh surface of the part to be reduced as the tool post is being controlled to move in the direction of the marked portion of work.
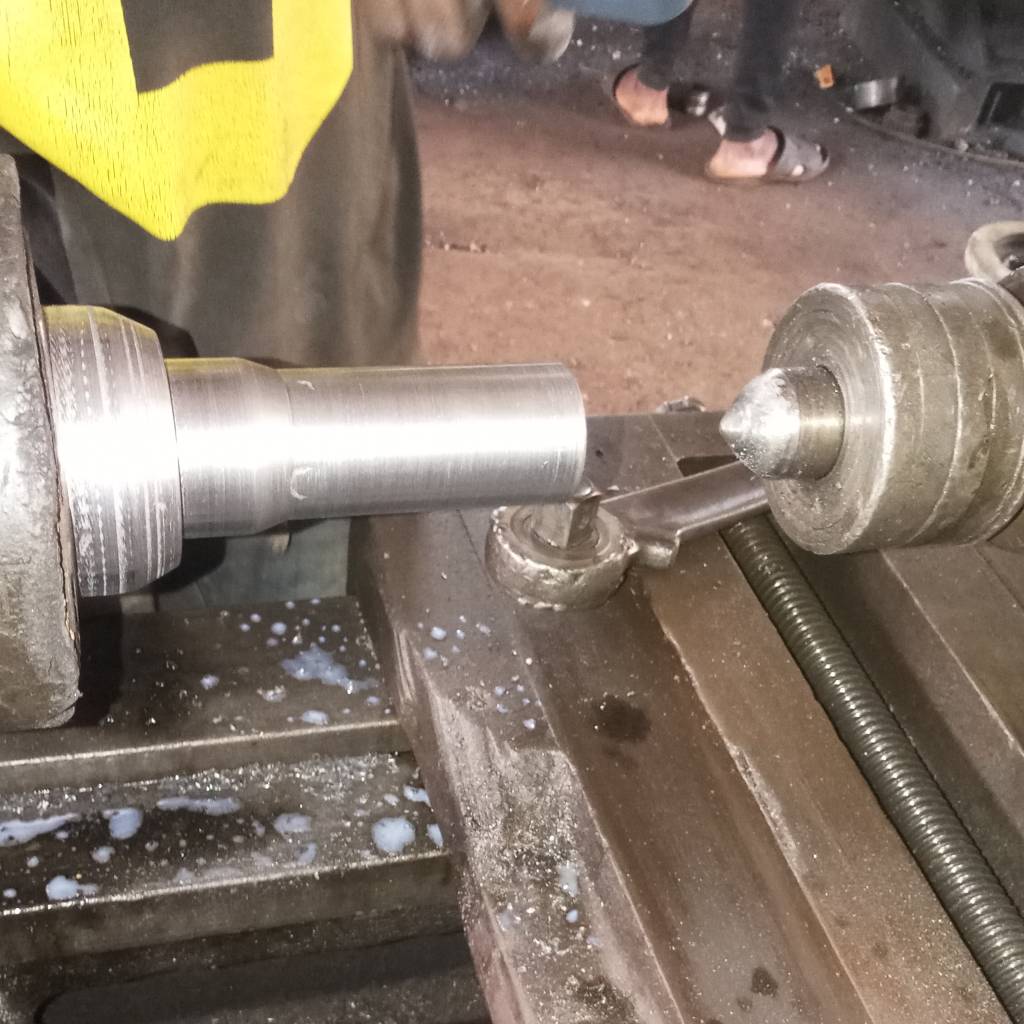
The next operation carried out was step turning
The step-turning operation.

Step turning as the name sounds is just creating steps on the cylindrical body of the material where needed. Just like coming from a lower ground to a higher one in what steps do, or look like so also is this operation. It is done such that a particular portion of the diameter is reduced than another portion. This operation requires skill and one being careful to prevent the tool from breaking as it approaches a thicker diameter and like I said in the first volume materials are fed gradually to the tool and not otherwise. The steps were formed in 3 steps depending on the length of the original part and they have formed accordingly. The awesome thing is that the same HSS (if you remember, I wrote about them last week) tool used to carry out the turning operation is the same used for step turning.
The chamfering operation
.jpeg)
You must have seen a step or a staircase as it may be called in your country or location. But as for most Nigerians its called step, this must have happened to you before probably climbing one and you mistakenly miss a step on a staircase, your knee brushes the sharp edge of the stairs. It hurts right?
Well, this would have been different if the edge was chamfered, by chamfer I mean removing of that sharp edge that forms the 90-degree angle and replacing with a curved edge is such a way that it won't be able to hurt you. But this is not why we actually did such, we did such just to get rid of the sharp edge so our bearing or the bearing for the metal part can fit directly or easily into the space provided.
The same facing tool can be used for chamfer just that the tool post is adjusted in such a way that the tip of the tool meets with the sharp edge of the step produced earlier. The operator then positions the tool post in a cone-like manner (he adjusts the tool post in such a way that he controls both the horizontal and vertical movement of the tool post simultaneously) to give that almost round shape depending on the size of the original material. But this is done carefully to the other steps to prevent wastage of materials and shape the material in the way the original is.
The facing operation
If we are conversant with the church terms, you would have probably heard be born again and be a new man, the first time I heard such, I was confused myself but it just means changing for a better person. This can be likened to facing operation it is like having lumps and rough things on the faces let us call them sin. So it is like removing sin to give a shiny and neat surface to the material and in our case, the turned material is now simply born again!
The mild steel surface has a shiny new smooth surface with a smaller diameter than it used to be. Well, every part is still slightly large than they are measured so we have to finish the surface.
Note: During these operations, there was an application of a cutting fluid i.e. The fluid I talked about which brings down the temperature of the cutting tool and reduces friction between the tool surface and the material being machined. sometimes oil is being used so don't be surprised if you watch any of my videos and you see lubrication oil being applied to the tool surface.
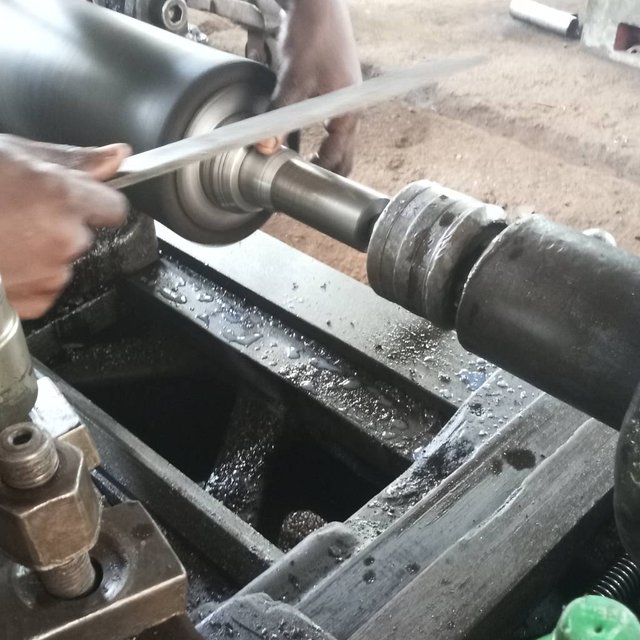
The finishing operation.
Well, this is the last phase of the project it involves blending and putting the final touches on the material surface before the bearing is tried on. The finishing of the surface is done with either a file or a sandpaper to remove all little pieces of metal that may hurt or cause damage to either the bearing or anyone that rubs his/her palm on the surface of the material.
This same process is repeated to the other end of the material as both ends are placed inside a bearing for them to rotate freely and paint an aluminum surface.
Watch this video I made below to see how some machining operations were carried out.
My Image gallery


What have you learned
I would say today you have learned about a machine part used in carrying out the painting of the aluminum roofing sheet and how this material was processed using several tools and machining operation to do the job.
This shows the superiority and the power the lathe machine has and the problems it has been solving worldwide.
If you just read that, you have come to an end of another episode of my day in the workshop. I hope to bring you more soon. Thank you for reading.

References
For further readings about where i got informations from follow this links or get these books
- lathe turning operation
- machining handbook
- lathe operations; chamfering
- step turning on lathe
- the art of creation
- high speed drilling
- Machine Tools - Dr. R. Kesavan
All images and videos were taken and made by me and are products of the infinix zero 5 camera.
If you write STEM (Science, Technology, Engineering, and Mathematics) related posts, consider joining #steemSTEM on steemit chat or discord here. If you are from Nigeria, you may want to include the #stemng tag in your post. You can visit this blog by @stemng for more details.

This is quite awesome. We would love to have more of this in the future.
No problem.. Would share more of my work soon. You might have to crave for it though? 😅
I need to buy a lathe so as to practice already, you took it in understandable and progressive lines....
Keep it up
Hehehe...getting a lathe would not be so bad there are so many parts that need to be reproduced daily. Just ensure to maintain and use for business purpose. Thank you for reading.
LOL sure..Business all the way! No one buys Lathe for fun...
Hehehe... Some people have too much money they can do whatever they like.
Lol. Not me sha... 🏃🏃
Makes me wonder, is there such a thing as a tabletop or hobby lathe? Maybe for turning softwood or wax?
This is truly an art, you did a fantastic job walking us through the process of machining.
Haha... I try my best to make it very simple.
Thanks for being here.
You are certainly welcome
This things looked vague while learning it in the lecture rooms.
Infact it was like punishment but now yoy have given us a workshop experience with accurately laid out photos....
Kudos!!!
Hehehe. Classrooms especially here in Nigeria do not get you everything in fact in engineering i would say it gives just 40% of what you should know. Its all abstract.
Thanks for stopping by
Wao
This is what I want to do in my further studies.... I enjoy reading this article
@adetola are you good with CNC as much as the manual lathe?
In CNC there is an exception
Well the CNC requires what they call G and M coding.. It requires computer knowledge and it's more perfect than the manual operation.. I know little about tge coding.
I made a post about it and the I got inspired by your works
truly, machining is an art and you just displayed one of the beauties of machining here.
nicely done sir!
Thank you sir.
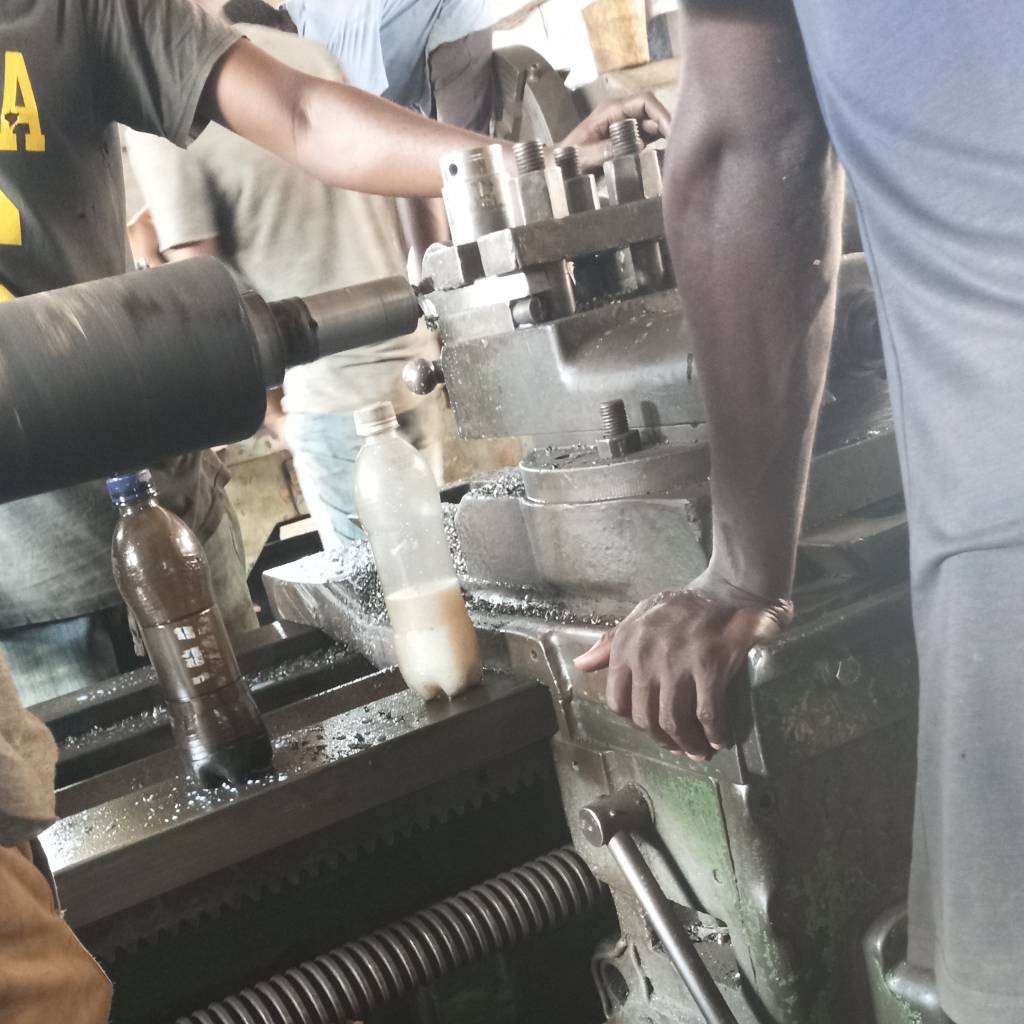
Machinist, is that what you guys are called?.And are you guys drinking zobo and kunun while working on your lathe machine? From picture number 4 😎
Yeah... Machinists.... Lol this one pass zobo o!
Its the cutting fluid sir.
This is a nice piece of work. I just kept imagining that I'm the one executing those jobs practically.
Nice Post sir. Keep it up
Thank you sir.. You always welcomed here.