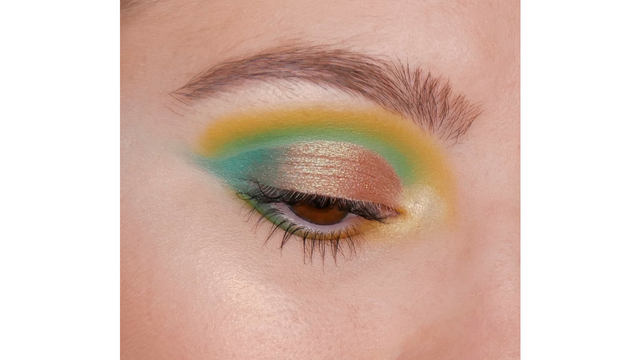
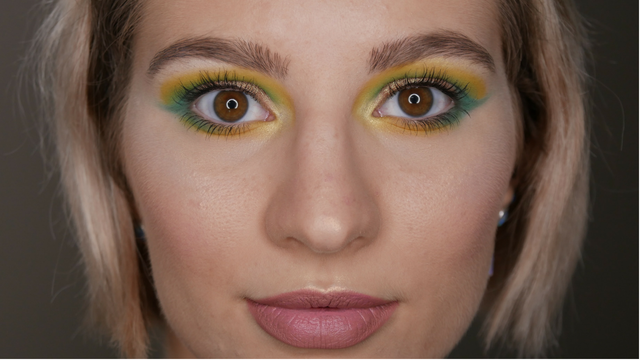
Green – Golden Cut Crease
Recently, I was thinking about what shades of eyeshadow I haven’t used at all. So, I was looking at some palettes to see if I did already used all of them, but I didn’t…
The first shade that popped up was green. Yep, green! I don’t know why but for some reason, I felt that green is a strange color to use for the eyes but I guess you could say this about every color. I don’t feel any connection with green even though I don’t mind that color at all!
Most of you know that I love blues! Doesn’t matter if it’s dark or light, any kind of blue is beautiful for me but I don’t feel the same with green.
This is where I thought that I should give it a go and try to create a makeup look with various greens and so, I did!
Let’s start:
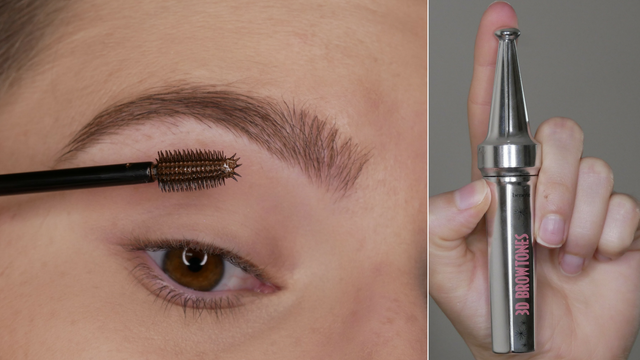
Step 1: Brows.
I started off by applying some tinted brow gel through my brow hairs to make them stay in place all day long, as well as keeping them very natural and not too overdone.
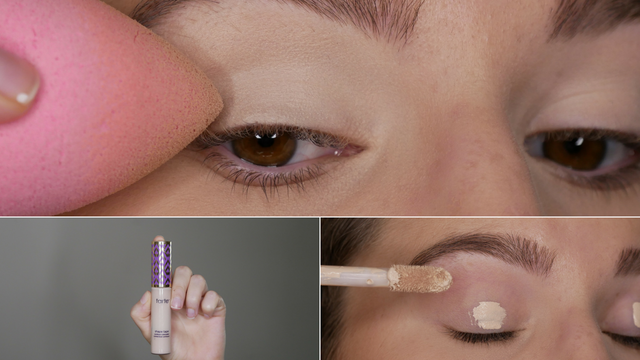
Step 2: Concealer.
Get a concealer that’s lighter than your skin tone and apply it to the entire eyelid area, then blend it with a damp sponge or eyeshadow brush into the skin.
The reason why I said the concealer should be lighter than your skin tone is because then the colorful shadows will show off even more!
Don’t set the concealer with any powder!
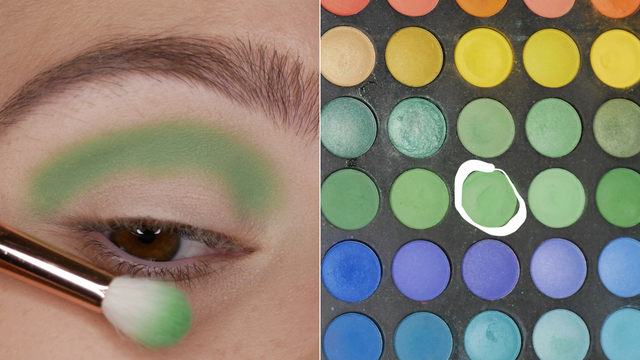
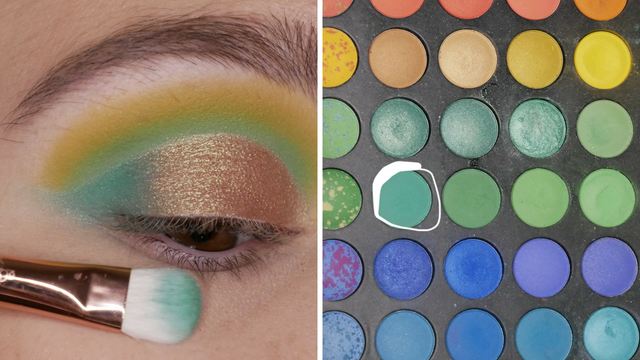
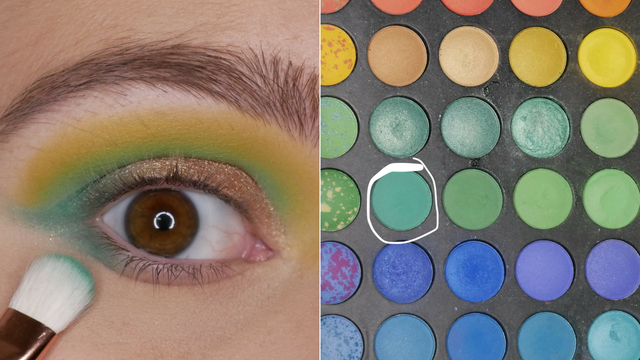
Step 3: Grass Green.
For the crease area, I went into some grass green eyeshadow and dabbed it at first in my crease. I went from the outer to the inner corner of my crease.
You shouldn’t have set the concealer with powder so that the green eyeshadow will stick to the concealer and the pigmentation of the shadow is more intense.
After you dabbed the shadow through the crease, you can blend it now a bit further to avoid any harsh lines. Get it a bit over the crease so that the shade can be seen when you look straight ahead.
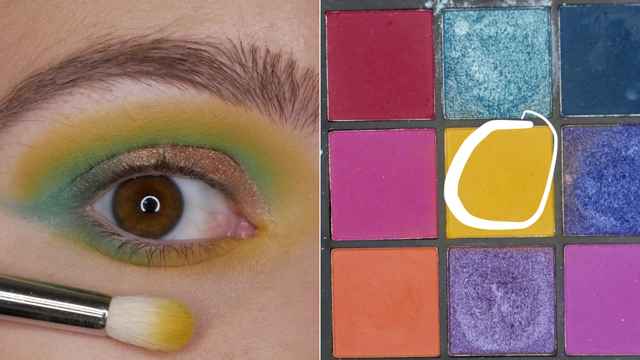
Step 4: Yellow.
Let’s add another shade above the green, how about yellow?
Add some yellow above the green and blend them together and at the same time, fade out the yellow a bit more towards the brows to make it look very soft.

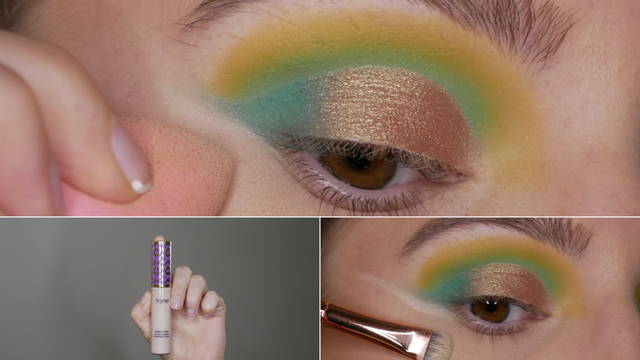
Step 5: Cut The Crease.
Now, we are ready to cut the crease to make the look amazing!
Take some concealer on the back of your hand and grab a concealer or eyeshadow brush to cut the crease with.
Apply at first a bit of concealer to the brush and then apply this on the main lid area/ mobile lid, just a bit. Now open your eyes very big so that the concealer will touch the crease and this is how you can find the crease and how far up you can go with the concealer.
If you find the guide line, fill in the main lid area with concealer but do not set it with powder!

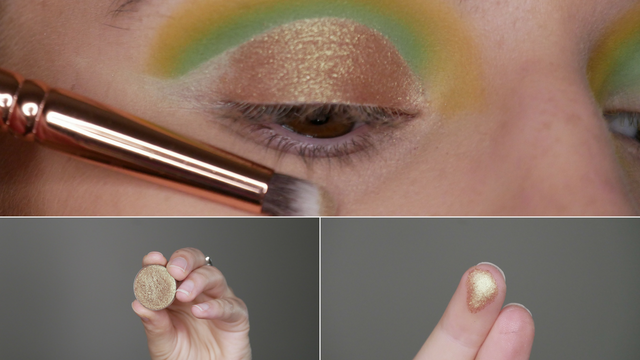
Step 6: Golden-Green.
I went for a golden shimmery shade that shifts into a greenish shade. If you found a shade for yourself, apply it with your finger and later on with a smaller brush to nicely cut the crease.
Just follow the concealed area.
Apply that shade from the inner corner, nearly all the way to the outer corner but stop a bit before getting to the outer corner.
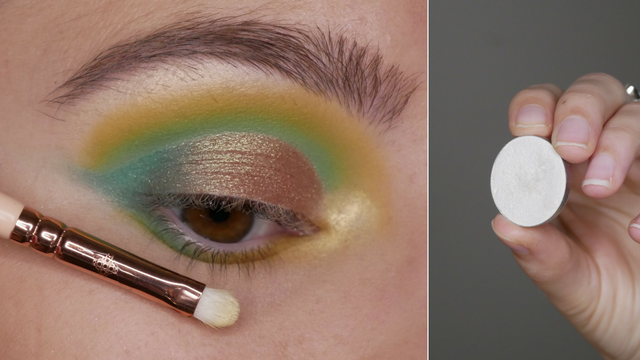
Step 7: Dark Green.
Adding a darker shade to the outer corner will add some depth to the look. I’ve applied it with a flat eyeshadow brush.
Step 8: Concealer again.
Use a flat or thin eyeshadow brush to clean up under the dark green area to create a bit more of a winged eyeliner looking shape.
Blend the concealer into the skin with a brush or dampened sponge.
Step 9: Dark Green Again.
With the same brush as earlier, I then applied the dark green on my lower lash line as well but only at the outer corner and connected it with the outer corner.
Step 10: Yellow again.
With the same brush that I used for yellow, I then blended the same shade again on the lower lash line and blended it into the dark green.
Step 11: Highlighter.
For highlighter, I went ahead and applied a white shimmery to shifting yellow shade in the inner corner and on my brow bone but you can also highlight the rest of your face with it.
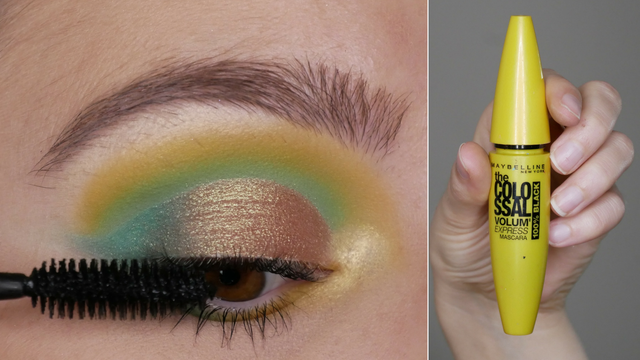
Step 12: Mascara.
Add a few coats of mascara and you rock the eye makeup look!
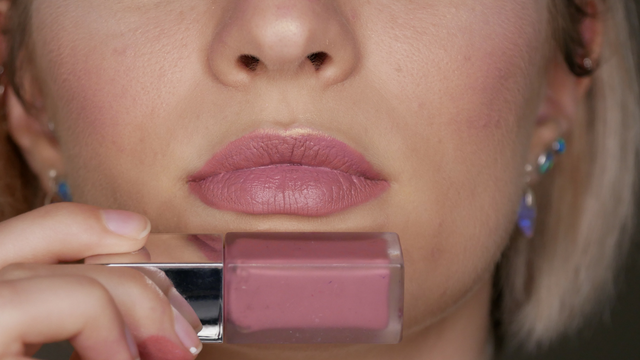
Step 13: Lips.
I personally added a light pink liquid lipstick to my lips because there so much going on with my eyes right now and I do not want to take the attention away from it!
I’ve never worked with green eyeshadows before but I’m impressed how different I personally look with those shades. For some reason, I feel like a stranger to myself….
Thank you,
xoxo, Melissa
Follow me on Twitter
Follow me on Facebook
Subscribe to my YouTube Channel
ALL MAKEUP GEEKS, feel free to RESTEEM this article! Let's keep spreading the word with real life everyday makeup application!
If you're someone who needs recognition for amazing an special content, don't be afraid to join the Promo-Mentor Channel