My Brow Routine
For today’s article, I would like to share my brow routine with you guys! This is neither an Instagram Brow Look nor a very Natural Brow Look. It’s something in between, and I hope you enjoy it.
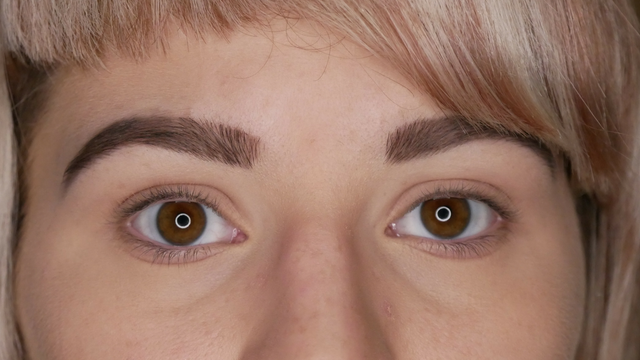
I'm going to follow these steps to get a look that is more of a special, full-on makeup look. Just because it’s more like a full-on makeup look brow doesn’t mean that I rarely do it; it implies that this brown routine isn’t a natural-looking brow.
Let’s start:
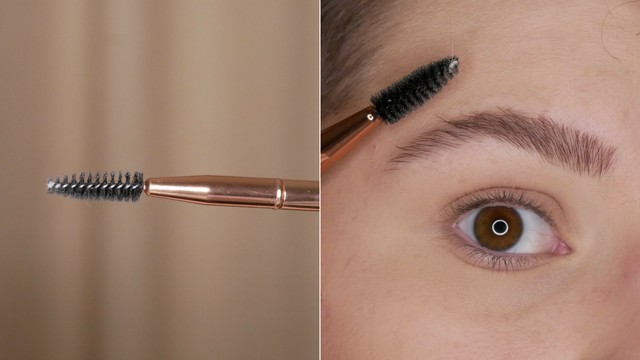
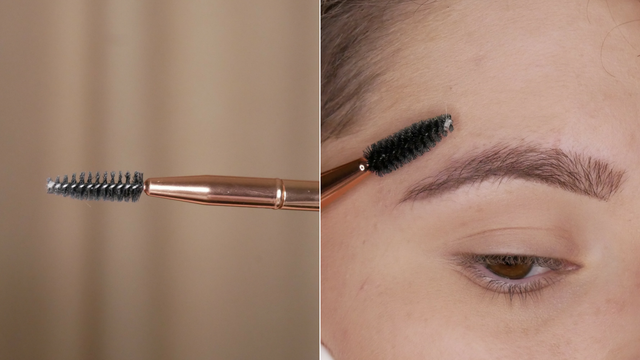
Step 1: Brush Up.
To start with, you need to get yourself a spoolie. It is sometimes on a brow pencil, but you also can get it separately.
Take your spoolie and brush it upwards through your brow hairs.
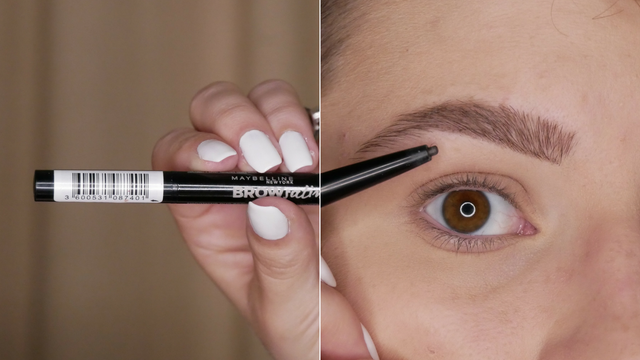
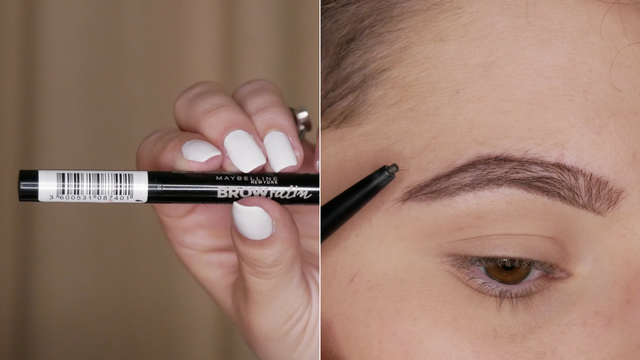
Step 2: Bottom Line.
Get your brow pencil to create the first bottom line. I prefer a brow pencil that isn’t that thick because you can create a beautiful line if you have a precise tip and know how to control it.
From the front bottom corner of your brow, draw a straight line until you reach the “bottom” arch. Use less pressure on the front part but more towards the rest of your brow.
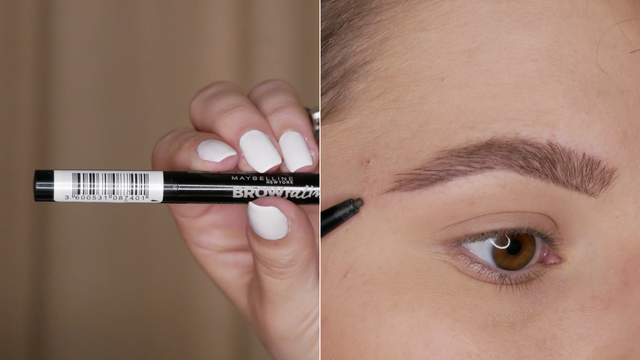
Step 3: Second Bottom Line.
Now from the “bottom” arch, create a second line towards the bottom brow tail. Do not add any curve to the bottom line; create two straight light-handed lines.
The brow tail can always be a little more intense and darker than the front part.
Step 4: Brush Down.
Take your spoolie and brush all the brow hairs downwards.
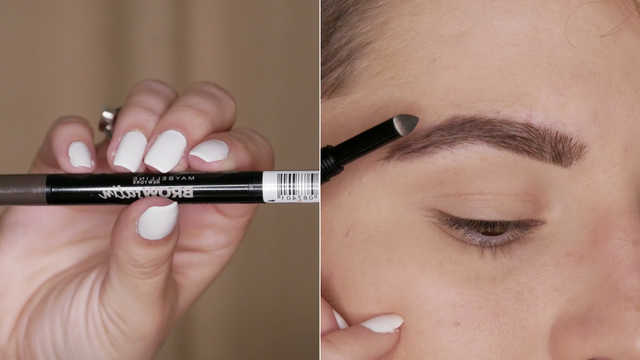
Step 5: Top Line.
For the top front part, I left some space so that it won't look too harsh. And that’s why I started a bit more towards the mid-top section of my brow.
You’re just repeating the same steps that we did on the bottom. One straight line towards the arch and the other one from the arch to the brow tail.
Your arch may look a little pointy and triangular, but wait as we’ll come to this shortly!
If necessary, you can emphasise your arch a bit more by adding more shape to it with the brow pencil.
Make sure that the end of your brow tail makes a sharp tip. By this, I mean that the two lines from the tail should touch each other at the end.
Step 6: Fill in.
The Maybelline brow pencil with me has on one side the pencil, and on the other, a sponge-like applicator and brow powder can come out of it.
You can make use of brow pomade, brow powder, the eyeshadow in your brow shade or the brow pencil. I wouldn’t use the brow pencil for the whole brow because that can look very harsh.
I suggest that you fill in your brows with brow powder or eyeshadow.
I’m going with the one on my brow pencil.
Keep it soft at the front and add little more depth to the end.
And always go back and forth with the spoolie to blend the lines and powder into each other and between the brow hairs.
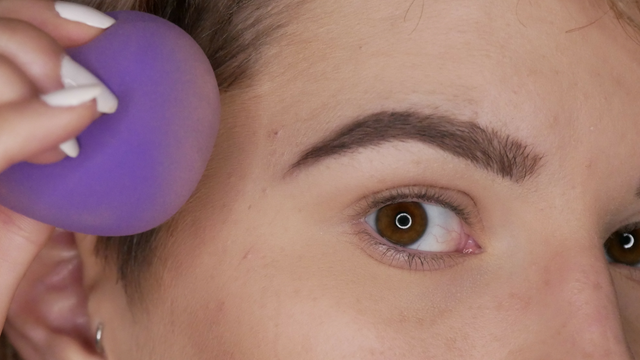
Step 7: Clean Up.
With a brush or angled brush and some concealer, you can now clean up around your brow to make it clean and crisp.
Do not use too much concealer or you won't be able to blend it back into the skin.
Shape your arch with the concealer and the brush. If it is not pointy enough, you can get it a little more, or if you want to keep it a bit more rounded, you can do this too!

Step 8: Foundation.
With the leftover on your foundation brush or sponge, you now can go over your brows with just a tiny bit. Let it be more at the front part than the rest of your brow. This will give it a look that is more natural, greyish and washed out.
Step 9: Brow Gel.
And the last step! Set your brows with a clear or tinted brow gel. This way, you can easily control your brow hairs and make them stay in place.

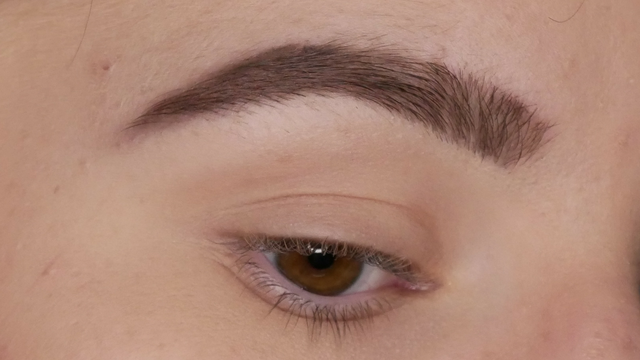
So, that was the in-depth Eyebrow Tutorial on my Brow Routine! Once you get the hang of it, it will take you just a few minutes to get it done! Practice every day, and you’ll see how much you’ll improve!
Good Luck!
Exceptional Communities on Steem


Exceptional Services an Dapps On Steem


Join The Ecological Movement Become a Part Of


 |
| |
| |
| |
|
@resteemator is a new bot casting votes for its followers. Follow @resteemator and vote this comment to increase your chance to be voted in the future!
I love your work! I don't typically use lots of makeup, but really enjoy learning about these techniques. Especially this one!
I want you to recommend the best software to check cryptocurrency status in real time - https://masscoinapp.com/