Recording a Big Rock drum sound in the studio
It's been an exciting week working on a project from a brand new band. The band want to keep the project under wraps so I can't name any names, however I can say that it both the drummer and bassist from from the major metal band 'Skindred' have played a heavy role in the production and arrangement of the music.
James Loughery was the producer for this EP. He has worked with the likes of Bjork, Lionel Richie and Def Leppard in studios across the world. It was a great experience to meet him and pick up some tips a long the way.
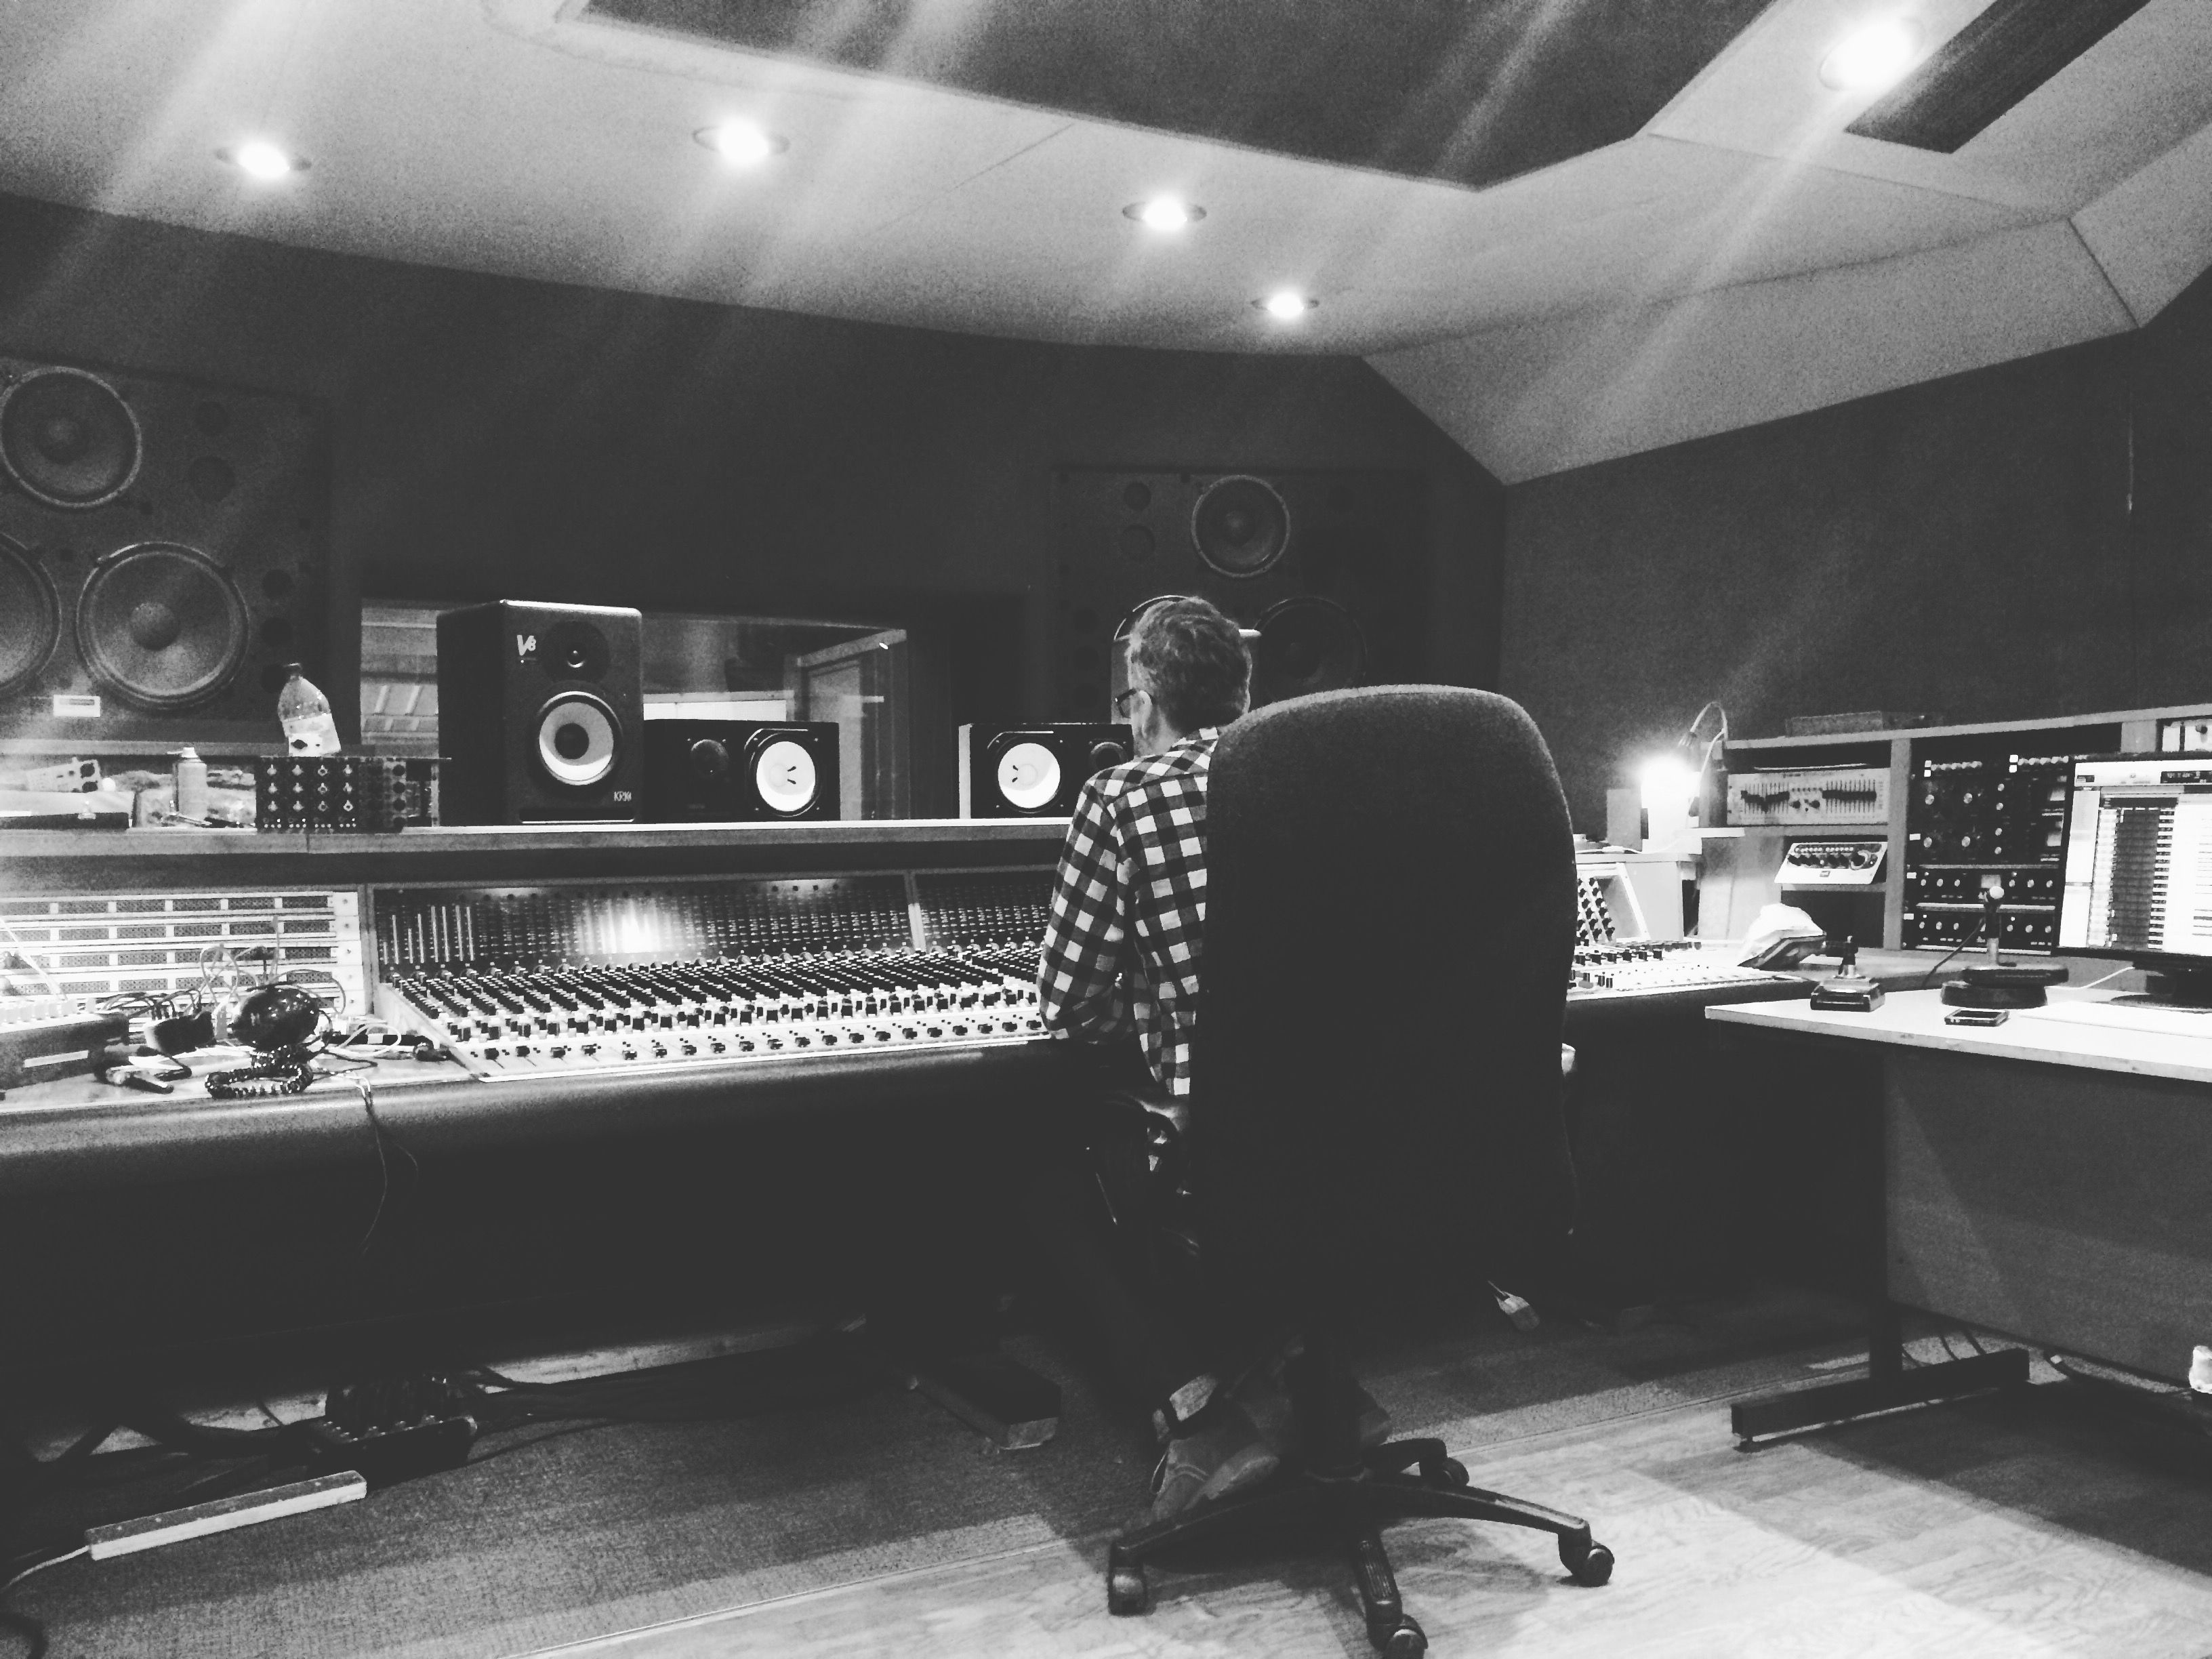
The band wanted to achieve a big, classic Rock sound that was reminiscent of 70's bands such as AC/DC, 10cc and Pink Floyd. I would characterise this sound as very bottom heavy, with accentuated transients due to the heavy playing style. The drums had to sound full and bright to cut through the dense mix of guitars, bass and vocals . They were the driving force behind every track and they were certainly doing so once we had established a drum sound! So, how did we do it?

I'm going to talk you through this as if we were mic'ing up the drum kit together and do my best to convey what I was hearing on the day.
We started with the Kick drum.
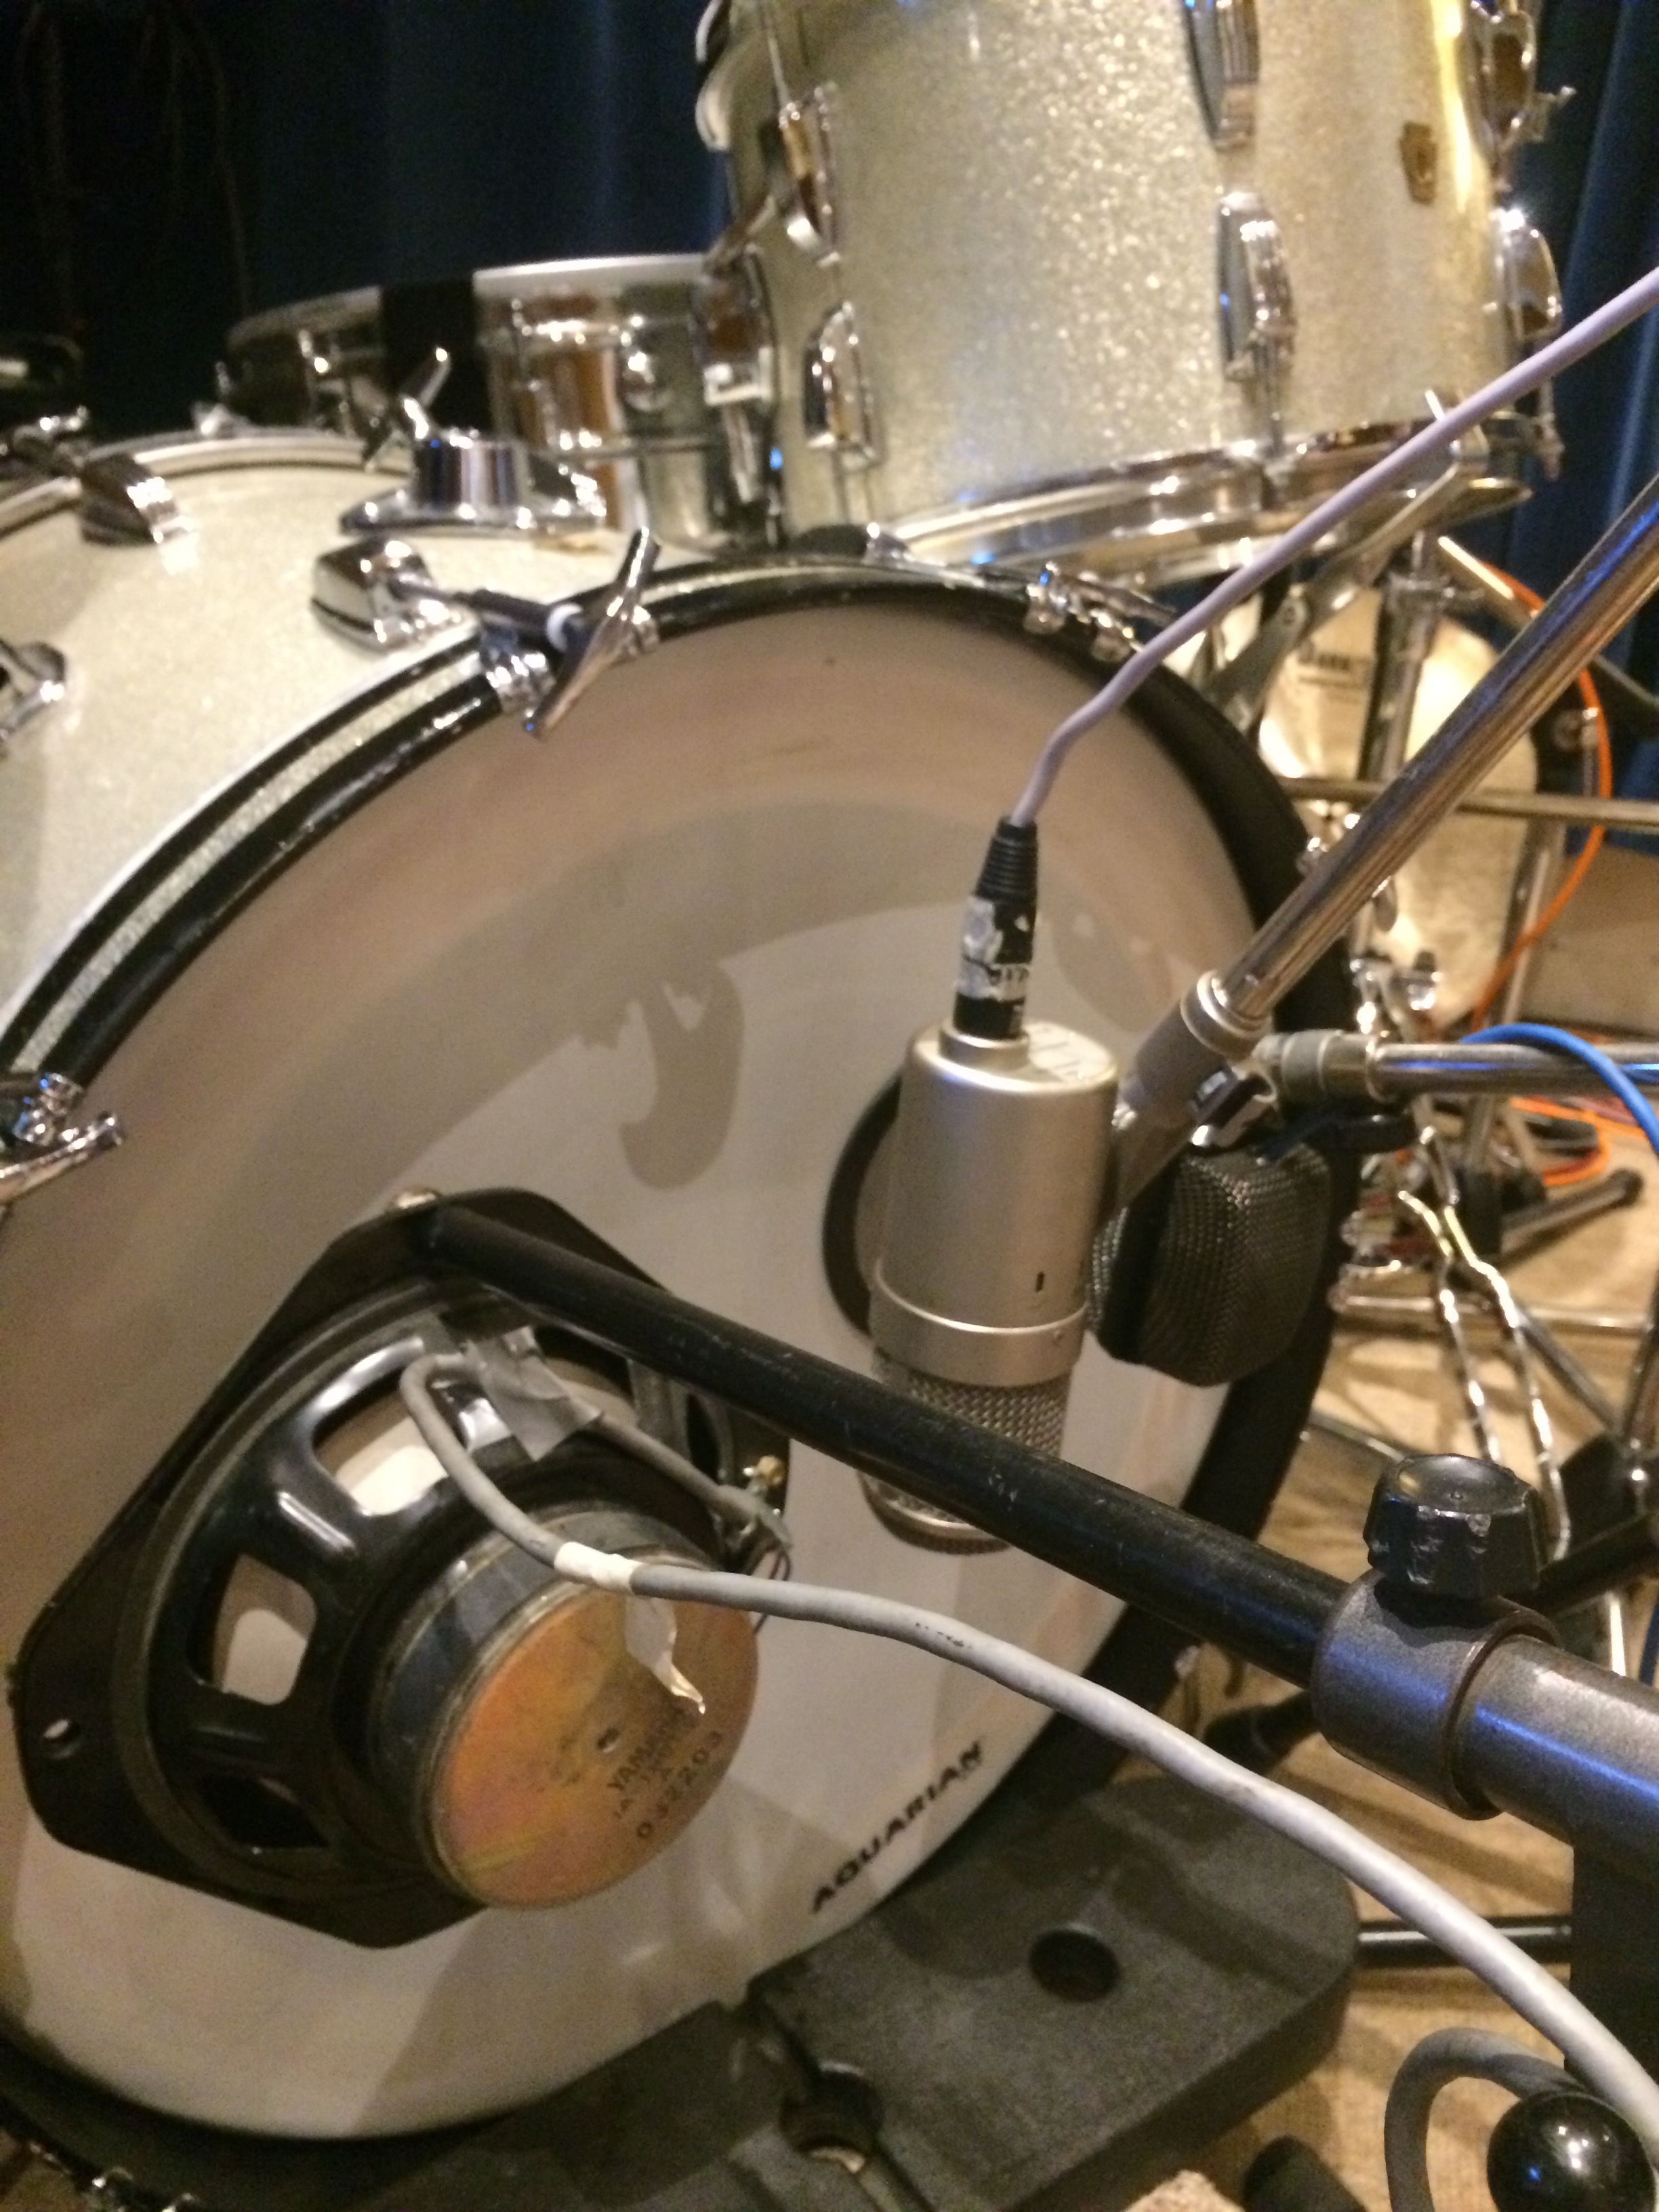
This was a beautiful 1960's 20x20 kick that had a very tight transient and a bottom end that punched me in the chest. You can see from the previous picture that the kick was backed in to the corner of a semi-dead live room. This was not a random placement; we played the kick at various distances from the corner of the room and difference in sound was remarkable! pushing the kit too far in to the corner produced an undefined tone with too much low end energy. bringing it more than 2 meters out produced a musical, pleasing tone which lacked the bass that we'd previously experienced. We found that keeping the kit approximately 110cm from the corner of the room created a healthy balance between midrange tone and low end energy that defined its place in the context of the track.
The differing tone of the bass drum according to it's position in the room was due to the way that bass frequencies interact with a room surfaces and the 'standing waves' that occur as a result of it. A 60 Hz sine wave has a wavelength of 5.7333. meters; now imagine that the kick drum is pushing out one of these sine waves approximately every second when played in a rhythmic fashion. Thats a lot of low end energy waves moving around the room, interacting and summing together to produce a perceived increase in bass energy. You can read more on studio acoustics here: https://ask.audio/articles/studio-acoustics-part-2-standing-waves
We used three microphones to capture the kick drum. First was an AKG D12 placed 2 inches from the front port. This was ideal for catching the initial transient and midrange frequencies. Next door was the Neumann FET 47, which was placed at the exact same distance as the D12 to maintain phase alignment. The FET 47 captured a lot of low end and delivered detail in a very powerful way. This was due to the high gain ceiling of a FET 47, allowing us to push the pre amplification without overloading the signal path. Last up was a kick drum classic; A Yamaha NS10 speaker cone with the polarity flipped. Doing so switches the cone from a sound emitting transducer in to a microphone. It's not very detailed but its technically got a bigger sound capturing diaphragm than any microphone out there, making it ideal for recording low frequency material. Remember that corner I was talking about earlier? We had that covered too with a Coles 4038 ribbon mic, which was the ideal tool for this application as ribbon mics naturally capture a lot of low end. They also have a polar pattern that resembles a 'figure of 8' meaning that in this recording, it was capturing both the direct sound of the kit and the low end reflections from the wall and corner behind it.
All 4 of these mics were mixed in to a balanced, weighted kick sound that was greater than the sum of it's parts.
Next up was Snare.
A lot of time went in to selecting the right snare for the tracks. The wrong snare tone can stick out and totally ruin the flow and rhythm of the track, so its very important to test out snare selections and tunings in the context of the music as a whole.
For this track, James wanted to get weighted snare tone with a very short sustain and minimal resonance. To achieve this, we taped an upside-down snare skin to the top of the snare drum and muted unwanted resonance and ring.
We used two microphones to capture the snare drum. On top we had a Beyer M260 and the bottom was covered by a Sennheiser 441. The M260 is a hypercardioid ribbon mic, making it ideal for snare due to it's mid range focused frequency response and directionality.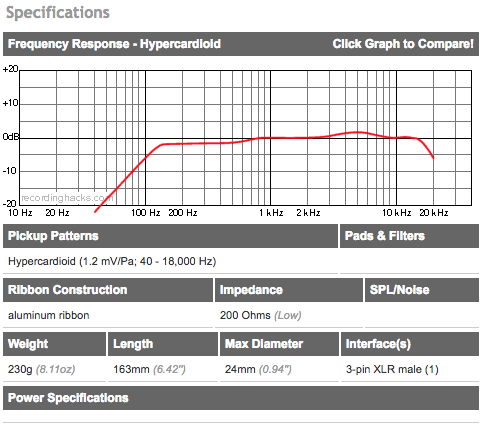
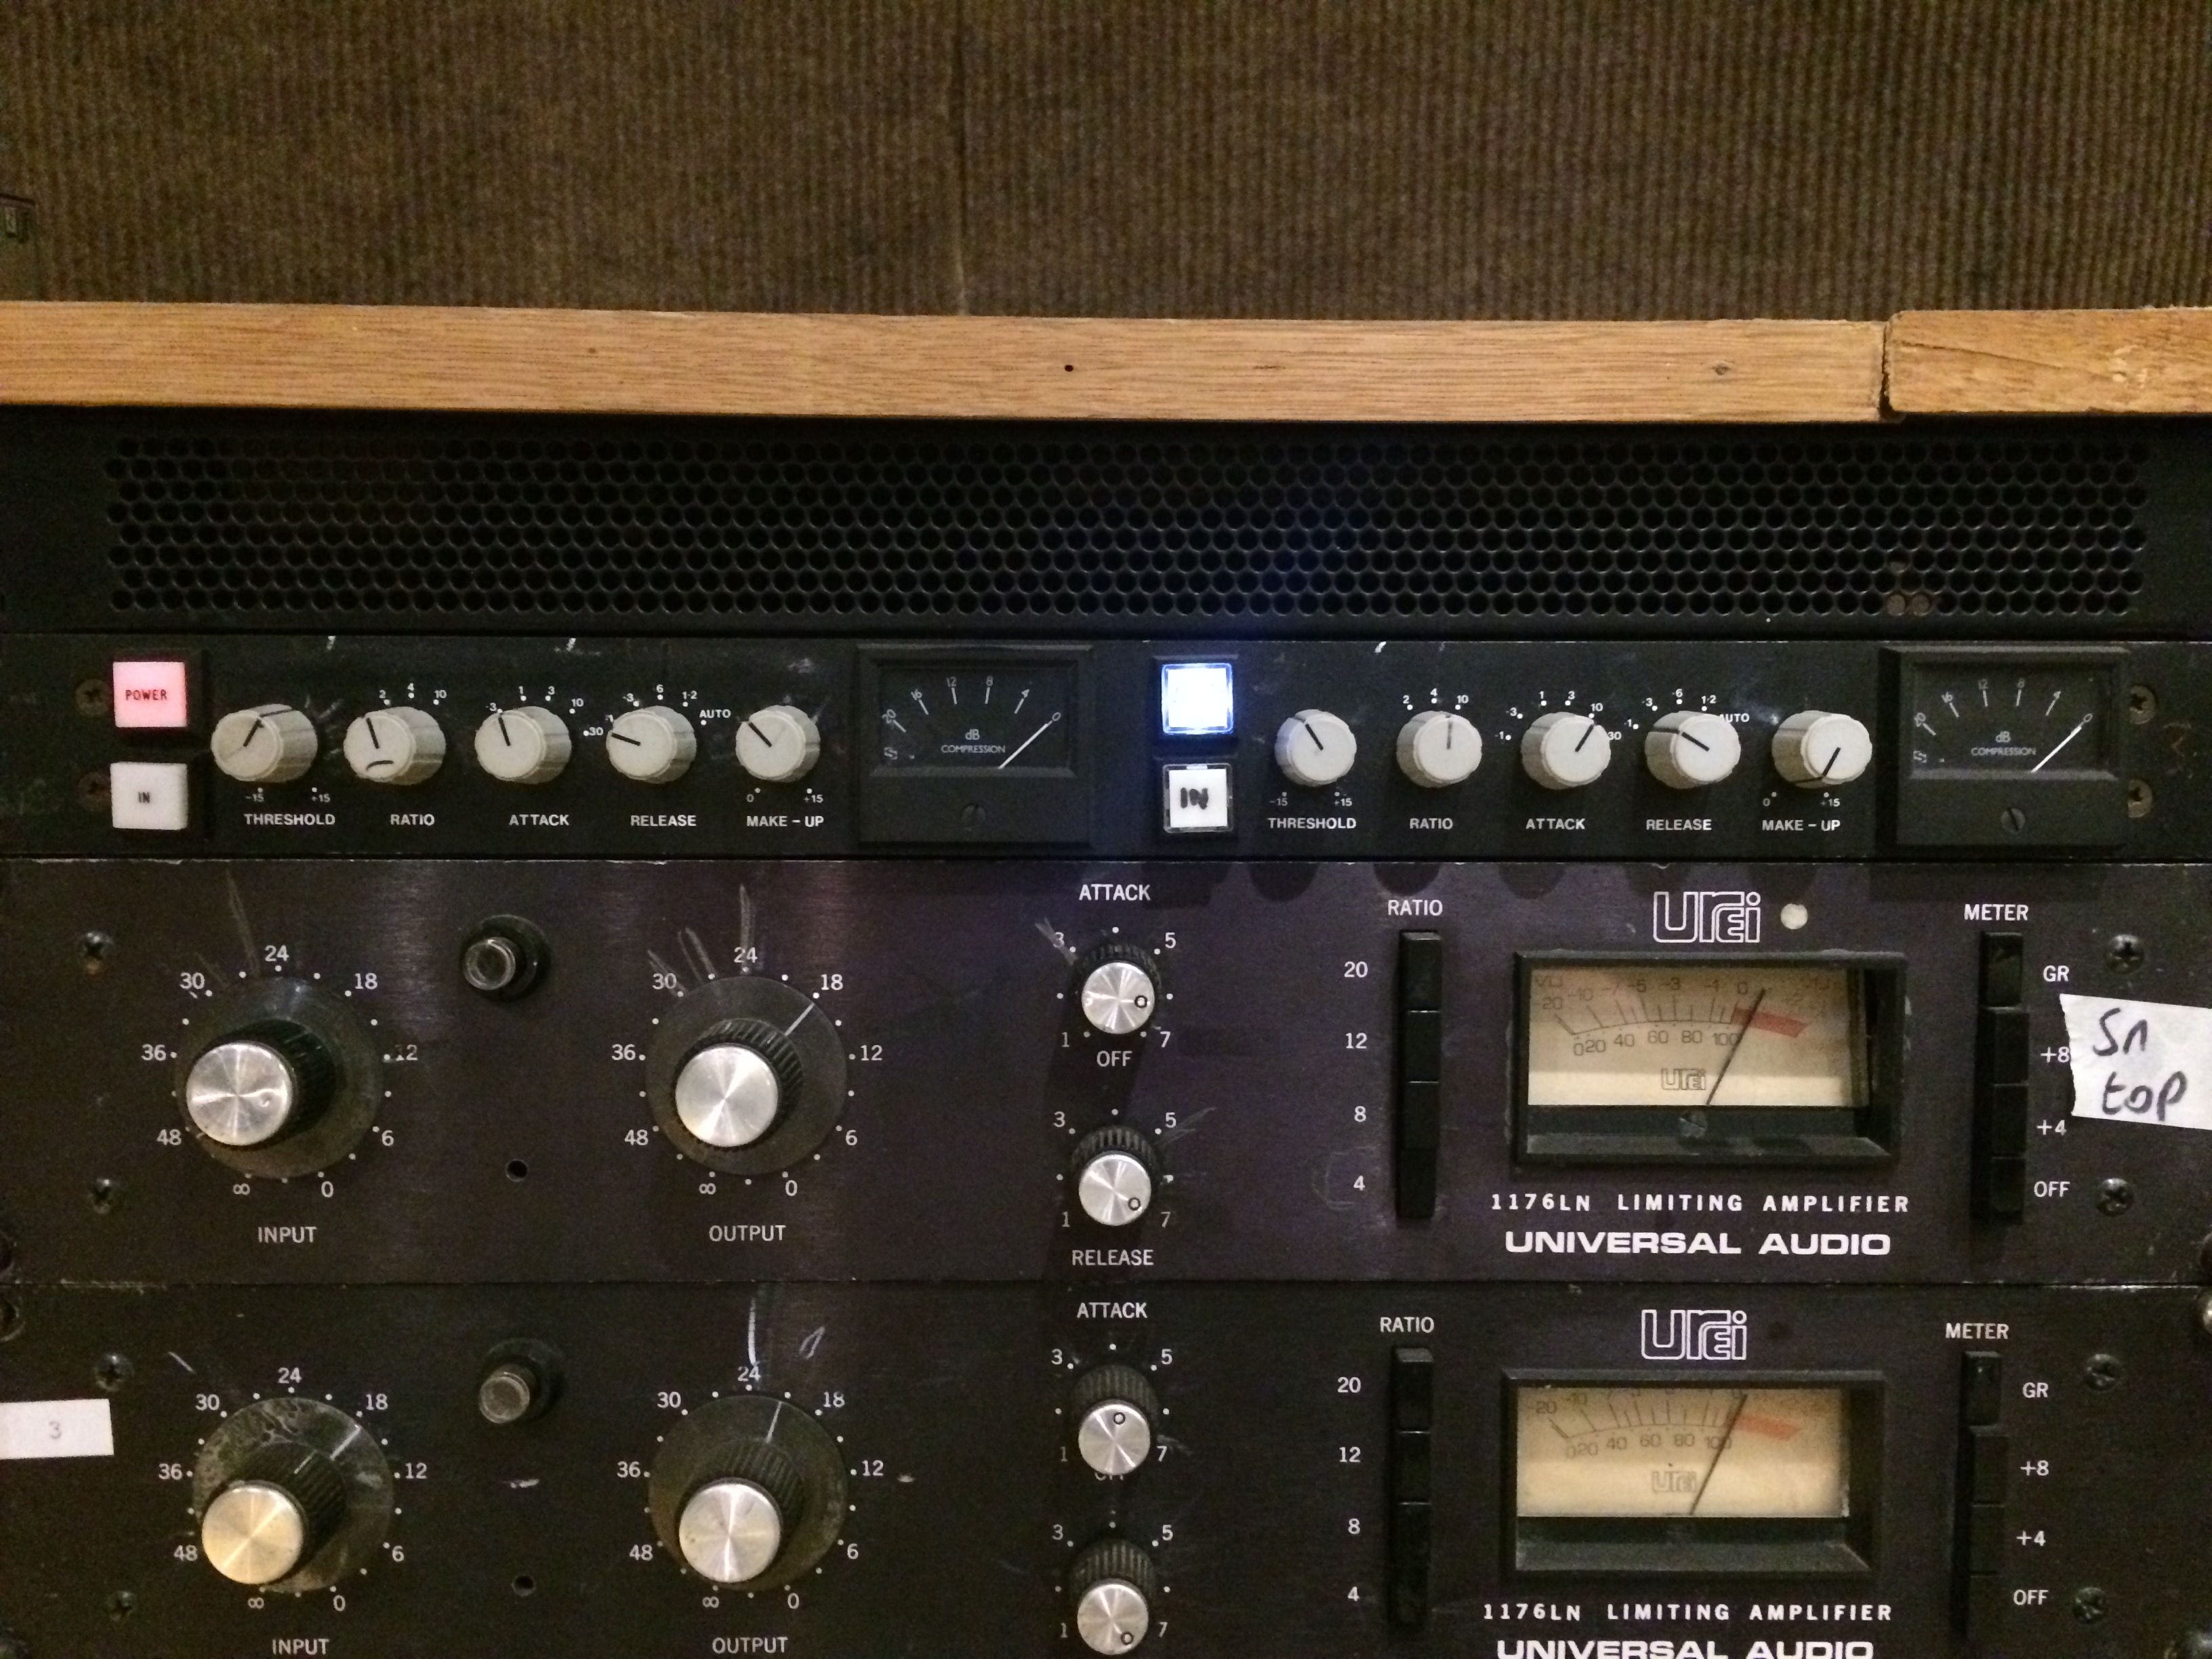
The emphasis around 4 to 6 KHz made for a naturally bright snare recording. To capture the underside of the snare, I would personally go for a small diaphragm directional condenser microphone such as a Neumann KM184. However, going with the 441 on this occasion opened my eyes to the sonically pleasing transient response of a dynamic microphone. The slower moving coil of a dynamic mic applies a natural compression to a transient and can reduce the harshness of a particularly harsh or bright sound (such as snare wires). Its worth noting that we also used dynamic microphones on the hi-hat and tambourine. These are areas where I would commonly use a small diaphragm condenser, however their characteristic suited this particular drum sound very well. The two mic signals were summed to a single channel and sent through a blackface 1176 compressor. The compressor was attenuating around 5 dB with a mid-speed attack, which allowed the transient to breathe and a fast release, which gave the snare an aggressive character with subtle saturation.
Toms
We used a pair of Neumann TLM 103 large diaphragm condensers for the rack and floor toms. Not too much to report here other than that they sounded very open and captured the full frequency spectrum of both toms. However it is worth noting that these channels should be gated fairly heavily as the mics are very undirectional and capture a lot of spill. Phase coherency issues could be encountered without appropriate gating.
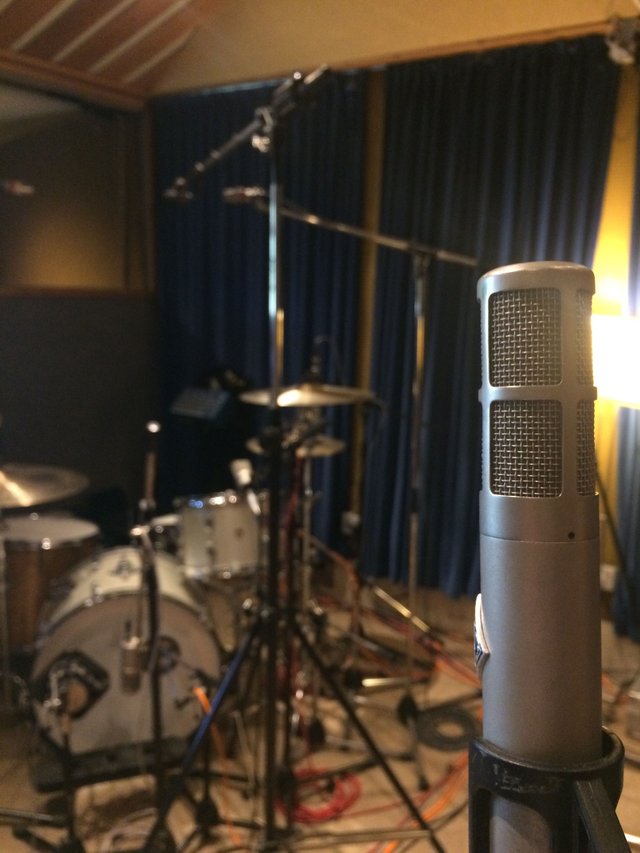
Next up was Overheads. James went with the popular choice of the AKG C12a valve stereo pair. The character of the music called for bright, aggressive drums and these mics captured that sound flawlessly. As they are powered valve condenser mics, they are highly sensitive with a very fast transient response, so every detail of that drum kit was captured to provide a stereo image to our drum mix.
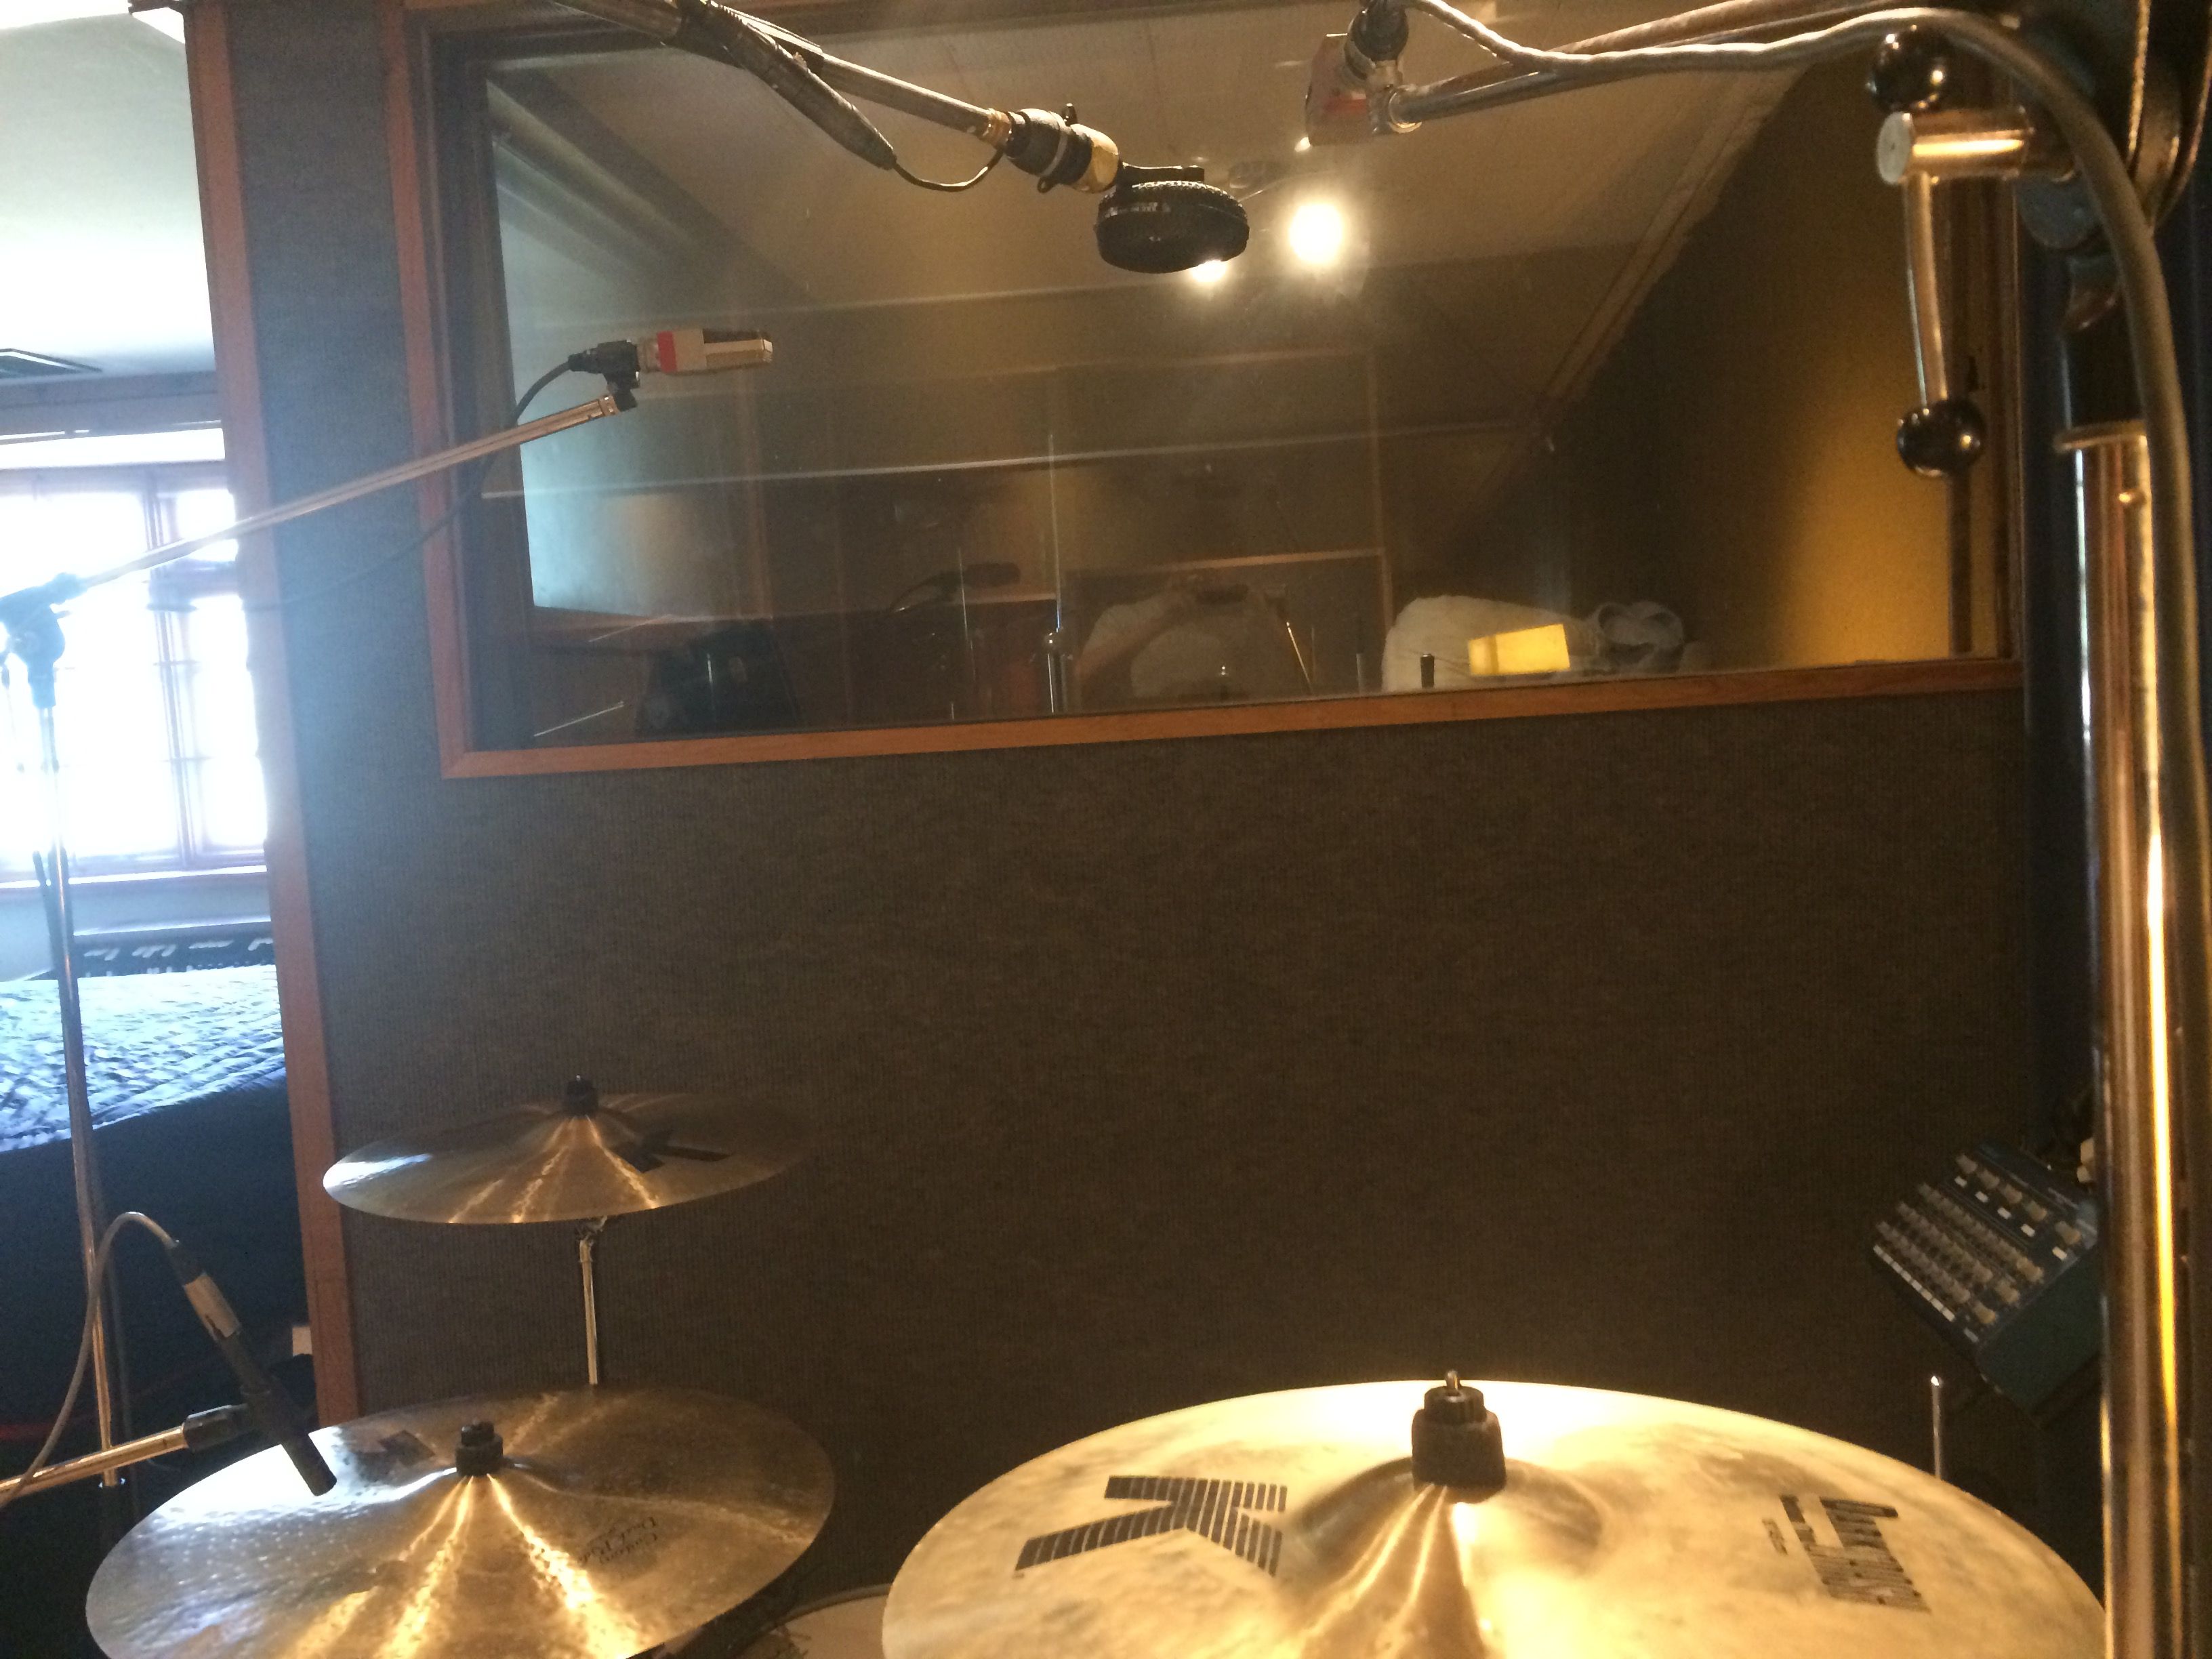
The stereo overheads were approximately 150 cm equidistantly from the centre of the snare drum to maintain a healthy phase relationship between the overheads and the spot mic'd elements. We also had a Coles 4038 ribbon mic as a mono overhead. This was positioned directly over the snare at the same height as the stereo overheads; this microphone really helped to define the centre of the stereo image. Here's how we check our stereo overheads for phase issues.
-Set the pre amplifier gain to the same level for both microphones.
-Pan both overheads hard left and right.
-Monitor both overheads at the same level - Is the snare in the centre of the stereo image? If it is pulling to one side, pull the opposing overhead in slightly and repeat until the snare becomes central.
-Bring up your spot snare channel(s) and experiment with flipping the phase on the channel strip. Does the snare lose power or low end? If so your snare is in phase with the overheads.
There is a lot of variation in the positioning of overheads in terms of technique and distance from the kit. It's all a matter of experimentation and application to the context of the music.
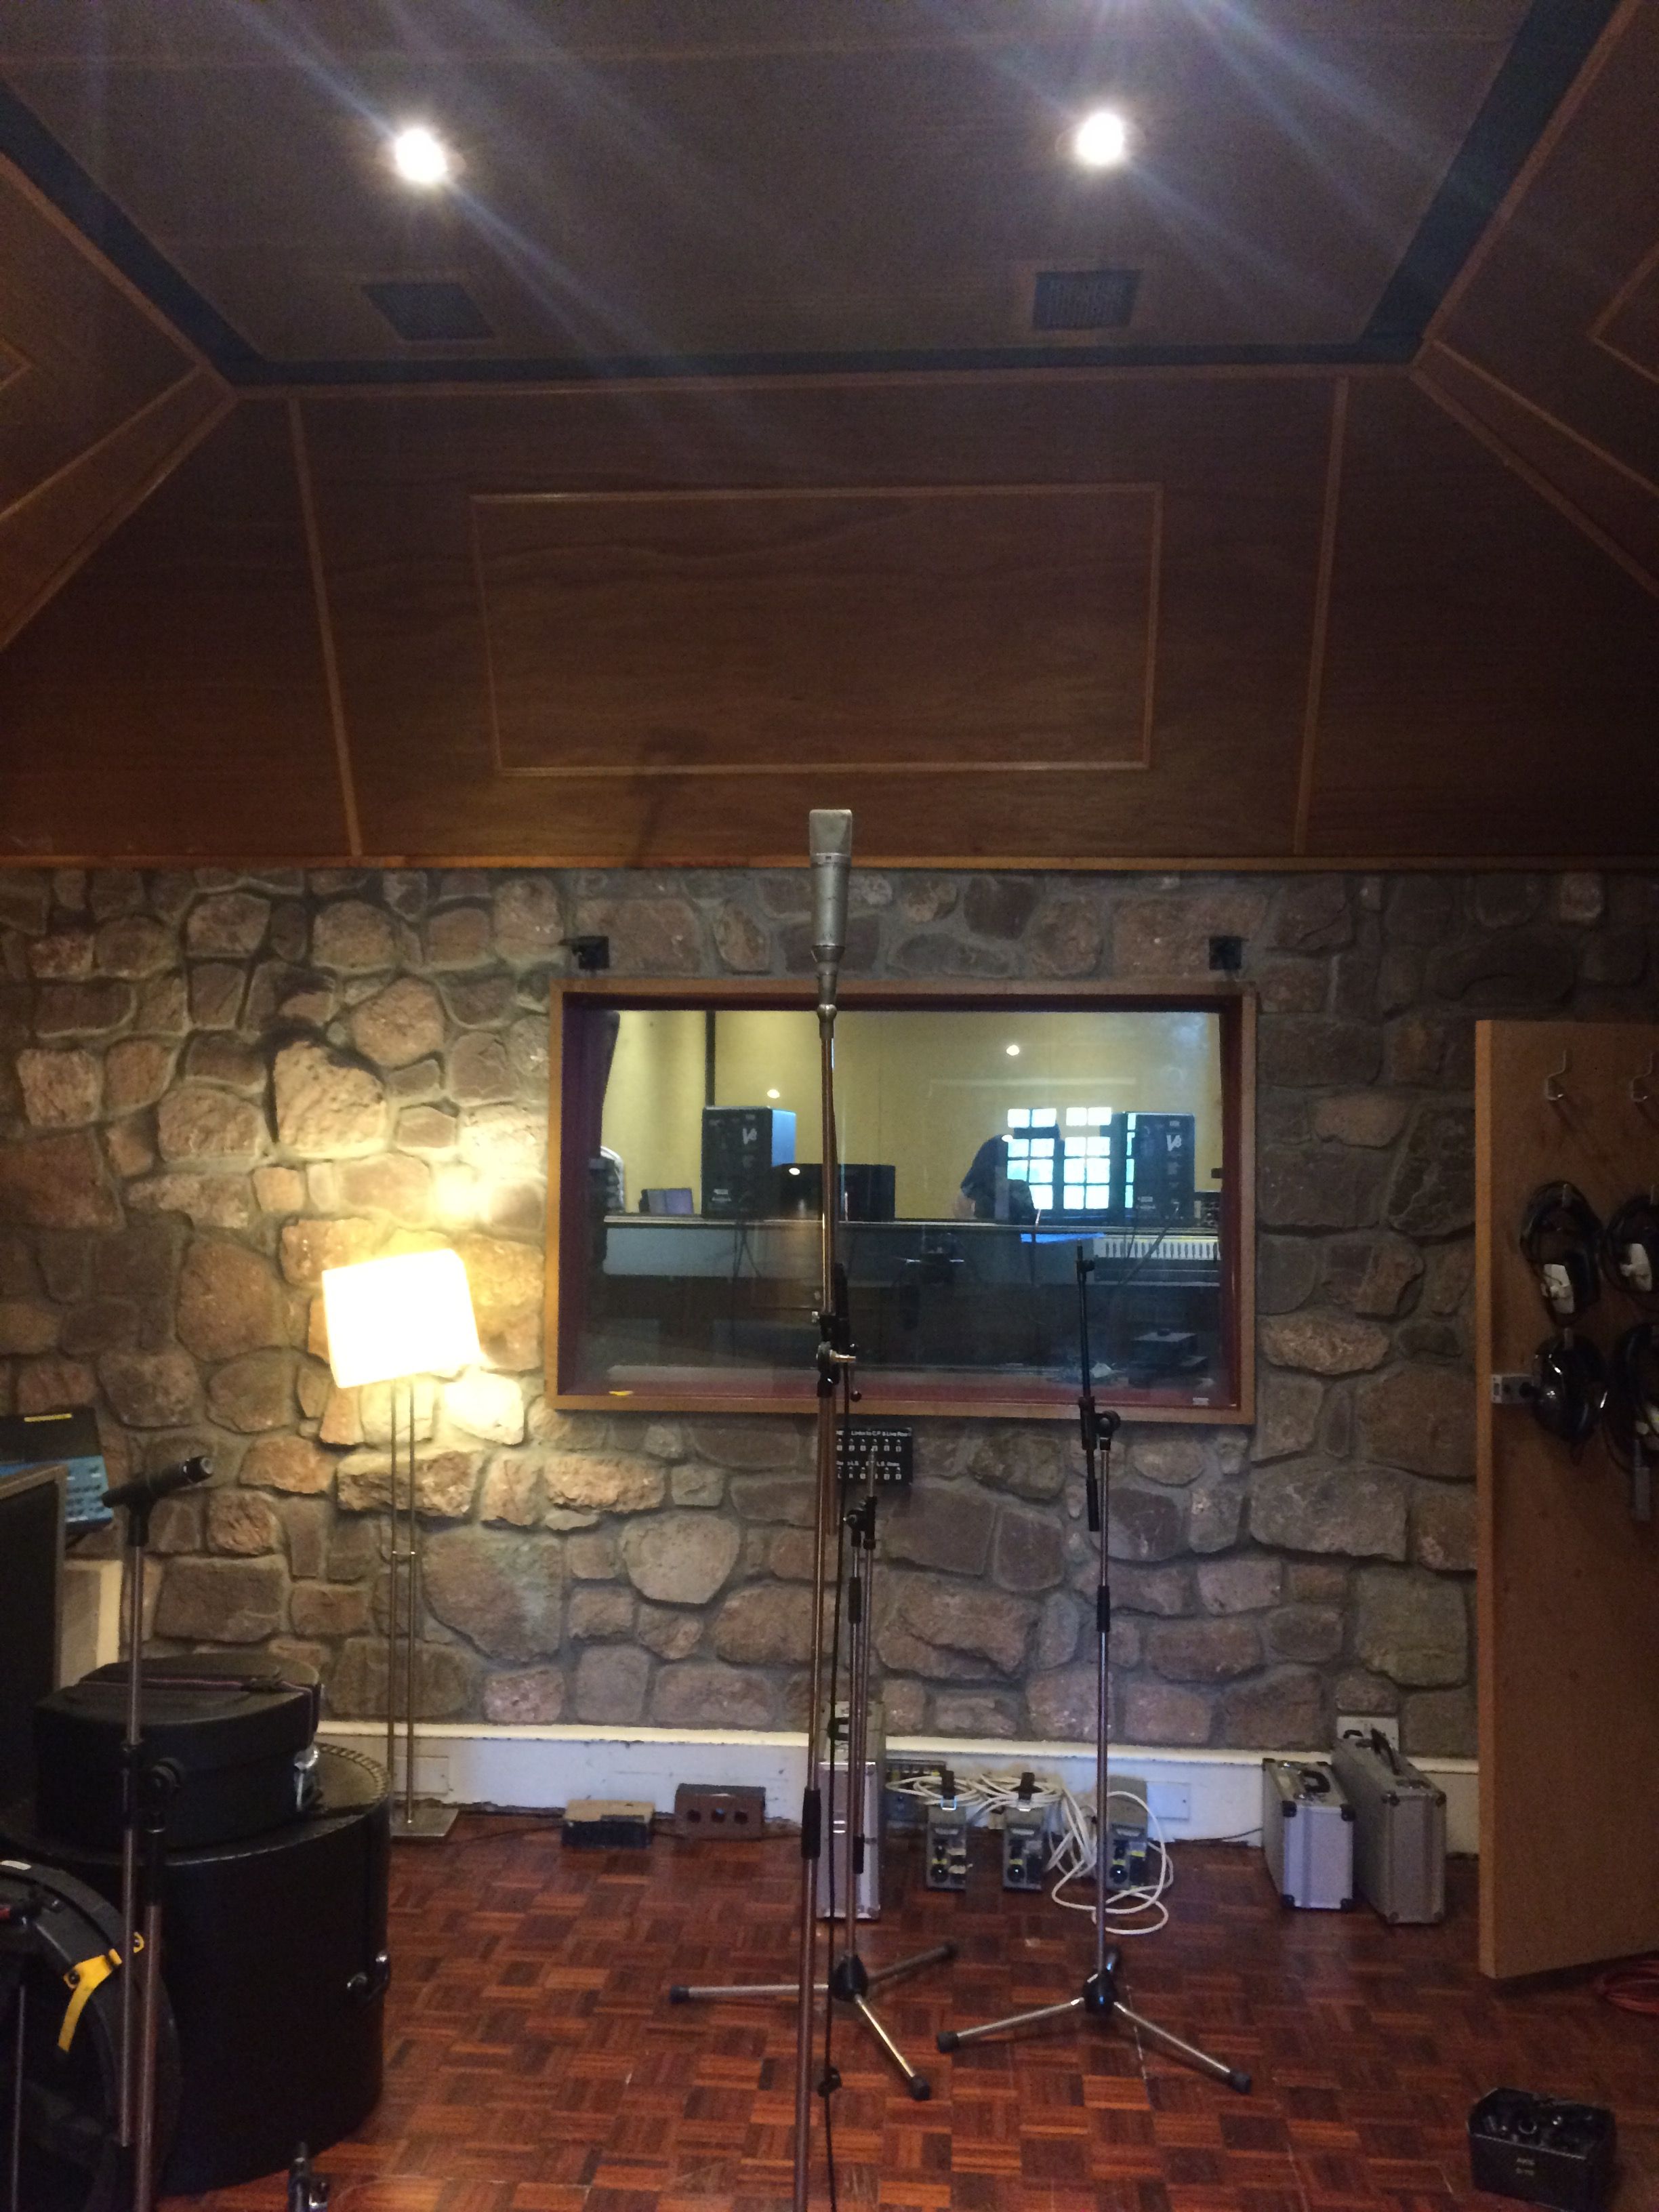
Room microphones
Here is where a lot of the character comes from in your favourite drum sounds. Capturing a great close mic sound is so important for reproducing the raw power of each drum hit. However, it is the room mics that capture natural reflections and put the kit in a characterful space, making it sound tangible and more familiar. We used a total of 3 room microphones; A Telefunken SM2, Neumann U87 and a Neumann U67.
The SM2 was the first stereo microphone to come in to production in 1957. For this project we had it set to an X/Y pattern and sitting 2 meters in front of the kit at around 120cm from the floor. This position captured a frequency balanced stereo image of the kit and the space it was sat in.
The Neumann U67 was placed in the centre of the adjoining live room. This room was slightly bigger and mostly clad in wood and stone, which made it fairly lively, reproducing a tight, musical room sound. The microphones polar pattern was set to omnidirectional to capture all of the room reflections in a uniform manner.
Lastly was the Neumann U87, which was left out in the tile-clad hall way and also set to omnidirectional.
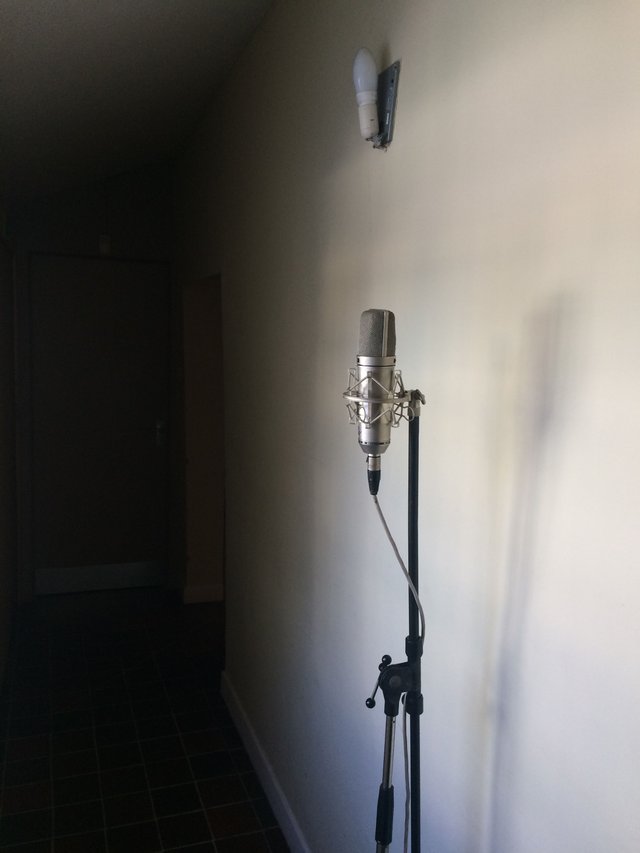
This was a very lively, bright and reflective sound, which was mixed in subtly to the overall drum sound. It could also be used as an effect or feature of the arrangement by automating its level during certain sections.
You can check the hallway sound here!
James used minimal processing during the drum tracking and honestly, he didn't need to! The selection and placement of the microphones gave him such a great sound right out of the channels. However, the Alan Smart C2 compressor on the drum buss really helped to smooth the transients and breathe life in to the mix.
This session really taught me a lot about identifying and creating a sound in the live room before hitting record. This can be through tuning, modification and placement of the kit in the room. Pay attention in these areas, couple that with thought-out microphone placement and you will be well on the way to your dream drum sound!
Thanks for taking the time to check this post!
I hope you enjoyed reading it as much as I did writing it.
Give me a follow and an upvote if you want to see more.
Big Love,
Jack
Wow! That is some kit!
You look like you have a good set up you may want to check out my friend @lucybanks does singing! Nice post
Thanks for the heads up man!
Congratulations @boston1994, this post is the ninth most rewarded post (based on pending payouts) in the last 12 hours written by a User account holder (accounts that hold between 0.1 and 1.0 Mega Vests). The total number of posts by User account holders during this period was 1092 and the total pending payments to posts in this category was $1927.29. To see the full list of highest paid posts across all accounts categories, click here.
If you do not wish to receive these messages in future, please reply stop to this comment.
Awesome! Big thanks for letting me know!
Congratulations @boston1994! You have completed some achievement on Steemit and have been rewarded with new badge(s) :
Click on any badge to view your own Board of Honor on SteemitBoard.
For more information about SteemitBoard, click here
If you no longer want to receive notifications, reply to this comment with the word
STOP