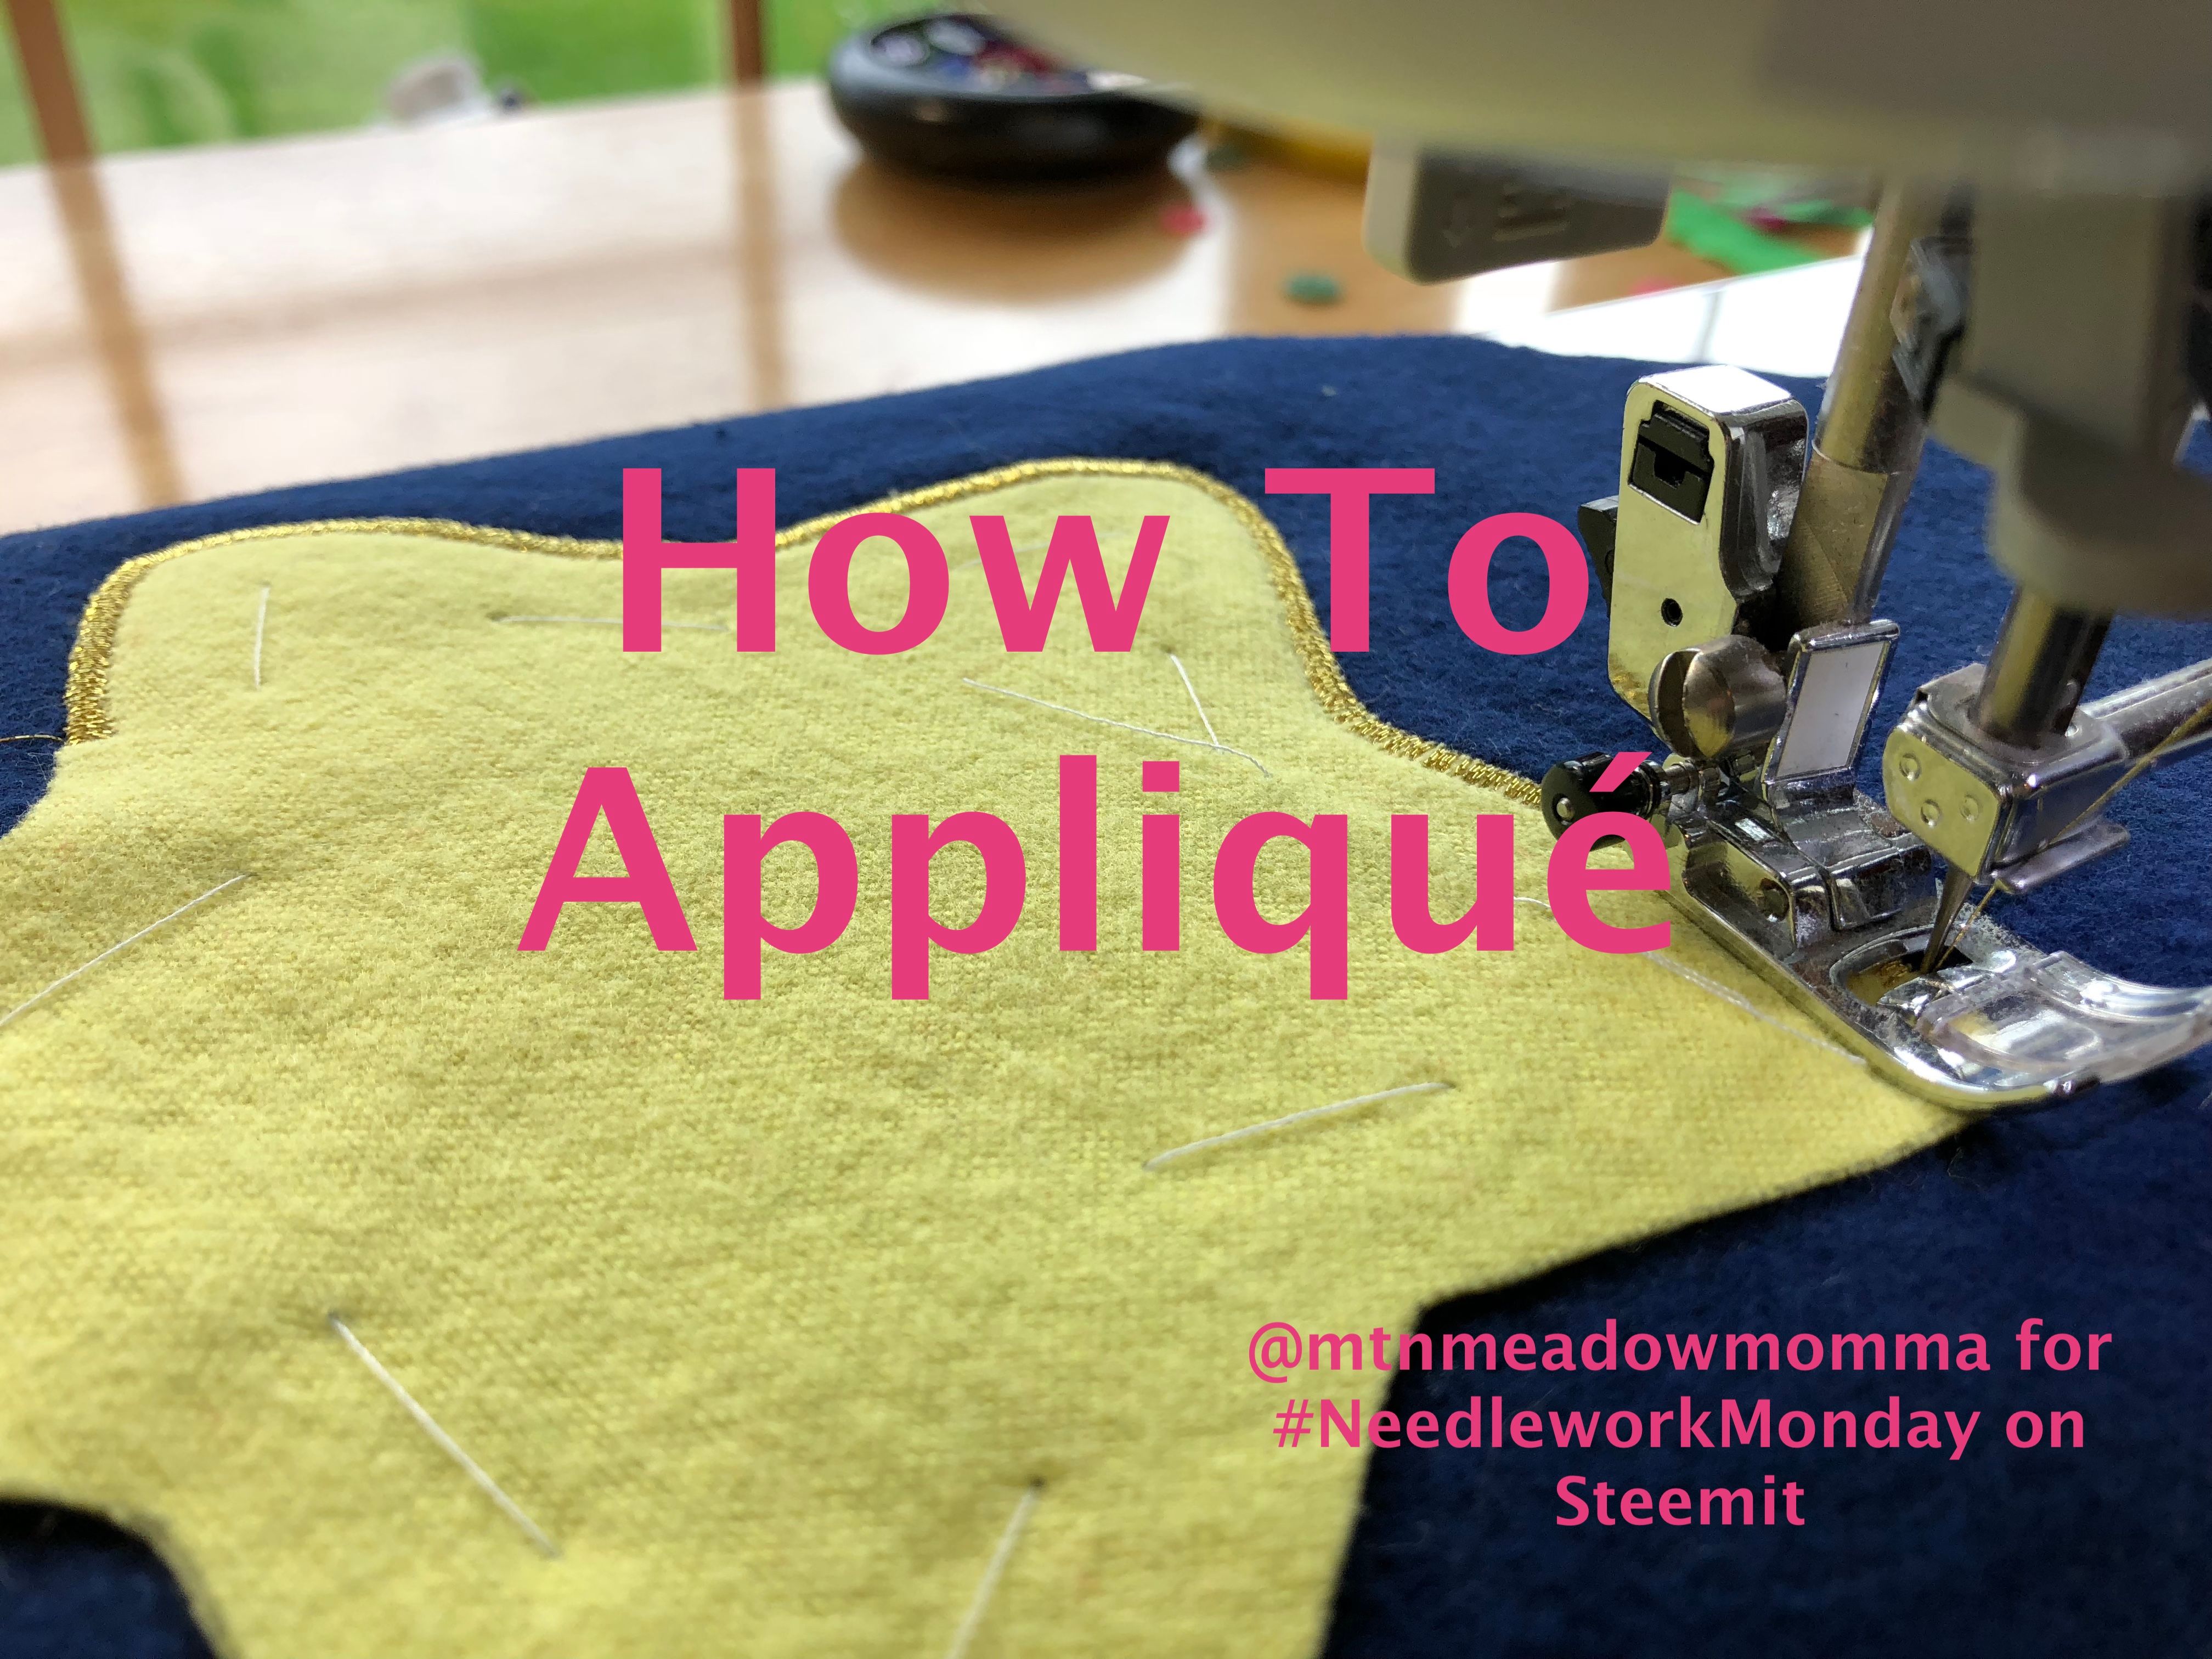
How to appliqué, step by step. Create your own designs! Photo-rich and detailed tutorial!
Good #NeedleworkMonday morning to all! I spent this week piecing placemats and a baby quilt top, and decided to take some photos along the way as I appliquéd stars onto the quilt blocks. Be forewarned that there are lots of photos in this post! Also be forewarned that this is a bit long, out of necessity--but that just makes it all the more AWESOME (if you ask me, anyway).
It's not that hard, but definitely requires practice to make it consistently smooth and pretty. Flannel, as I'm using here, isn't the easiest fabric to work with. For a first attempt, I recommend trying with something like woven cotton--not stretchy, thick, or slippery fabrics.
All photos in this post are my own.
Wikipedia defines appliqué as "ornamental needlework in which pieces of fabric in different shapes and patterns are sewn or stuck onto a larger piece to form a picture or pattern." I taught myself how to do it a couple years ago when someone requested a theme quilt, and I couldn't find satisfactory fabric. I solved the dilemma by appliquéing the design I wanted :)
Appliqué is such a fun way to create something that is truly unique, and it's a useful skill to have as a seamstress, because it opens up all kinds of possibilities as far as mixing and matching fabrics and customizing your own designs. It's certainly not limited to quilts, either; for example, my neighbor used appliqué to turn a plain black T-shirt and some Teenage Mutant Ninja Turtle fabric into a personalized birthday shirt for her grandson. Clothing, blankets, tote bags...so many possibilities!
You will need:
- Basic sewing skills
- A sewing machine (unless you possess the gifts of saintly patience and unlimited time for hand-sewing appliqué, both of which I positively do NOT have)
- Fabric, thread, scissors--well, all the basic sewing stuff ;)
The first thing to do is measure and/or trace, and then cut out, all the fabric pieces. Note: cut your quilt blocks (or whatever you're sewing the designs onto) slightly larger (say 1/4-1/2") than you need, because the appliqué process will draw up the fabric. You can trim them down to the correct size afterward.
Here, I made my own star pattern piece out of a cereal box, because thin cardboard holds up better over time and is easier to work with than paper.
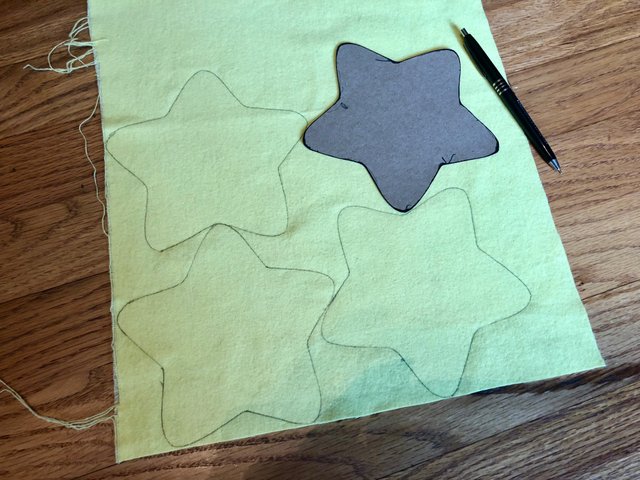
Trace and then cut out the pieces.
Lay out your pieces and determine what will go where.
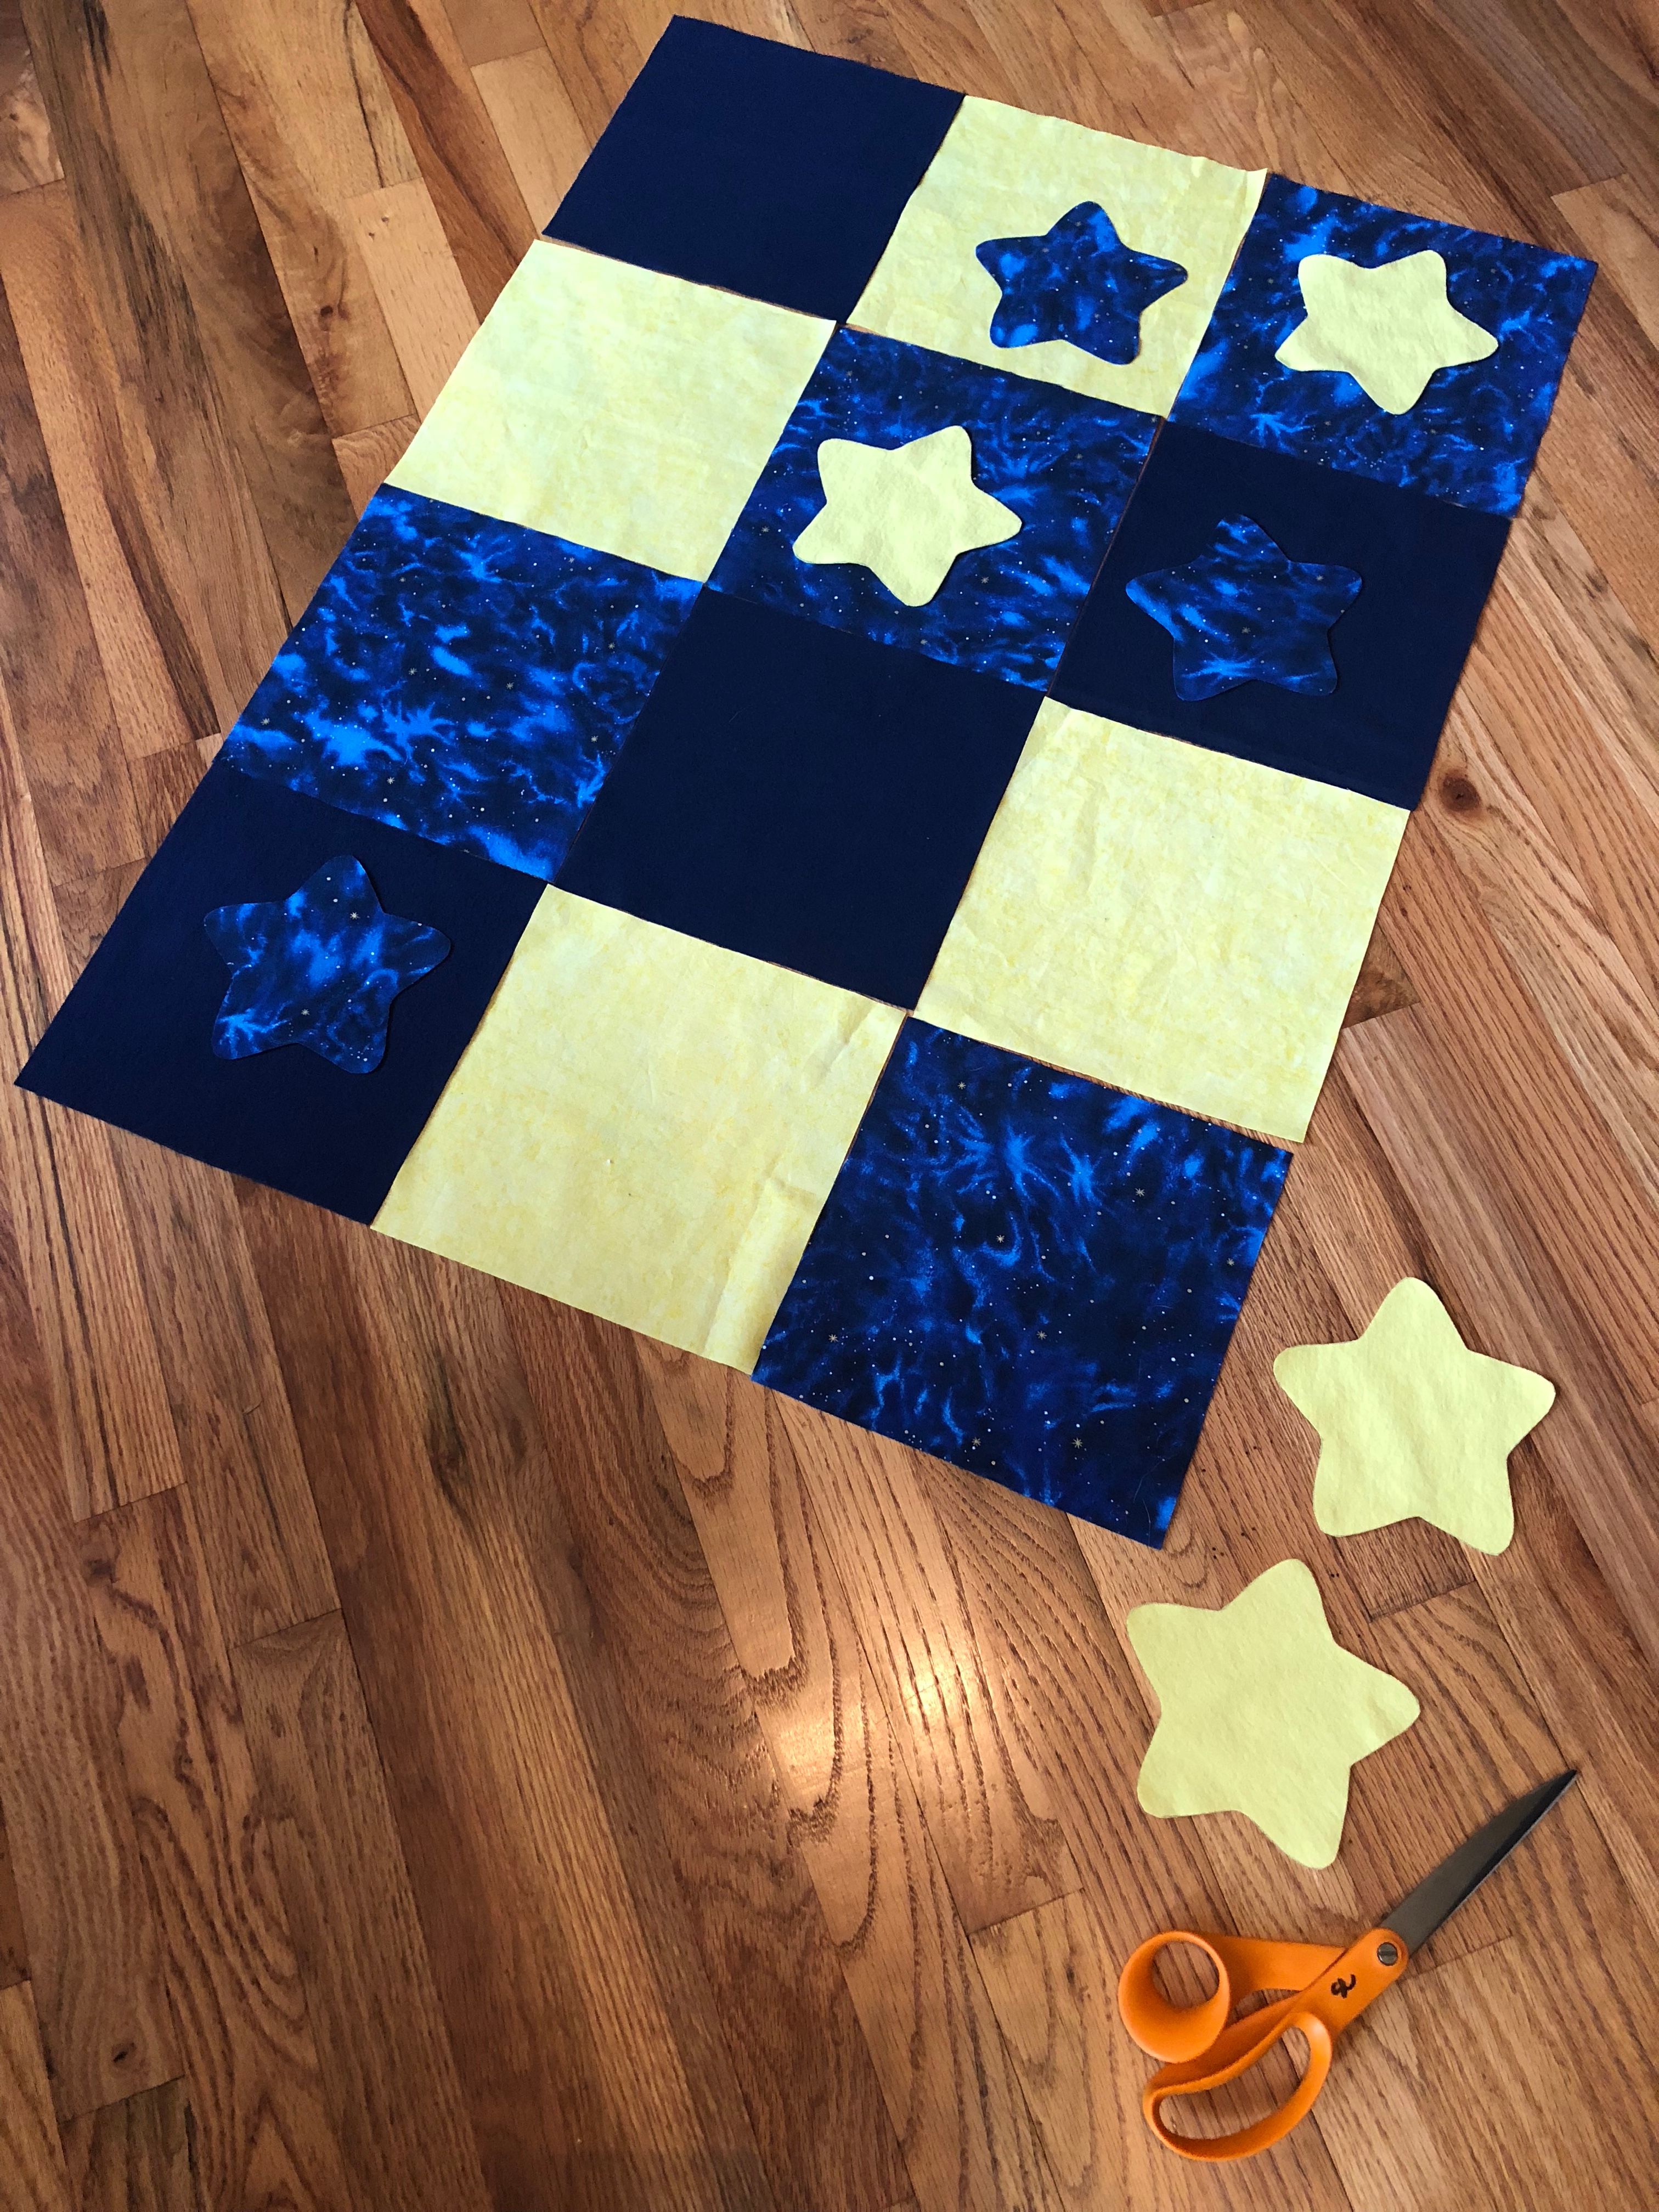
As with everything else, I prefer free-wheeling in appliqué vs. following a predetermined pattern.
Now, this is where everybody has a different opinion and/or preferences: How to stabilize your pieces and How to temporarily attach them to the base fabric. Some people use iron-on interfacing, some people use basting spray, some people use "tear-away stabilizer, etc., etc.
Because I am innovative frugal, I stabilize my design on the back of the base fabric, with...coffee filters. Really, they're like $1 for a million store-brand ones, and all you have to do is iron them flat and they work beautifully.
Also because I am innovative frugal, I have in the past attached small appliqué pieces to the base fabric using a very very light coating of Elmer's Washable Clear School Glue, applied gently with a small craft paintbrush. It's cheaper than basting spray and is already rattling around my house anyway. The keys are to avoid soaking it through the fabric, and letting it dry completely so you don't gum up your needle with wet glue.
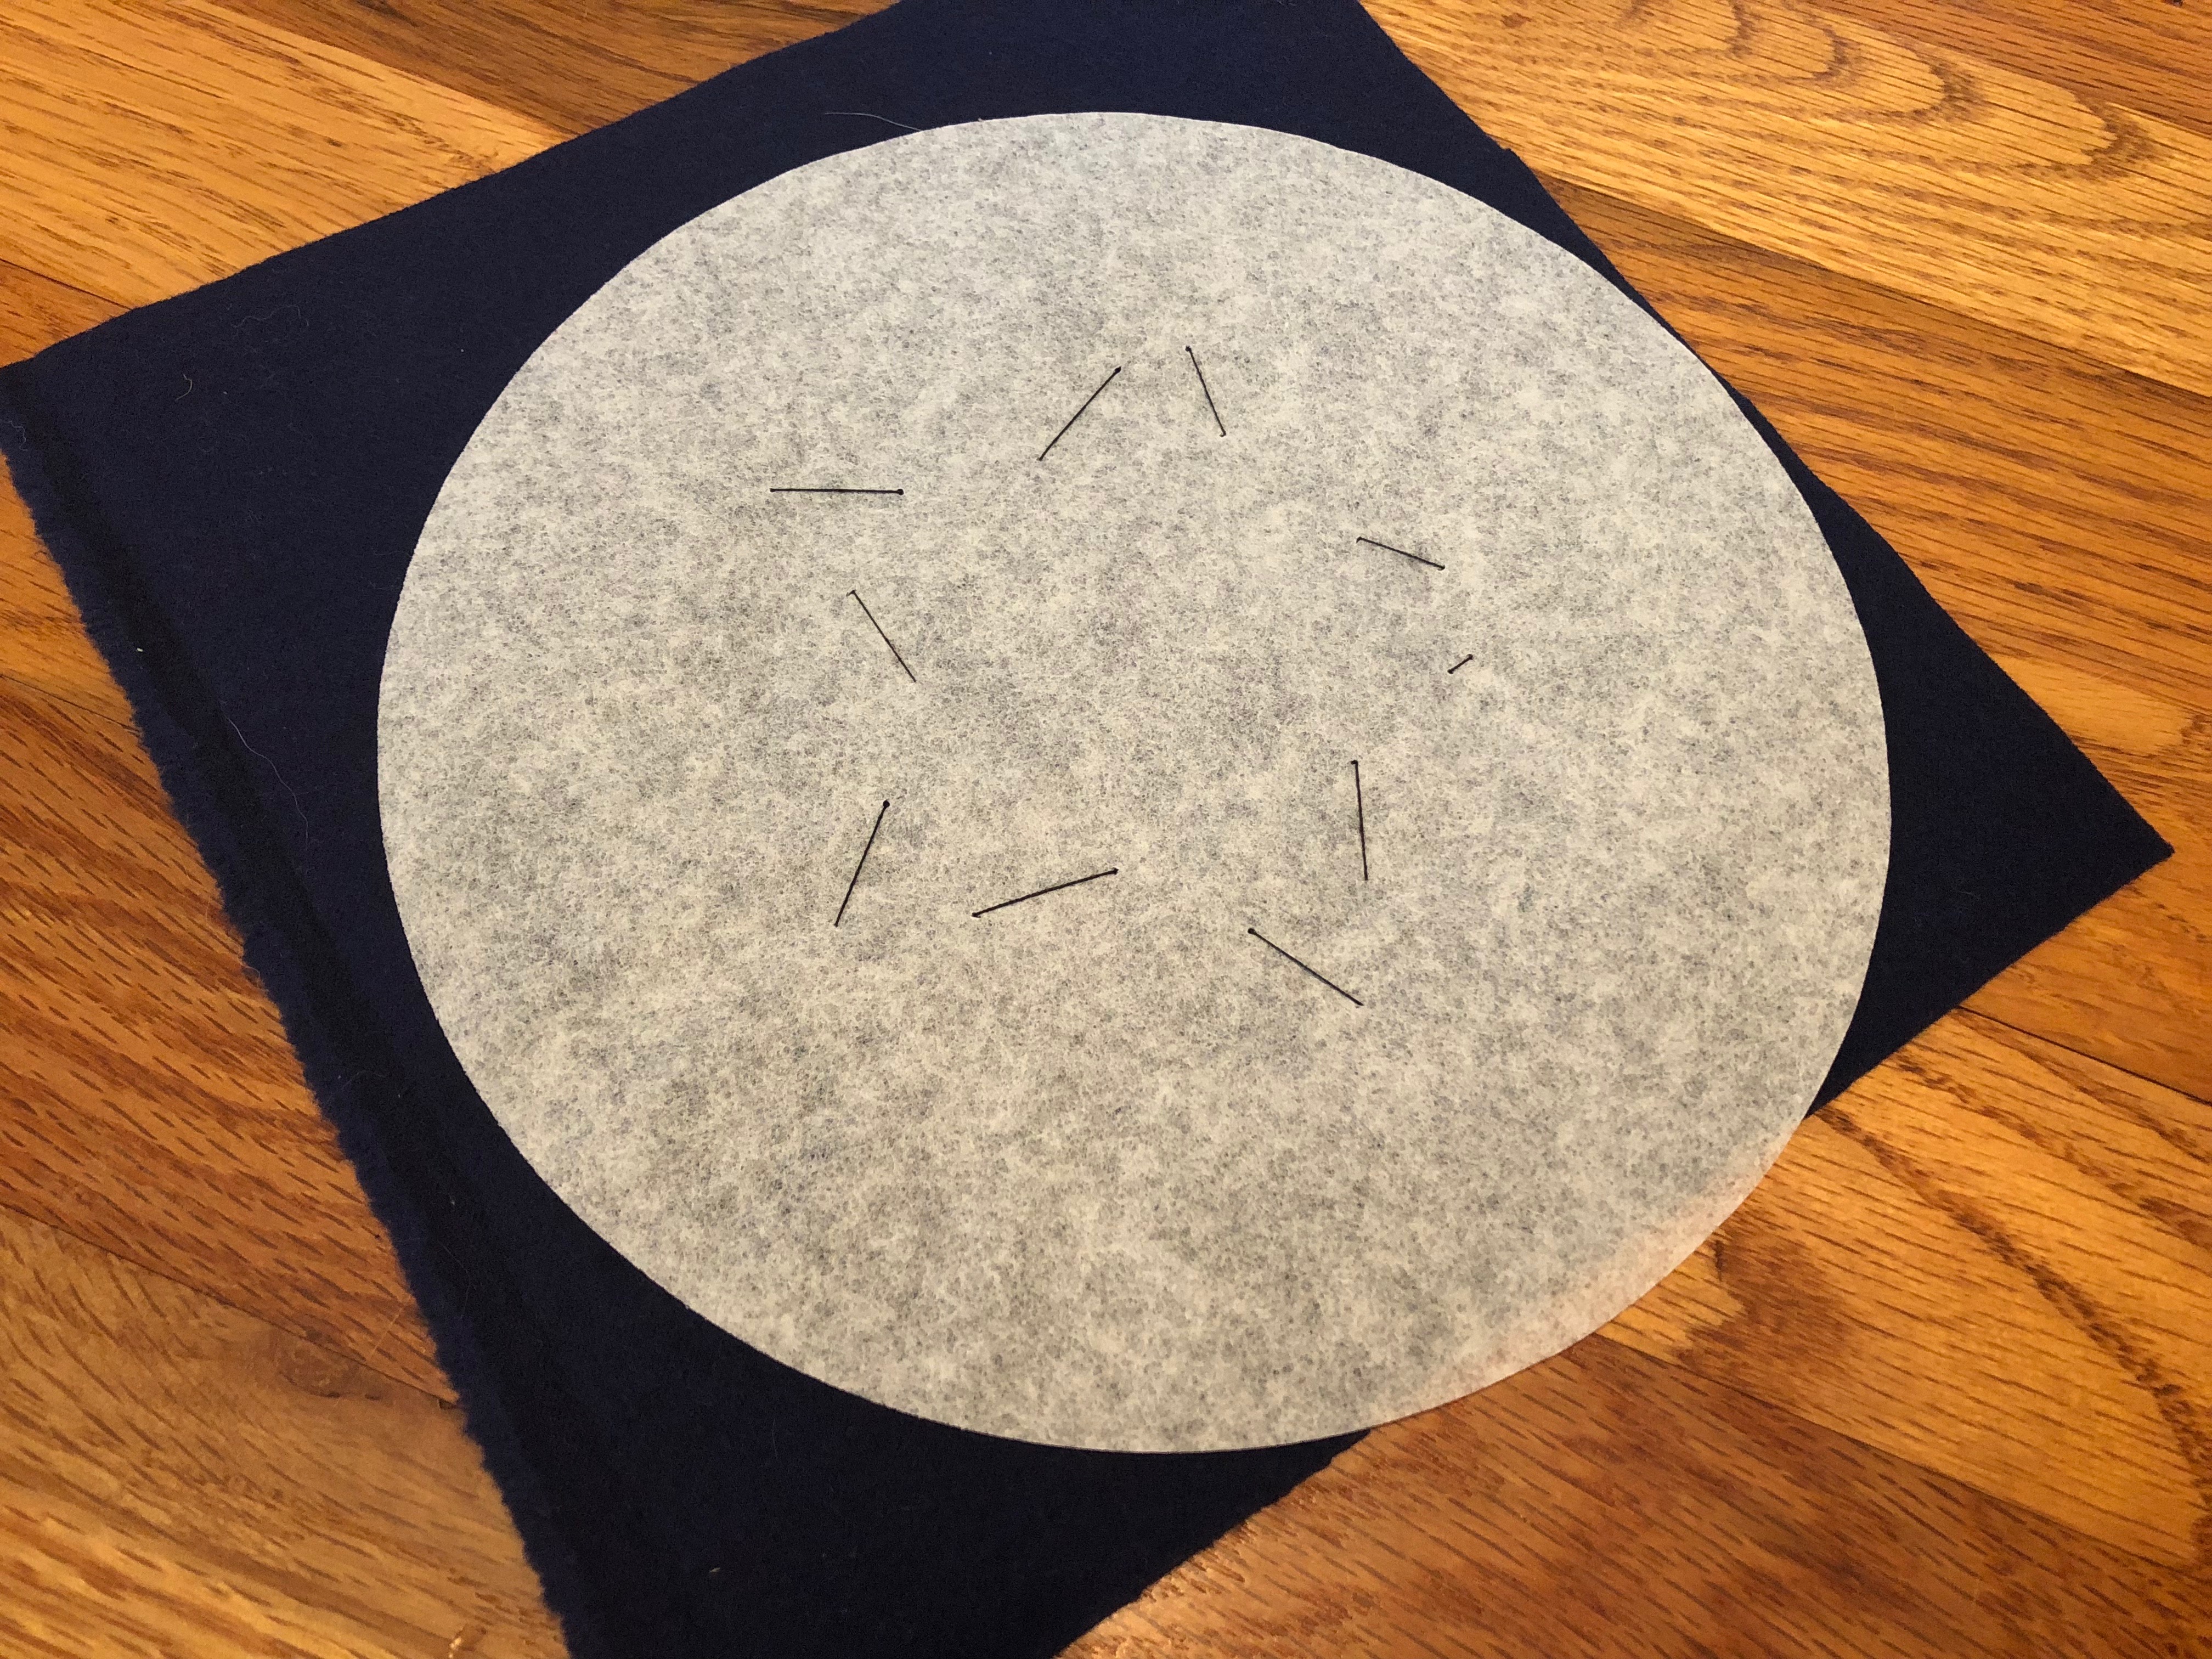
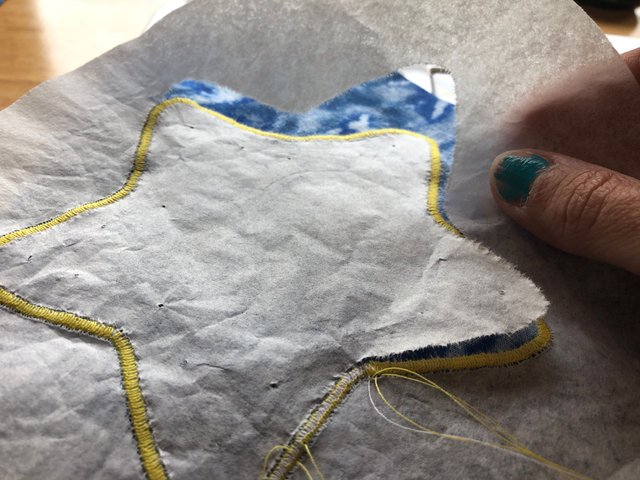
With somewhat larger pieces, I prefer to secure them in place the old fashioned way, with thread and needle basting. Layer the coffee filter on the bottom, then the base piece of fabric, then the design cutout. Ensure the whole cutout is centered on the coffee filter. Careful not to baste too close to the raw edge, so that you don't sew over top the basting stitches later. Baste through all 3 layers.
Use a long running stitch, and tie no knots.
The back looks like this:
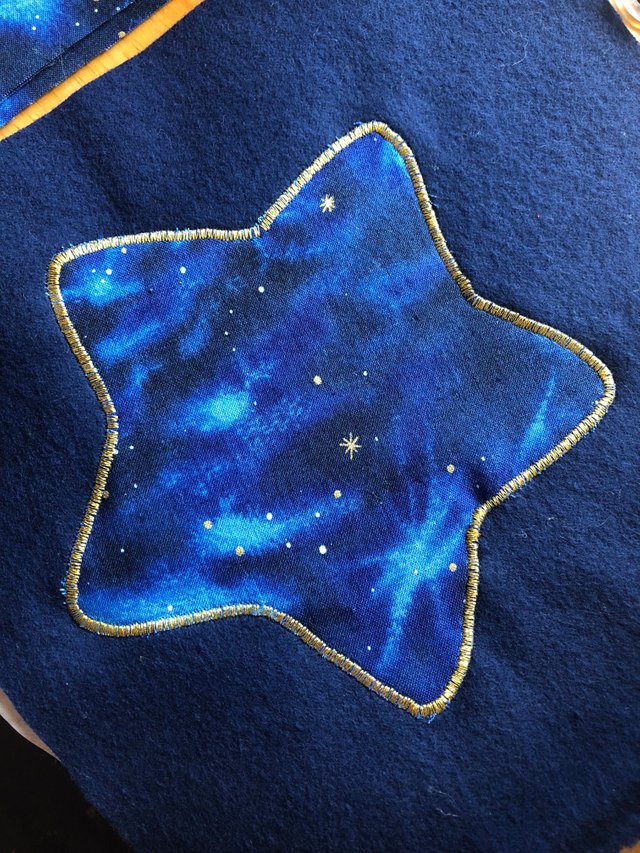
Now to select your stitch on the sewing machine. I prefer to use satin stitch, but not a completely tight one, so I can skip pressing the raw fabric edges under, and avoid fraying. Here's my particular machine display, with handy dandy labels (Oh the things I do for Steemit):
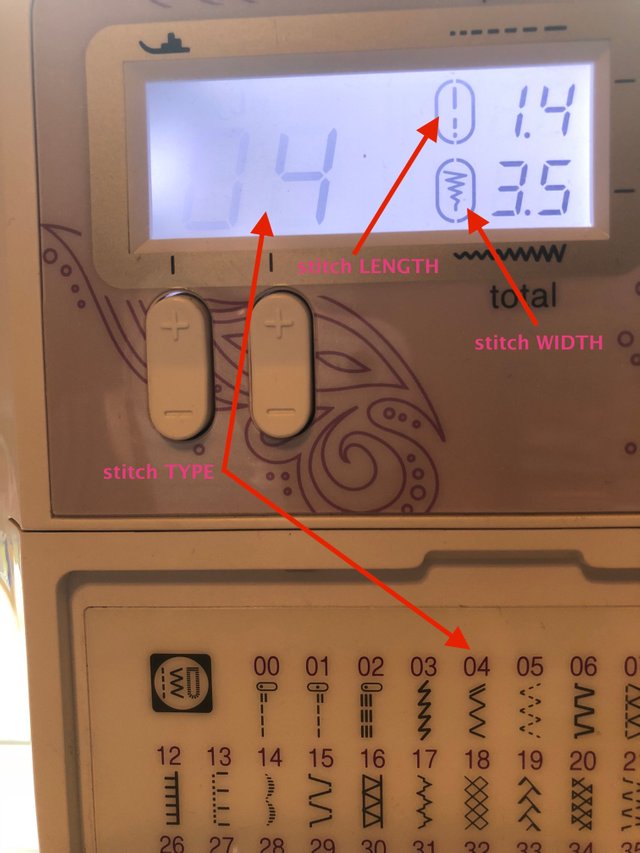
I've already selected "04" for a basic zigzag stitch.
To create satin stitch, I need to change the zigzag stitch LENGTH to tighten it up. "1.4" on the display above is the default for my machine. Using a scrap piece of fabric, experiment with making that smaller until you have the desired tightness:
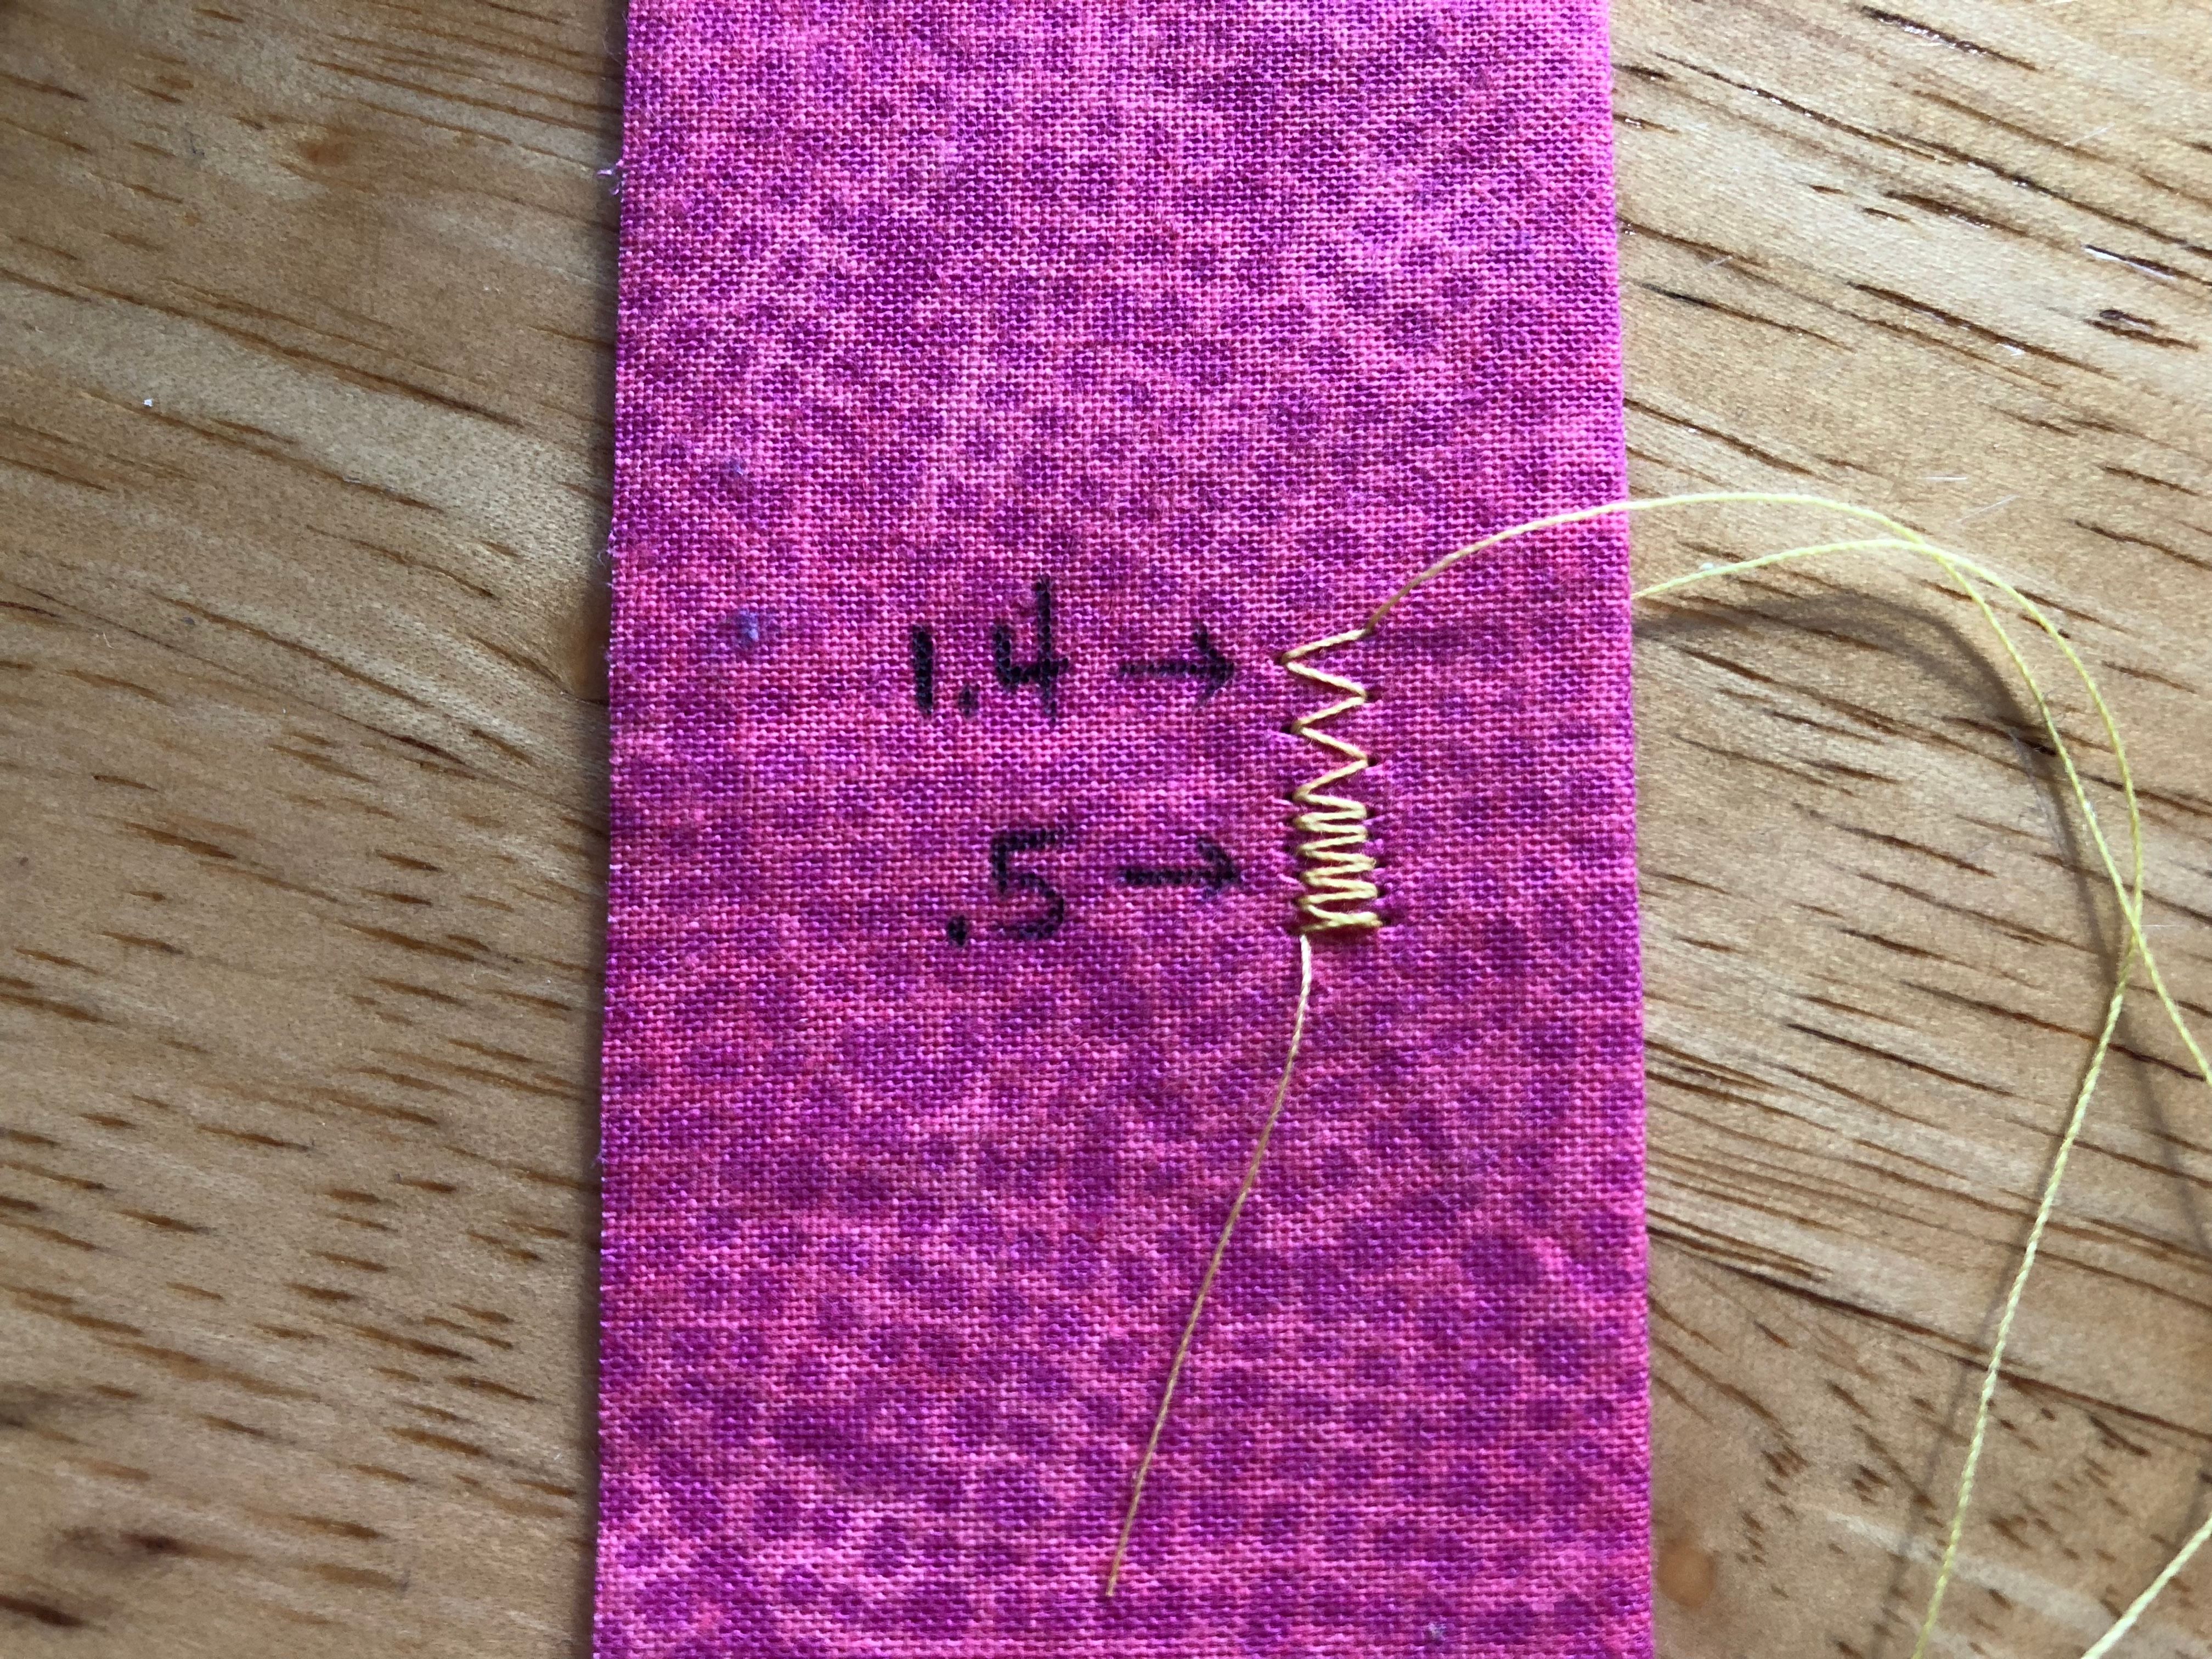
I ended up going with .4
OMG FINALLY I CAN START SEWING HOORAYYYYYYY!! (Right?)
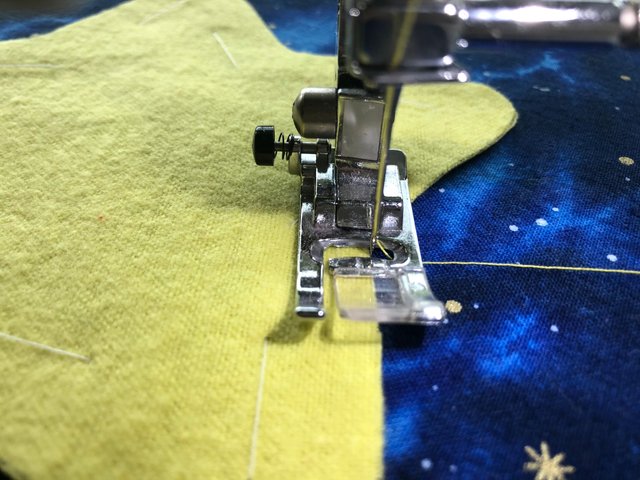
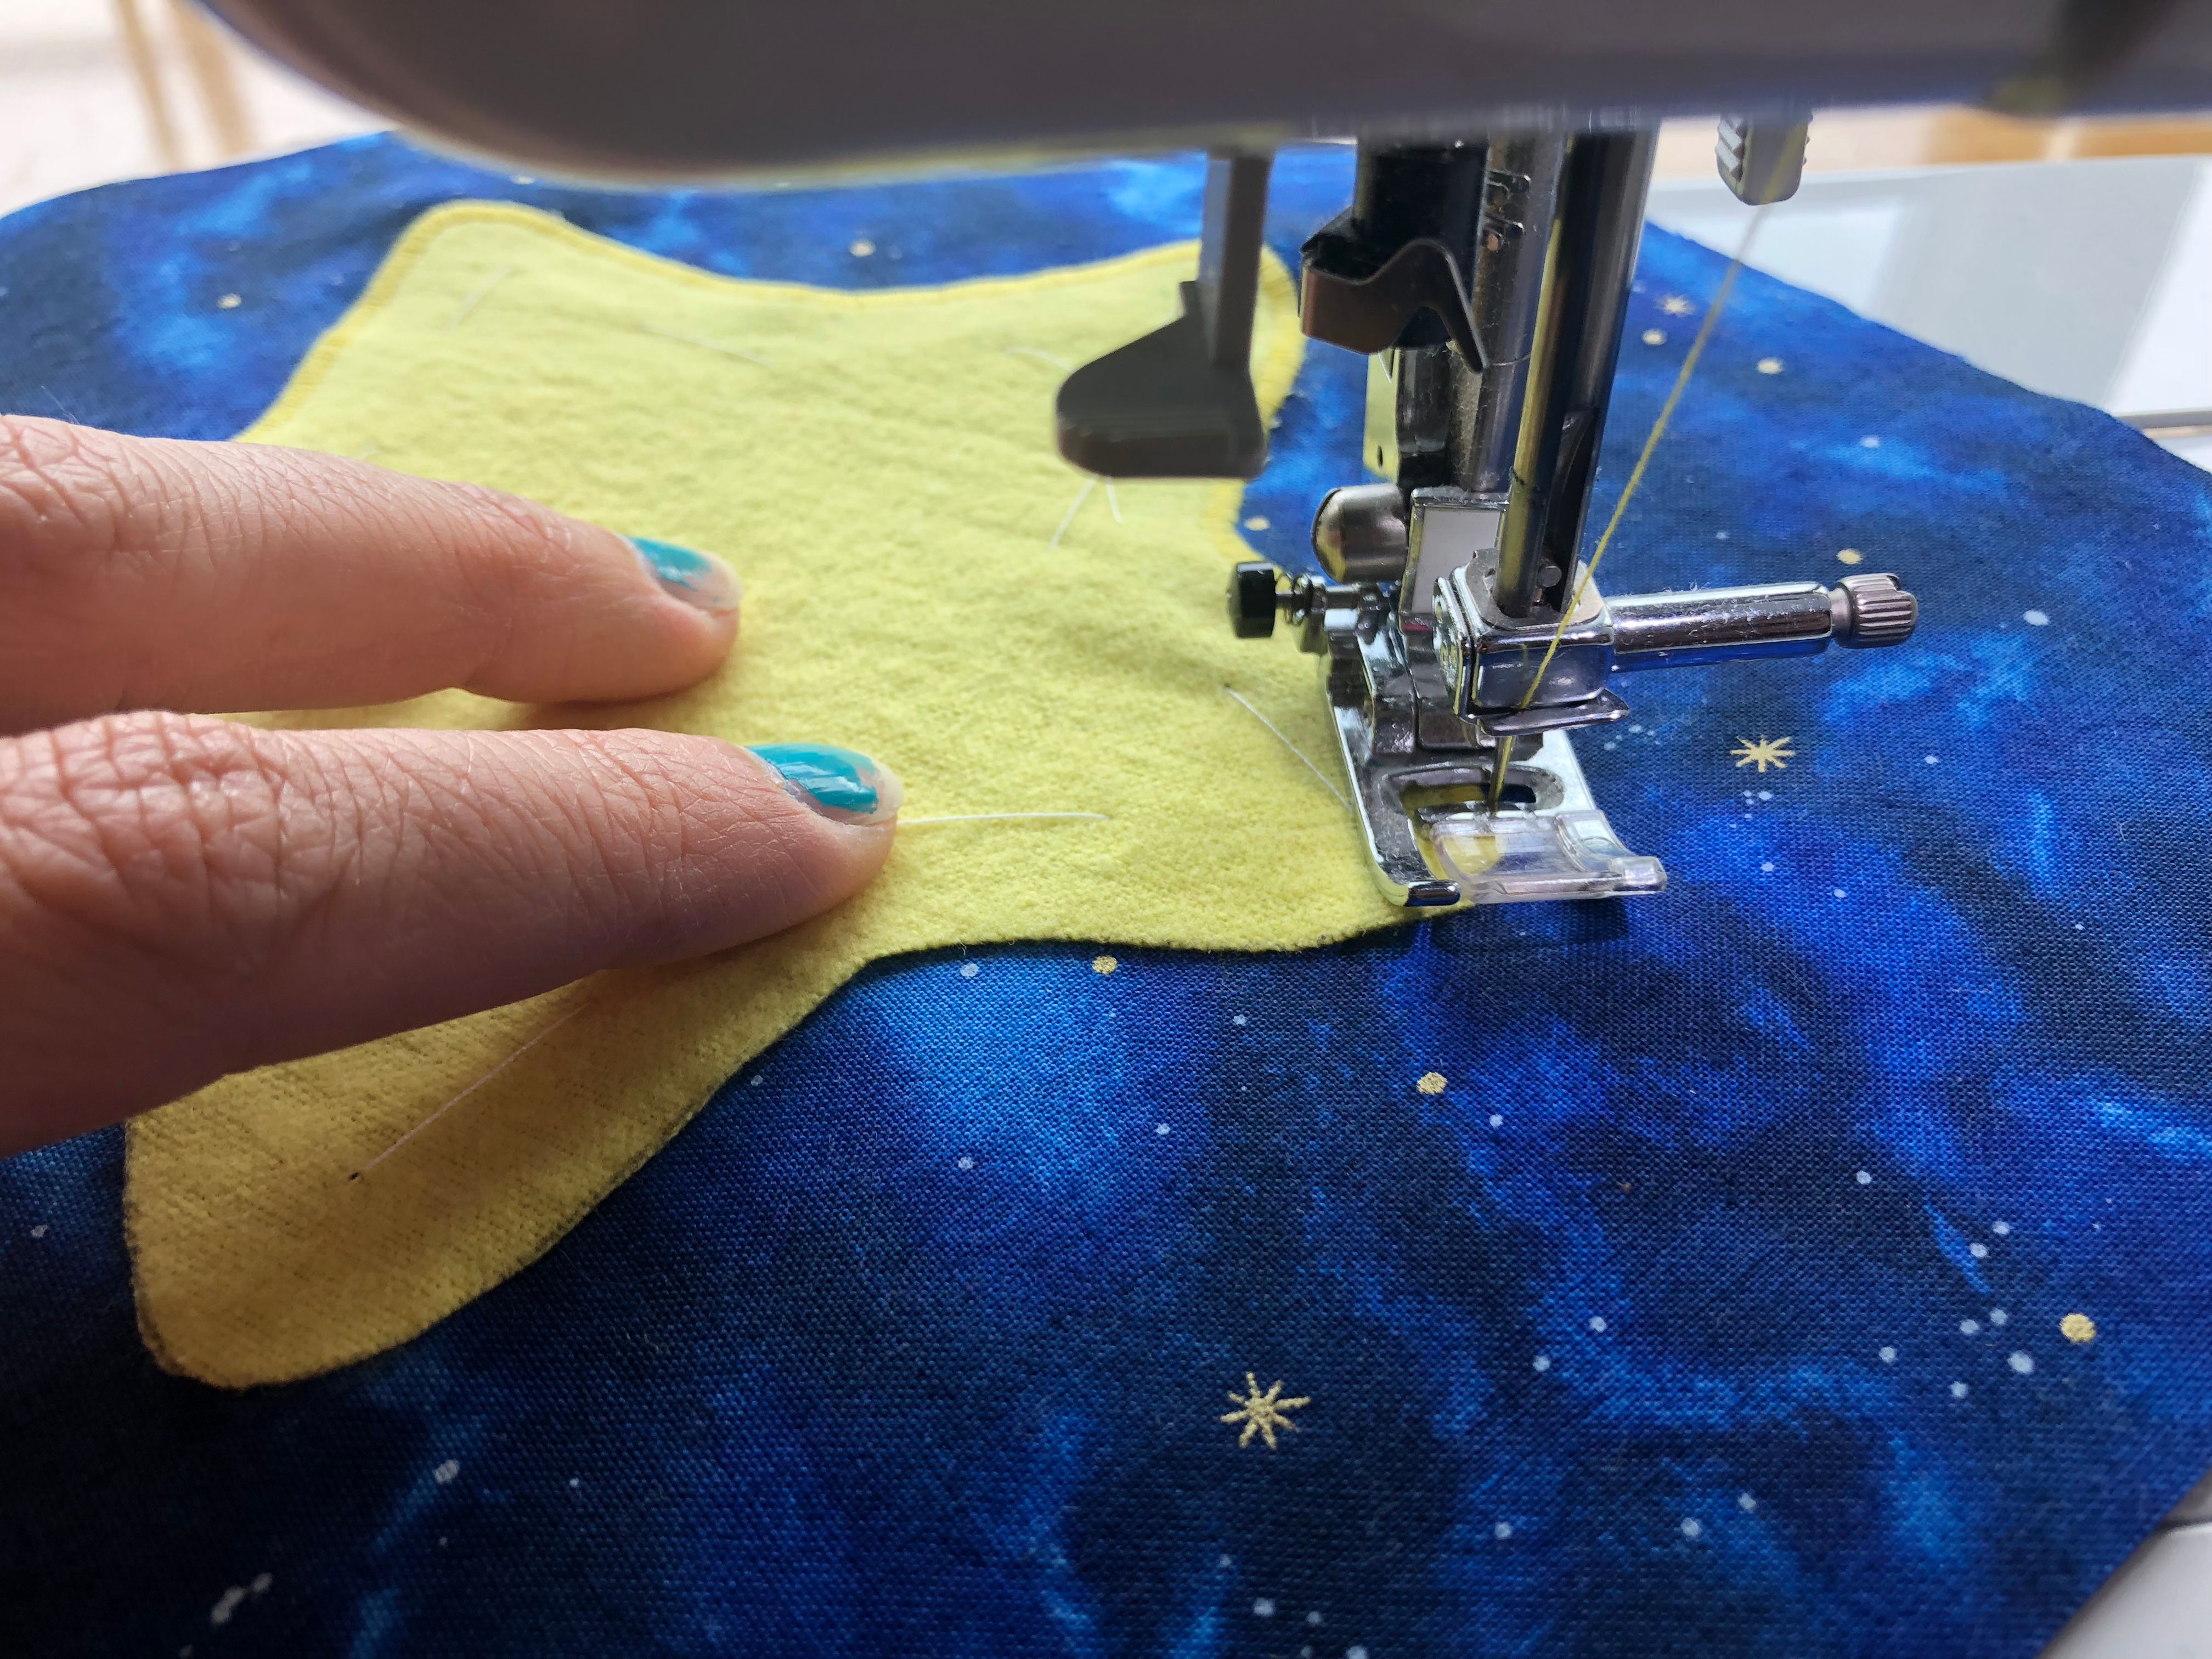
Turn the machine's hand wheel, if necessary, to get the needle positioned on the right side of its zigzag motion, and then position your fabric so the edge of the cutout is exactly where the needle will come down. That way, when you start sewing, it'll start the first stitch on the edge, and then immediately hop to the left (and into the cutout piece).
Backstitch a few stitches, and then off you go! NO RACING! Slow is good. You'll figure out as you improve that you can speed up on the straight portions, but especially on curves, keep the pace slower. Stitch along the edge of the cutout piece, guiding it so that when the needle comes down on the right, it always lands on the edge itself.
Use your fingers as a pivot point, out to the side, while stitching around curves. Instead of trying to get the needle to walk its way around curved edges by manhandling the fabric right by the presser foot, imagine your fingers working as the hub of a wheel, turning the fabric around an invisible circle.
Pardon my "manicure", which was done by my preschooler and promptly destroyed by me. At least it was free.
Now because I don't use interfacing to stiffen my cutout pieces, I use my thread-cutting scissors to constantly ease/push along excess fabric, that would otherwise bulge up in front of the presser foot and create puckers.

Again, flannel is worse for this kind of misbehavior than regular woven cotton.
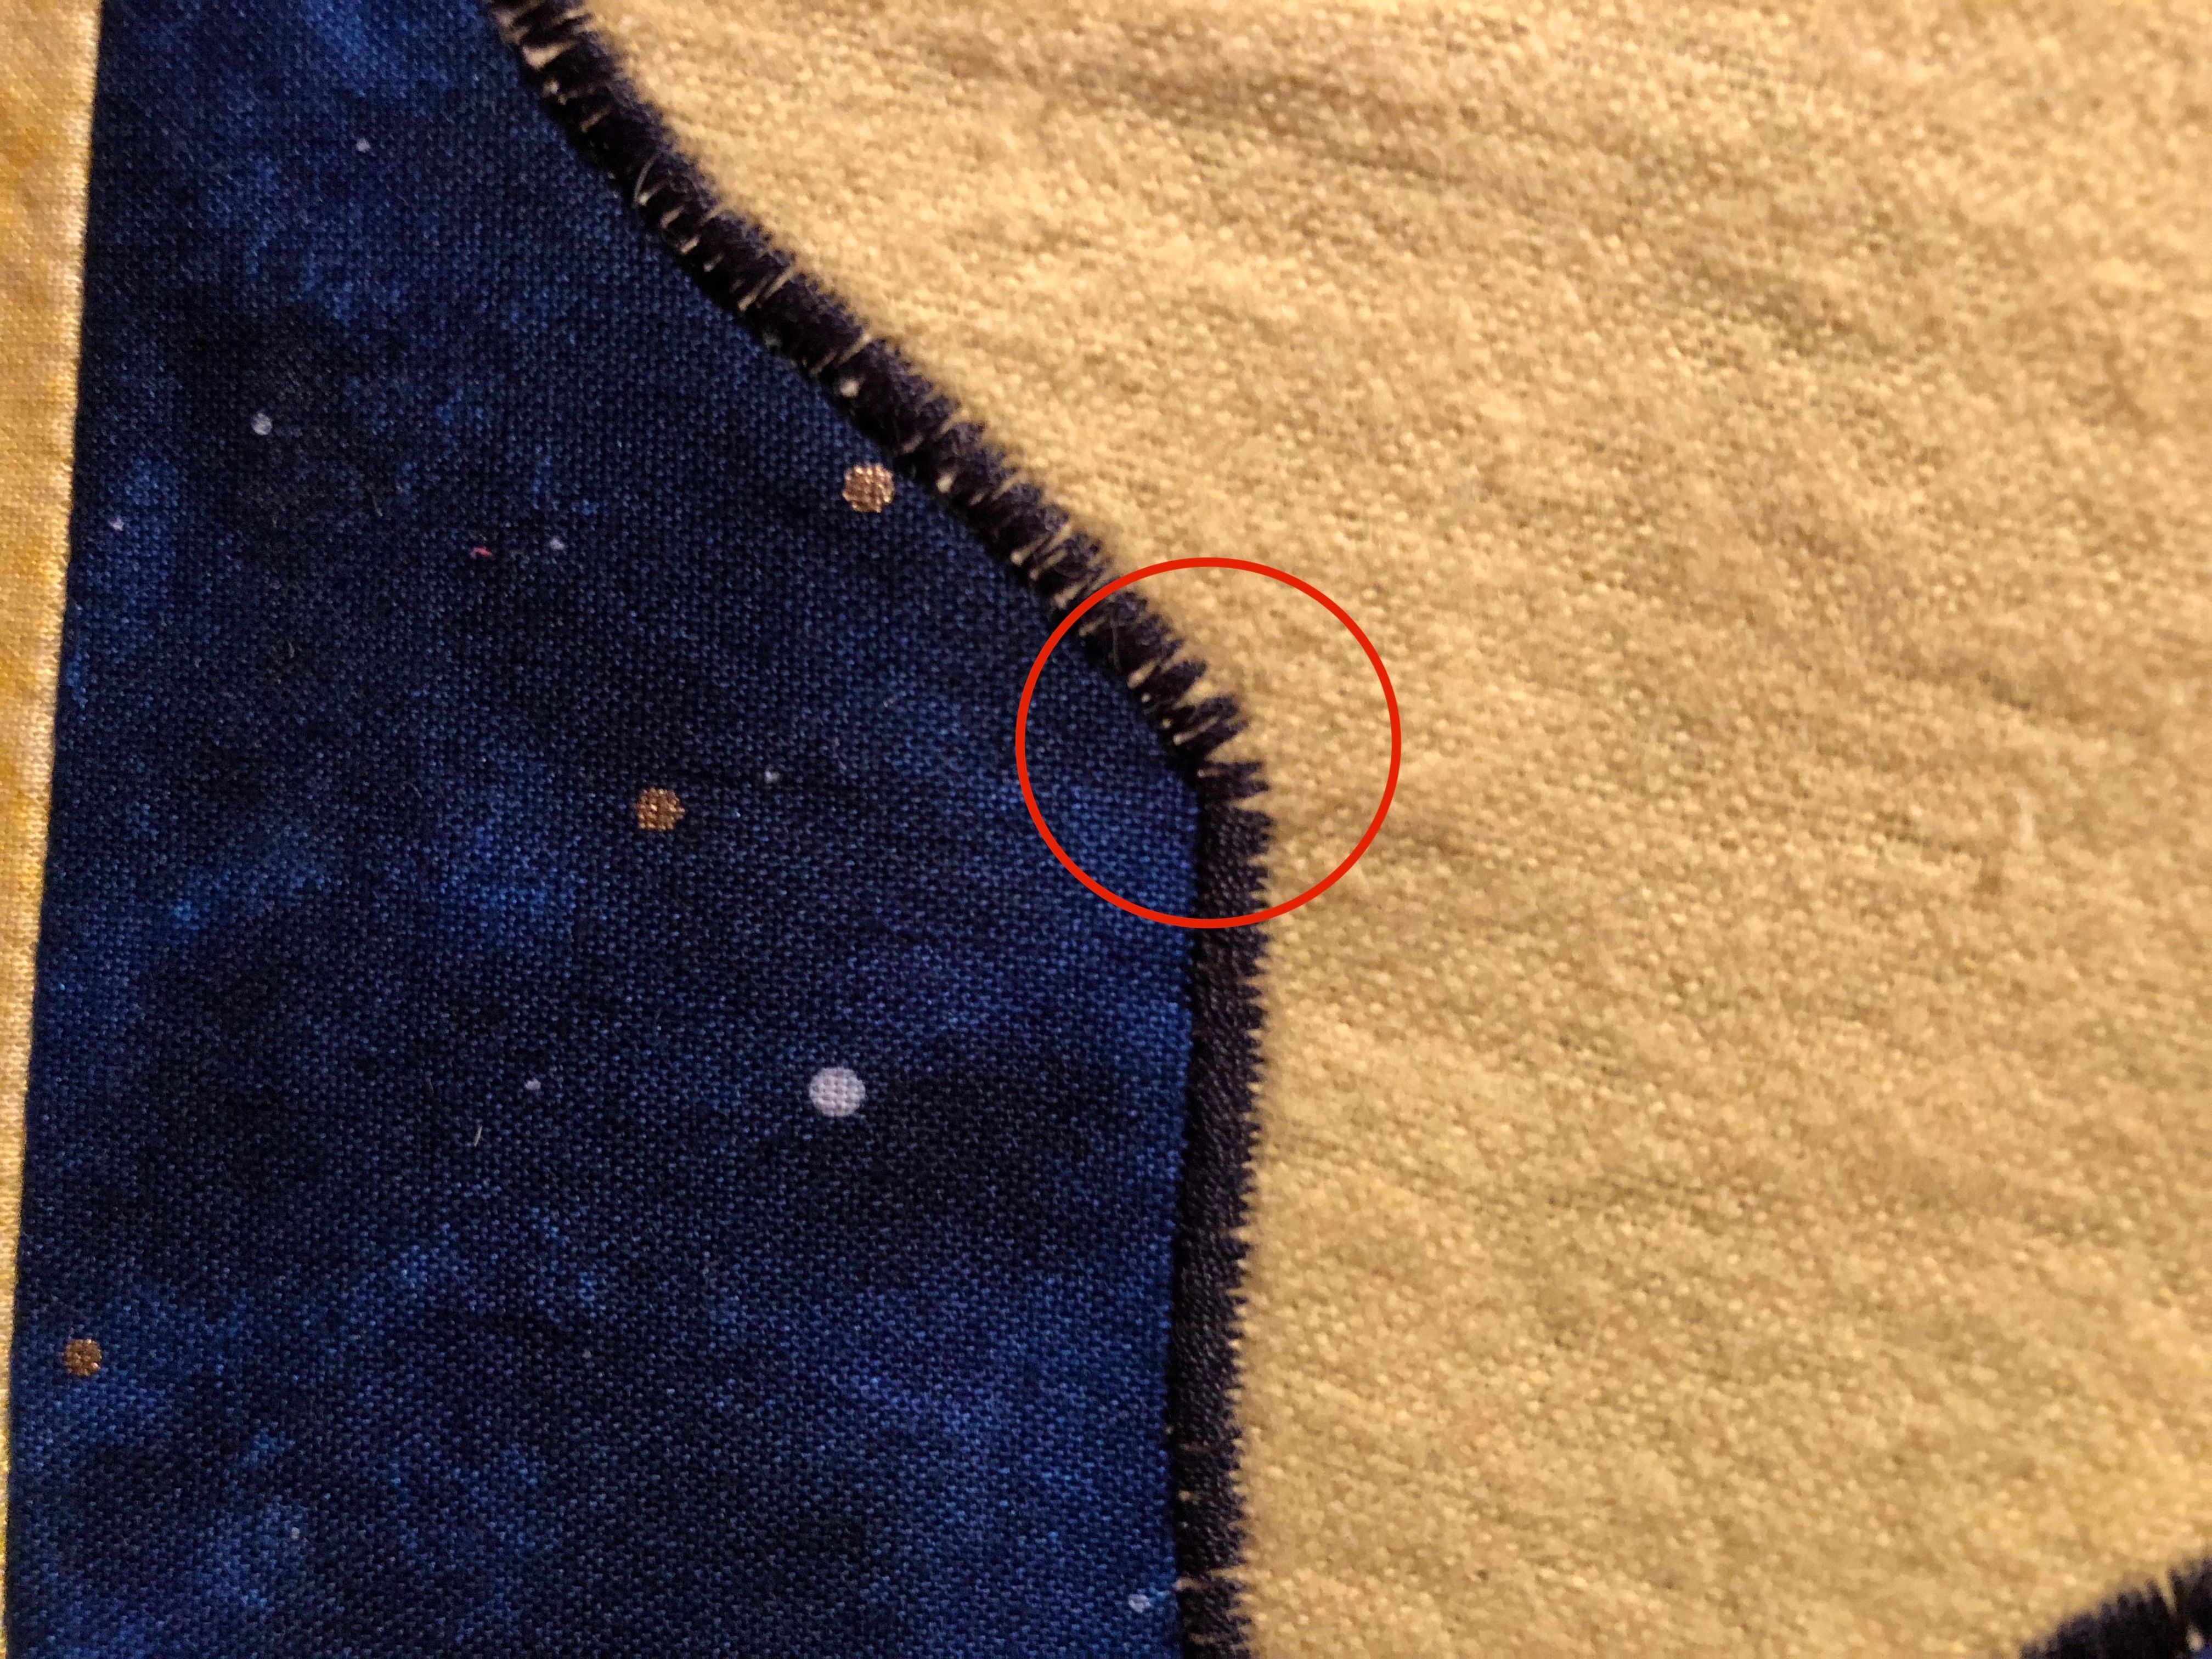
OH!! Going around "sharper" curves or corners. I almost forgot.
On curves that are just too sharp to navigate with your finger-wheel-hub, you will have to:
- stop sewing, with the needle in the DOWN position (in the fabric)
- lift the presser foot
- rotate the fabric slightly
- put the presser foot down
- do a stitch or two
- repeat as necessary until you've made it through that spot
The trick is to strategize the adjustments so that the outer edge of the cutout always remains covered by the stitching, and any "gaps" will be on the inner edge of the zigzag stitch, like this:
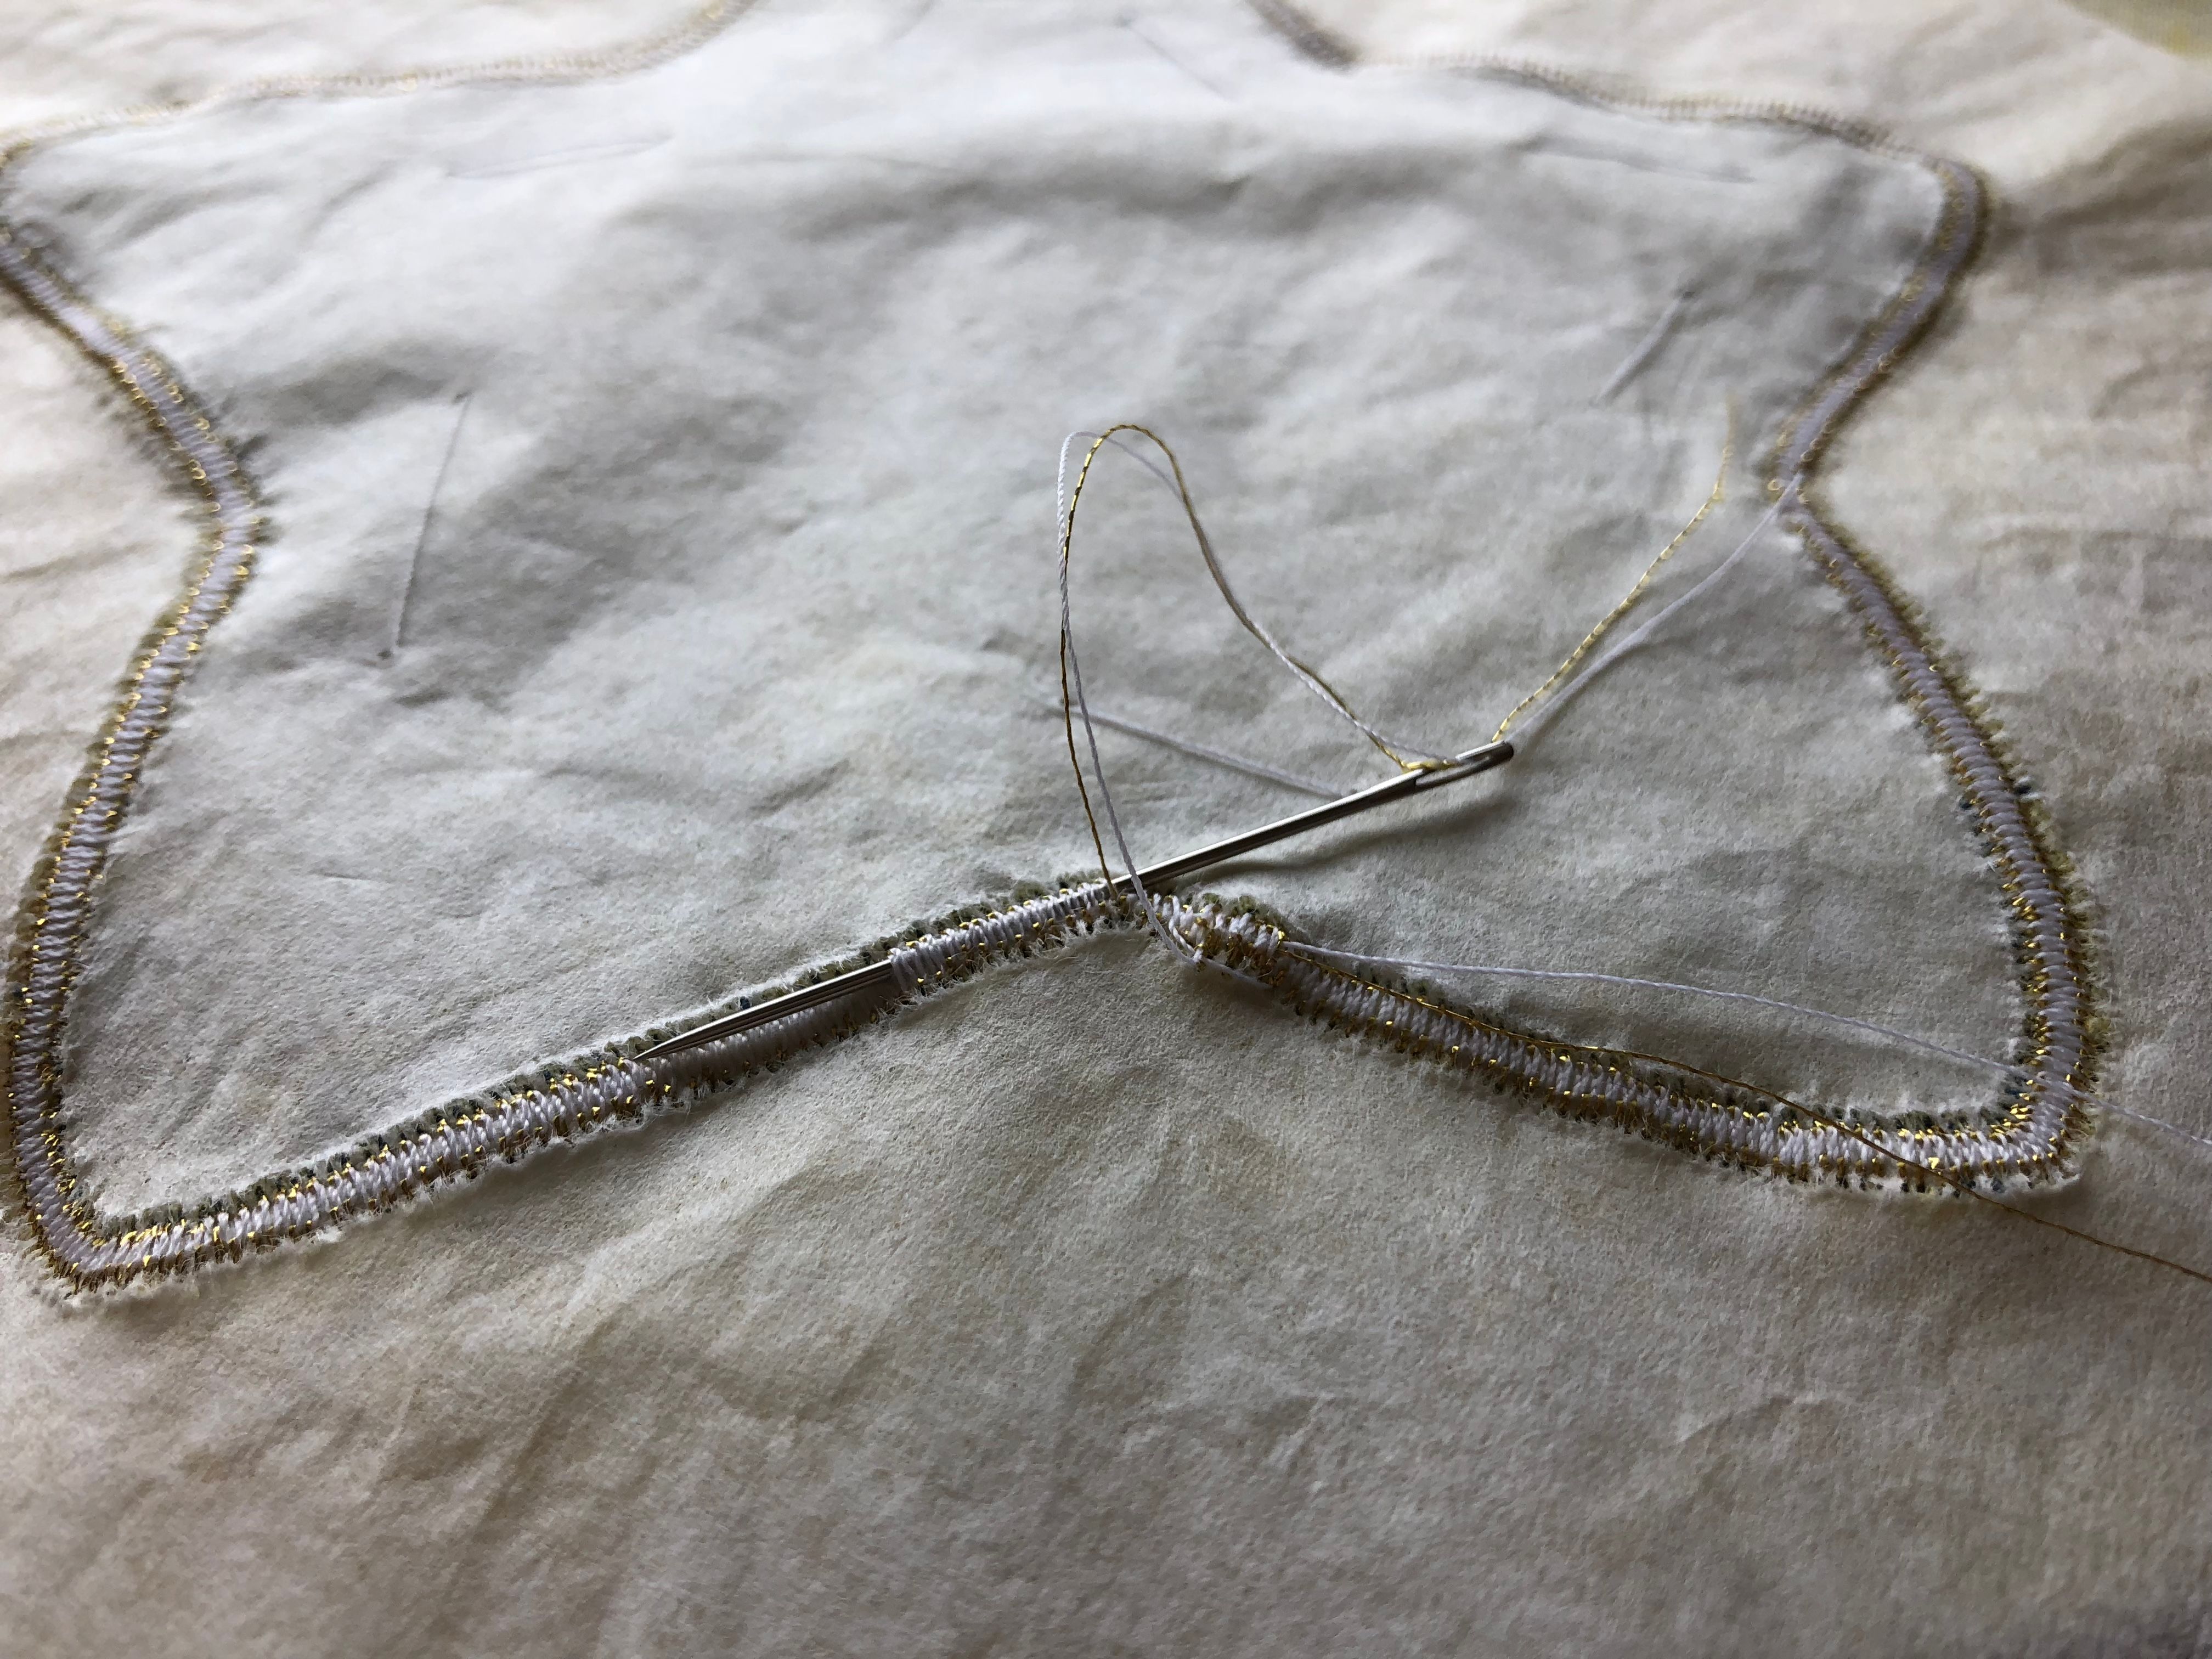
When you've made it back around to your starting point, backstitch a few stitches, and then cut the threads (I leave a few inches hanging). You're done! Celebrate!! Flip the whole thing over, pull out the basting stitches, and then gently tear away the coffee filter.
Easy now. They come off very easily though!
Because I'm a nut for attention to detail, I like to pull the topside threads through to the backside, and then run them under a few stitches to secure them before cutting them short.
I can't stand just clipping threads off and having them poke out at me later when the last stitch unravels.
Ta Daaaaa!!!!
Because you have heroically conquered this post, here is a look at my sewing room, and the cutest assistants ever :)
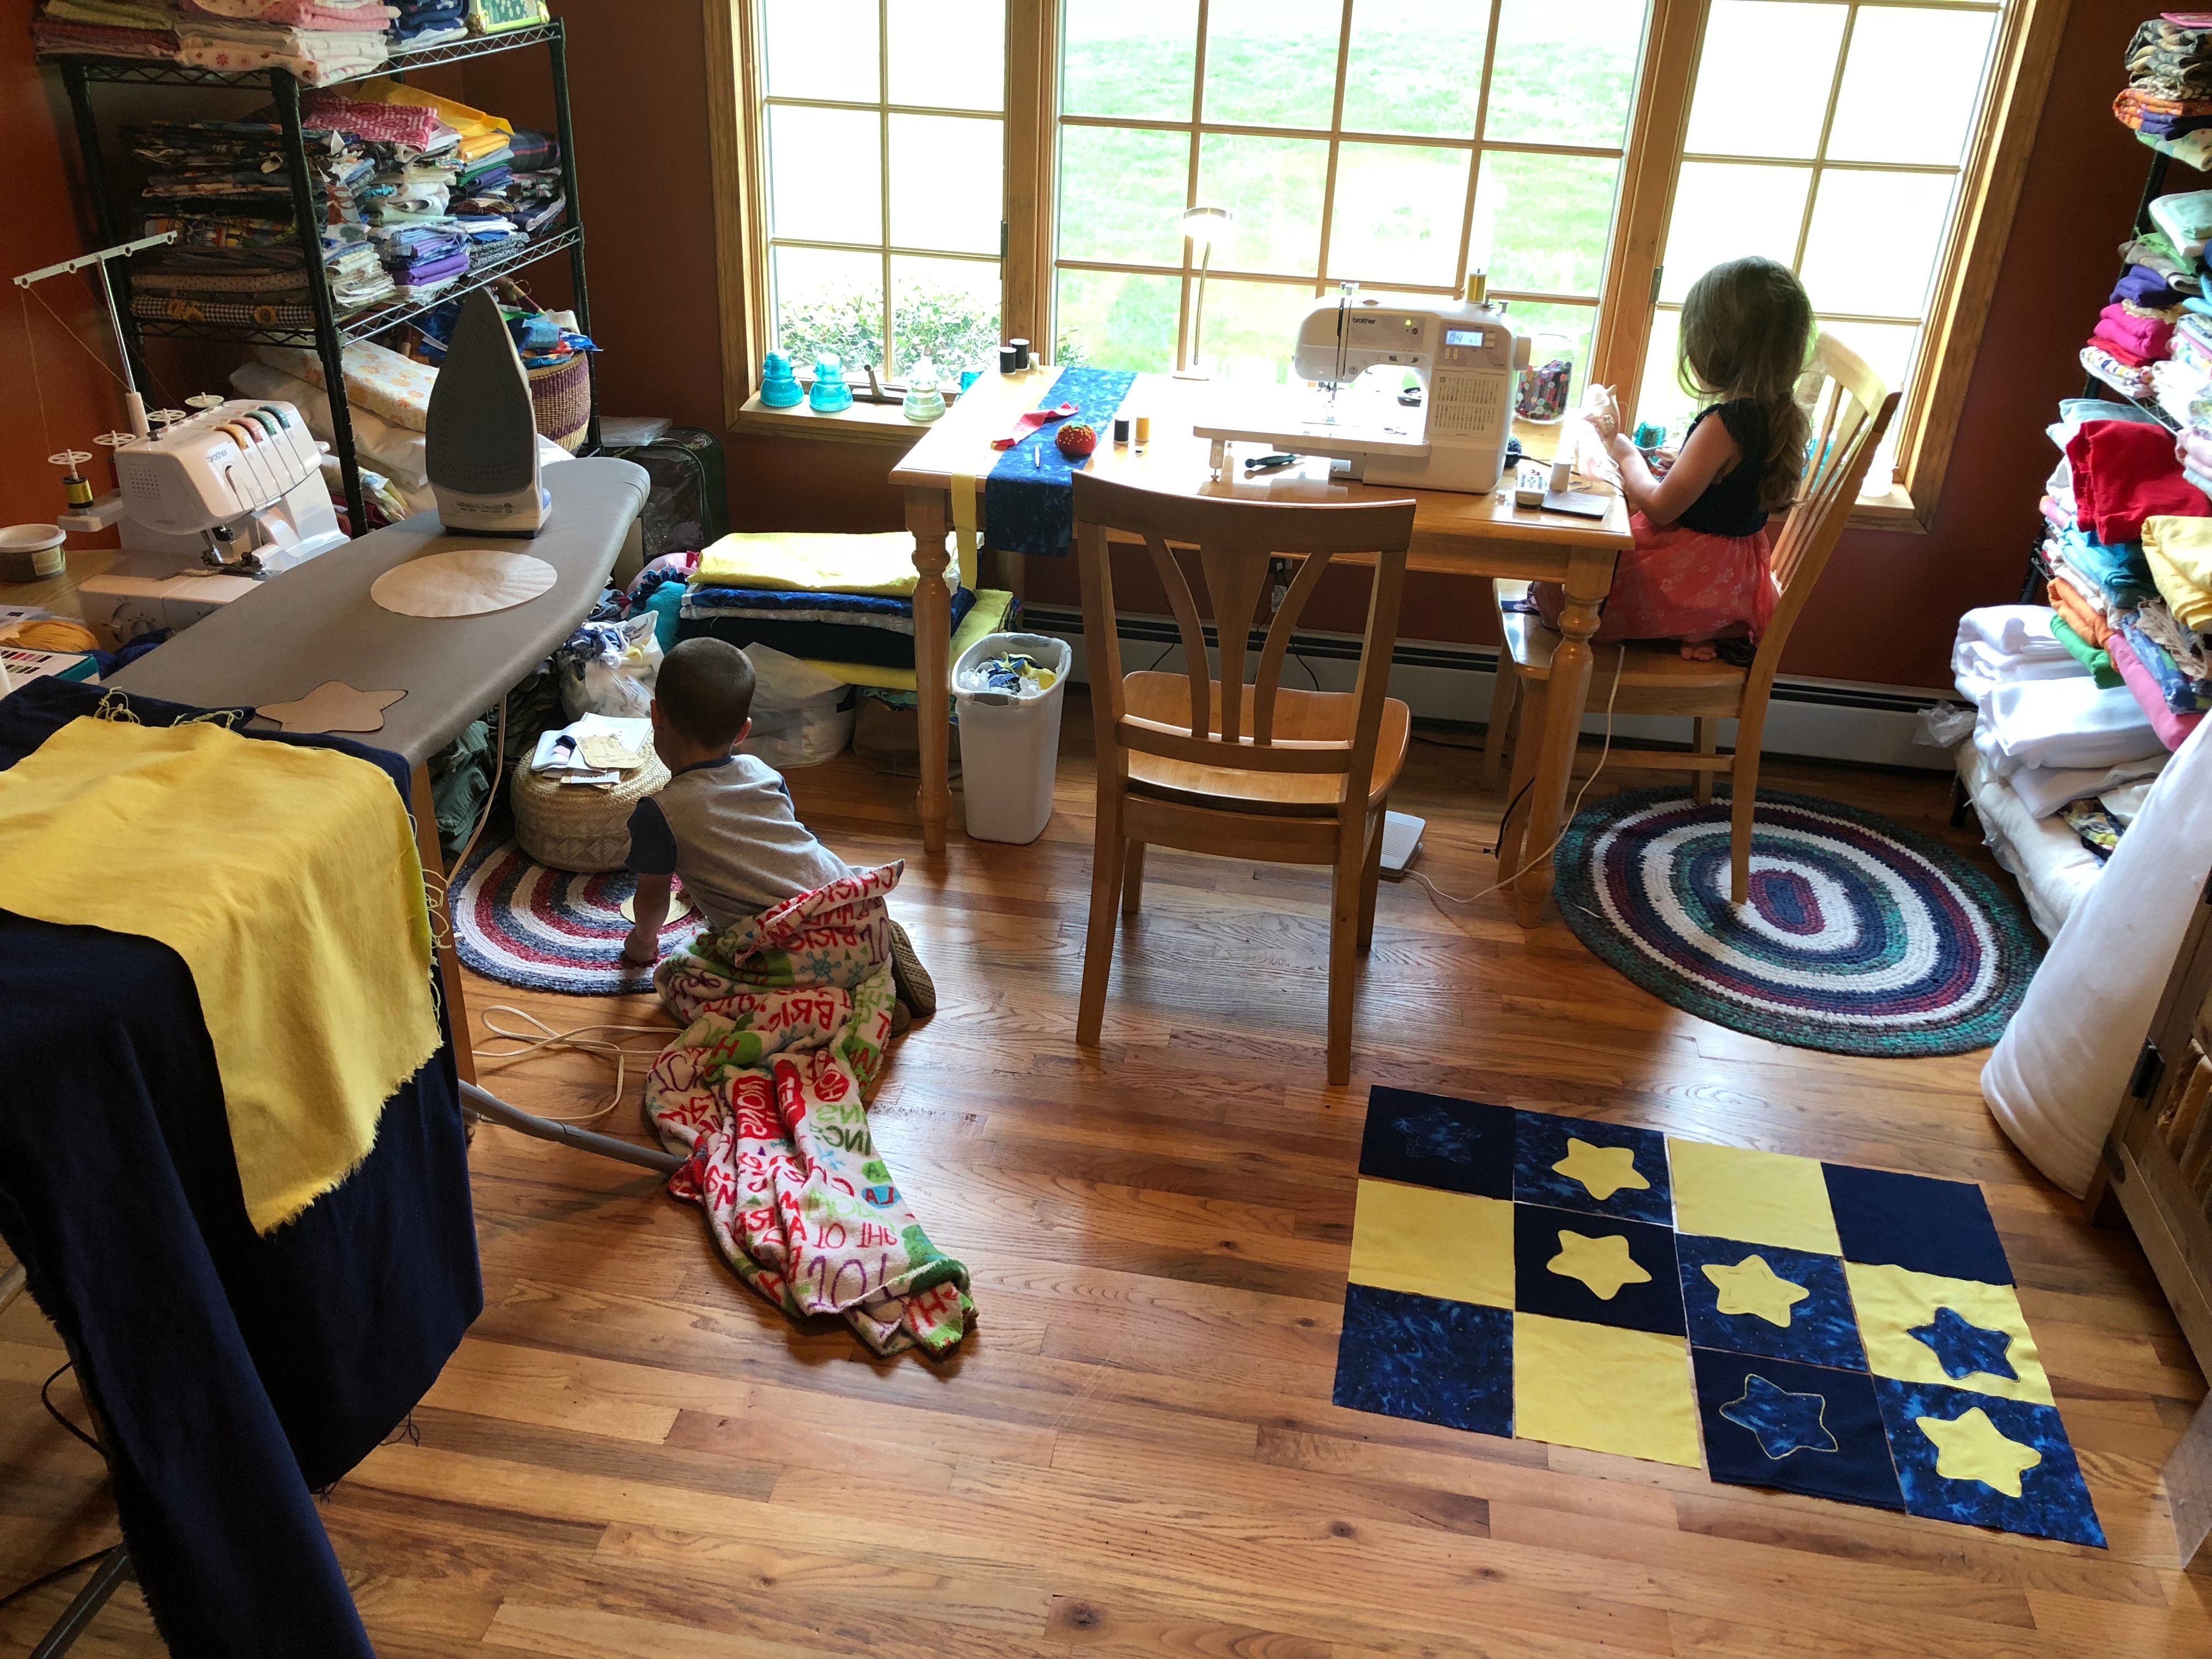
....because there's nothing better than sharing what I love, with who I love. Guess that means I love you too, Steemit :))) Happy #NeedleworkMonday! I do hope somebody finds this useful, and that everyone has a great day!
Great post! I love the photos (especially of your room, which is beautiful and cosy. I love a wooden floor, sadly we don't have one and it is much too expensive to change it)
It is so helping to see you working. I always asked myself, if an applique should be seamed, but now I understand you do this in one step by using this very narrow criss-cross stitch.
And I still love the quilt design with the rounded stars <3
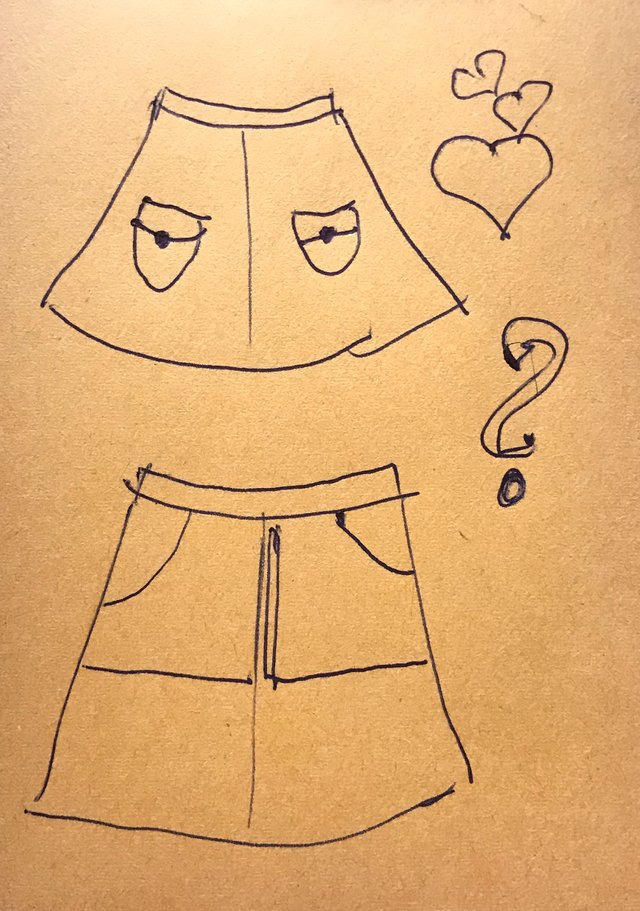
In the nearer future I want to make a simple half circle skirt with pockets which are sewn on. Can you recommend a tutorial, tips, ideas? I have never made pockets before....
Does a half circle skirt only have one seam down the length? Your drawing shows 2 but I'm not sure if you drew those lines to indicate actual seams or just the centers of the design :) If you're not dealing with side seams and you're going to be putting patch pockets on it, this is the method I'd go with (ignoring the "face" aspect, because the overall method works for any shape): http://www.sewing.org/html/face_patch_pockets.html
Full disclosure is that I've never made pockets before either, but the tutorial is something I'd do if I was going to make them! :))) @wondermaey or @naomipangolin are the clothing wizards, so they might also have good ideas!
The skirt I want to make with pockets is not a real circle skirt, because I made panels to save fabric :-D So the skirt will have 4 seams, front, back and on the sides. I would love to do the second pocket variation, but I have no idea how this kind of pockets are called (not in English neither in German, so researching is problematic)
But thank you for the link. I will watch how these kinds of pockets are done... and if I still don’t understand it I will perhaps include the question in my next post.
Wow - a beautifully detailed, explained and illustrated post. I have shudders remembering a thousand needlework classes at the Convent of Mercy!! I am in awe of your patience and skill. Seriously nice job.
Thank you so much! I really appreciate that. Where was the Convent of Mercy? I'm intrigued :) I assume you went there for school?
Beep! Beep! @shadow3scalpel at your service. I am here to assist all military members on Steemit. This HumVee will be scouting posts from a list of Veterans that is maintained by @chairborne. If you are a Veteran and new to Steemit, and you have questions or want to join the Veterans community, reply to this comment. We got your six, unless you are in the rear with the gear. Ooh-Rah!
Comment by @inthenow. This is a opt-in bot.
I learned something, which is always appreciated! Coffee filter for backing is a great idea.
Thank you for the cool post!
You're welcome! I like knowing when folks find something like that useful :)
I love it! Your helpers are darling, brings back such good memories I haven't done machine appliqueing for so long. Your designs are beautiful. Very talented. You have the best sense of humor by the way. I love reading your posts!
Thank you!! Did you have darling little helpers too? You might have to dust off the machine with a grandbaby on the way to sew for <3
I did! I used to make mother-daughter dresses for the three of us. Appliques were the sweet touches! Funny you say that, I told my hubby yesterday that I needed to get my machine tuned up! I'm making something for the babies room right now! I posted about it the other day, such fun, the time is near!
wow !!!!! with such detailed instruction even I would have risked trying to do it! you spent a lot of time on this post. Thank you!!!! idea with filters for coffee - super! I like how the stars look on the blanket. you have a wonderful bright room for work and with such helpers it will go even faster :)))
Thank you so much! Haha, right now my helpers tend to slow me down...but that's ok, as long as they're having fun :) I'm glad you enjoyed the post!!
Incredible tutorial and I love the quilt!! Beautiful colours. I always buckle the appliques, thank you for the tips!!
Thank you! It's always nice having others' opinions on something I've dreamed up, as a sanity check that the fabric and/or designs actually do work together :) I hope the tips work out for you, too!
The stars😍! First of all the machine I use is not quite as electronic as that, but I could always buy the teeth and make it work.
Secondly, the detailing you gave is totally out of this world. I mean you didn't leave anything out. Even labelling the stitch you use on your machine. There's so much to learn on needlework monday alone talk more of the whole steemit platform. I'm loving this every step of the way and I'm writing it down on the list of stuff I have learnt here that I really must try out.
Lastly your design is so lovely, it looks like the one you made for the navy wife last two weeks needleworkmonday if I can remember correctly, and look at those cute kids again, trying out stuffs!
Thank you for this nice piece of work☺
Aw thank you! I'm glad you found the detail helpful! I'm the same way in that I learn so much here on Steemit and I have an ever-growing list of things to try!
Yes, this quilt is for the same friend who is giving them to Navy moms, and she asked me to use the same general design again :)
Thank you so much for this tutorial @mtnmeadowmomma ! I remember holding my breath every time I attempted doing applique... You inspire me to try again.... Your work room is awesome !
You're welcome! I hope you do try again! I am in love with my sewing room, I must admit :) My parents did all their sewing at the dining room table, and I never had decent space to work either until we bought this house...so I am extra grateful for it!
I confirm that is a beautifully detailed and explained post. 😊😊
Why thank you!! 😃