🔨👷My Life's Journey - Continuing On The Rebuilding Of My House Which Was Ravaged By War 23 Years Ago. Bathroom Renovations Part 5.👷🔨

Well, hello there amazing Steemian friends. It is time to finally finish showing you how my bathroom renovation turned out for the SECOND time. Yep, a second time. Because 2 days ago I left a post almost done as a draft which I was planning to post the next morning. Only to wake up to Steemit being under DDOS attack which somehow deleted all I have written. So here I am again. hehe O well I will just write it better this time for your guys. For some reason, I just did not get to finish the story. Many things happen in between and just got too lazy to finish it all. But, the bathroom renovations turned out better than I ever expected and it is time to show you as well in these last 2 posts.
If you missed my posts about it you can catch up:
Part - 1
Part - 2
Part - 3
Part - 4
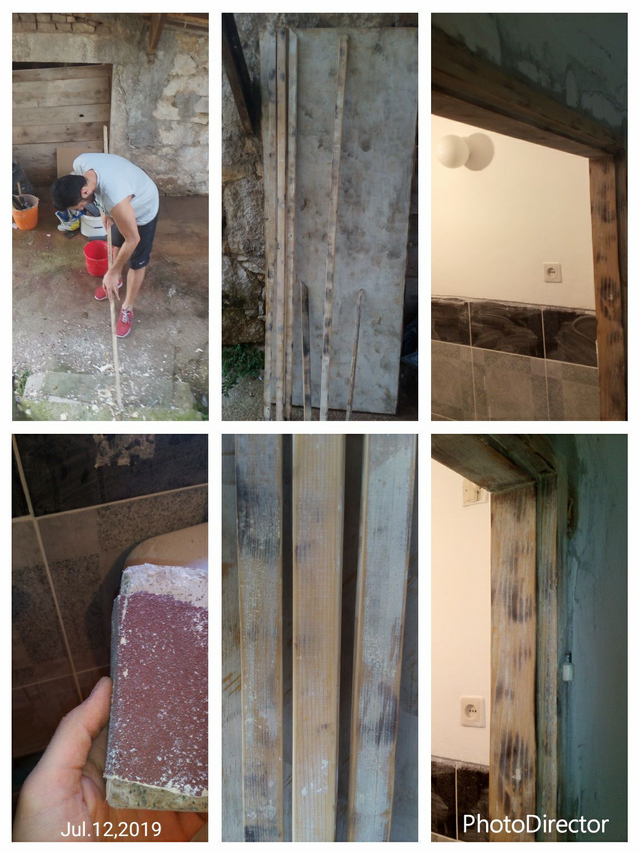
So where have we left off? O man, we left off at setting the last of the tiles and getting the new bathroom ready for finishing touches. I don't even know if I can call them finishing touches. Because those finishing touches kicked my butt. lol I mean it took my father and a while to get to this point, but cleaning up and detailing was not something I thought it would take so much time. Well, let me explain what I mean? Laugh at my pain as Kevin Hart would say. lol This picture has been where I left you off the in the last post.
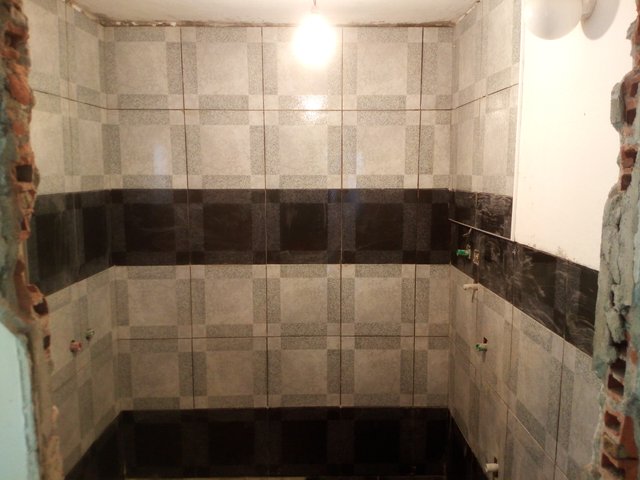
As you can see it "seems" like we are close to our goal, but in reality, there is still A LOT of work before we come to the finish line. And, to add myself a little more work because my father told me only the "professionals" can do it I decided to make a special tile. It would be the last tile we glue to the wall. Kind of like throwing a champagne bottle at the side of the new boat before they put it on the water. Something that would really make our new bathroom, OUR bathroom. I decided to carve up our last name on the last tiles with a tile saw. For this, you truly have to have some steady hands and patience. But, if you have that it is a piece of cake. Anyways this is how it turned out.
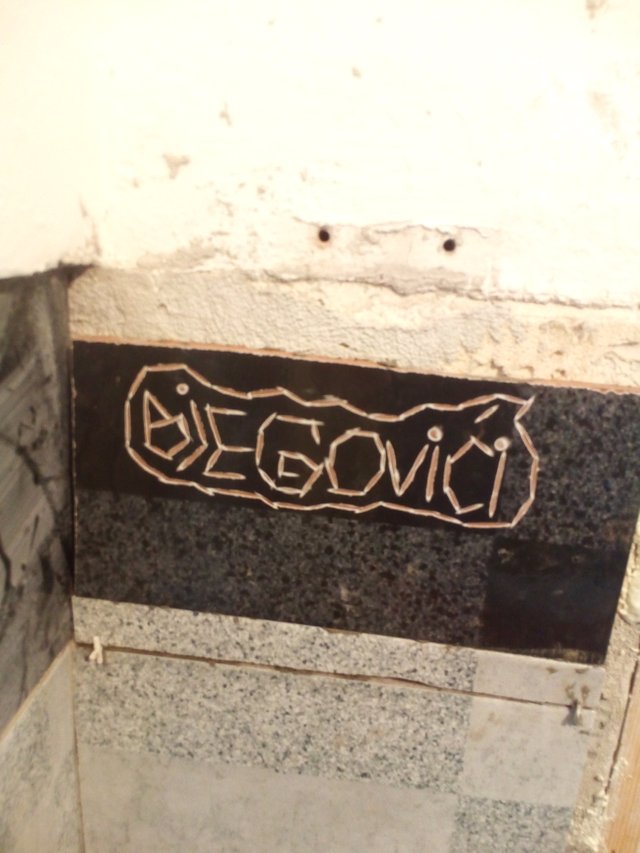
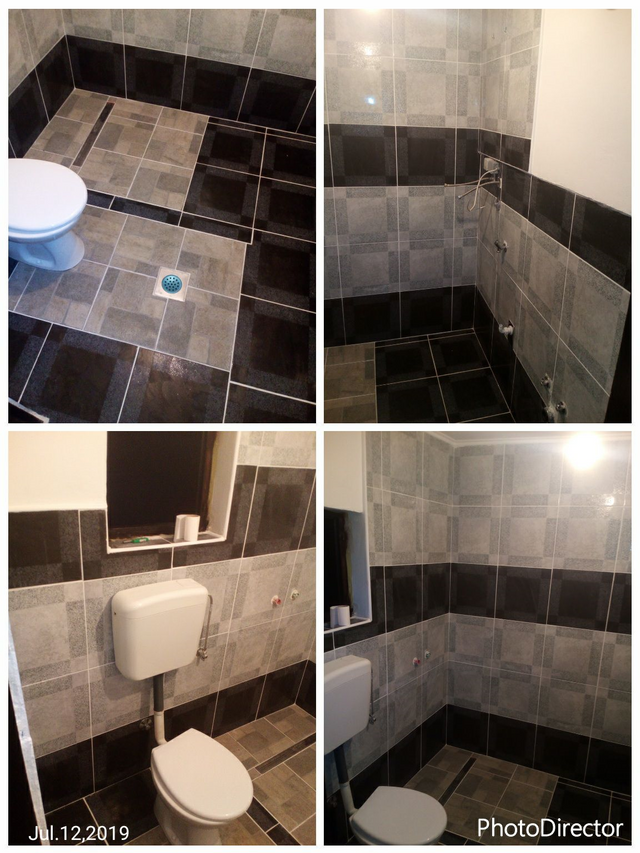
I was very pleased how it turned out and it was definitely worth the time I invested in it. My dad shook my hand and said I was officially a professional now. We had the ceremony and everything. I graduated. lol And, you would think we are close to our goal. And, we were, but there was still plenty of work to do. If you can look closely in the two pictures above you will see there are empty lines between the tiles. The next I had to do was take out the 3mm white crosses which divided the tiles and fill each line with a special waterproof mixture. And, guys you have to do this carefully making sure you don't leave any holes or space between the tiles. Or, if the water gets in between the tiles all your hard work could be ruined really fast. So it took me about 2 days just to only do this. This is how it looked when it was done.
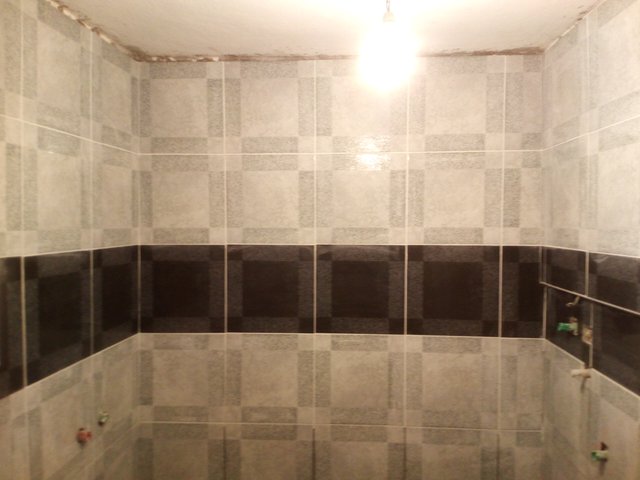
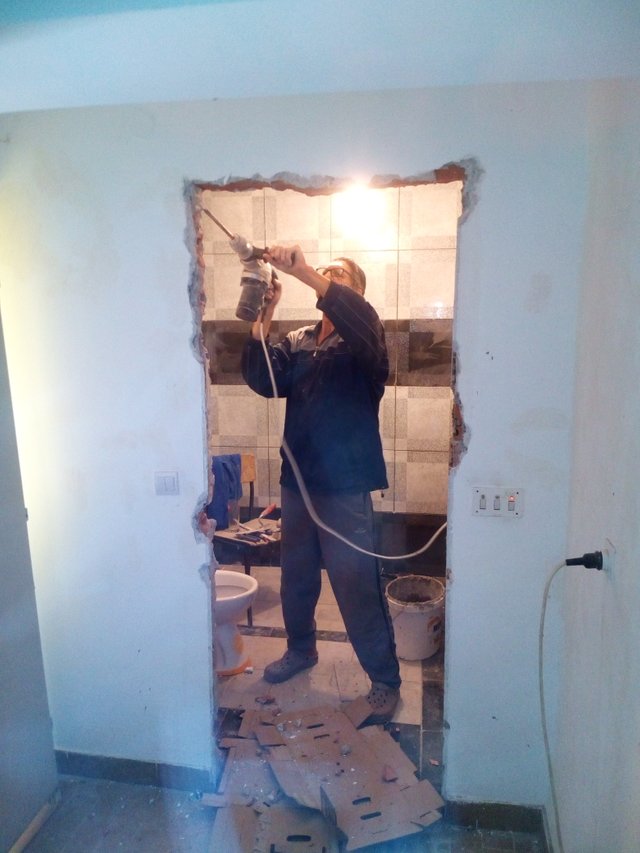
The tiles really did you look way better when those lines were finished. I was getting really excited about it as things were finally coming together after the chaos of breaking everything down to pieces in order to rebuild it. But, yes, still plenty of work to do. Since we have put new tiles we also raised the height of the floor. So the old frame could not fit anymore. So we had to use the drill to remove some of the bricks from the top to fit the doorframe again.
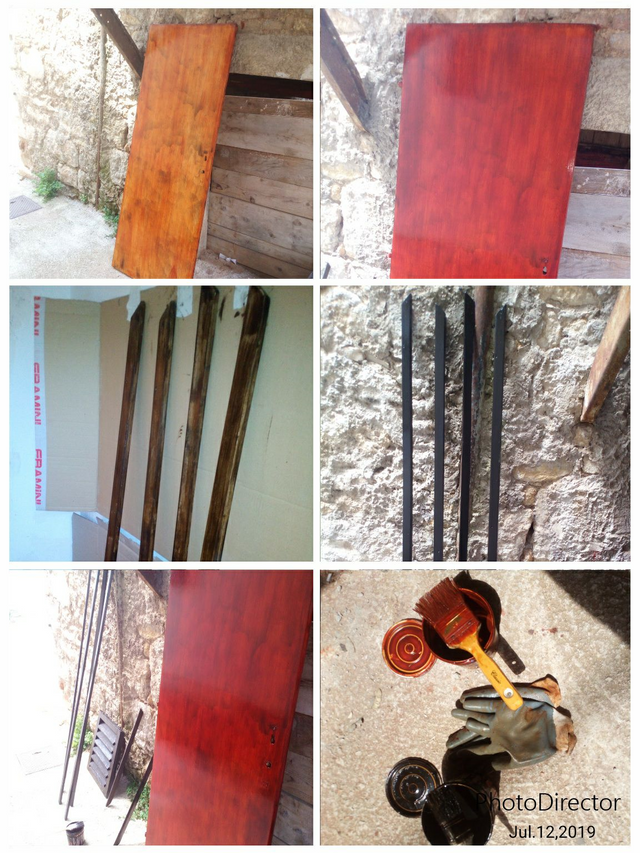
After the doorframe was in I had to take down the door, shutters, window, and the wood strips. The all had this type of wax on top of them which you can only take off by burning it off. And, guys that really took some time. I honestly spent about 4 hours to burn off the paint just from the door. I had to the same with everything else. After I would burn off the paint I had to use the sandpaper to give them that nice smooth finish and prepare them for the new paint. I am telling you guys it took me some time to do so. It honestly took me close to 2 days almost working non-stop to just prepare them all for painting. Now what I was surprised the most by was the quality of this wood. I mean it was all still good with almost no damage to them after all these years.
After I used the sandpaper to give them that nice smooth finish they were ready for the new paint. O yeah, I had to do the same for the window and door frame. Forgot about that. lol Well, let's just say my hands were sore for a couple of days after doing all this because I did it all by hand. The painting was not hard and actually enjoyed doing it, but it takes time because you have to wait at least a couple of hours for the first coat of paint to dry. If you get inpatient the new coat will literally slide off and leave drops of paint on the surface. I did as many coats of paint as needed before I got it looking like I wanted it to look. But, I loved doing it. Because all I was imagining in my head how it will all look when it all finished. Trust me guys I was dreaming about it by now. During the day I was working on the bathroom, and during the night I was dreaming about it. I was bathroom dreaming. hehe
After the shutters, door, wood strips, window, and door frame were all refurbished and painted it was time put them all back. And, guys, I was so incredibly happy finally seeing things coming together. I mean we were so close to finishing I could taste it. It took us about 4 weeks of working more than 10 hours a day to get to this point. To be honest I was exhausted. But me being me I did not want to take a break until I finish it all.
After everything was in their original place first I had to prepare the walls in the bathroom for the new paint and add decorative styrofoam strips to connect the tiles with the ceiling. I had to spray the old paint with a special type of liquid which would enable me to paint over the old paint. If you don't do so the new paint would literally fall off. And, I learned the hard way guys trust me. lol

I will tell about these "funny" stories in some separate posts. And after it was all finally painted I had to clean it all up and our bathroom was finally ready for the final stage and installing the new stuff we bought for it. And, to be honest, cleaning took a lot of my time. O man it took a lot of my time. You hate doing it, but when you see it all cleaned up you realize it was all worth it.
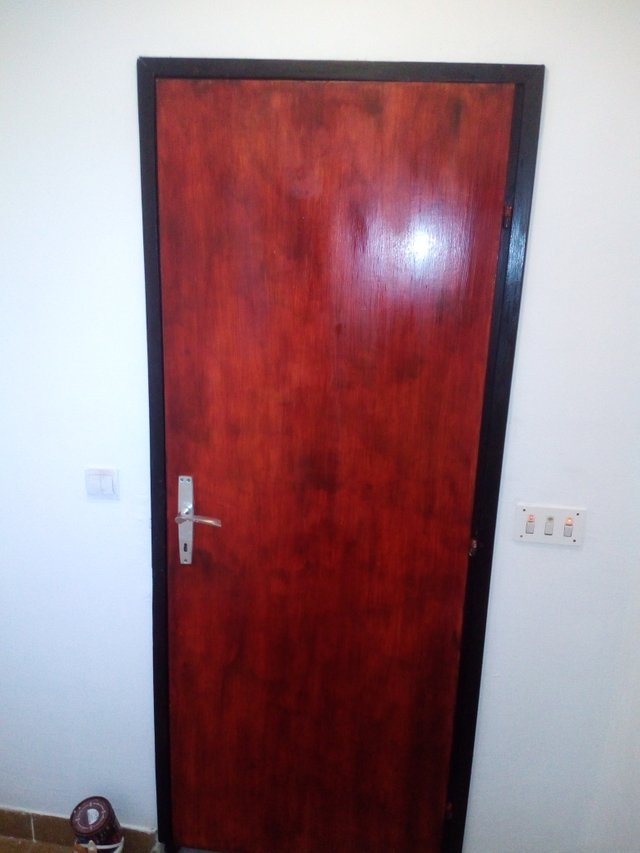
So, my friends, we are very close to the finish line. It was quite a journey to get to this point. A lot of sweat and hard work, breaking, fixing and putting things back together. Not to mention learning on the fly literally. I have never done any of this stuff in my life. And, in the final post, you can be the judge if it was worth or not? I am honestly incredibly anxious to finally share it with you guys. So until the final post, I will leave you with this nice shiny door and you can imagine how it looks inside. Yep, nice red shiny door. lol
Thank you all for reading, have a beautiful day, much love,
dbjegovic 💕 💞 💓
.gif)


Oh my goodness, your a professional tile layer too? lol This looks fabulous @awakentolife :) Such hard work, refurbishing is so difficult because of the "unexpected" surprises you find!! Love the tile, this is really wonderful, you should definitely be proud my friend. Can't wait for the final reveal! blessings to you!
I Became one in a week. lol Oh don't get me started on the surprises. I will talk about them in the seperate posts. There are some funny stories to share no doubt. :)
It really did turn out amazing considering this was my first time doing all of this stuff. It was an amazing journey to say at least and I soon I will have a final post for you guys.
Thank you for stopping by and blessings to you too as well my amazing friend. :)
Wow, Duro! A basketball player and a professional tiler! Well, it looks amazing! If you remember, I met you before you started writing about the demolished house and the effects of the war.
I was so very sad for you and now, what a difference a few years make.
An amazing job and what a truly remarkable son you are.
!tip
I do remember actually. We had finished some more stuff but just did not share it here with you guys. Bathroom really did turn out great and it was worth the hard work no doubt.
Thank you for such an amazing comment. You are amazing. In this next few days, I will share the final post about how it all turned out.
I wish I was a professional. lol It would probably take less time to do it all. hehe But, this has its charms as well. :)
Oh, I will. I've done stuff like this. Little projects you think will take "about a week tops" you wind up working on hard every day for months. It usually takes me about two years to forget the agony enough to try something else. Heed my warning.
Oh, I believe you, my friend. I really do believe you. I started some stuff after this and have not finished it. So I did not learn the lesson jet at all. lol I thought this will take 2 maybe 3 weeks tops... Month and a half later I was still finishing it. lol
The carved tile with your name looks very "Roman" to me for some reason. Maybe it's the angles in the letters.
Ok, I'm going to go do something else now.
Great job!! Seriously!! Can I call you when I need mine redone? (Because that will be easier than flogging The Weasel into doing it. Yeah, I know. That sounds odd. Very odd. Leave me alone.)
I love the emojis in the hardhats.
The things I never wore at all. The bathroom is too short for something to fall on my head. Usually, my toes get the beating. lol
Fantastic job Durko! I am glad you are all done! M be you ca do this for living someday, lol. Anyway, how is your dad?
Thank you, my amazing friend. I have one more final post to write and show you how it all looks with all the new pieces we bought for it. We honestly had a general plan of it and the rest of the design we just made up as we went along. And, it really did turn out great as you will see in my next post about it. :)
You are most welcome! I look forward to see it Durko!!!
A lot of work but it's coming together, I love the special tile you made I think it is awesome
Thank you, brother. I was a nice special addition to really make it our bathroom. hehe :)
And, yes, a lot of work finally coming together. :)
Its nice when a place has personal touchs like that :)
Hello!
This post has been manually curated, resteemed
and gifted with some virtually delicious cake
from the @helpiecake curation team!
Much love to you from all of us at @helpie!
Keep up the great work!
Manually curated by @enchantedspirit.
Congratulations! Your post has been selected as a daily Steemit truffle! It is listed on rank 13 of all contributions awarded today. You can find the TOP DAILY TRUFFLE PICKS HERE.
I upvoted your contribution because to my mind your post is at least 5 SBD worth and should receive 180 votes. It's now up to the lovely Steemit community to make this come true.
I am
TrufflePig, an Artificial Intelligence Bot that helps minnows and content curators using Machine Learning. If you are curious how I select content, you can find an explanation here!Have a nice day and sincerely yours,

TrufflePigSo nice to see the outcome of this project you have been working on with your dad! You did a great job! It looks really neat! Both of you must be really proud of it! Congrats!
Yes, it really did turn out great. Actually considering I was a complete amateur doing this it turned out better than I expected.
Thank you for your lovely comment. Have s blessed day. 😀
Posted using Partiko Android