Digital photography - Exposure compensation
Exposure compensation
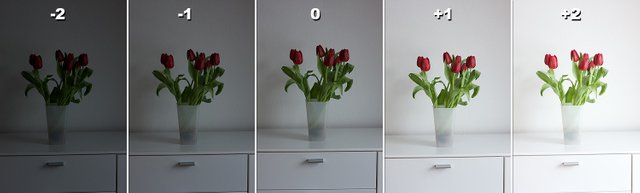
An easier way to correct the lighting of the camera is by using the exposure compensation setting. This is the +/- button on the camera. Photos that are underexposed need a positive (+) compensation and photos that are overexposed need a negative (-) compensation.
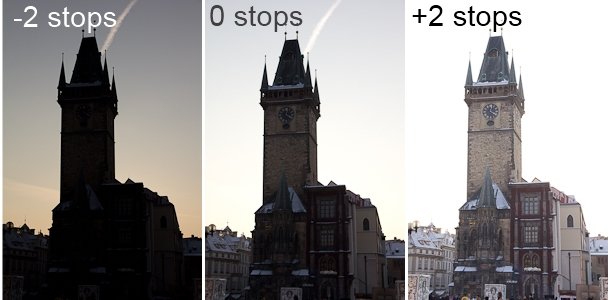
As a guideline, minus 1-2 stops can be used for darker objects or darker backgrounds and plus 1-2 stops for a lighter object or lighter background and plus 1-3 stops for a background that is over lit. Depending on the shooting function that you chose, the camera will adjust the shutter speed and the aperture automatically.
Using the AE-lock
If the object you are trying to capture, is in the center of the photo and there is a lot of light or a very dark background, the camera might read the lighting incorrect.
The cameras automatic exposure lock might help with this.
How is this done?
The object must be in full view. While holding in the AE-lock button, hold the shutter button in only halfway to get the light reading direct from the object. Now you can compensate the photo and take the picture.
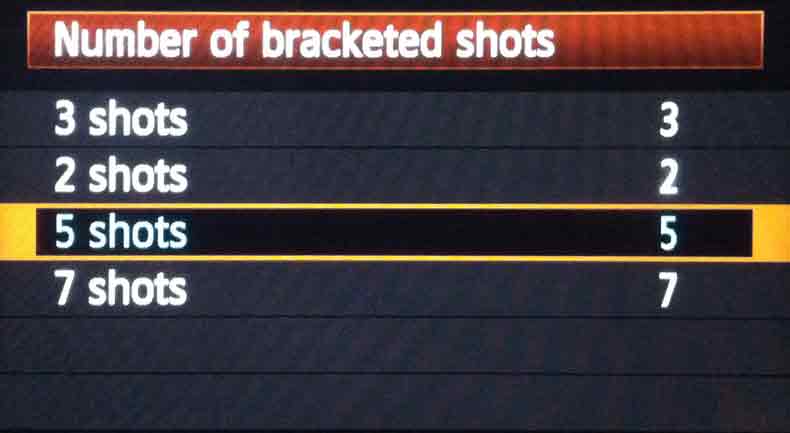
Exposure bracketing (AEB)
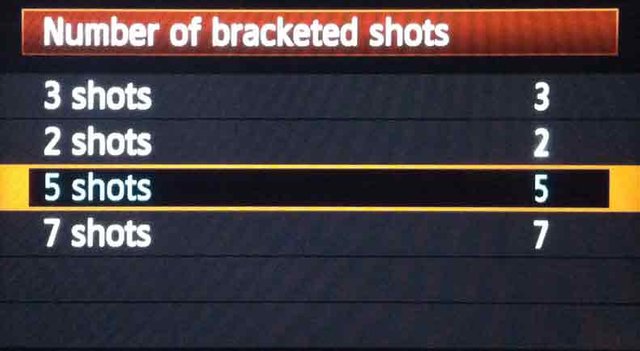
Often it is better to ‘bracket’ your photo and this can be done by exposure compensation bracketing or changing the shutter speed manually about 3 times and then comparing the 3 photos taken. Choose the photo that is correctly exposed. To use the automatic setting on your camera, the camera must be set to multi-shots, activate the AEB function and capture 3 photos. You can also refer to your manual for this, as every camera is different.
Using the Manual (M) function If you are capturing images on the M function, you can adjust over-or underexposed photos easier by changing the shutter speed and aperture. It is also easier to do a light reading if there is a high contrast in the photo. Look at what the light reading is every time before capturing a photo and adjust the settings until you are satisfied with the light reading.
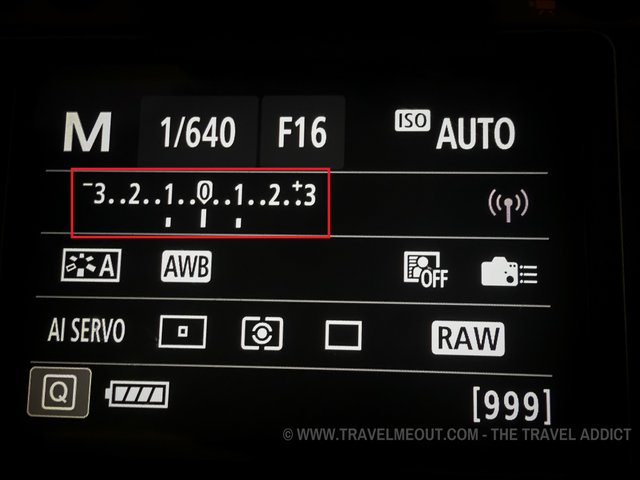
The camera light meter (Exposure level indicator)
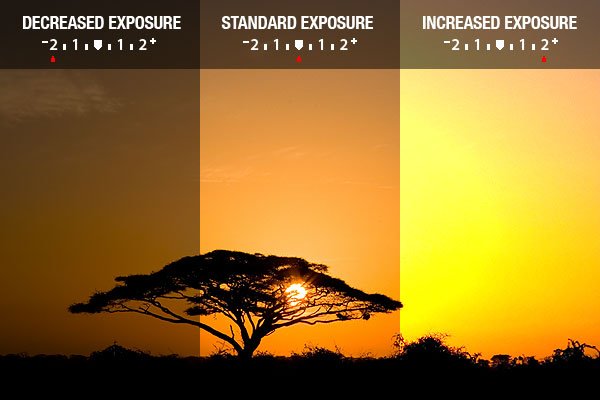
If you are using one of the creative shooting functions, and you look through the viewfinder of the camera, you will notice that there are information at the bottom of the viewfinder. The most important of this information is the cameras built in exposure level indicator, a line with dots that is numbered -2 -1 - +1 +2.
Underneath the exposure level indicator s light will blink indicating the current exposure. If the indicator is on 0, it means that you will take a standard photo. If the indicator is on +2, it means that the photo will be 2 stops overexposed and if the indicator is on -2, it means that the photo will be 2 stops underexposed etc.The shutter speed, aperture and ISO are also indicated.
The following information is indicated on the back of the LCD screen:
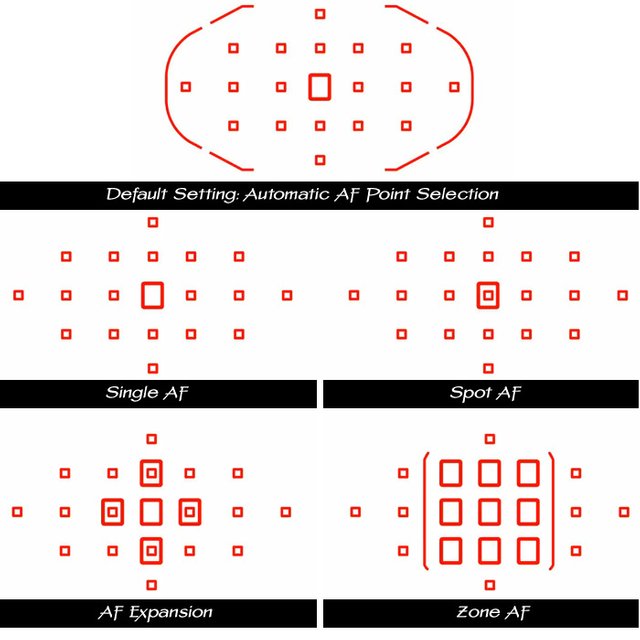
Which focus method to use?
When looking through the viewfinder and holding the shutter button in only halfway, you will see the auto-focus lights blinking and might also hear a “beep” sound. In the basic shooting settings, the camera will automatically look for these focus points.
With creative shooting (M, AV, TV etc.) you can choose the focus points. By pressing the AF button (on Canon-models it looks like a small magnifier) and turning the wheel, you can choose which focus point to use. This is referred to selective focus.

If you would like to support the educational community by delegating to @steemiteducation, please click on any of the following links. This will ensure that more teachers are supported on a daily basis.
100SP;200SP;300SP;400SP;500SP;750SP;1000SP;2000SP;3000SP;4000SP;5000SP;10,000SP;25,000SP