Makeup for my photos #6 幫我的相片美容 #6 | 攝影月旦評
 Dear Steemit friends, welcome to the "Makeup for my photos" series. Let's see the before after photos for today.
親愛的Steemit朋友們,前陣子跟大家介紹4Mano Cafe這間咖啡廳時,其中一張照片經過後製處理之後有很大的差距,趕快來跟大家分享一下我後製的過程,希望對大家有幫助。
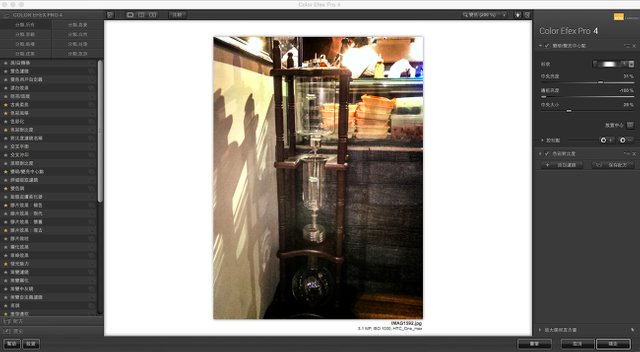
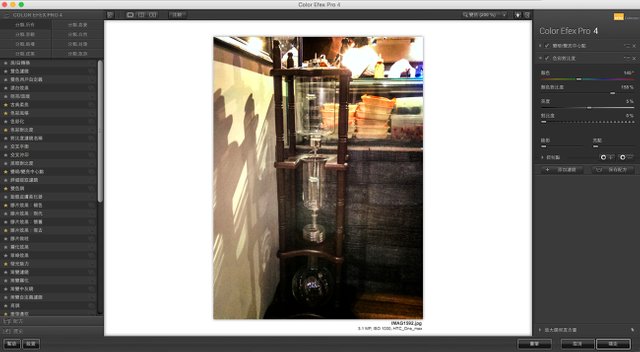
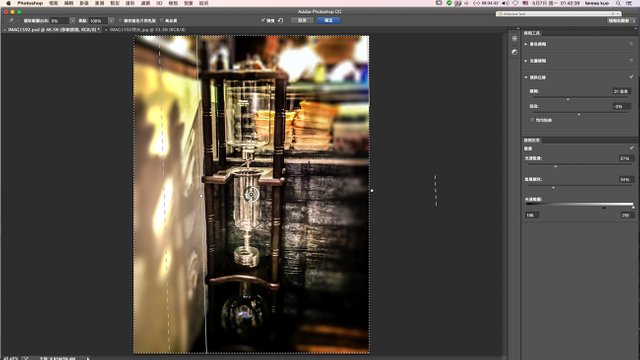
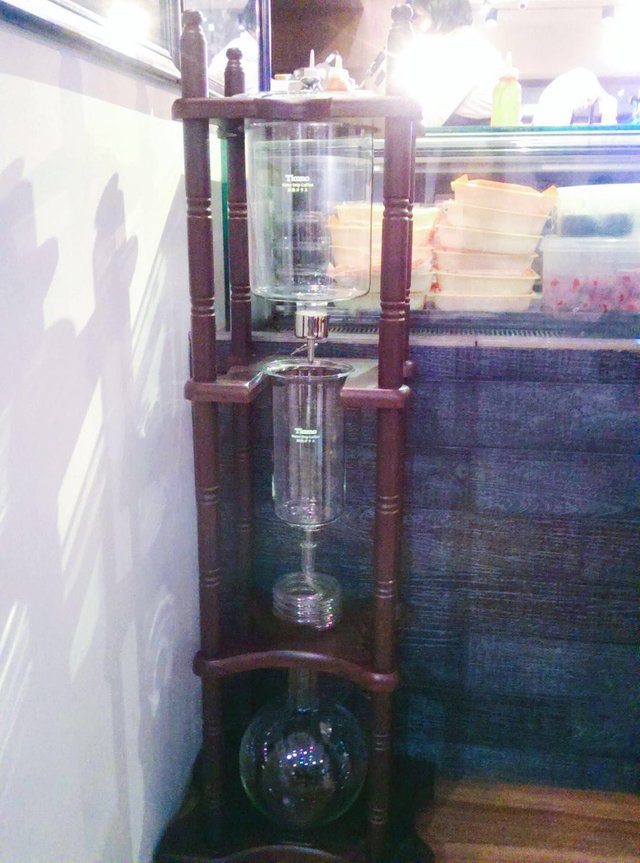
先來看一下修改前後的對比,質感是不是差很多呢?
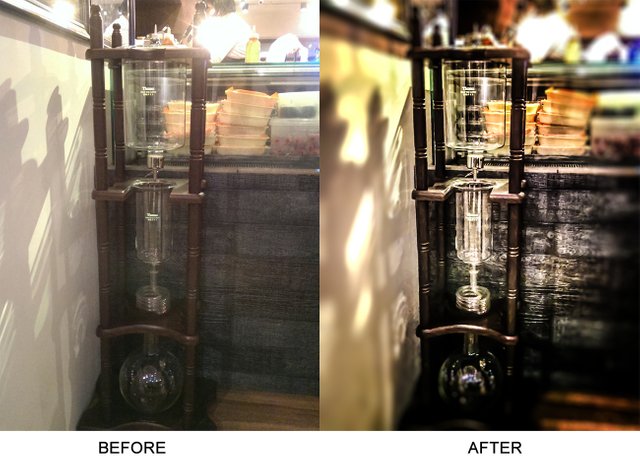

The color saturation of the initial photo is not enough, there is no depth of field in the foreground and background, and the subject cannot stand out.
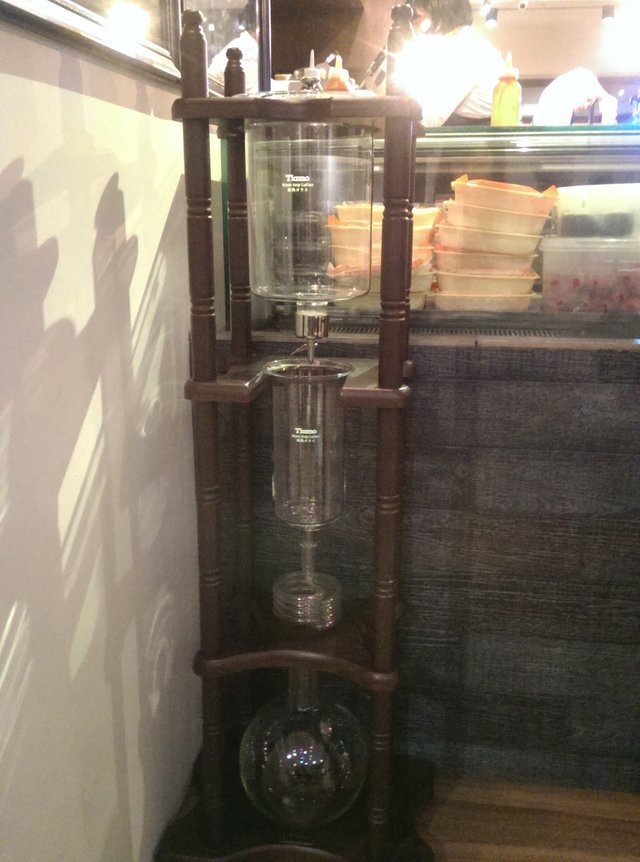
初始的照片色彩飽和度不夠,前景與後景沒有景深,主體凸顯不出來。
First, use Photoshop's built-in function Filter -> Camera Raw filter to roughly adjust the sharpness and contrast of photos
先利用photoshop內建的功能 濾鏡 -> Camera Raw 濾鏡,粗略調整照片的清晰度與對比度
Then use Photoshop's plug-in Color Efx Pro to make more detailed adjustments.
Color EFx Pro is a free plug-in filter introduced in my previous "Makeup for my photos" series. This plug-in is very helpful for photo post-production. If you haven't installed it, it is recommended to download and install it!
I used two functions this time.
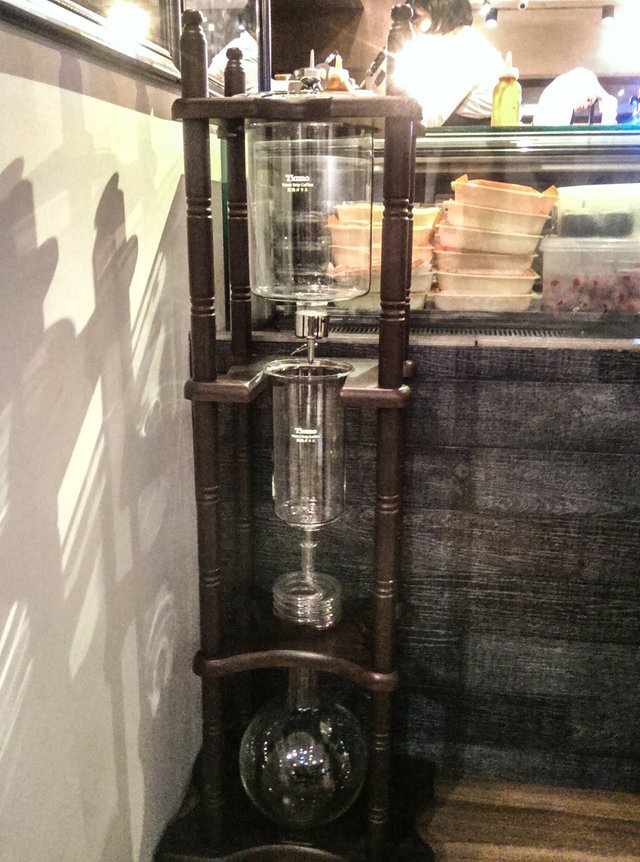
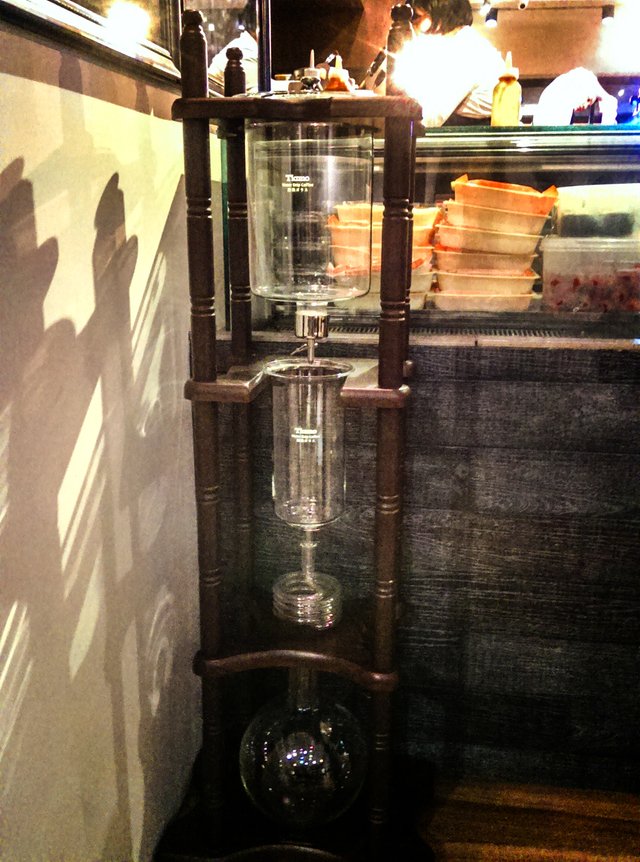
"Darken/brighten center point" darkens the outer corners of the photo, brightens the center of the photo. The degree and range of darkening and brightening can be fine-tuned. After adjusting the photos, because the center is relatively brighter, there will be a vague spotlight effect, and it is easier to highlight the subject.
I also added the "color contrast" function to adjusting the color contrast and saturation as the name suggests. These two functions are coordinated with each other so that the glass part of the ice drip coffee machine is slightly more translucent, and the shadow on the wall becomes more layered.
接著使用photoshop的外掛 Color Efx Pro 來做更細節的調整。
Color EFx Pro 是一款免費的外掛濾鏡,在我之前的相片美容系列有介紹過。這款外掛非常好用,對於照片後製有很大的幫助,我自己經常使用。如果你還沒安裝,很建議去下載安裝喔!
這次我使用到了兩個功能,分別是變暗/變亮中心點以及色彩對比度。
「變暗/變亮中心點」會將照片的外圍四角變暗,中間變亮,變暗變亮的程度及範圍都可以微調。經過調整之後的照片對比度及色彩飽和度都會增加。這個功能是我經常使用的,經過調整之後的照片,因為中間比較亮四周比較暗,所以隱隱會有打了聚光燈的效果,比較容易凸顯主體。
但是這張照片的明暗對比和色彩飽和度實在太差了,所以我又再加上了「色彩對比度」這個功能。色彩對比度功能除了調整明暗對比之外,顧名思義可以調整顏色的對比與飽和度。
這兩個功能互相搭配調整,冰滴咖啡機的玻璃部分稍微比較有剔透的感覺,牆上的影子也變得比較有層次。
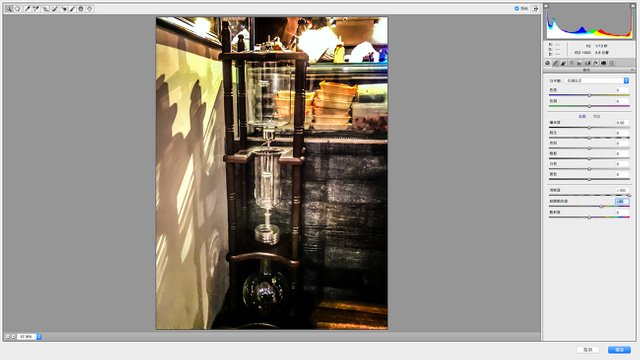
Although the photo is much better than before, the texture of the photo still looks a little rough, and the clarity of the photos still needs to be enhanced. So I used the Camera Raw filter again to make more detailed adjustments.
After adjusting the sharpness option to the highest, and increasing the detail saturation, the contrast and the color saturation are close to what I want.
However, the photo still looks rough. So I use the noise reduction function to remove noise, the texture of the photo will look delicate. Be careful when using this feature. Some photos may look fake if they are used excessively.
這時候的照片雖然已經比之前好許多,可是照片的質感看起來還是有些粗糙,照片的清晰度仍然有待加強。所以我再度用Camera Raw濾鏡做更細節的調整。
將清晰度的選項調到最高,同時增加細節飽和度,這時候照片的明暗對比及色彩飽和度都接近我想要的程度。
不過此時照片看起來質感還是很粗糙,所以利用雜訊減少的功能,去除粗糙的粒子,照片質感看起來就會比較細膩。使用這個功能時要小心調整,有的照片使用過度會看起來假假的。


Now the contrast and the color saturation all performed very well, but the protagonist Kyoto coffee machine is still not prominent enough, so we will blur around to let the subject be more obvious.
Choose filter-> aperture blur, adjust the range of blur, the protagonist jump out immediately.
經過上述的幾項功能調整,明暗對比和色彩飽和度都表現得很不錯了,不過主角冰滴咖啡機還是不夠凸顯,所以我們來將四周模糊,讓主體更明顯。
選擇濾鏡 -> 光圈模糊,調整模糊的範圍及模糊程度,主角是不是立刻跳出來了?

I want to make the effect of light through the glass reflected on the wall, so I used the filter -> shift axis blur to adjust the light on the left wall.
Tthe fuzzy range is adjusted to only affect the wall on the left side. After adjusting the color of the light source, the light spot is strengthened to simulate the effect of the overexposed light source.
吹毛求疵的我,想要做出光線透過玻璃映照在牆上的光影,所以我用了濾鏡 -> 移軸模糊來調整左側牆壁的光影。
在這個功能底下,將模糊的範圍調整到只有影響左側的牆面,這裏調整的目標是光源散景與散景顏色,將光點加強,模擬光源曝光過度的效果。

Let's see the whole process from GIF
來看看整個變化的過程

今天的分享,大家覺得實用嗎?喜歡的話,記得鎖定這個主題,如果你也有什麼修片的撇步,也歡迎留言跟我分享喔!

Thanks for reading.
If you would like to learn more about me, please read my self-intro.

Welcome to upvote, resteem, and follow me. If you like the content I share with you, don't hesitate to leave your comment. See you next time~
如果你想要更了解我,請看我的自我介紹

歡迎留言跟我聊天,喜歡我分享的內容的話,別忘了留言告訴我喔!我們下次見!
太强了,请收下我的膝盖。
您太客氣了,像您這樣的設計高手用photoshop只是小菜一碟
突然想起了斗地主里的一句——要不起
哈哈哈哈哈
非常实用哈!仔细看完后马上去下载那个PS外挂了!O(∩_∩)O谢谢分享

哈哈!對你來說是小菜一碟
^_^ 还要多和你学习,继续关注你的教程分享
感謝感謝
恭喜你!您的这篇文章入选 @justyy 今日 (2018-05-08) 榜单 【优秀被错过的文章】, 回复本条评论24小时内领赏,点赞本评论将支持 @dailychina 并增加将来您的奖赏。
Congratulations! This post has been selected by @justyy as today's (2018-05-08) 【Good Posts You May Miss】, Steem On! Reply to this message in 24 hours to get rewards. Upvote this comment to support the @dailychina and increase your future rewards! ^_^
謝謝
顿时有了质感!我只会美图秀秀。
給自己修修臉還是比較重要的
哇,你好厉害啊,照片经过你处理完之后太有感觉了!我都不会修片,不会使用photoshop呢
photoshop的基本操作還是值得學一下的,挺實用的喔
真的差很多ㄟ!話說貓女姐對照片品質的要求也很高!👍
這方面我真的挺龜毛的,誰叫我從小就喜歡跟藝術有關的東西呢
同感 🤝 有时候看到一些辣眼睛的照片觉得生不如死 😄
哈哈哈!也太想不開了
高高的要求才有美美的照片可以看~ :D
你和你室友的照片也都很美呀
大家互相交流學習!! :D
哇,超级佩服会用photoshop的人的,我一看到那么多按钮就晕掉了啦(´▽`)我也试着P了下下放上来,见笑啦O(∩_∩)O~~
不錯耶,比原先的照片質感和氣氛好得多
我还没玩过这个滤镜,让普通的物体更显质感更加高端了。
很好用的,我自己常常使用
学习了,感觉手机拍照也应美下容。
手機拍照更需要美容呢
真的差很多,效果也很好,佩服佩服!
呵呵~ 謝謝你的稱讚