Making an old Hollywood style portrait
Hi,
Today I will show you how to set up a lighting in the studio for that "Old Hollywood" style. It is very easy, I myself did it in the comfort of my own home. The natural light for this photoshoot should be easy to manage, preferably use a room with less penetration of the sunlight or try doing it later in the day when the Sun starts to set. If you are using a room with lots of sunlight, try to minimise the amount of light coming in by drawing the curtains.
Managing the light
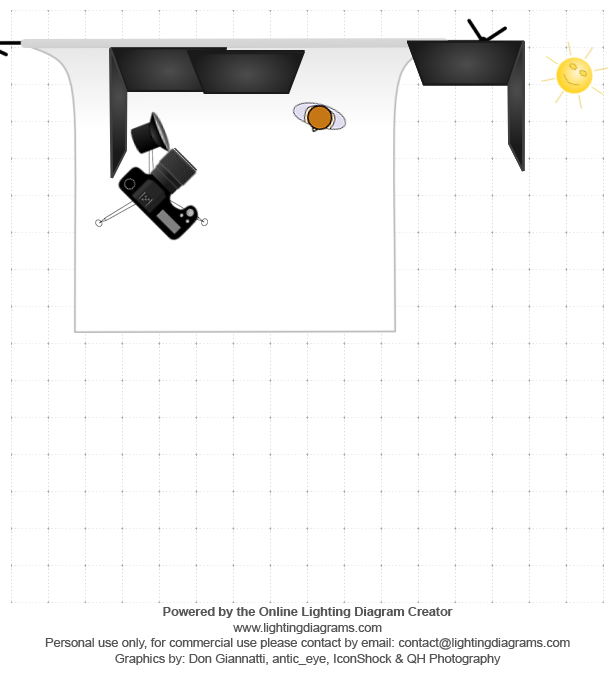
Here, I've created a lighting diagram. I've used the Web site: http://www.lightingdiagrams.com/Creator
So it's basically a Web site/tool called "The online Lighting Diagram creator" and you can manage and insert the backgrounds, light sources, reflectors and props into your diagram and afterwards export it as a PNG, JPEG or an URL format.
In the diagram/image above you can see where I've put the black reflectors. If you don't have black reflectors, you can use black sheets of fabric or black paper. In the online diagram you can't remove the white background which is set. I didn't use a white background, but in the image it represents the white wall in the room. So the black reflectors were covering the wall and the windows on the right side. The only place where I didn't use the reflectors is in the area behind where the model stood. The reason for that is that the reflectors lowered the exposure/amount of brightness in the room, so that there is no reason for covering the whole wall and your photographs won't end up being to exposed/bright. You also get to keep a natural background atmosphere of the room.
The light was put on the left side in front of the left side reflectors. The light is tilted towards the models right shoulder (it is not lit exactly in the face). I've used a beauty dish antic-eye lamp.
The shots
The camera stand is set up underneath the lamp. On the right side of the lamp.
For portraits use a long lens, preferably, at least 100mm. I've used my Nikon COOLPIX L830 16 megapixel camera which has an 34x optical zoom lens plus a 68x dynamic fine zoom. The COOLPIX L830’s 34x optical zoom lens goes from wide-angle—great for portraits and landscapes—all the way up to telephoto—great for closeups of sports, concerts, nature and more. When you need even more reach, zoom up to 34x with optical zoom and 68x with Dynamic Fine Zoom, an enhanced digital zoom function that effectively doubles your reach.
The menu is easy to use, you can easily change your picture settings. I've set up my camera to low key settings, which is great for making your photographs dark and noise-free and my scene was set up as portrait scene.
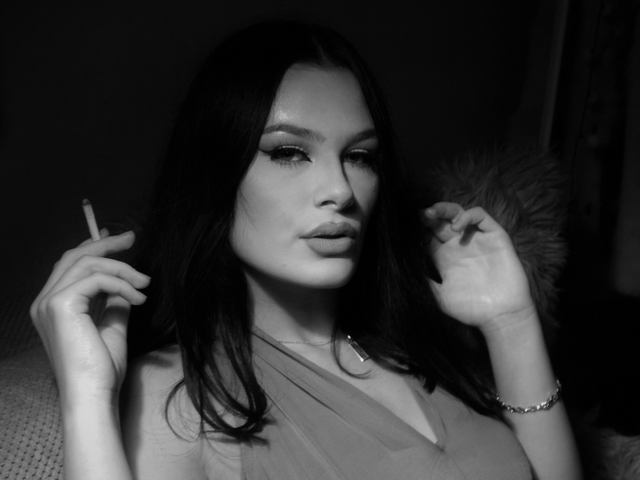
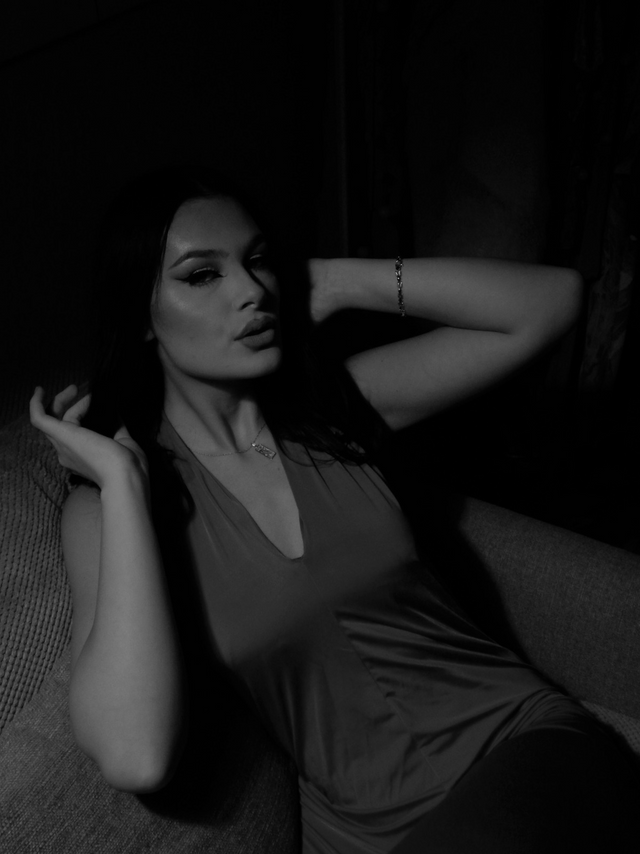
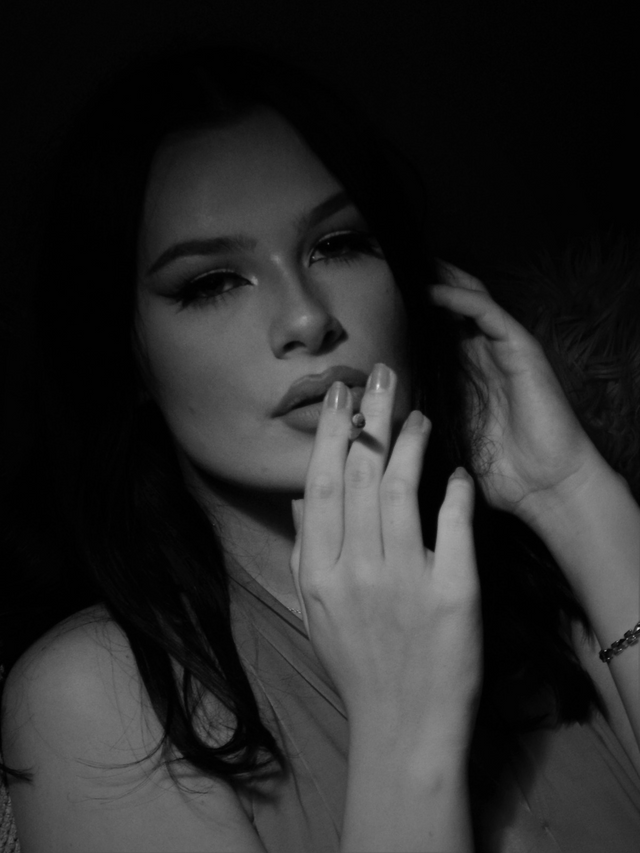
The photographs were taken in colour, which I have later edited in Photoshop. I've only removed the colour from the pictures and altered the exposure and shades in some of them.
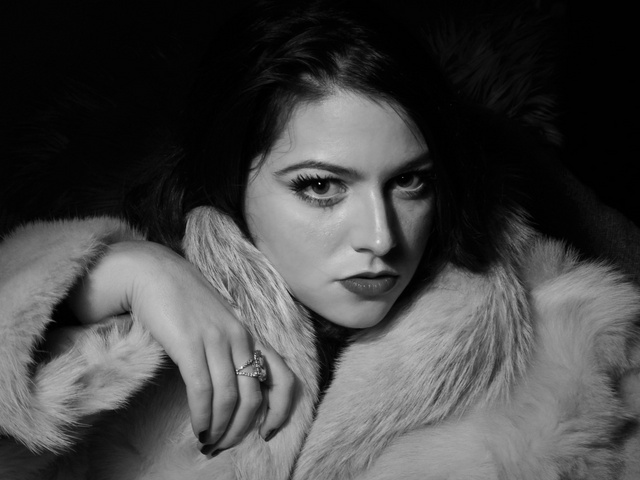
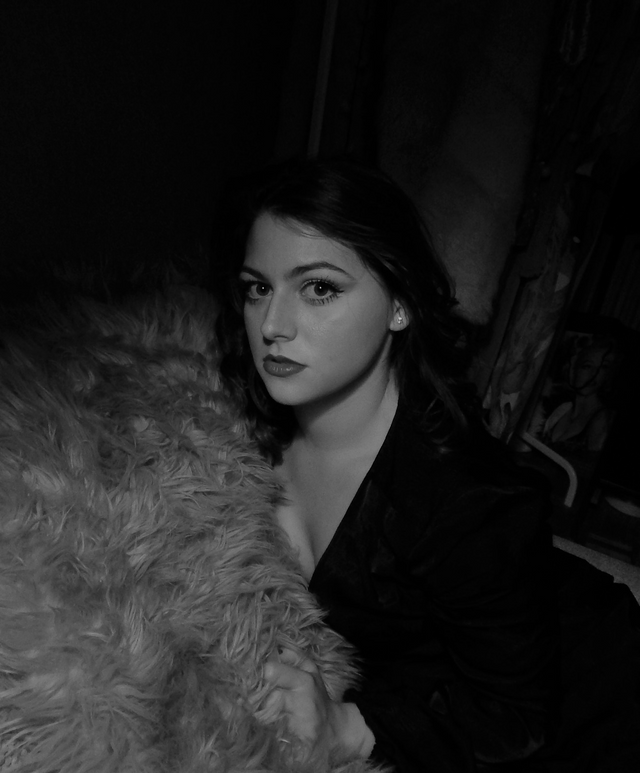
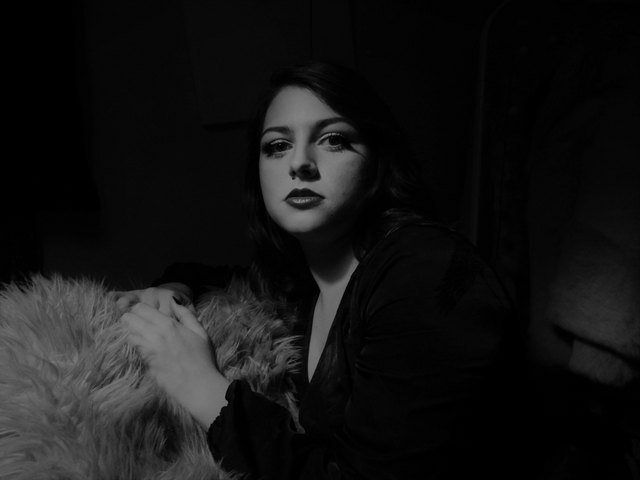
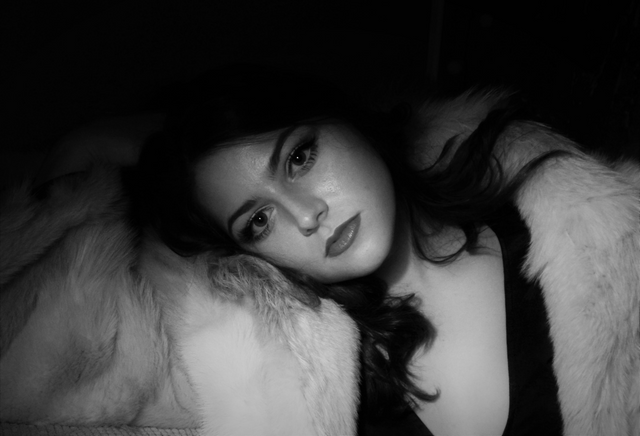
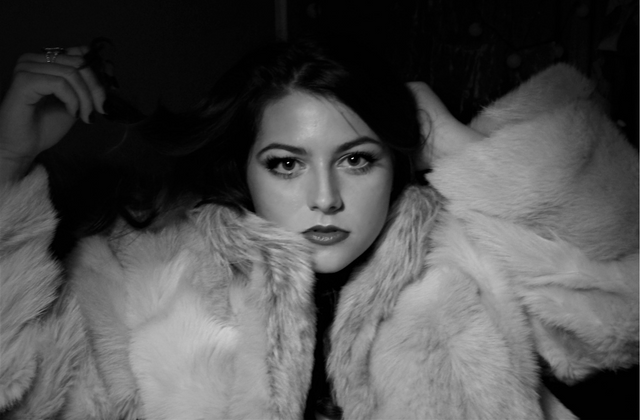
The final pictures
So, here are some of the final photos of my best friend and I.
That's all from me for today. Hope you like the post, I have really enjoyed making it. If you like the post and have any questions be free to ask in the comments, I would be pleased to answer.
Spreading the love,
Emma Stephanie
xx
Instagram: https://www.instagram.com/e.s.gaunt/
Hi esgaunt,
Visit curiesteem.com or join the Curie Discord community to learn more.
ehy dear @esgaunt, you wrote a very interesting post with very useful information to recreate your setting. your photos are beautiful, I personally prefer the lighter ones, with white fur, I like the contrast you create! congratulations
Hello, @esgaunt! We heartily appreciate the time and effort you put towards your DIY/How-to article. It is, for this reason, we built a website known as Build-it, where your efforts are fairly rewarded. At Build-it we welcome all sorts of DIY, How-to, and Lifehack articles.
Build-it is a tribe on the steem platform that sharpens your #diy and #how-to skills, in an attempt to save more money for yourself.
The recommended tags required when creating a DIY article are #diy, #build-it, #how-to, #doityourself and #build. You'll get rewarded with BUILD tokens in form of an upvote from our @build-it.curator account upon every valid post/project which can also be exchanged for steem on steem-engine when you use any of the recommended tags as well as posting via our website.
Need help? Live technical support on Discord or Telegram
This project is run and supported by our witness @gulfwaves.net. If you think we're adding value to the steem platform, your witness vote will be appreciated! Click here to vote for us
Hello Hello!
The photos are art, I'm in love, congratulations!
Greetings from Venezuela :)
One tip, also use tags from communities such as creativecoin, neoxioncity, palnet or lifestyle. They will help you have better visualization and higher earnings especially for tokens. Your post is very good and could have a better exposure on steemit.
Regards
Hi Emma, thanks for spreading your love through this excellent tutorial and your photos.
Good data on the website to create the lighting diagram.
Undoubtedly, the dress also influences and this can be seen in the difference between white clothes and dark clothes.
Thanks again for a good job.
What good shots Emma Stephanie!!. I have a camera similar to yours but I don't have models to take pictures of portraits. This intention of you seems fabulous. I think other photographers can tell you some software for development, since its good use will help you improve some aspects of your work light. I almost always use the original photograph without going through these software. A great pleasure to admire your portraits. Regards @esgaunt
Excellent tutorial, very well explained and detailed. The images are excellent.
Congratulations @esgaunt! You have completed the following achievement on the Steem blockchain and have been rewarded with new badge(s) :
You can view your badges on your Steem Board and compare to others on the Steem Ranking
If you no longer want to receive notifications, reply to this comment with the word
STOPVote for @Steemitboard as a witness to get one more award and increased upvotes!