Stunning SUNSET Photography editing in 3 steps
Hello Everyone,
I hope you are all having a great day! We’ve all seen a most beautiful sunset. Some people are taking a picture that one and share with us. But few creative people edit a photo in Adobe Camera Raw, Lightroom or Photoshop.
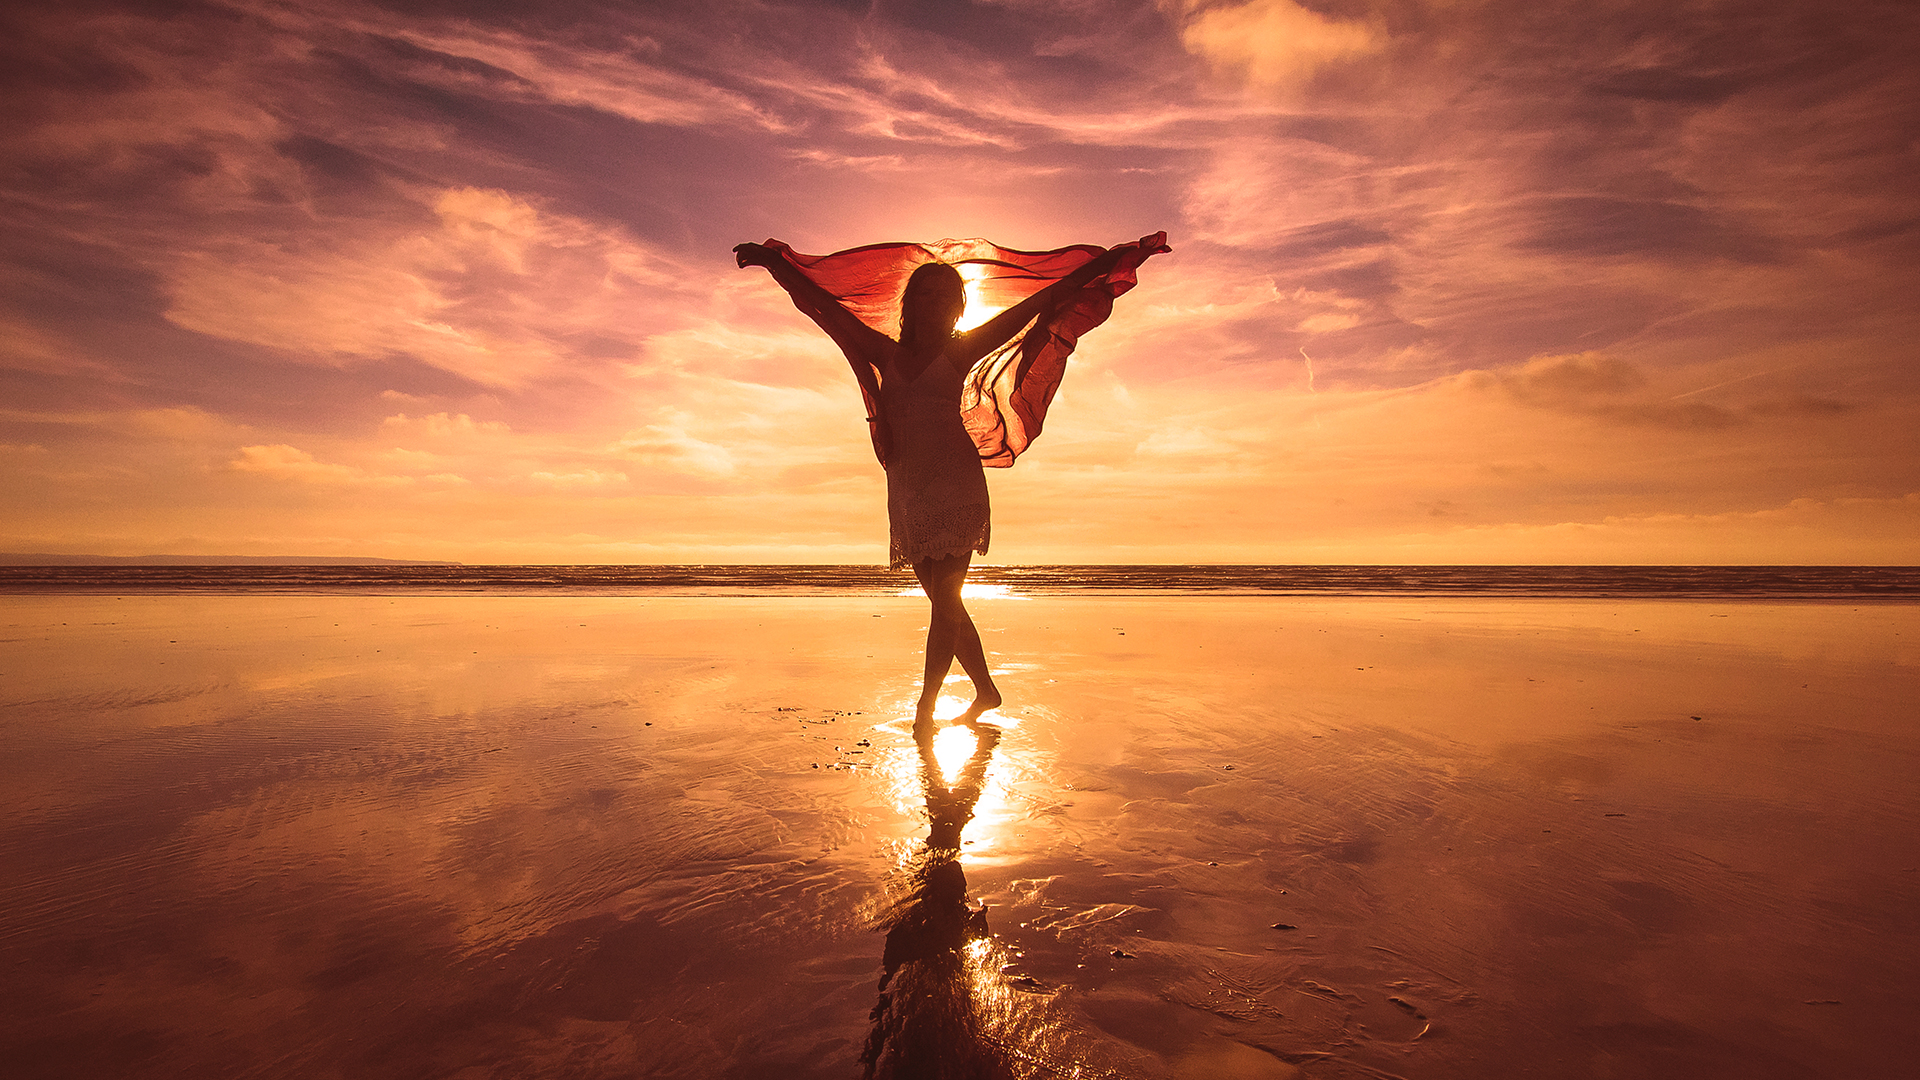
Today I'll show you how to create a realistic sunset effect in your photo. It’s really easy too. see before and after pictures:
before

and after
=====================
Step 1 – Color Balance
======================
Open up a landscape image and add the Color Balance layer
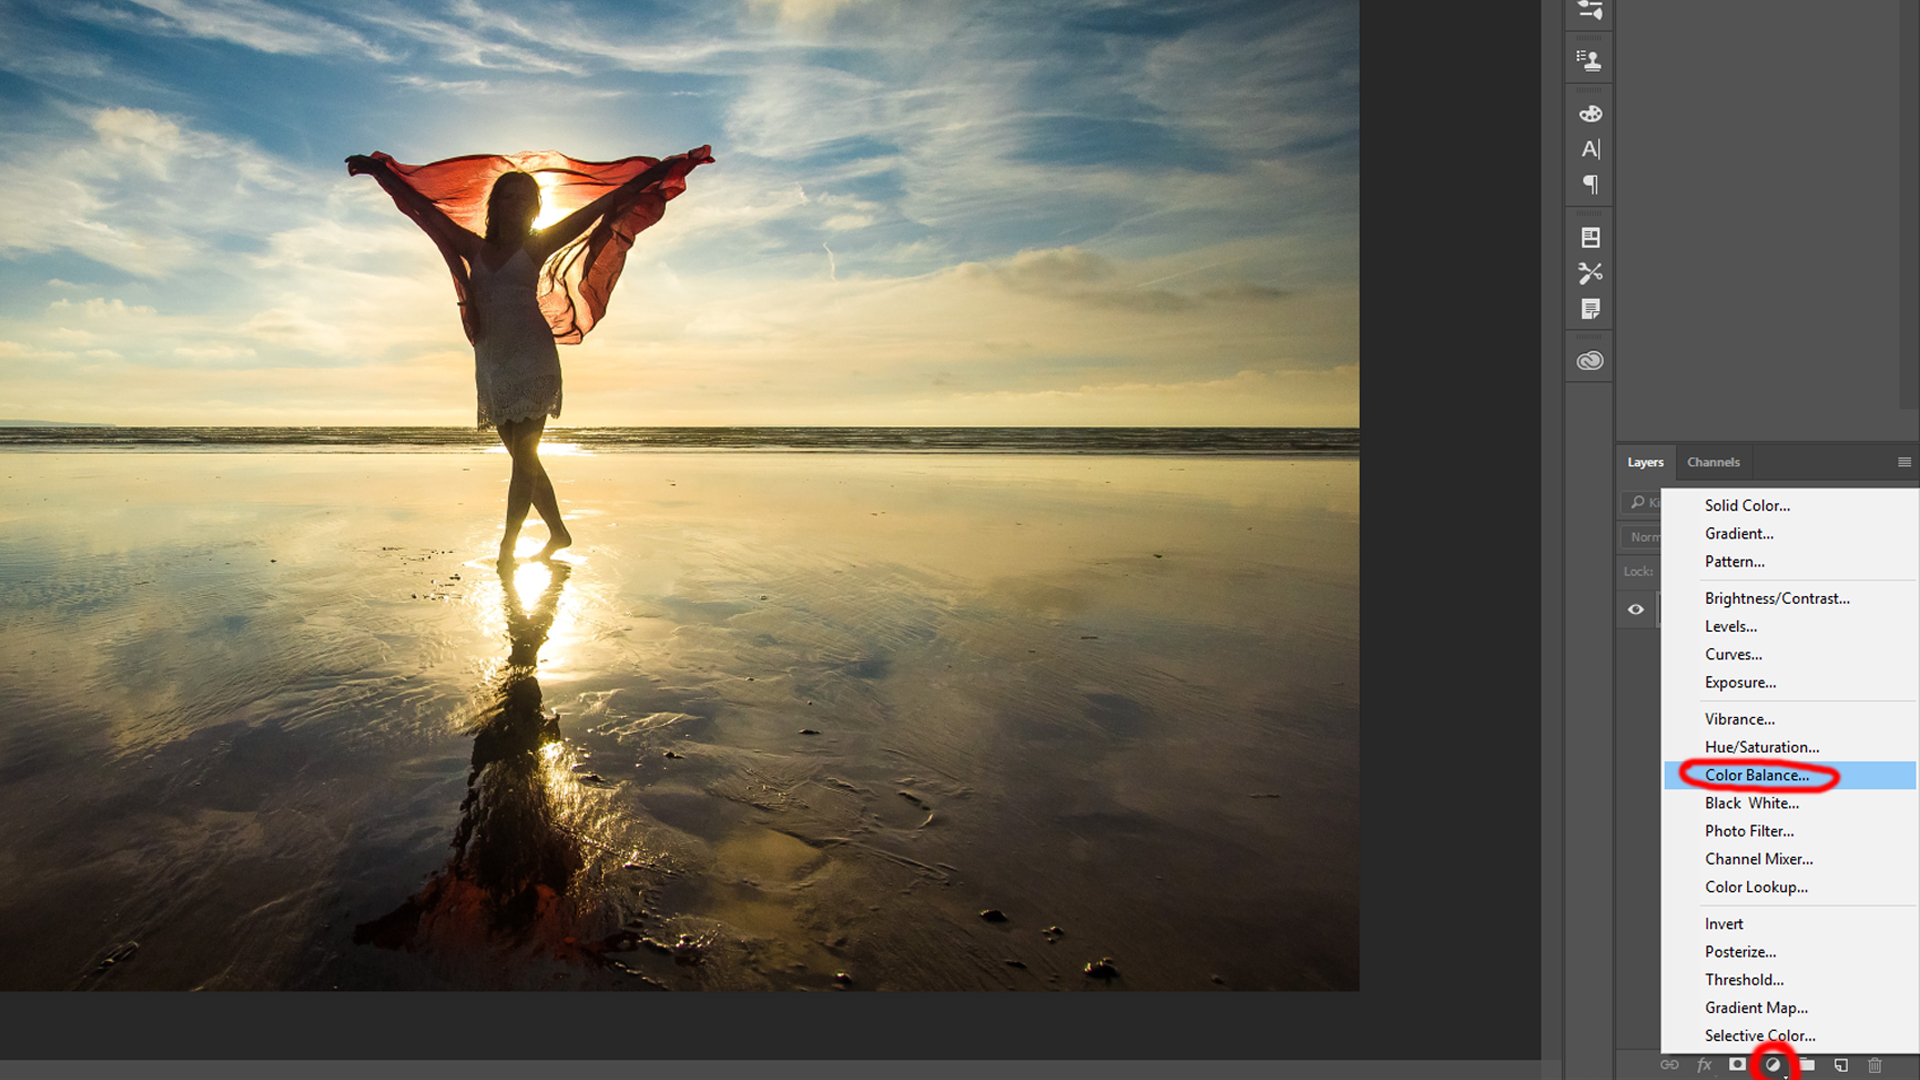
and My target here is to get reduce of the blue that’s in the photo.

=====================
Step 2 – Adding Curves
======================
open curves for adjust image color and tone.
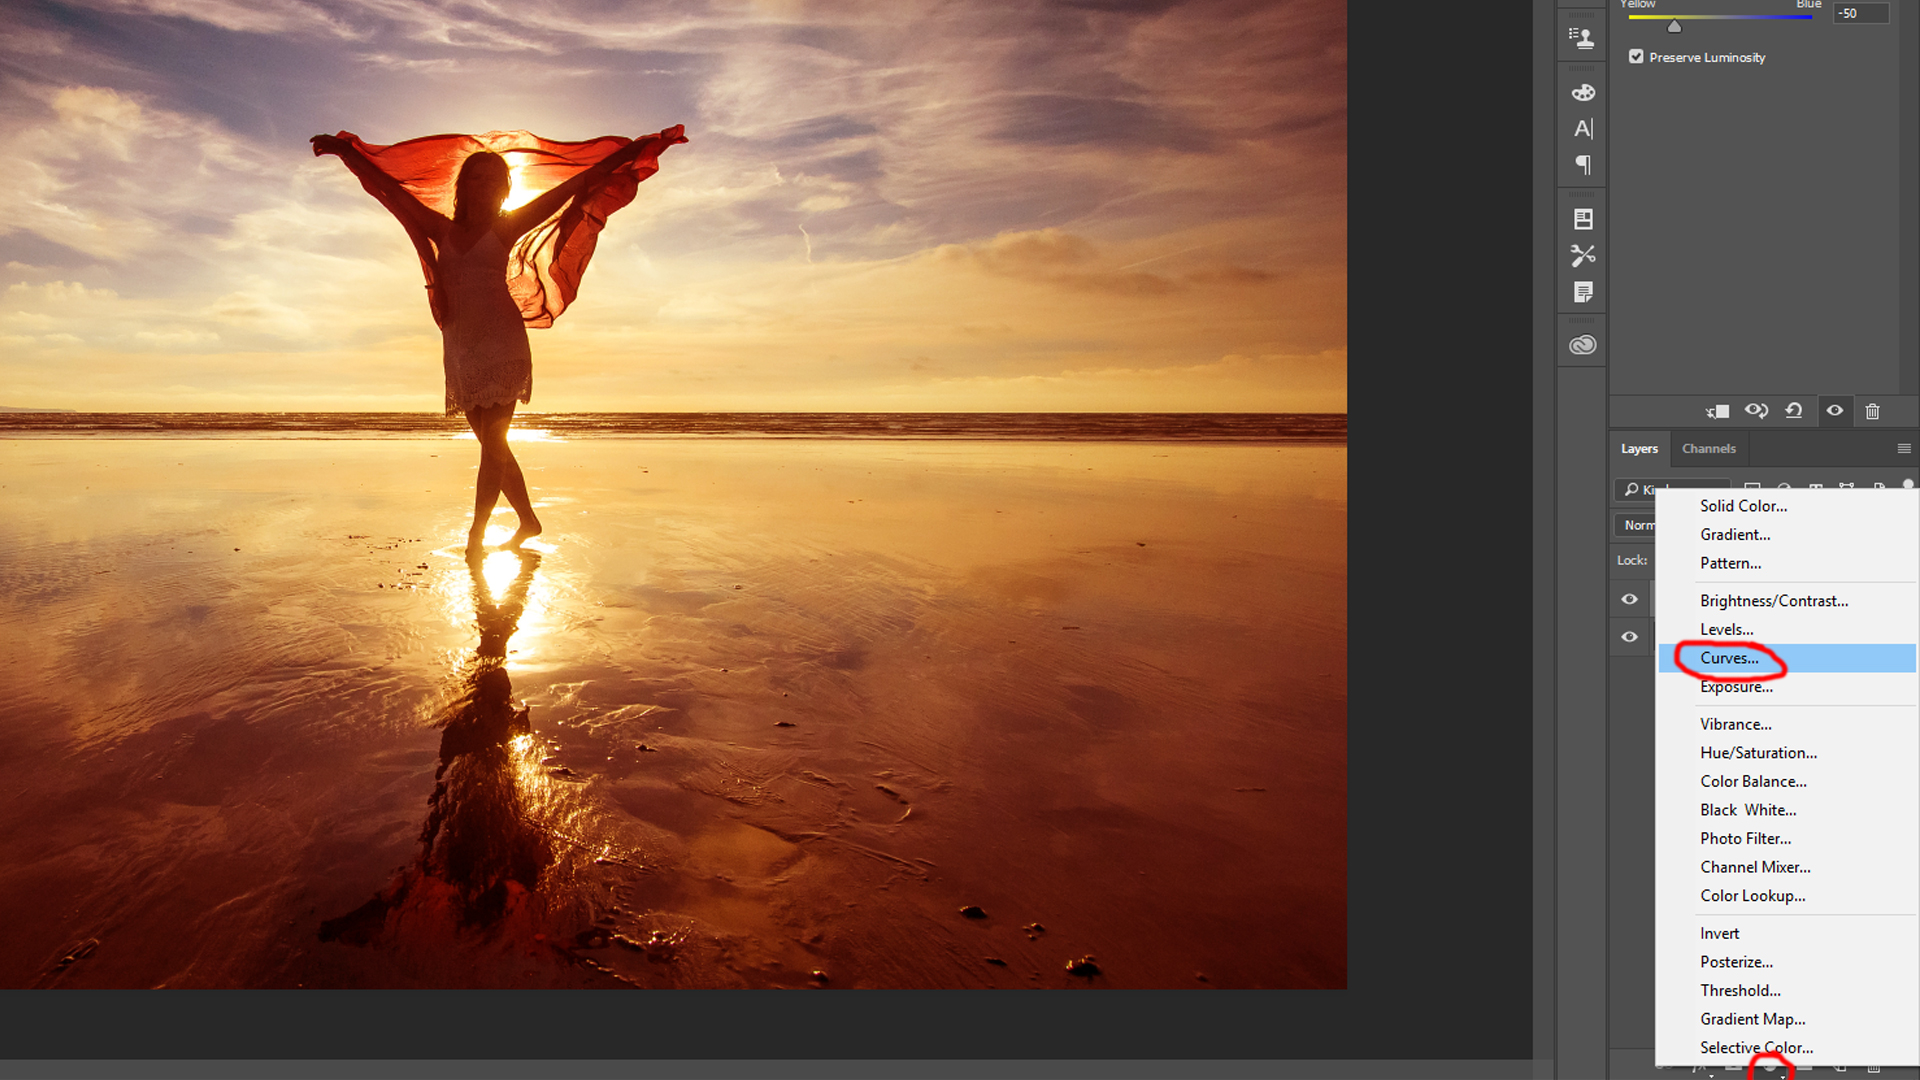
adjusting tones to brightness and darkness

=====================
Step 3 – Adding Photo Filter
======================
add cool yellow color effects in your image
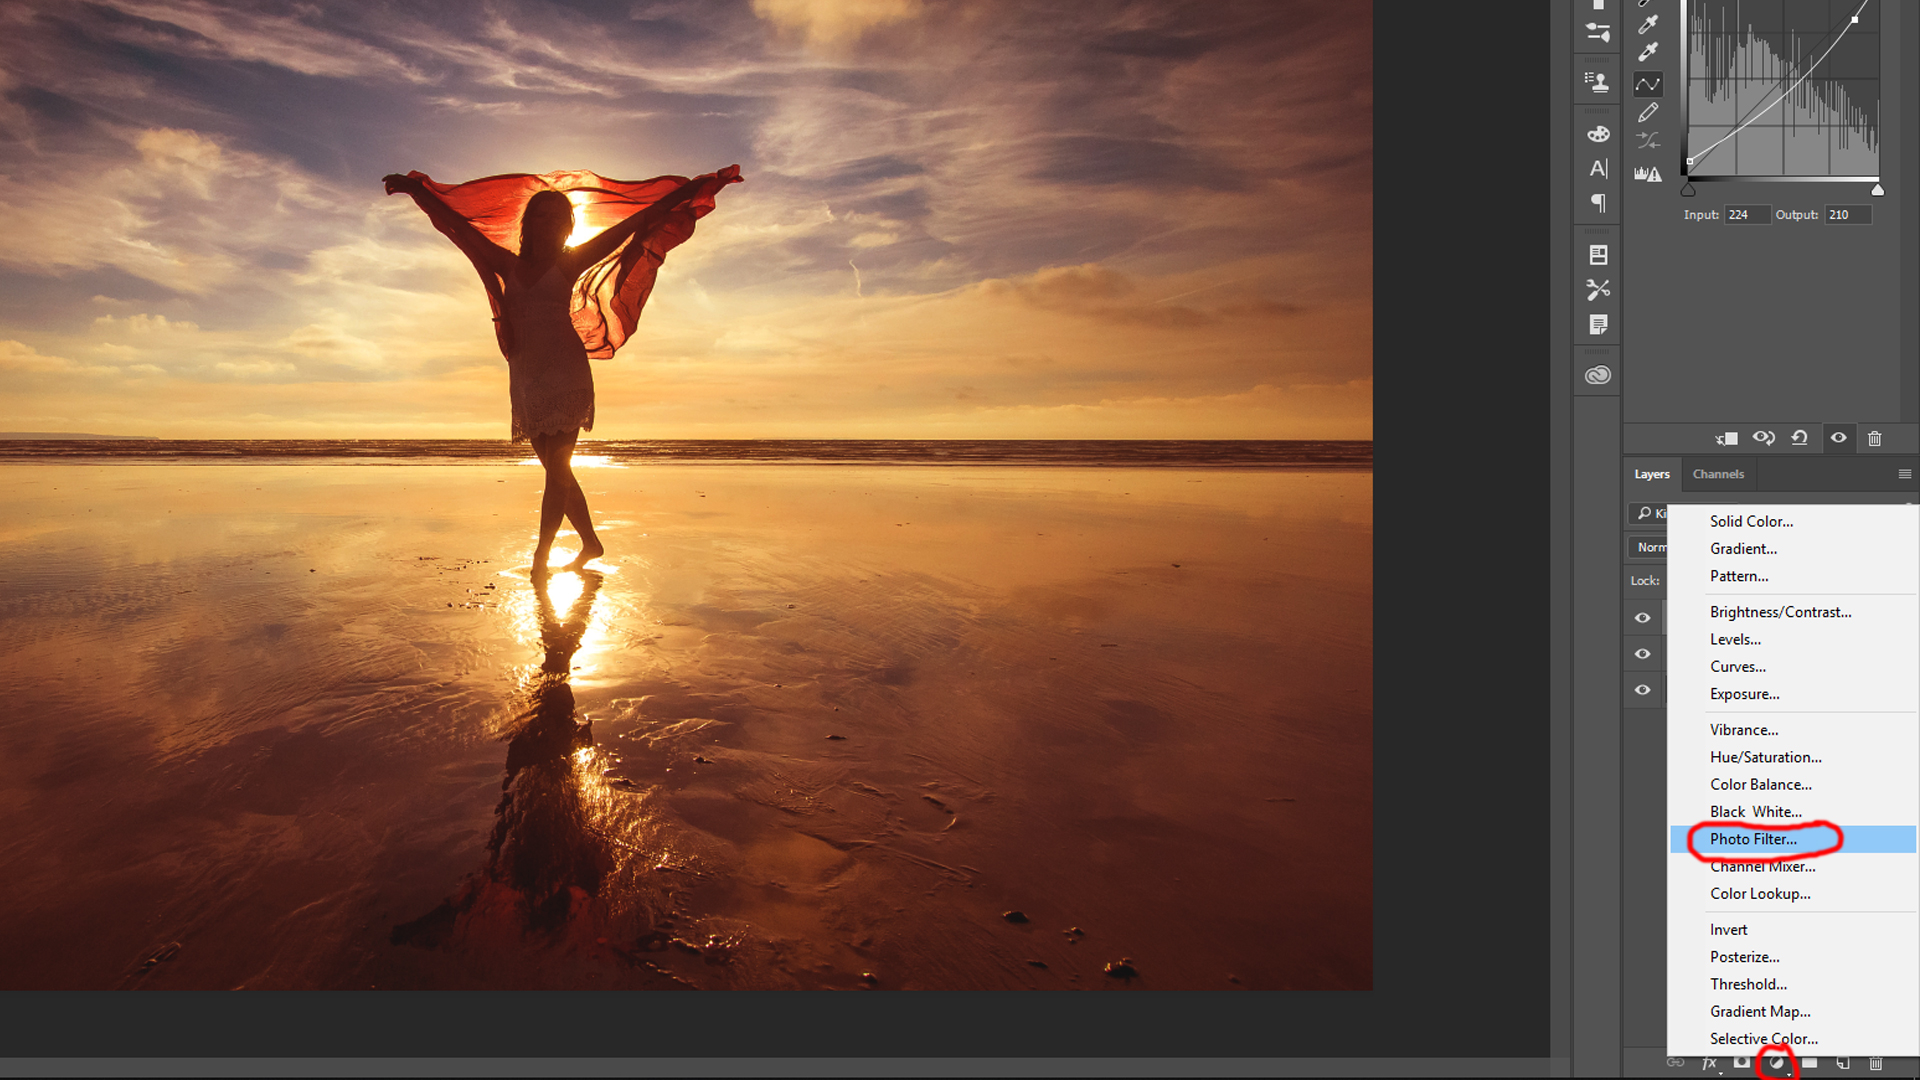
Click on custom filter color and set its color to a bright yellow (#ffa200).
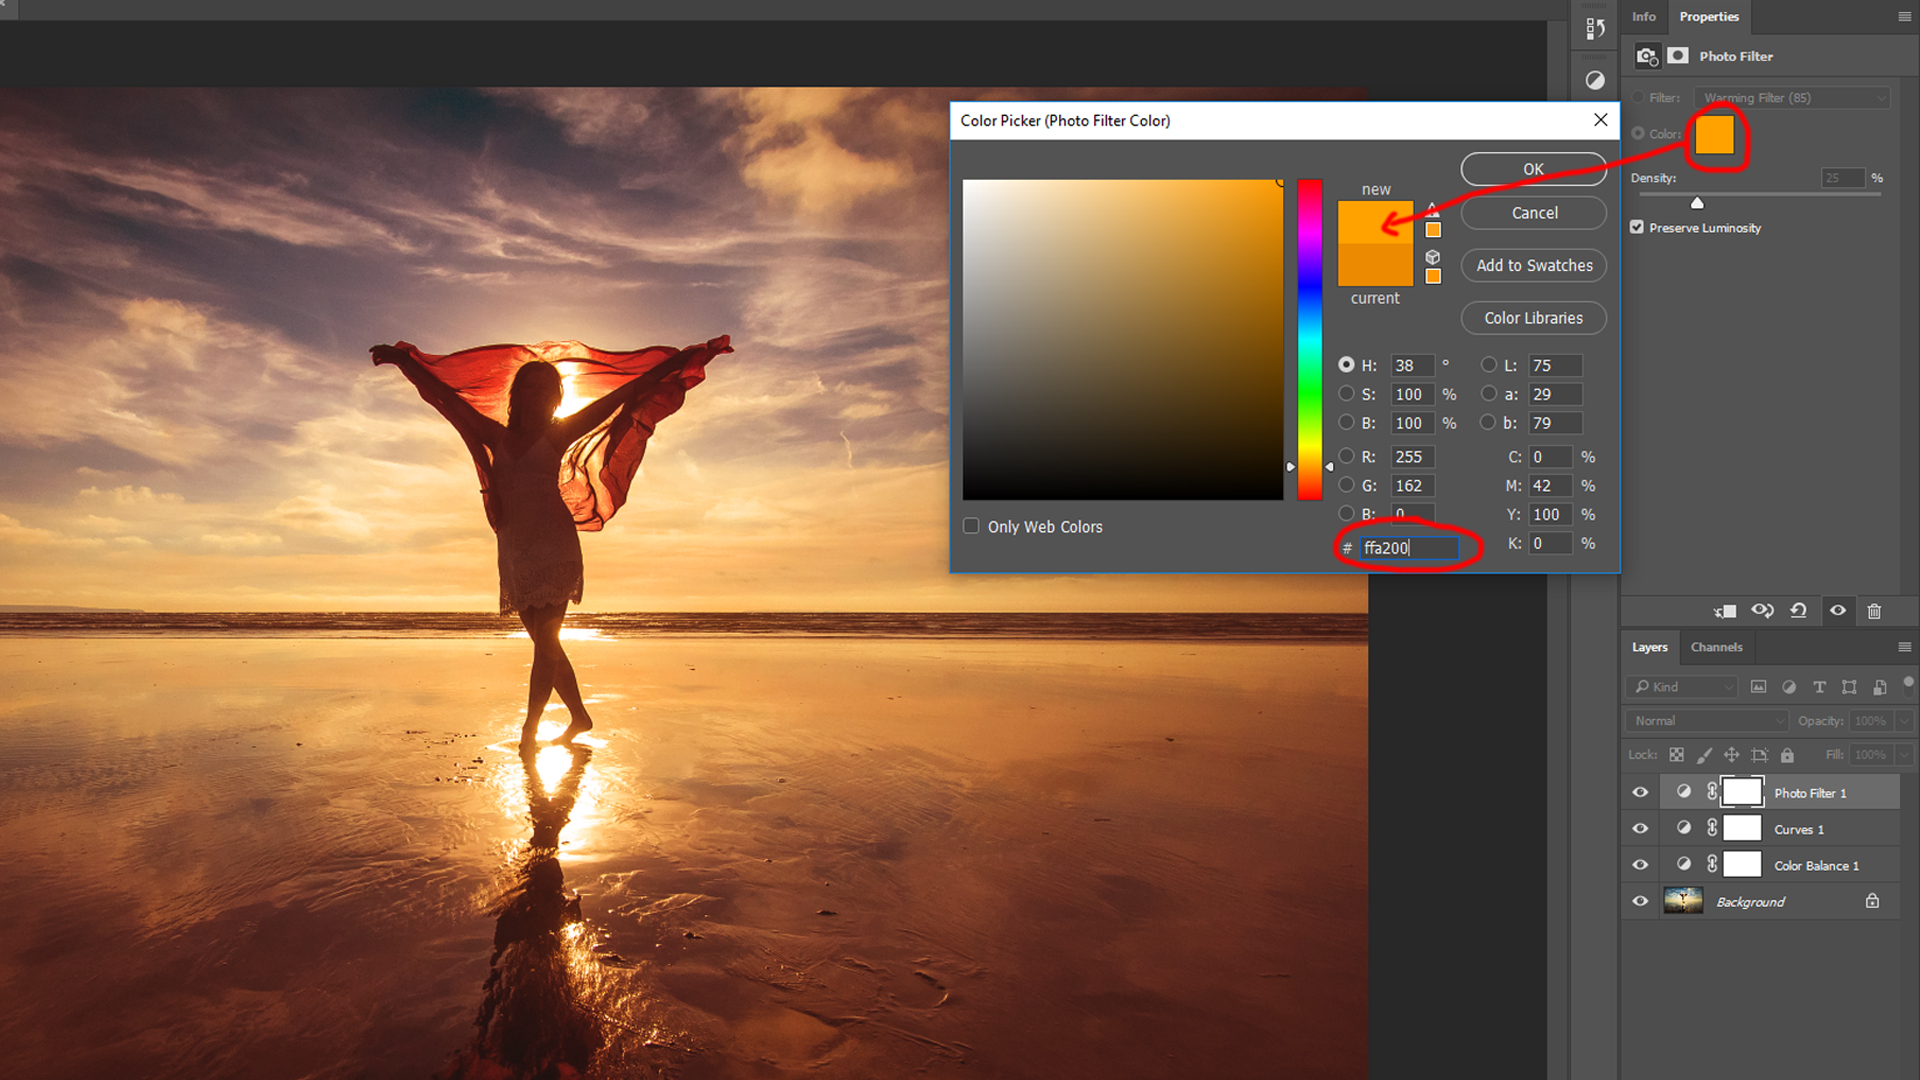
and increase the density
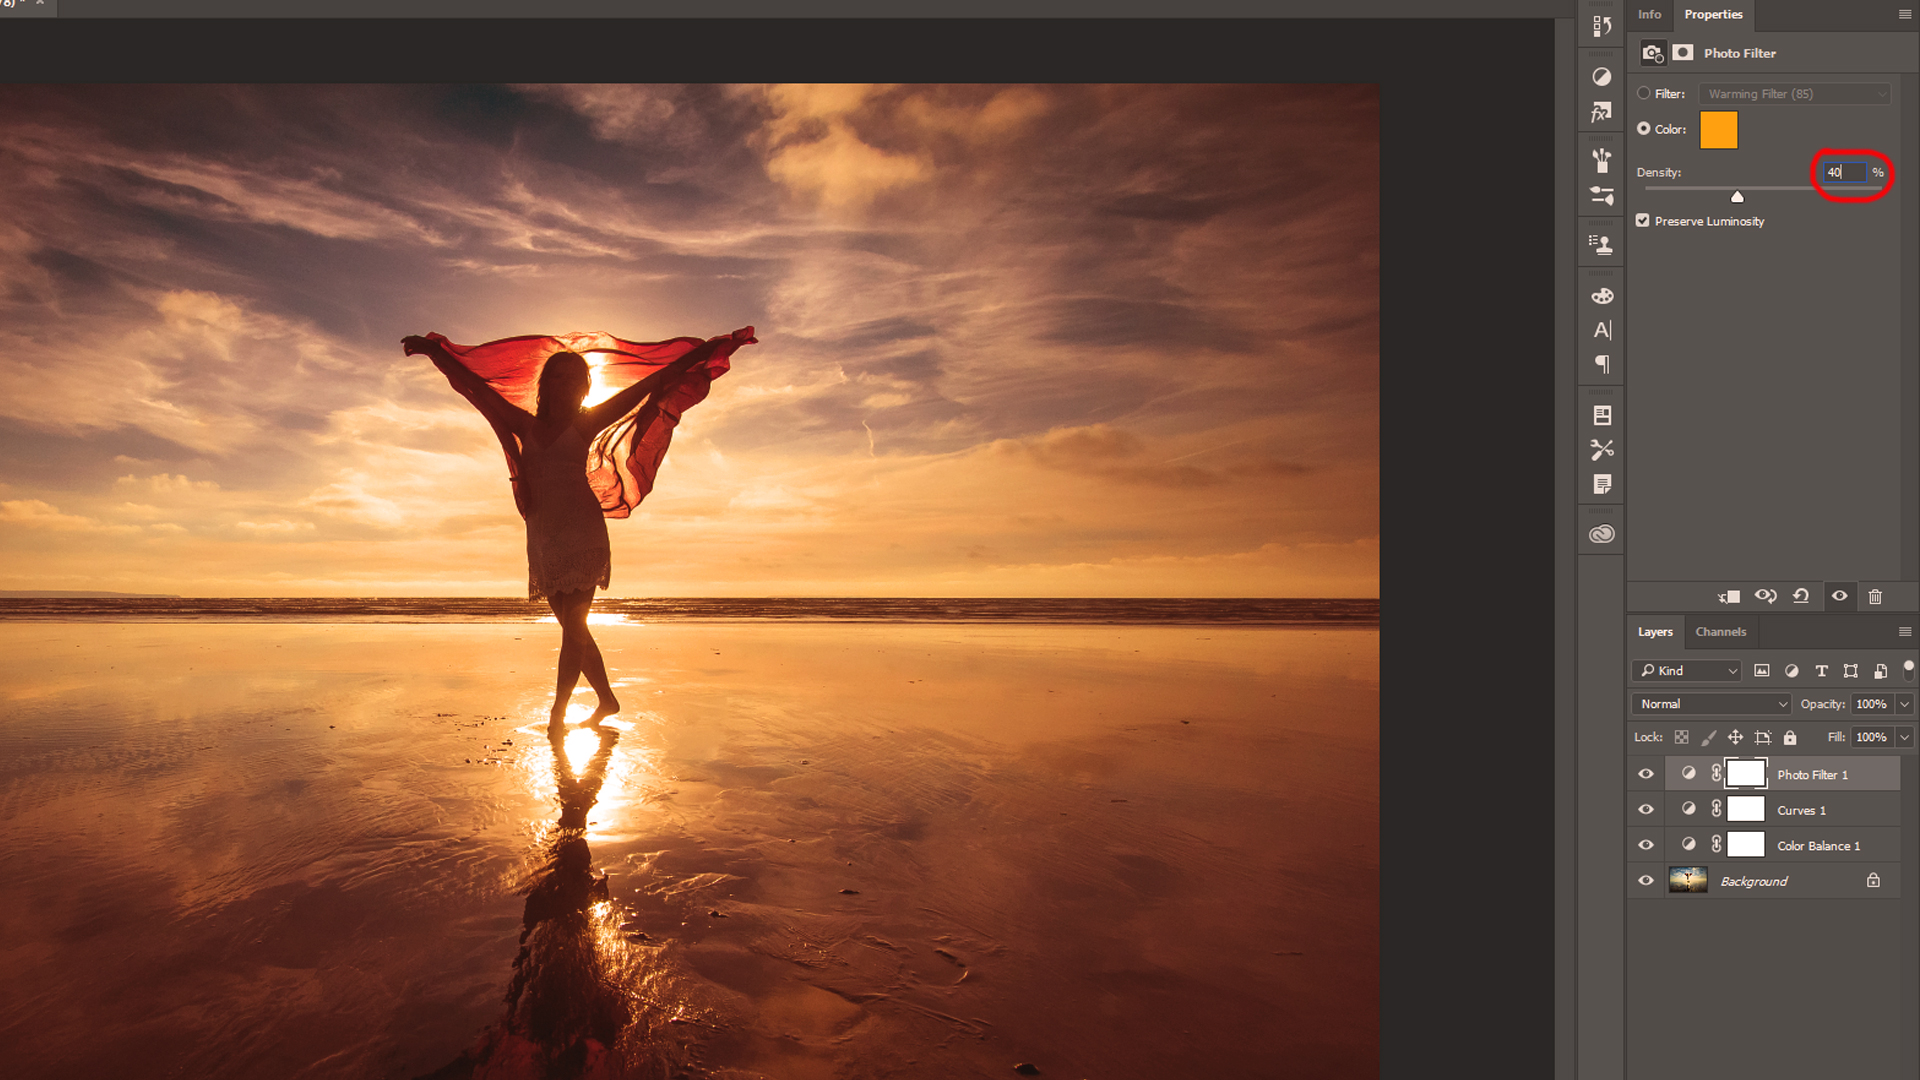
And this is the final resulting image.
=====================================================================================
Please feel free to check out some of my other recent posts
Easy to Change WaterColor Painting Effect - Photoshop Tutorial
Dream World - Photoshop Manipulation Tutorial - Background and Mixing Color Grading
Double Exposure Effect Photoshop Tutorial
You can also find me on:
Steemit: @ykdesign
YouTube ➜ https://goo.gl/vmj6sg
Facebook ➜ https://www.facebook.com/ykdesigns.in/
Google+ ➜ https://goo.gl/je0Xj0
Twitter ➜ https://twitter.com/ykdesign_in
Pinterest ➜ https://in.pinterest.com/ykdesign_in/

Very beautiful, keep it up @ykdesign
thanks @chalidteuku