Create Virtual Machines For Hacking(Kali), 100% Anonymity(Whonix) & Increased Security(Windows)
In this post I'm going to teach you how to set up 3 different virtual machines that can be used for hacking as well as extreme privacy, anonymity and security. We will cover three different setups; one for hacking(Kali), one for privacy/anonymity (Whonix), and one for more secure every day use(Windows). Virtual machines provide several benefits especially for hackers:
- You can run multiple and different OS's on your main machine
- You can have a VM that's custom designed for what you're trying to accomplish(i.e. Kali for hacking)
- You can run potentially dangerous or sketchy programs without risk to your main computer(useful for malware analysis and other tasks)
- You can have multiple VM's doing multiple things(especially useful for automation which I will cover in a later post)
Let's get started.
First Steps:
We first need to download Virtualbox.
Windows Install
Install with default options and start program(via start menu or icon).
Linux Install
Go to terminal and type:
- sudo apt-get update && sudo apt-get install virtualbox
- virtualbox
Hit yes at any prompts.
Creating A Virtual Machine
Now we need to go about creating our virtual machine. For this we tutorial we will create three different ones. To do this you need to download the Windows 10 ISO, Kali Linux ISO, & Whonix OVA. Creating a VM is the same process for Windows & Kali, and even simpler for Whonix so I will go over how to do it and you can apply it to each one.
NOTE: If windows tells you to download a tool instead of an ISO, use user-agent-switcher to make your machine appear as MAC OS/Safari browser and it should let you download it.
Windows/Linux Virtual Machine
- Make sure Virtualbox is open and hit Ctl+N
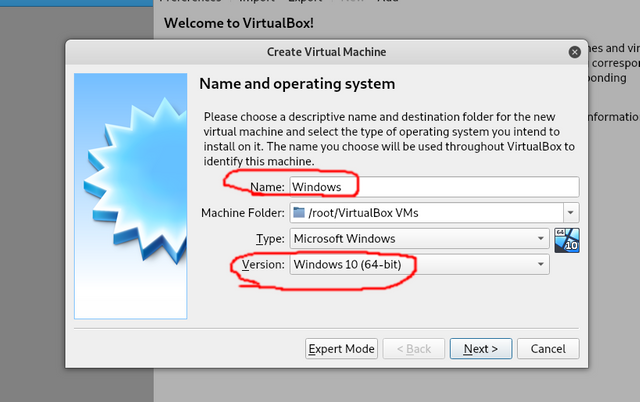
- You should see something like below. Choose whether you're creating a Windows or Linux machine and fill in the appropriate data(Windows as shown, Kali choose Linux and below that Debian 64-bit).
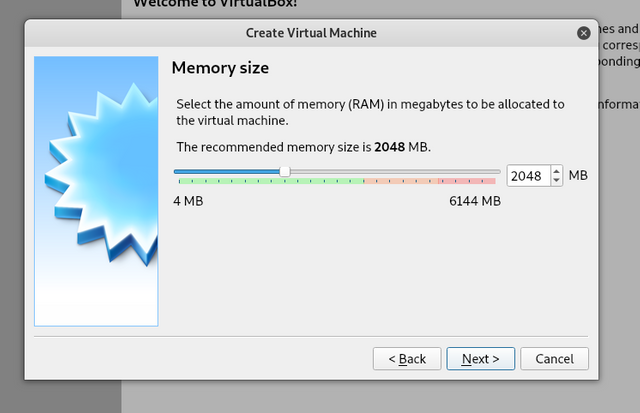
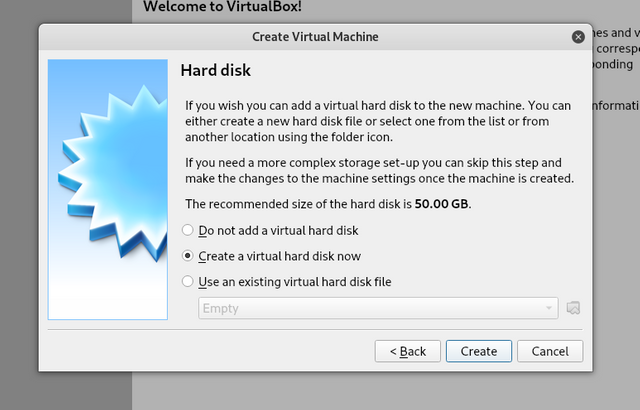
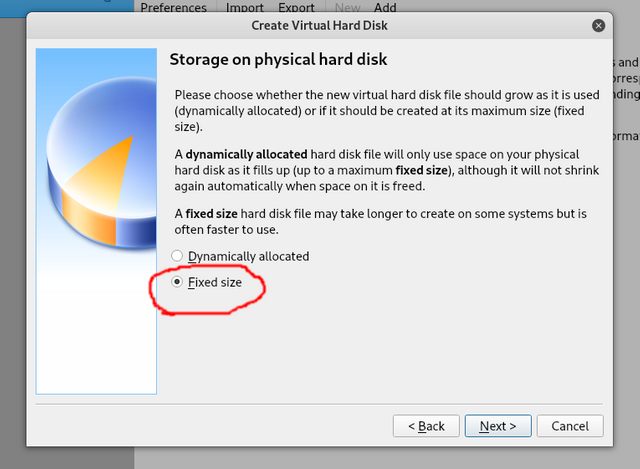
- Afterwards hit next and as you do go through the various options as shown(the below settings are just examples make sure you choose as high[while still leaving enough for your main PC] as possible for hard drive space/RAM!)

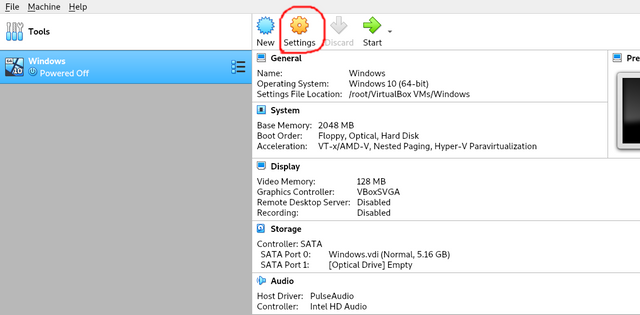
After creating the hard drive It should then return to the main program. From there select your machine to the left and click settings.
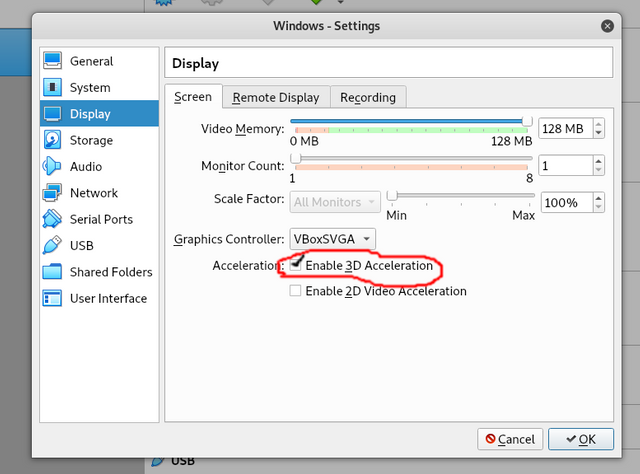
From there go into Display and check 3D Acceleration.
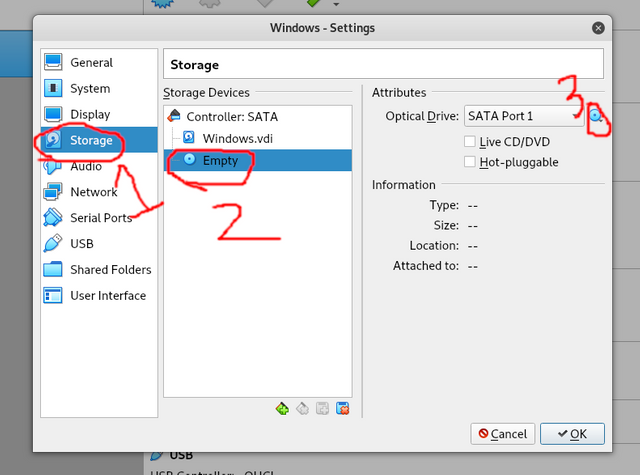
Then go to Storage click Empty, and click the following(ultimately selecting your .ISO file you downloaded)
Finally click OK. It will take you back to main program. Click Start and your machine will begin the installation process(it is just like installing an OS on any computer)
NOTE: for Windows 10 you don't need to activate it(as of Oct. 2019) even though it asks for a key(just select "I don't have a key" or "Activate Later".
Once your machine is installed make sure you update it:
- In Windows just type update into the start menu
- In Kali go to terminal & type:
- sudo apt-get update && sudo apt-get dist-upgrade
Now you have a virtual machine that should function just like any computer. But we still have one more OS to do for ultimate anonymity and that's Whonix. Let's get to it!
Whonix VM Creation:
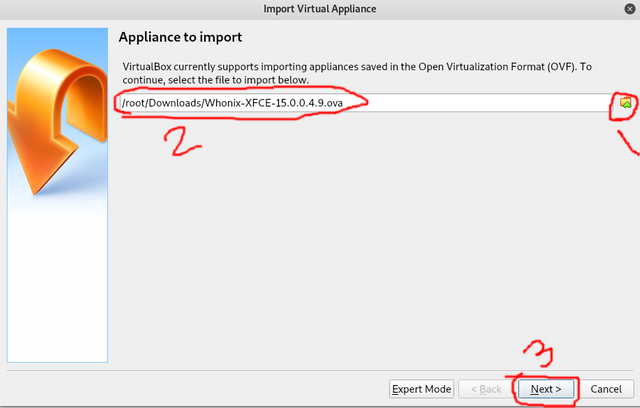
Creating a Whonix VM is extremly simple. Simply hit Ctl + I or go to File-Import Appliance. You should see the following. Click the button to the right and choose the .OVA file you downloaded earlier.
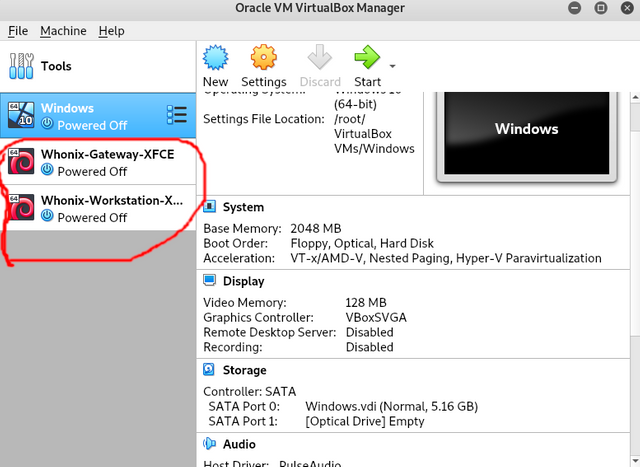
Click OK and Agree to any prompts that pop up. Once it's done you should see two new VM's to the left(Whonix Gateway & Workstation respectfully).
When starting the Whonix Machines do it in this order:
- Whonix Gateway(Let it load completly)
- Whonix Workstation
Once they are loaded make sure FOR BOTH MACHINES you go to terminal and type(make sure you let the following complete in Gateway FIRST,then restart it, and go to Workstation and repeat): - sudo apt-get update
- sudo apt-get dist-upgrade
IMPORTANT INFO:
- You must run both machines when using Whonix
- Whonix Gateway IS NEVER USED FOR ANYTHING(though it MUST be running when using Whonix). It simply ensures that you are securely connecting to TOR as well as helping protecting you from malware.
- Whonix Workstation is the machine you will use!
There you have it. Though accomplishing this was deceptively simple, you now have some of the strongest solutions available to practice hacking, browse the deep web, and protect yourself in even the most extreme of surveillance states.
Stay tuned because in my next tutorial I'm going to show you how to put it all together like a ninja to have a truly secure Dual-VPN and even go through TOR to a VPN(useful for bypassing websites with TOR restrictions and super anonymous)! Don't forget to upvote & follow and leave any questions you have in the comments. I typically respond within 24 hours. Until next time my fellow hackers and freedom fighters stay safe and happy hacking!