How To Make Ugly Countertops Beautiful With Contact Paper
We have mismatched countertops with different designs in our kitchen. The counters near the stove and sink are stained and old. Replacing the counters is expensive so I decided to beautify my counters in a cheap and easy way. Contact paper can be pretty cheap. I got mine for $8 a roll and I only needed three rolls. I wanted a marble look to my counters because it looks a bit fancier which is neat for paper you stick on your counter top. The nice part is contact paper is easy to remove so you don't have to worry about destroying your counters by covering them. If your paper get damaged or you get tired of the color the paper peels right off with no residue left behind. You can have marble counters one day and purple flowered counters the next.
I Picked Marble Contact Paper
Tools You Need
- Contact Paper
- Scissors or a knife
- Credit Card
- Sewing Needle
1. Choose your design
Contact paper comes in a wide variety of designs. They make different types that look like stone, wood, or other textures. They make plain colors and multi-colors. Whatever color counters you want, you have plenty of choices. They sell contact paper online, at home improvement stores like Lowes and Home Depot, Walmart, and numerous other places.
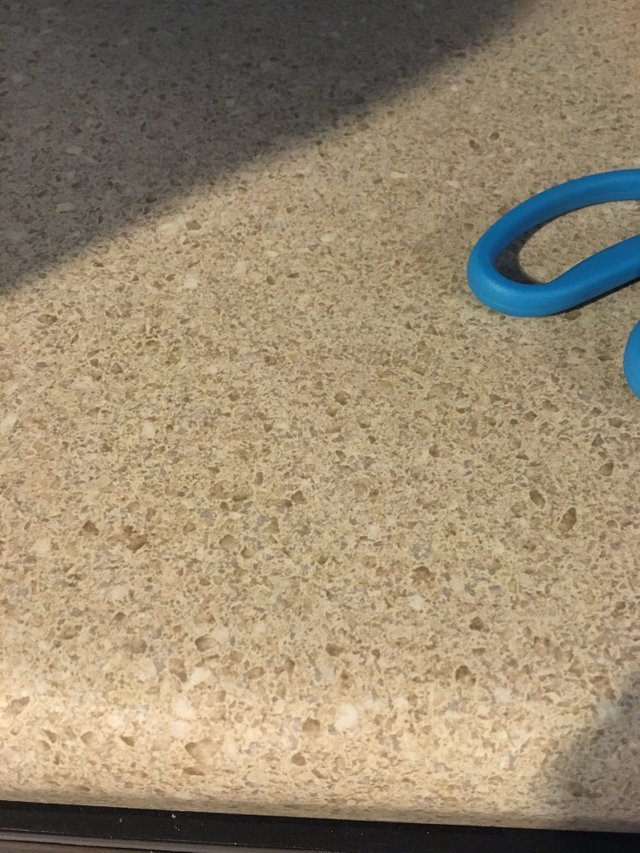
2. Clean Your Counters
Before you start your project you need to clean your countertops. You need to have all dirt cleaned up. The sticky side of the contact paper won't stick very well if your counters have debris on them. Make sure the counters are completely dry after you clean them.
My original counter top color nice and clean
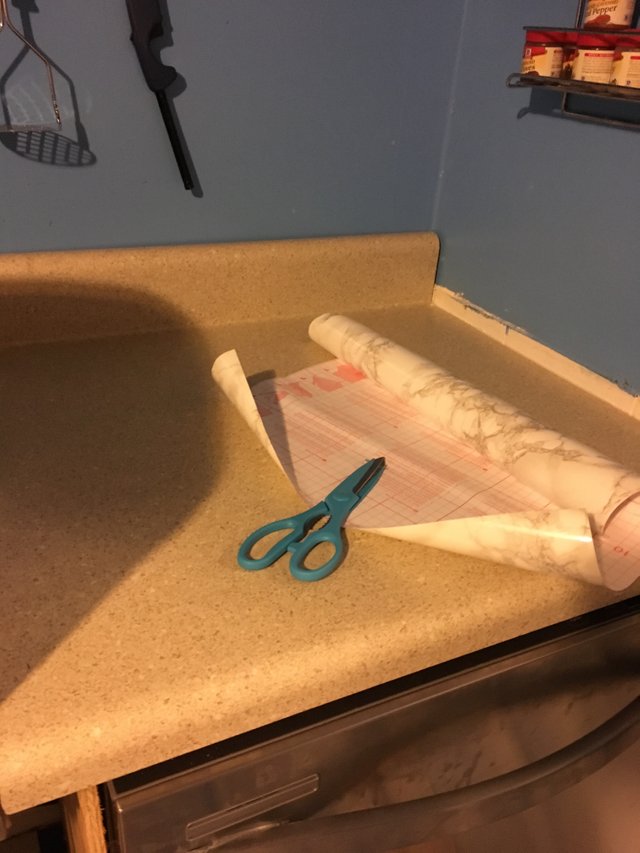
3. Measure Your Contact Paper
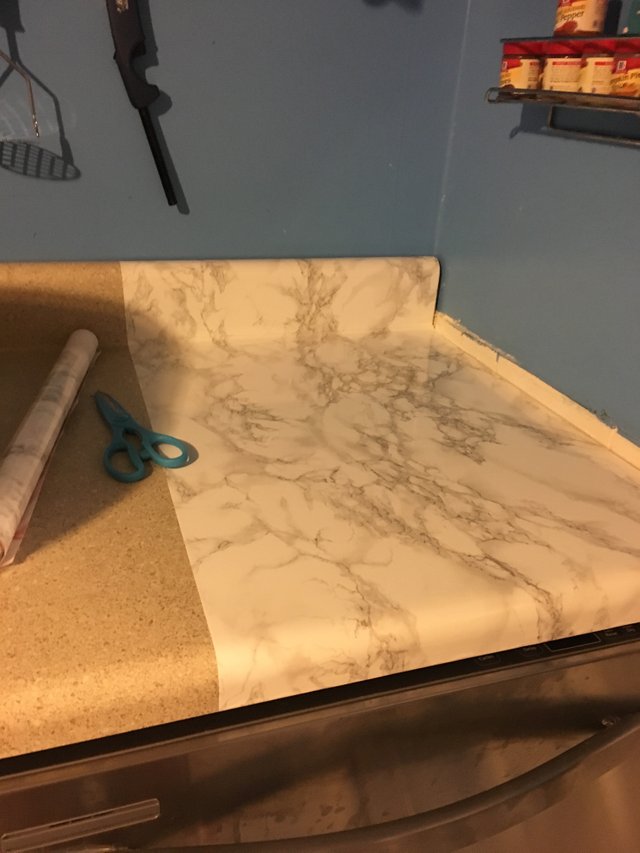
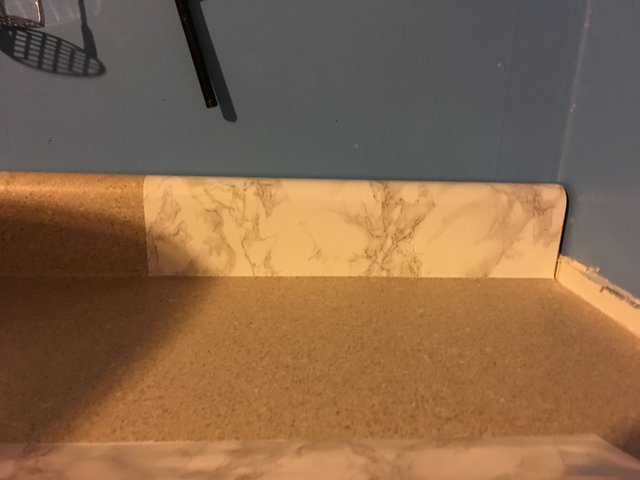
Contact paper comes with a handy dandy grid printed on the back. This helps you measure and cut straight lines. I find it best to start with the back of a counter that goes up against the wall. I cut separate pieces for the back and the rest of the counter. Depending on your counters, you will have to pick how you want your paper to lay.
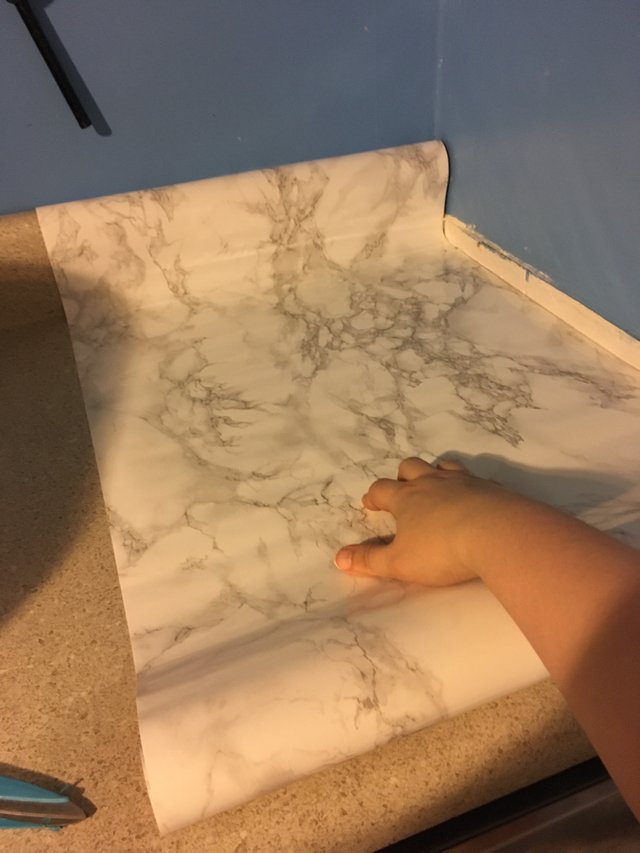
4. Peel and Stick and Smooth
Contact paper has a pretty side and a sticky side. You peel the back off to reveal the sticky side and then attach it where you want it. When you are placing contact paper on a large space, you need to peel only an inch at a time to help prevent air bubbles and wrinkles from forming. I peel an inch, press it down, and then use a credit card to smooth it down. Credit cards don't have sharp edges so they are the perfect smoothing tool. Inch by inch, peel it, stick it, and smooth the paper down. After you have the entire piece of paper down, check for air bubbles. It's impossible to not have air bubbles. This is where a sewing needle comes in handy. If the credit card doesn't smooth the bubbles out then use a sewing needle to pop them. I gently prick the bubbles and then smooth with the credit card. The holes are so small they disappear after smoothing. When putting sheets together I overlapped a bit and tried to match the design to hide any lines. You have to get really close to the counters to see they are four separate pieces of paper.
The Back First
Then the rest: Peel, Stick, and Smooth
Quick and Easy!
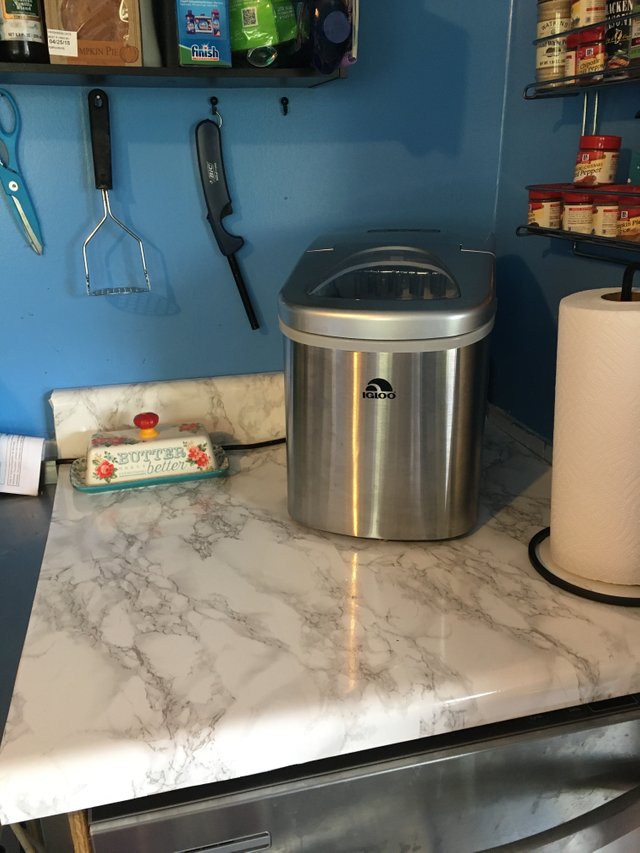
Makes things brighter and fancy looking.
The marble contact paper really brightened up the space. The walls are a dark enough blue that the kitchen could appear dark. I've always had a hard time taking photographs for recipe posts in the kitchen because of the dark counters. You can't tell the counters are covered with a giant sticker. The only downside is the type I picked was cheaper but not heat proof. I can't put hot pans or pots on the counters which is no problem. I have a metal counter as well where I put hot things. They sell types of contact paper made specifically for kitchen counters that are heatproof. They are more expensive though.
Contact paper can be used for other beautification projects. You can cover walls, notebooks, gift boxes, furniture, and more. Contact paper is my favorite craft tool and the possibilities for using it are endless.
Instructional Video How To Complete This Project

yes it is very show high artistic creativity can be carved with various techniques that can complement a good room.
very complete texture to fill various beautiful ornaments @ marxrab
Yours looks really good. We have ours covered in contact paper too but it already has started mostly peeling off after about a year. I guess contact paper doesn't last that long. Ours is not as cool as yours though. I really like that marble design.
We've used contact paper in the past to line cupboards, but never thought of it for benches before. Looking good!
Surprising the resltado friend congratulations of truth does not seem contact paper but ceramics of the fine, excellent strategy to improve parts of the kitchen and more.
This is brilliant, this is going to save me heaps instead of remodeling the whole kitchen, off I go to get some contact papers
Well it looks nice! It's too bad contact paper doesn't last longer, but it's fairly inexpensive.
My uncle got tired of his countertop woes and put in butcher block. I have to say, though, it worked out. Plus, he never needs a cutting board again!