Google Chrome T-Rex game with Arduino
We all have seen the simple game in Google’s Chrome browser that we can access only when there is no internet connection. A fun and simple way to pass time while waiting for the connection to return. The dino character is not only cute but also represents a pre-historic period without internet.
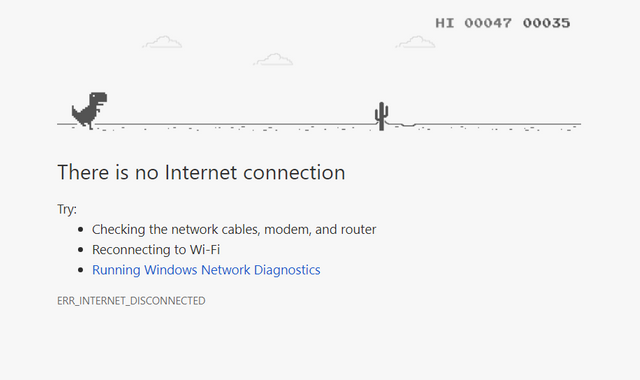
(The game from Google Chrome)
Today, I’ll write about how I tried to recreate the game in the Arduino platform. This is a fairly simple project and can be finished in an afternoon’s time.
Components needed
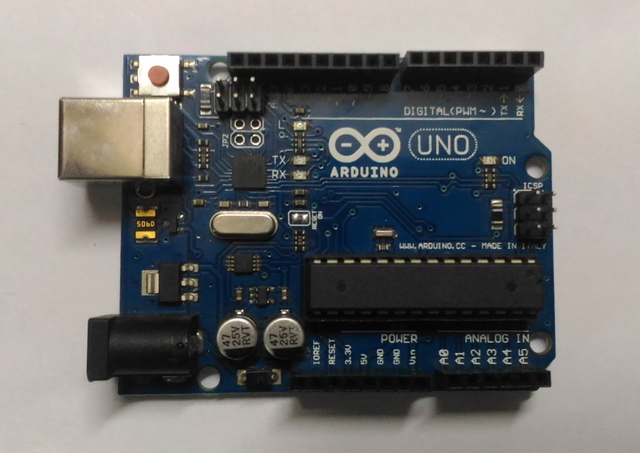
1.Arduino UNO (Or any other board)
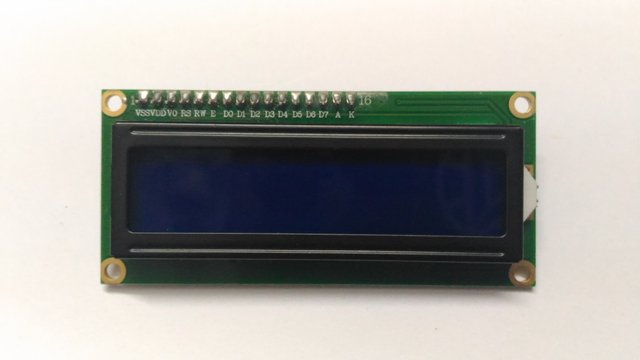
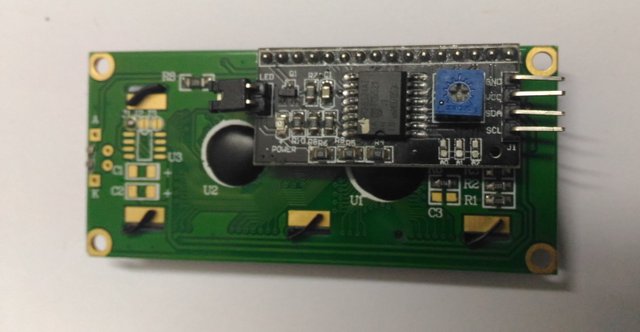
2.16x2 lcd screen with I2C driver
3.A push button
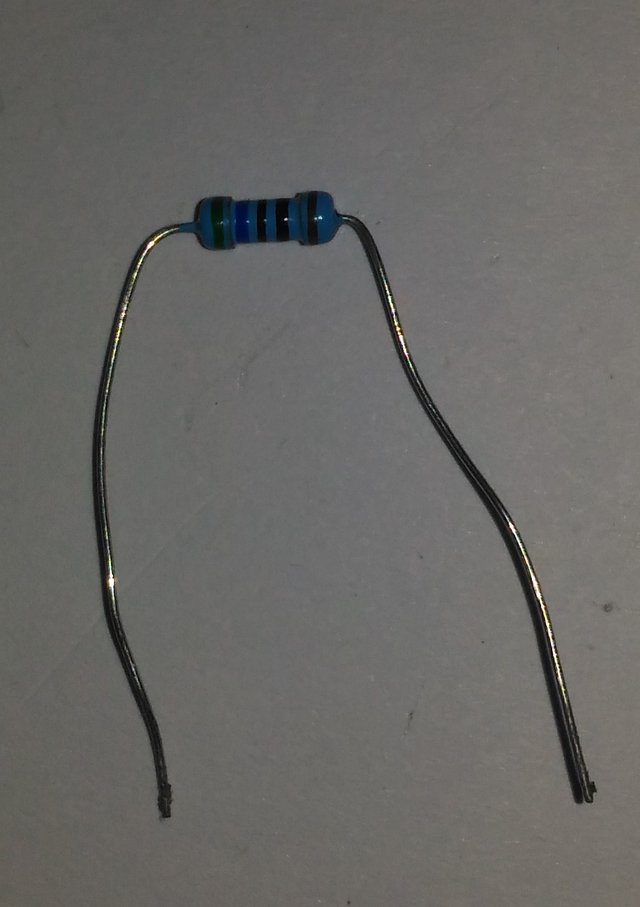
4.A resistor (of resistance between 1 and 10k ohms)
5.A piezo buzzer
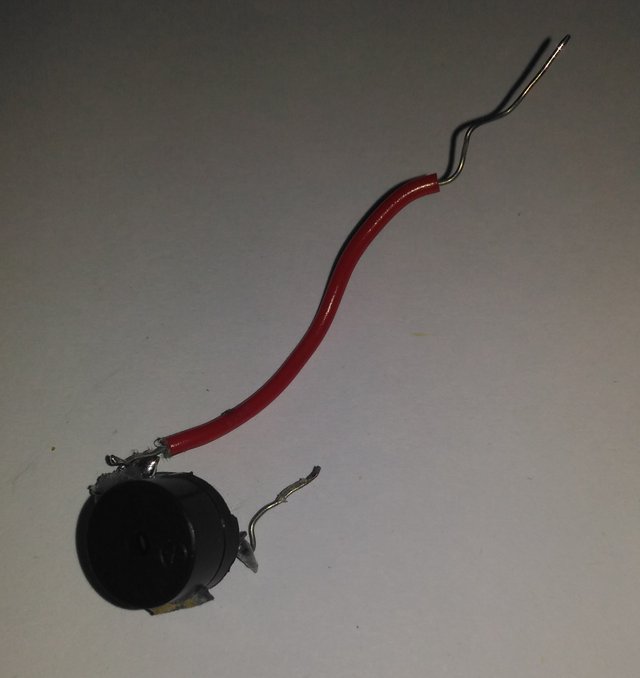
(Mine's an old one, which I had used for another project from college.)
6.Jumper Wires
7.Breadboard
8.A Battery
9.An enclosure of any sort
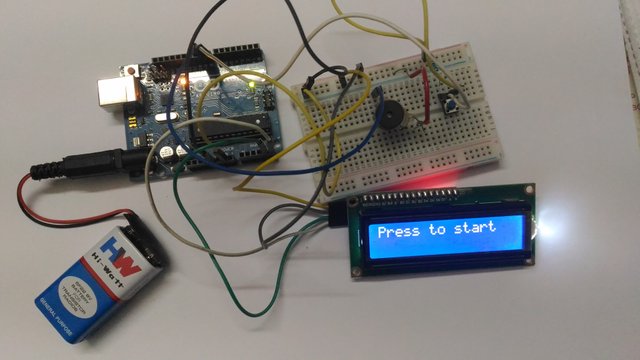
Wiring up the components
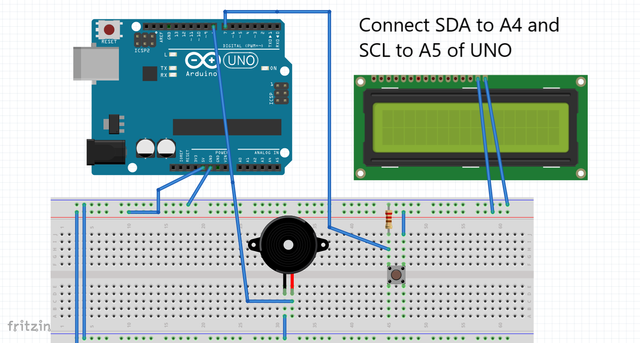
As we have used an lcd screen with an I2C driver, all we need to do is to connect the SDA and SCL pins of the lcd to the respective SDA and SCL ports of your suitable Arduino board.
I connected a pushbutton and connected one of its ends to the positive rail and the other end was connected to a digital pin in the Arduino board. This pin was also pulled down to ground by a resistor. The resistance value can be anything from 1ohm to 10k ohms. This is to pull down the button while it is not pushed.
Next, connect the piezo buzzer’s ground to the ground rail and the positive pin to any of the digital pins of the Arduino.
Code
#include<Wire.h>
#include<LiquidCrystal_I2C.h>
LiquidCrystal_I2C lcd(0X3F, 2, 1, 0, 4, 5, 6, 7, 3, POSITIVE);
boolean dinoOnGround = true;
//declare a boolean to check if the dino is in the ground
int buttonPin = 8;
int buzzerPin = 9;
int buttonState = 0;
// a token variable to check the state of the button
int highScore = 0;
boolean playState = false;
//the game starts only when this becomes true
// This is a common method used in coding games
int dist = 0;
int distTwo = 0;
// variables to set the distance between the trees
int score = 0;
/* An array of byte type is used to display
bitmaps in an LCD Display.
Here, the display is 5x8, the size of one
'unit' in our lcd
The places where it is a 1 will light up and
the places with a 0 will be off
You can create this array easily with a site
that I'll explain below
*/
//bitmap array for the dino character
byte dino [8]
{ B00000,
B00111,
B00101,
B10111,
B11100,
B11111,
B01101,
B01100,
};
//character for the tree
byte tree [8]
{
B00011,
B11011,
B11011,
B11011,
B11011,
B11111,
B01110,
B01110
};
void setup() {
lcd.begin(16,2);
lcd.createChar(7, dino);
lcd.createChar(6,tree);
lcd.setCursor(0,1);
lcd.write(7);
pinMode(buttonPin,INPUT);
pinMode(buzzerPin,OUTPUT);
}
void loop() {
lcd.clear();
// at the start, check is playState is true or false
if(!playState){
lcd.setCursor(0,0);
lcd.print("Press to start");
//When it is false, print the starting instruction
if(digitalRead(buttonPin)==HIGH) //Read the button
{
playState = true;
// when button pushed, make playState true
}
}
// when playState is true, call the startGame function
if(playState)
{
startGame();
}
delay(100);
}
// the loop function ends here
// when playState is true, startGame function is called
void startGame(){
lcd.clear();
dist = random(4,9);
distTwo = random(4,9);
//Generate two random distances for the gap between the trees
// this for loop is to make the trees move
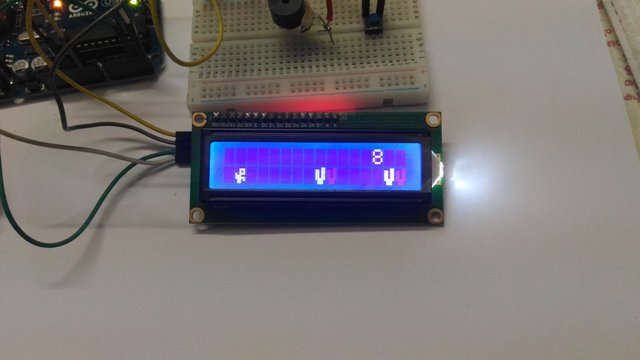
for(int i=16; i>=-(dist+distTwo); i--){
lcd.setCursor(13,0);
lcd.print(score); // print the score
int state = digitalRead(buttonPin);
// Read the push button
if(state == HIGH)
{
buttonState = 1;
tone(buzzerPin,700,100);
}
else if(state == LOW)
{
buttonState = 0;
}
//when the button is pushed, print the dino on the upper
if(buttonState == 1){
lcd.setCursor(1,0); // row and set dinoOnGround to false
lcd.write(7);
lcd.setCursor(1,1);
lcd.print(" ");
dinoOnGround = false;
}
else{ // When the button is not pushed
lcd.setCursor(1,1); // print the dino on the lower row
lcd.write(7); // and set dinoOnGround to true
lcd.setCursor(1,0);
lcd.print(" ");
dinoOnGround = true;
}
// This prints the trees so that it moves with the for loop
lcd.setCursor(i,1);
lcd.write(6);
lcd.setCursor(i+1,1);
lcd.print(" ");
lcd.setCursor(i+dist,1);
lcd.write(6);
lcd.setCursor(i+dist+1,1);
lcd.print(" ");
lcd.setCursor(i+dist+distTwo,1);
lcd.write(6);
lcd.setCursor(i+dist+distTwo+1,1);
lcd.print(" ");
//When the trees reaches the starting point
if((i+dist+distTwo)==-1){
i=12;
} // they are taken to the end and set up randomly once more
/* Now check if the position of the trees
and that of the dino coincides, but we
only need to do this if the dino is in the ground.
Use the dinoOnGround variable and check if the
condition is satisfied. If so the game is over
*/
if(i==1 && (dinoOnGround == true))
{
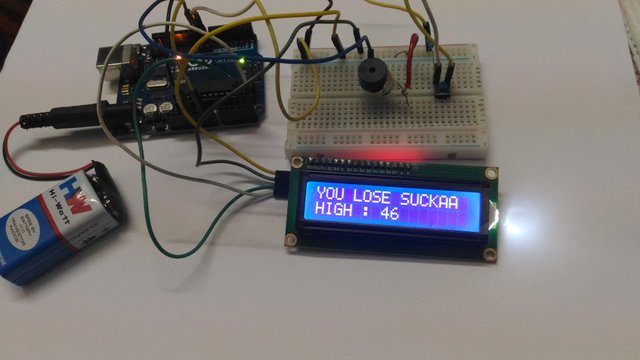
lcd.clear(); // instructions for the game over screen
lcd.print("YOU LOSE SUCKAA");
if(score>highScore){
highScore = score;
}
lcd.setCursor(0,1);
lcd.print("HIGH : ");
lcd.print(highScore);
playState = false; //Set the playState as false so it goes to the
delay(5000); // start screen after the game is over
score = 0;
break;
}
else if(i+dist == 1 && (dinoOnGround == true))
{
lcd.clear();
lcd.print("YOU LOSE SUCKAA");
if(score>highScore){
highScore = score;
}
lcd.setCursor(0,1);
lcd.print("HIGH : ");
lcd.print(highScore);
playState = false;
delay(5000);
score = 0;
break;
}
else if(i+dist+distTwo == 1 && (dinoOnGround == true))
{
lcd.clear();
lcd.print("YOU LOSE SUCKAA");
if(score>highScore){
highScore = score;
}
lcd.setCursor(0,1);
lcd.print("HIGH : ");
lcd.print(highScore);
playState = false;
delay(5000);
score = 0;
break;
}
score++;
// increase the score variable for every run of the loop
delay(500);
}
}
Explanation of the code
Explanations for various parts of the code
byte dino [8]        //bitmap array for the dino character
{ B00000,
  B00111,
  B00101,
  B10111,
  B11100,
  B11111,
  B01101,
  B01100,
};
This is used to define the shape of the character. You can either write it up in paper or use the handy dandy link that I'll provide here to generate the code.
You can go to https://omerk.github.io/lcdchargen/ for easily generating the bitmap code for any shape you want.
The cells you click will be black. They will light up in the lcd screen.

Here is how I made the code for the characters used in my code
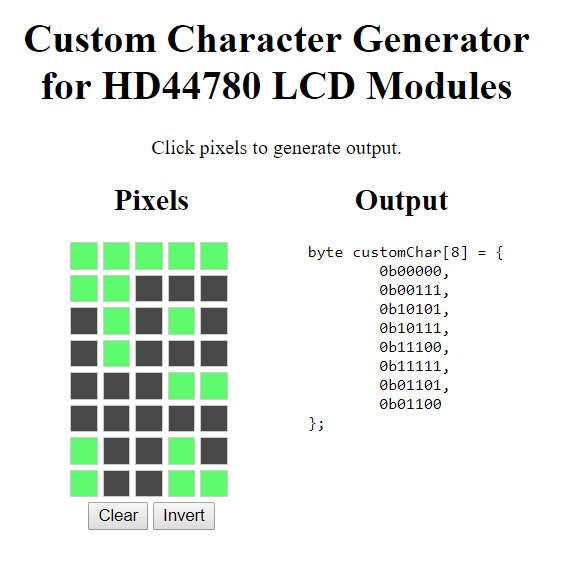
(The dino)
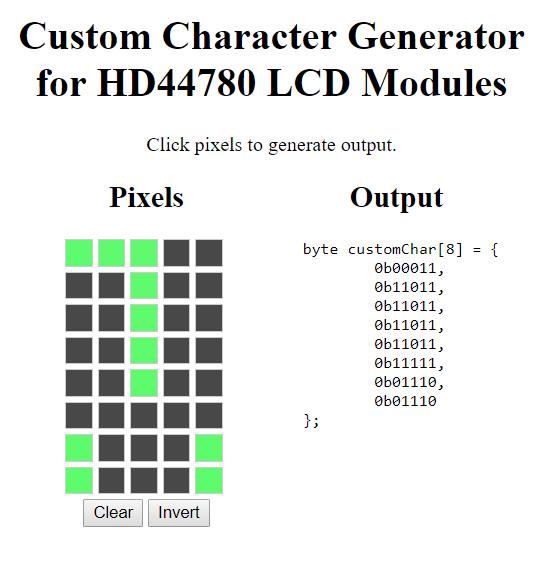
(The tree)
What's more interesting is that they even provide you with some sample arduino code to display it in your lcd!
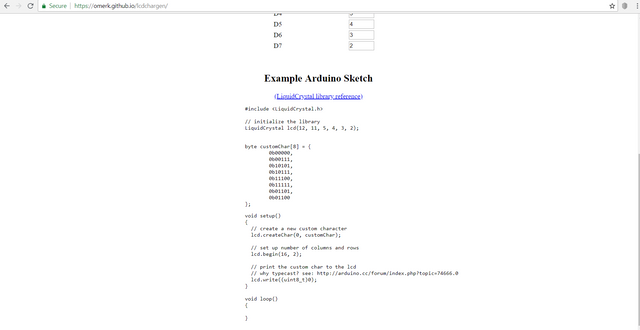
lcd.createChar(7,dino);

lcd.write(7);
These commands are for creating the array which you wrote as a character and for further displaying it in the lcd screen.
 if(score>highScore){
      highScore = score;
 }
    lcd.setCursor(0,1);
    lcd.print("HIGH : ");
    lcd.print(highScore);
    playState = false;
This is after the game is over (Dino coinciding with the tree) and it checks if the score attained is greater than the high score and set the high score. It also sets the playState to false so that it goes back to the start screen
Conclusion
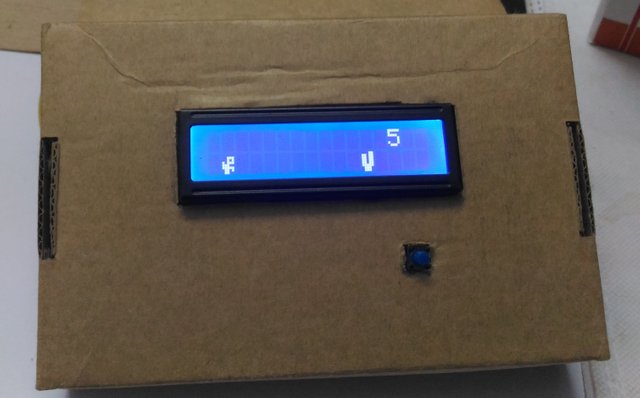
Up and runnning!!
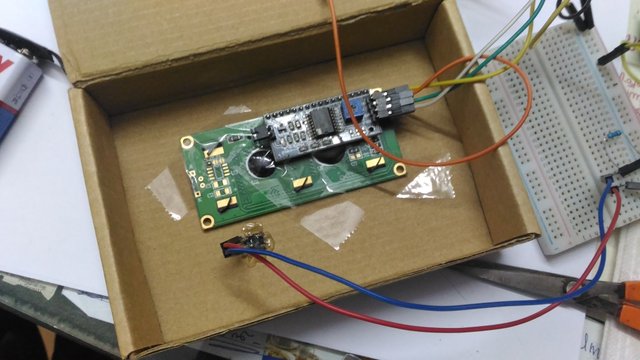
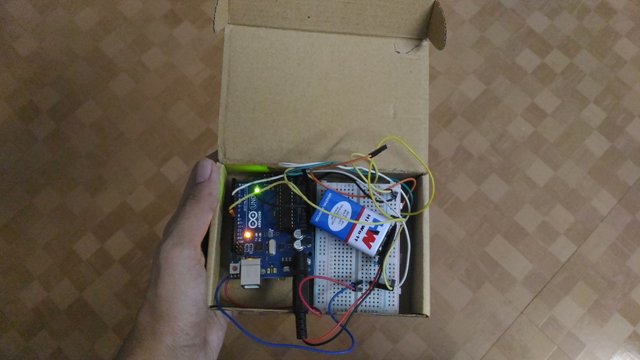
I tried putting it all together into a box.
All packed up!
It was a really fun project and I was able to complete it in around half a day.
Sources
All the code and the pictures are my own creation. The screenshots of the web pages were taken by me.
Love the project! I have only done stuff with a Raspberry Pi but this looks fun!
Thanks! Share your raspberry pi projects too :D
Wow i love this :D So cool ! And the step by step is very instructional :D An amazing post <3 <3 <3
Thanks! I'm glad you liked it!
Join our Discord Channel to connect with us and nominate your own or somebody else's posts in our review channel.
Help us to reward you for making it ! Join our voting trail or delegate steem power to the community account.
Your post is also presented on the community website www.steemmakers.com where you can find other selected content.
If you like our work, please consider upvoting this comment to support the growth of our community. Thank you.
This post was shared in the Curation Collective Discord community for curators, and upvoted and resteemed by the @c-squared community account after manual review.
upvote for me please? https://steemit.com/news/@bible.com/2sysip
Hi @filler!
Your post was upvoted by utopian.io in cooperation with steemmakers - supporting knowledge, innovation and technological advancement on the Steem Blockchain.
Contribute to Open Source with utopian.io
Learn how to contribute on our website and join the new open source economy.
Want to chat? Join the Utopian Community on Discord https://discord.gg/h52nFrV
Congratulations! this post got an upvote by @steemrepo and was manually picked by the curator @veryspider to be added on STEEM REPOSITORY, simply comment "YES" and we upload it on STEEM REPO Website.
Want to know more about the Steem Repo project? Contact us on Discord
YES
Nice and interesting poct
I love this, hope to see more of this from you>>
Thanks! Glad you liked it! :D