Dare to Learn with me! Step by step tutorial Tendrils, Earrings or Earrings, elaborated under the soutache technique with my personal touch
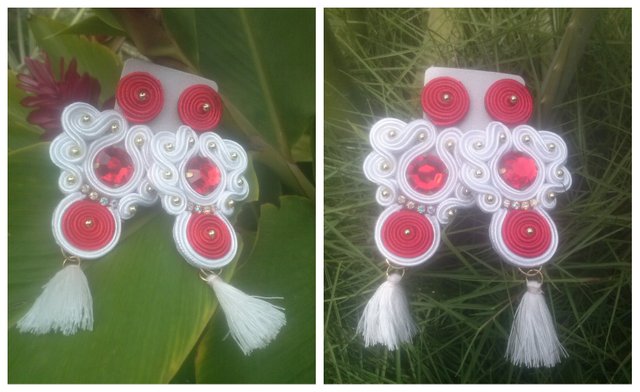
Hello, on this day I will explain my way to easily and simply make some beautiful tendrils, I hope you like them, these tendrils that you brought today are a little more elaborate but it is the same technique that we have used previously, no It is difficult you just have to be patient and do it little by little so that at the end your piece is excellent.
Every time I can, I will be publishing tutorials and tips so that you can learn a little of my work that, as I have already said, is something that I love is my passion ...
Let's start ...
MATERIALS:
Soutache thread or Rayón braid (varies the name according to your Country)
Scissors
Liquid silicone
Lighter
20 laminated balines 2 mm
2 Base for Flat Tendrils
2 Apply round 1cm in diameter
10 cm approx. of Strass of 3 mm
2 Earplug stopper
Thick or semi-leather fabric for the base
Anime
2 Rings or rings of 1 cm
2 Hoops or Rings of 0.5 cm
Fine tip eyebrow tweezers
Fringe

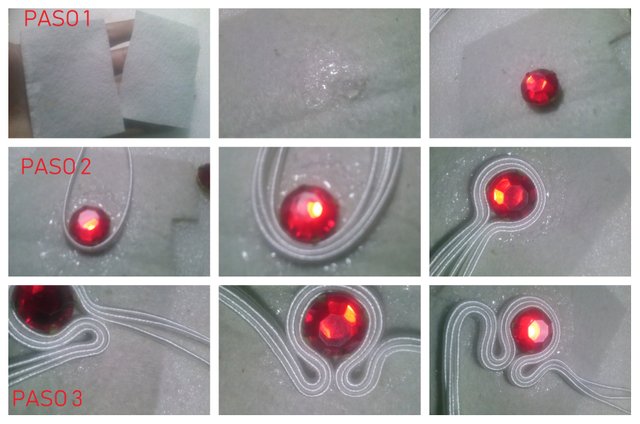
STEP 1: Cut 2 pieces of leather about 9 * 7 cm, in the middle of it spreads a little liquid silicone and sticks the round sconce, wait a moment for it to stick so that when placing the thread does not slip.
STEP 2: Place liquid silicone around the appliqué, and proceed to cut 3 threads of 15 cm each and stick them around the appliqué as I show in the image.
STEP 3: Fold down the 3 threads on each side of the tendril, creating a very small circle when doing so as you see in the image.
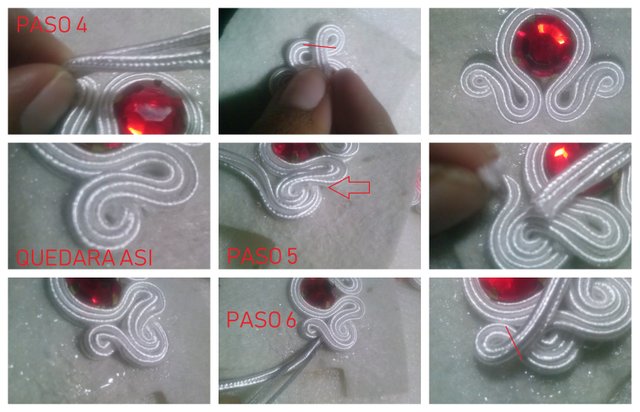
STEP 4: Return liquid silicone under the excess thread and for the second time fold the thread this time in a new circle, cutting it burns the ends and puts the excess under the threads to make it look more presentable. It will remain as I show you in the third image.
STEP 5: Cut 2 threads of about 6 cm burns the tips and you must put it on the second circle that we formed in the previous step just below the threads in the image you can detail it leave it marked with an arrow to make it easier to see down with the remaining thread returns to form a small circle bending inwards cutting the excess and burning the tips in turn introduces the surplus underneath. It will be as I show you the next image.
STEP 6: In this step we must perform exactly the same as in the previous step.
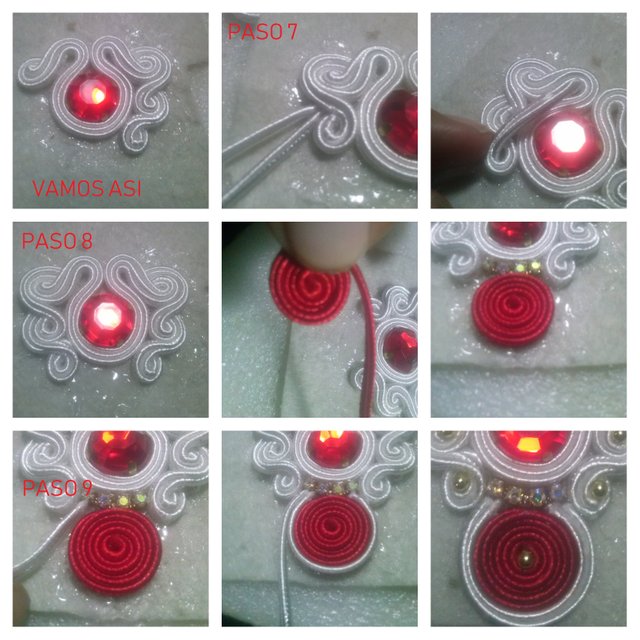
STEP 7: At this point we must do what was done in step 5 and 6, only on the other side so that it is the same on both sides of the wall.
STEP 8: In this part we have half the tendril ready, put some liquid silicon on the bottom of the tendril, cut 4 rhinestones or 2 cm of strass and stick it just below the tendril between the last two circles as you see the image. Now we must cut a thread of 20 cm long roll it with your fingers leaving a small space in the middle because when you finish there we must place a 2 mm balin and paste it right in the middle below the strass.
STEP 9: Place liquid silicone on the outskirts of the circle that you just pasted and cut 2 strands of 6 cm each to stick it around the circle. We already have the bottom part of the tendril almost ready.
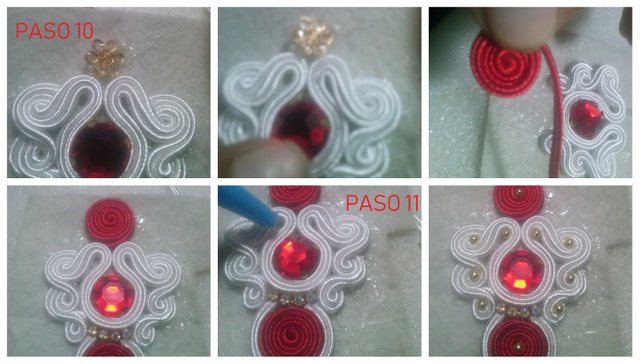
STEP 10: Spread a bit of silicon on the top of the tendril and proceed to insert the base of the tendril the silicone that we place helps the base is fixed and does not get damaged or move with the use, Then we put back liquid silicone on the base of the tendril, cut a thread 20 cm long, with your fingers roll it and you must stick it on the base.
STEP 11: Place a drop of very small liquid silicon in each circle that we form and with the help of the clamp, insert the 2mm pellets one by one there. The last image will remain as shown.
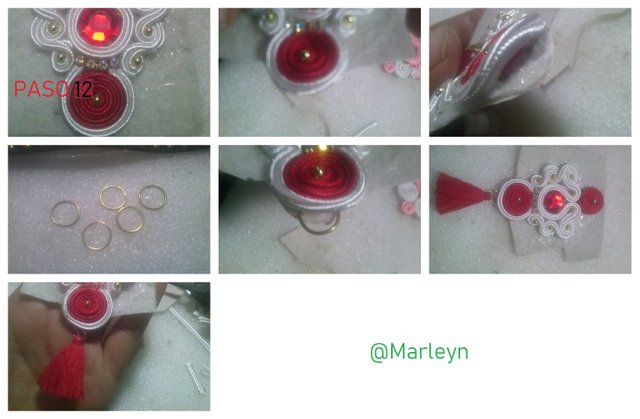
STEP 12: In the lower part of the tendril cut the leftover leather just to the ace of the thread being careful not to tear it, lift the circle that you hit in the previous steps, being very careful not to deform or dirty, introduce half of a ring of 1 cm in diameter, re-attaching it by exerting a little pressure and there we will place the pompom just missing the rest of the leather, then we pass the tinder flame very carefully and quickly throughout the tendril, this helps to seal the thread and That way, these beautiful tendrils will be ready.

Very professional well executed product.
Thank you...
Congratulations! This post has been upvoted from the communal account, @minnowsupport, by Marleyn from the Minnow Support Project. It's a witness project run by aggroed, ausbitbank, teamsteem, theprophet0, someguy123, neoxian, followbtcnews, and netuoso. The goal is to help Steemit grow by supporting Minnows. Please find us at the Peace, Abundance, and Liberty Network (PALnet) Discord Channel. It's a completely public and open space to all members of the Steemit community who voluntarily choose to be there.
If you would like to delegate to the Minnow Support Project you can do so by clicking on the following links: 50SP, 100SP, 250SP, 500SP, 1000SP, 5000SP.
Be sure to leave at least 50SP undelegated on your account.