Who Says You Cannot Make your Own Airplane? Series #10: Pilot Navigation - Flight Planning, Flight Logs, Map Readings, Correcting Heading Errors & Actions To Take When Lost
Being regarded as the fastest and most relaxing mode of transportation, air transportation possesses dangers that no other form of transportation dares to possess. Lives of the passengers and crew members are placed in your hands as the captain, hence a need for total devotion from you - @teekingtv
Here comes another highly educating series, the most important aspect as the judgement you are going to make during emergencies will be based on what we are going to discuss here today. But the, pardon me for not welcoming you to this page first. You know, I am such a rascal and I guess you should get used to that already. Chuckles. Now I am going to give a quick recap of what we discussed in our previous series.
The three types of landing discussed are
Normal landings,Crosswinds landingsandShort, Soft and Unprepared Field landings. There are certain conditions that tell the pilot which type of landings to use while approaching. The most used among the three is the Crosswind landing where wind affects aircraft at an angle towards its longitudinal axis. Crosswind needs to be managed properly in order to avoid causing a loss of control.Side-slip or Wind-down methodandCrabbing methodare the two basic methods used for landing in a Crosswind. There are essential pre-take-off actions that must be taken by the pilot. So also do we have some irregularities that may occur up during landings.
Just joining us for the first time? I strongly request you check out our previous series: Series 1 | Series 2 | Series 3 | Series 4 | Series 5 | Series 6 | Series 7 | Series 8 | Series 9.
On this series, you will be shown how to prepare for air conduct and safe cross-country flight. Topics to be discussed will include Flight planning, Navigation Techniques, Keeping Flight Logs, procedure to divert to Alternate Airport, the basic use of Radio Aids for navigation, Low Level Flight and flying in Reduced Visibility, and the actions to be taken If You Get Lost.
We are getting there gradually.
Pixabay image - (CCO Licensed)
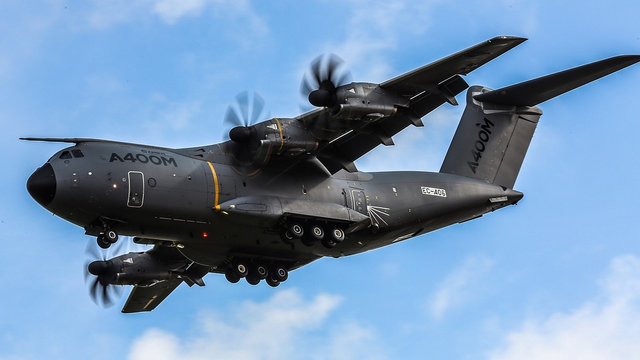
Flight Preparation
The preparation include taking into to account:
- Present and anticipated weather
- Terrain
- Distance
- And your competence as a pilot.
In your planning, you will have to determine and maintain an heading and altitude. This means you will have to take into account drift, and be able to estimate new headings to regain and maintain the desired track. You will also have the task of accurately calculating ground speeds to come up with revised estimate times reliable or ETA. To do much of these, you have to re-chart and identify landmarks on the ground. As well as identify redetermined and new checkpoints. You will also be tasked to recognise when it is necessary to divert from a planned route and fly towards ultimate destination.
The first item of business is to check the weather. Remember, pilot navigation flight can only be conducted if VFR weather prevails and the forecast to prevail over your route. You may get weather briefing either in person or from Aviation Weather Specialist. If this is not possible, transport cans of Flight Service Stations can supply you with aviation area, terminal and upper wind forecast along with hourly weather report. make sure to check forecast reports against those at the airport you plan to land at. Pay attention to surface wind at your destination as a strong wind or crosswind may preclude a safe landing.
As weather conditions constantly change, plan to have an alternate destination where you can safely land. You should list all suitable alternate in chronological order on the Flight Log and circle them on the navigation chart. Enter the weather data on the flight planning form. Check NOTAM's and field condition reports.
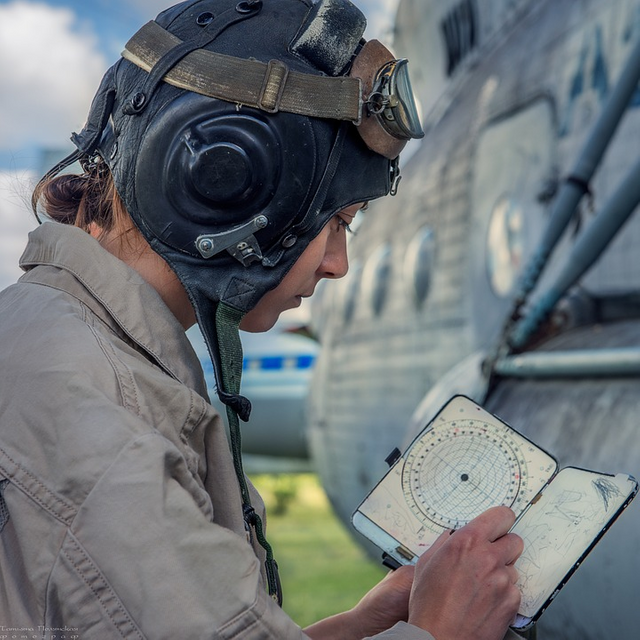
Flight Planning
Now, it is time to plan the route. The chart generally used for pilot navigation is the transverse locator projection with the scale of 1:500,000. Be sure you are using an up-to-date chart that is in good condition so that details can be seen. You want to make use of aeronautical chart with road maps since this is generally include more barging load detail. But they must be used only as a secondary source of information as distance scales and land features are not always as accurate.
Flight planning is so essential.
Pixabay image - (CCO Licensed)

When determining your route, you will find that direct route is not always the most advisable. You will want to avoid the route that is largely over water beyond landing distance from land. You will also want to avoid prohibited or dangerous areas. As you examine the map, look for possible checkpoints along the way. These are primary features you can use as landmarks to establish your positions as well as help on the calculation of ground speed and revised ETAs. Major highways, rivers, railways and lakes are examples of such landmarks. You route should include as many of these features as possible.
It is not a good idea to plot the track from airport to airport especially for the busy unfamiliar ones. It is better to set the heading for nearly final destination and then navigate the short distance to the airport. It is preferable to make the set heading point a new by easily identifiable landmark. Such as a rail or road in assertion, bending a river, tower or small village lake. this allows the pilot to visually fly from the airport to the heading where he can climb to cruising altitude. Climbing to height over a departure airport is dangerous and a waste of time. However, if you cannot find a suitable landmark, there is no alternative but to set the heading over the airport.
Use a yellow tip pen to draw your track line from the set heading to your destination point. Now, check the map again to know the elevation of the terrain and any hills or other obstructions. Make sure you will not be flying through any dangerous or prohibited area. Make a list of alternate airports and keep track of where your checkpoints are.
To help you make in-flight corrections to any deviation from your track, draw drift lines on either sides of your track line. This should be drawn at 10 degrees on either side of the track line from both the set heading and destination the point. Later in this series, you will shown how these drift lines can help you get back on track.
To help you make quick distance calculations, the track lines should be marked at 10 nautical line intervals. Or you may want to divide the track line at quarter, half and three-quarter marks.
Before continuing with the techniques of pilot navigation, a word about the paperwork. Use the Flight planning form to keep track of all information about your trip. Information should include:
- The cruising altitude.
- True airspeed.
- Track and wind velocity.
- Weather.
- Destination runway details.
When determining the track, it is best to place the protractor at the midpoint of the track line to measure its angle with the radius of the longitude. This upset any error that occurs on the Transverse Locator Projection. Airspeed corrections are made using a navigation computer. True Airspeed is used for all navigation calculations since indicated airspeed will vary with Temperature, Pressure and Altitude. The conversion can be done quickly on your circular navigation computer.
Keeping Flight Logs
Because wind velocities vary with altitude, they must be taken into account when preparing the flight plan. It is one of the factors which will determine your cruising altitude. The other form you will fill out is the navigation log. This will give you an organised record and schedule. It also reduces the possibility of forgetting important data and having to compute problems in flight.
Keeping reduces the possibility of forgetting important data and having to compute problems in flight.
Pixabay image - (CCO Licensed)
Once you know the wind velocity for the altitude you will fly at, you can calculate headings, ground speed and times. Enter these on the navigation logs. Itemise all tracks, headings, distances, speeds and other information with regards to your trip. Due requirements should be figured out and these should be checked against actual consumption on route. And remember, it is mandatory to follow flight plan, flight notification prior to any flight on 25m of the airport of departure. This lets the authorities know where you might be should your aircraft be overdue. It is imperative you close your flight plan and notify the appropriate agency when you reach your intended or alternate destination.
Before getting into the section of navigation using a chart, some note about the instruments on your aircraft.
The Magnetic Compass will not give you a true reading when the aircraft is being turned, banked, accelerated or decelerated. To get an accurate reading, you must be in straight and level flight and constant airspeed. A good rule of turn is that the aircraft turns at about 3 degrees per second in a standard rate turn. Therefore, to make a 90 degrees turn, the aircraft will have to be held in a standard rate turn for 30 seconds. Although speed and altitude changes may cause errors on the Heading indicator readings, they are so slight but cannot be ignored for all practical purposes. However, it should be set manually by the pilot every 15 minutes because it is prone to precession errors.
The altimeter also has to be rest from time to time in different locations because of changes in atmosphere pressure. You can obtain com altimeter readings from control tower and Flight Service Stations or by tuning into Automatic Terminal Information System (ATIS) broadcast.
Map Readings
Now, it is time we discuss how to develop your skills in map reading. If visibility is normal, a well trained pilot should be able to fly directly to the destinations by map reading alone. When practicing map reading and cross-country navigation, you should be flying at least 2000ft to 3000ft above the ground. Remember, it is harder to pick up landmarks and find them at lower altitudes because you cannot see as much of the terrains. When navigating with the map, a good rule is from watch to chart to ground. That is note the time, study the chart and anticipate what you should be seeing on the ground.
When flying by map read, orient the map in the direction the map is proceeding even though it may mean the lettering of the map is sideways or upside down. It is important that you develop the ability to estimate. Something that is achieved through constant practice. While in flight, estimate the bearing and distance the aircraft is from the airport, town or checkpoint. Observe the natural science of surface winds and direction. Get into the habit of estimating the sizeof objects on the ground and the distance they are from each other. If you fly over a field, estimate its length and breadth and determine if it will be suitable for emergency landing. In another word, be as familiar as possible with your route. Once you are in flight, you will find out that inaccuracy in forecasting and flying the aircraft will throw you off track.
Before you are shown how to make corrections, let us become familiar with the following terms.
- Required track: This is the proposed path of the aircraft over the ground. The track made good as the actual path you will fly.
- Track error: This is the angle between the track made and the required track. Note that this is always express as being the number of the grease to the left or right of the required track.
- Opening angle: This is the angle between the required track and the track made good.
- Closing angle: This is found between the all required track and the new required track to arrive at your destination.
Three Ways To Correct Heading Errors
Earlier, we marked the map for a flight with 10 degrees drift lines. You will now be shown three ways to use these lines to correct your heading should you drift off course.
The first method is the Double Track Error Method. You have calculated your heading to reach your destination at 150 degrees. About 50 miles from point A, you accurately pinpoint your position at B. Using the 10 degrees drift line as a guide, you estimate the opening angle or tracker is about 6 degrees to the left of the required track. Now, if you off to heading by 6 degrees, you will fly apart parallel to the required track. What you must do is double the tracker to get back on course. Your new heading will be 162 degrees. At point C, you will regain your required track. It should take you approximately the same length of time to reach C as it did to fly from A to B. If possible, confirm your position with landmarks on the ground. Upon reaching C, off to your heading by subtracting half of the correction that was applied to your original heading. This means your heading will be 156 degrees to maintain a required track.
Another way to regain your required track is the Opening and Closing Angles method. This method is useful if more than half of your flight is completed before you are able to return to your position. But it cannot be used to any distance along the track. This happens where there have been no features on the ground on which you can fix your position. In our example here, you have flown more than half of the road before pinpointing your position at point C. Using the 10 degrees drift line, you find the opening line about 4 degrees to the right of the track. The closing angle to the destination appears to be 8 degrees. In order to fly directly to your destination, add the opening and closing angles and adjust your heading by this amount to the left. Again, if your heading was 150 degrees, subtract 12 degrees which give yu a new heading of 130 degrees.
The third method of getting back on track is the Visual Alteration Method. Use this method if you can positively identify a landmark on the required track. In the example here, your heading is 150 degrees. At point B, you notice a tracker of about 6 degrees. You then fly to the positively identified landmark at C. To maintain a required track, you now off your heading to 156 degrees.
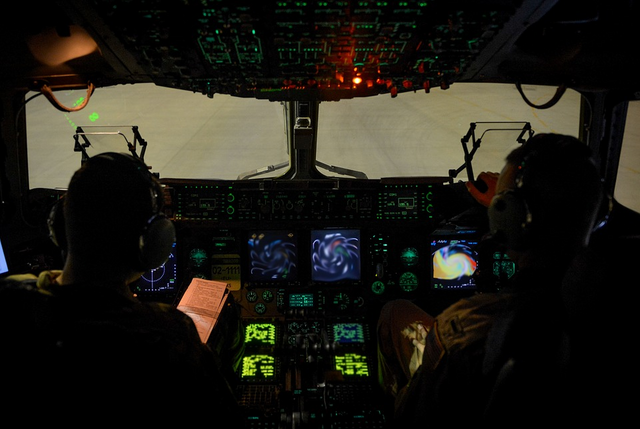
In Flight Navigation Procedures
As soon as possible after take-off, get the aircraft under the desired set heading for the first Leg. This should be done either to the airport or either a convenient checkpoint. Enter the time over the set heading point and calculate the ETA. To ensure accuracy, it is important to begin the navigation exercise directly over the aircraft set heading point.
Flight navigation.
Pixabay image - (CCO Licensed)
Revisions to the ETA should not be attempted until you are 10 and 25 miles from the departure point. Rely on navigation instruments on the aircraft rather than inexperienced personal judgement. Maintain a steady planned heading and speed. If you do not recognise where you are, do not suspect the inaccuracy. Continue to hold a steady heading until you reach a recognizable checkpoint. You have little time for log keeping in the air but there are some that must be recorded. These include Compass Headings, the Time the Compass Headings is altered, the ETA of Destination and planned turning points, time of the Checkpoint and turning points, new Ground Speeds and Revised ETAs.
As you are flying, keep an eye out on checkpoints and note the time to check your progress. Watch the clock as well. Time is the key element of navigation. It helps you locate checkpoints by preventing you from looking further too soon or too late. Do not fly at zigzag from checkpoint to checkpoint. There is nothing wrong in not arriving directly over a specific point. Any change in the heading should be deliberate with the goal of flying in a straight line as possible.
Alternate Destination
One skill to develop is the ability to quickly estimate a heading to alternate destination should the flight become practical. The calculation is the same as you would use in pre-flight planning, but because of having to simultaneously operate the aircraft you must take advantage of all shortcuts. With a little practice, you can quickly determine headings with reasonable accuracy.
In mentally transpose airways and air route on the chart, or the estimate information on the compass rolls that circled VOR stations, alternate can be determined quickly by studying chart or forming estimate information on the compass rolls and circling the VOR. Use the pencil or edge of your hand as a straight hedge. If airways or compass rolls is not close enough on the chart, estimate angle by taking them as a fraction of 90 degrees angle between the radius of longitude and the lines of latitude. If possible, draw or freehand drawing on the chart from a divert point to your alternate destination. Estimate distances using your thumb and index finger as a set of dividers.
Here is another tip. On Canadian chart with the scale of 1:500,000, the compass rolls around VOR stations is about 30 nautical miles. Always divert to the airport which is the easiest route to follow, be the highway, river, powerline or other landmarks. Remember, you are generally diverting in an emergency or near emergency situation. So this is no time to test your pre-navigation skills. To compensate for wind, use forward landmarks as a means of staying close to the desired track.
Low Level Navigation And Flying In Reduced Visibility
In the case of poor visibility, you will have to rely on low level navigation. At these altitudes, you will find your filed of view extremely limited especially rough terrain. As well, because you will need to give a better attention in handling the aircraft, you will have less time to look for landmarks and checkpoints as you pass over them. Try to pick easily identifiable features such as railway lines or roads that run perpendicular to the track.
Flying at low levels also means you have to keep an eye out for hazards such as broadcast towers, powerlines and other objects. Your set heading procedure should be carried out before you descend to lower altitude and limit your navigation to map reading. If altitude is critical, frequently look outside while making log entries to make sure you do not fly into the ground. If you are uncertain of where you are, climb as high as necessary to give yourself a better view of the ground and try to find a landmark.
Procedures To Follow When You Are Are Totally Lost During A Cross-country Flight
Here are some points to follow, should you become lost while flying cross-country.
- First, remain calm and hold a steady heading.
- Check the heading indicator against the magnetic compass.
- Check your previous calculations by studying your chart and your log.
- Check for a possible wind shift.
- Draw a circle of uncertainty. You will do this by drawing a circle on a chart around the position you would be in if you are on track and on time. The radius should be at least 10% estimated distance flown since the last confirmed position.
- Now, examine the circle for primary features you might recognise on the ground. When you recognise a landmark, tat is your position.
- You might also want to try to get a bearing using radio aids. Usually, you will be able yo establish your position in a short time.
- If you decide you are definitely lost, notify the air traffic control by radio or try to contact any other agency. Once established a radio contact, transmit your general position and the amount fuel you have left.
- Ask for any assistance you need and the actions you planned to take.
In an extreme emergency, you should broadcast your MAYDAY distress message on 121.5mhz giving the aircraft type, the nature of the emergency, the amount of fuel left, assistance required and your immediate intentions.- Listen on the same frequency for instructions.
- If you have no idea of which direction to fly, set up a triangle at a pattern and endure power settings at the highest practical altitude. This will alert the radio network.
- If you are sure there is a problem, save enough to complete off-airport procedures.
Conclusion
As you might have known, despite being the fastest and most enjoyable mode of transportation, air transportation is at the same time the most dangerous form of transportation. You are flying at a very high altitude. That gives room for lots of dangers that can hinder or poss threats to the your life as the pilot and those of the passengers your aircraft is conveying. As a pilot, you need to develop a very good navigation skills such a map reading, ability to quickly make estimations in moments of short time as your life and those of the people in your aircraft lie on your judgement.
There will come the time when you will be flying without knowing your position or get into emergency situations where you will need an emergency landing. Your ability to get familiar with your route and make quick decisions will save lives and your dear aircraft. Let us take a break now, we will be meeting again.
References
- Flight planning
- Air navigation
- Pilot logbook
- Alternate destination
- Alternate Airports
- Low level flight
Previous Lessons In The Series
- Series #9: Understand The Concept Of Flight Approach And Landing
- Series #8: Understanding The Airport Circuit, Control Zone & Dealing With Flight Conditions Illusions
- Series #7: Understanding The Aerodynamics; Spin, Spiral, Slip And The Concept Of Take-Off
- Series #6: Understanding The Concept Of Slow Flight and Stall
- Series #5: Understanding The Flight Maneuvers; Climbing, Descending & Turns
- Series #4: You've Got Attitudes, Aircraft Got Some Too
- Series #3: Understanding How Jet Engines Work And Effect Of Atmosphere In Flight
- Series #2: Understanding The Thrust Mechanism And How The Engine Works
- Series #1: Understanding The Mechanism Behind Airplanes And The Misconceptions

Hey! Do you write posts that are related to Science, Technology, Engineering, and Mathematics (STEM)?
Then join #steemstem on on discord. Click here.
Check this blog post by @steemstem to understand the guidelines on how to become a member of @steemstem.
Also check on this post by @steemstem to understand the use of images so as to avoid copyright infringement.
And in case you are writing from Nigeria, you can include #stemng tag in your posts. Details on @stemng blog.
Thinking of delegating SP to @steemstem to support this great initiative? All you have to do is to use the links below:
50 SP | 100SP | 500SP | 1,000SP | 5,000SP | 10,000SP | 50,000SP
However, ensure you have at least 50 SP left in your wallet.
I am @teekingtv, the no.1 Global Meetup analyst

Hi @teekingtv!
Your post was upvoted by utopian.io in cooperation with steemstem - supporting knowledge, innovation and technological advancement on the Steem Blockchain.
Contribute to Open Source with utopian.io
Learn how to contribute on our website and join the new open source economy.
Want to chat? Join the Utopian Community on Discord https://discord.gg/h52nFrV
Another important lesson learnt today.. Thanks for posting.
Pls how do you do this mark stlye thay your picture and writeups are onesided. Teach me. Thanks
Another great episode about airplane. As always I learn alot about Pilot Navigation, Flight Planning, Flight Logs, Map Readings.
Wow! Thank you for following. Honored.
This is alot to take in dear. Quite alot.
Yeah. Quite. Thank you for following.
This post has been voted on by the steemstem curation team and voting trail.
There is more to SteemSTEM than just writing posts, check here for some more tips on being a community member. You can also join our discord here to get to know the rest of the community!
Bro did you go to a pilot school or something?
Your posts on this series have been so detailed amd comprehensive.
Keep up the good work!
Baba... Pilot school keh. We've got every resources needed to learn anything we want with internet. Our willingness to learn is the key.
I'm so grateful for your read and comment.
Awesome post 👍👍👍