Tutorial | How to remove the background to our image in photoshop - LEARNING COURSE PHOTOSHOP FROM ZERO # 1
Hello readers and all my supporters I hope you are very well ..
In this new post will be the opening to a small and essential course of photoshop in which we will learn from scratch, completely from scratch, I will explain step by step how to use each and every one of all the tools that you bring this program "PHOTOSHOP".
And I will explain in both SPANISH and ENGLISH language, so I will do two post of each tutorial that deals with this course.
Well if you are new and want to learn how to use photoshop here I leave a post where I explain step by step HOW TO DOWNLOAD AND INSTALL THE PHOTOSHOP
Well already having this program installed on your computer you can start this course ...
In this post I will explain how the title says "how to remove the background to our image"

Well let's start ...
Step by Step
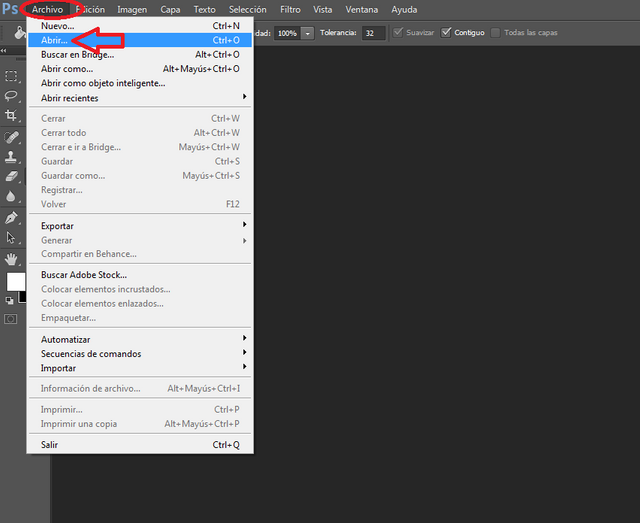
- We will open our photoshop and on one side of the left corner we will see that it shows us some options, we will give it on file and then open
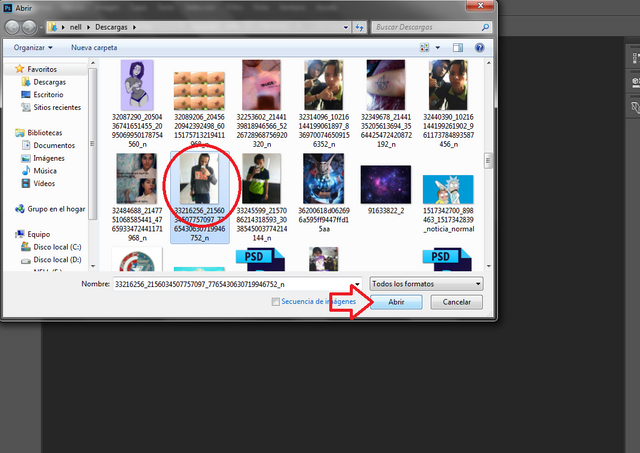
- Then we see a box and there we will look for the image that we will use, we select it and we open it.
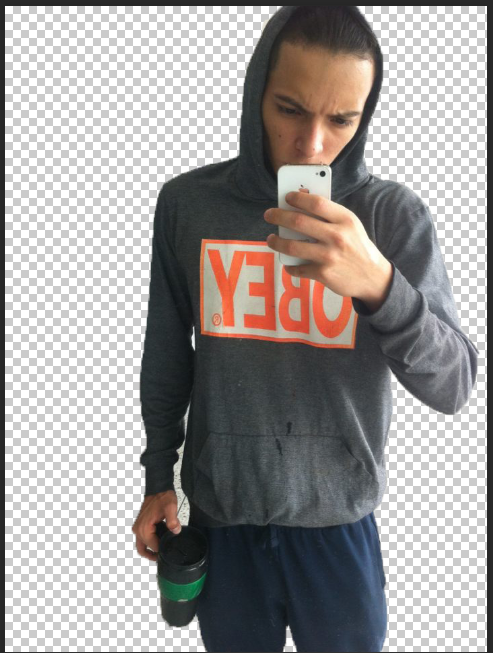
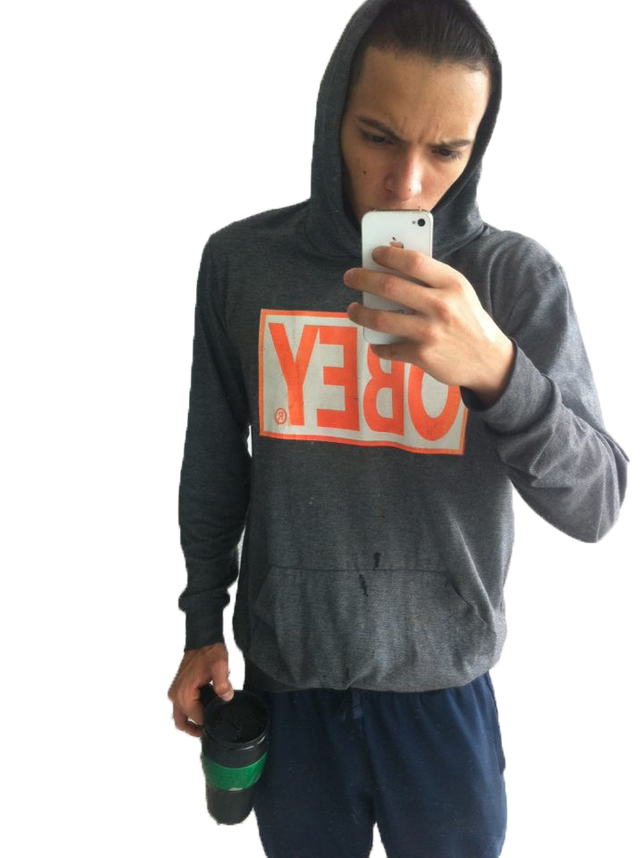
- Ready, we have our image which will remove the background.

- We press the keys Ctrl + J of our keyboard, and we observe that our layer "our main image" has doubled.
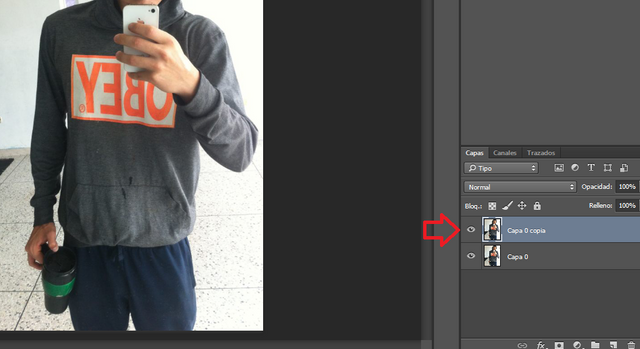
- With the layer that we have duplicated is with the layer that we will work, which will remove the background, a tip for all who are started, whenever they are working on any image always duplicate the start layer, since that in the future can save your work ..
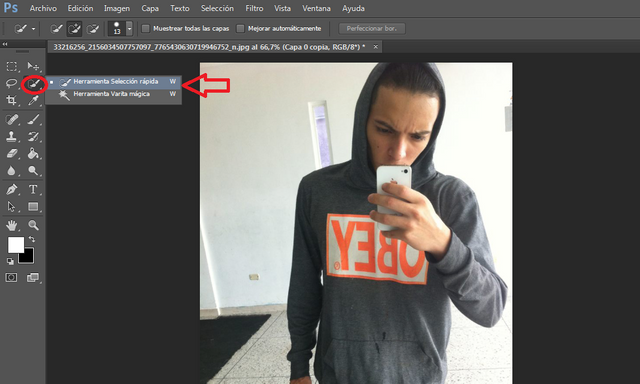
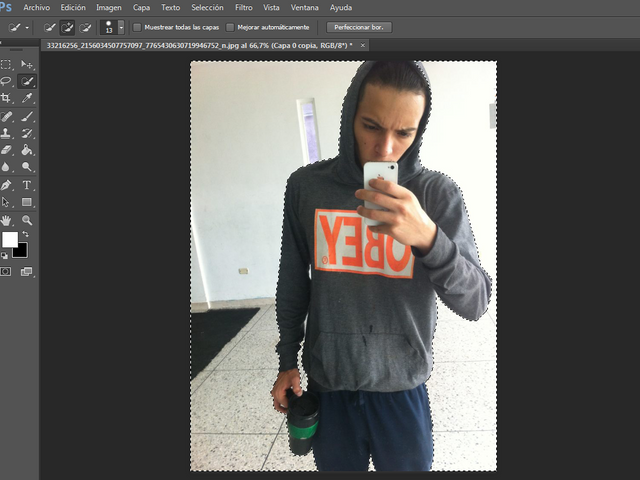
- If you can notice on the left side a toolbar also leaves obviously you will not know the function of each of them, but through the course you will go to learn each of them, in this case we will use the "quick selection tool" , with it is that we can remove the background of any image.
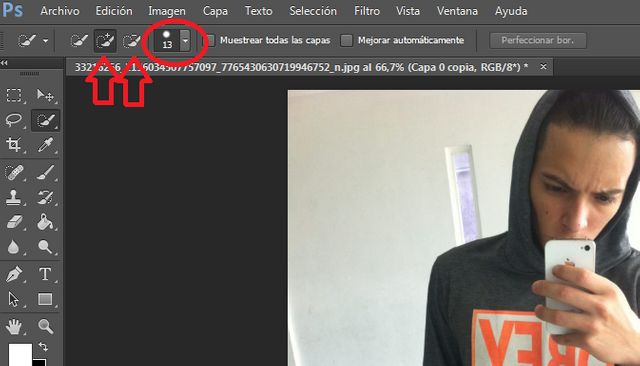
- If you could notice well, to one side you can notice the positive sign (+) and the negative (-) and next to it a value, well with the sign (+) we can open and expand the whole selection in our image and with the (-) we will shrink it, it is something very simple to do, and in the value I will choose in my case the number 13, you can choose the one that you want depends on your image and it would be at your pleasure.
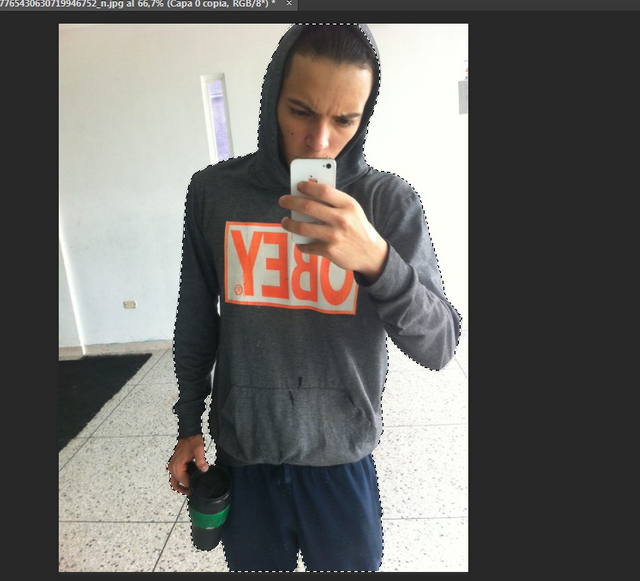
- We start with the sign (+) and touch the part where we want to select our image, in my case I will select the subject of my image.

- If we keep pressing the Ctrl key of our keyboard next to the wheel that is in the middle of our mouse, we will notice that it approaches and moves away from our image "like magnifying glass", and we will approach our image to verify that in the edge this well selected...

- We already have the subject all selected.
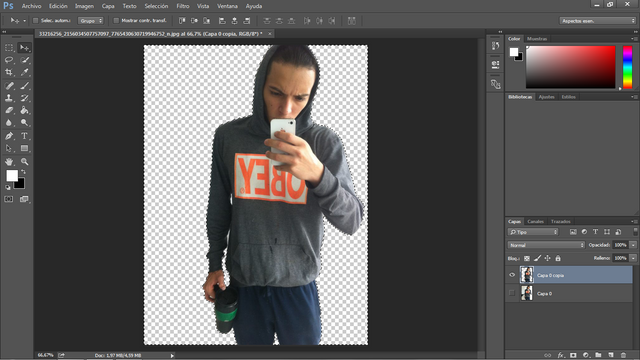
- We go in the options that it shows in the superior part and we will look where it says SELECTION, then where it shows us "to invest".
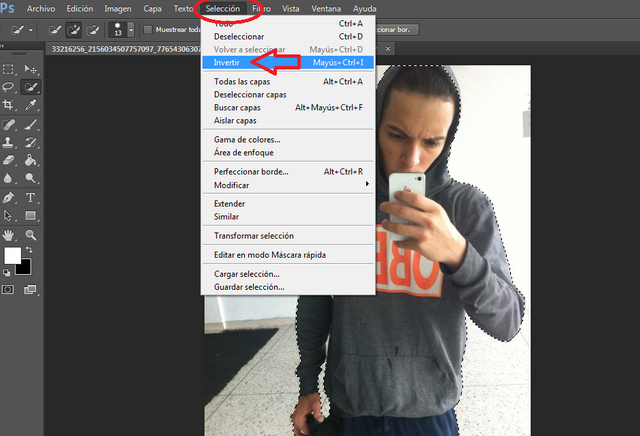
- Already put the option to invest, as the name implies we have invested our selection, now is no longer selected the subject of our image, if not, the pure fund.
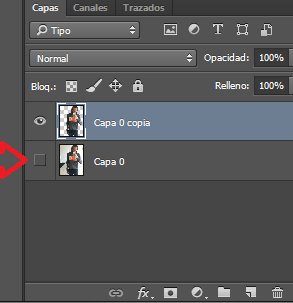
- We go a moment where the layers are, and in the original layer that is the one below we will remove the "little eye" that appears on the side, we just click it and it's done.
- And having everything ready to almost complete, we press the delete key on our keyboard, it is like this in "SUPR", and after we press it we will notice that the background is completely eliminated.
- And to remove the selection of our image press Ctrl + D, always for all selection when we want to remove it are those keys to remove them.

- If we want to save it, we do not go back to the file, save how a small box will appear, and in the options below, I will look for the PNG format, when they are images without a background like this, they are saved in PNG format but the other normal ones "so to speak "They are saved in JPEG formats, but this case is png.
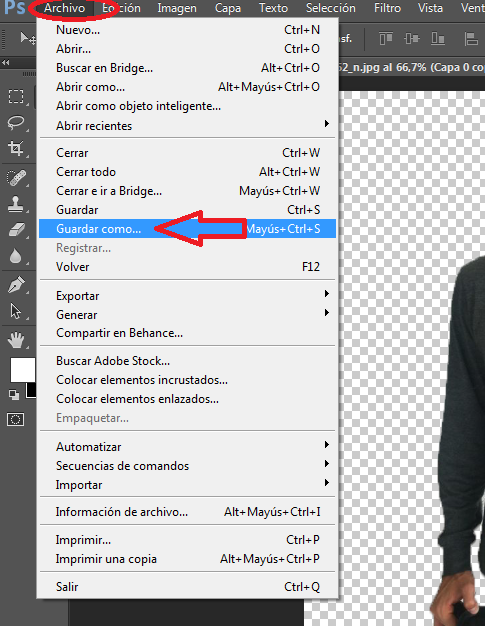
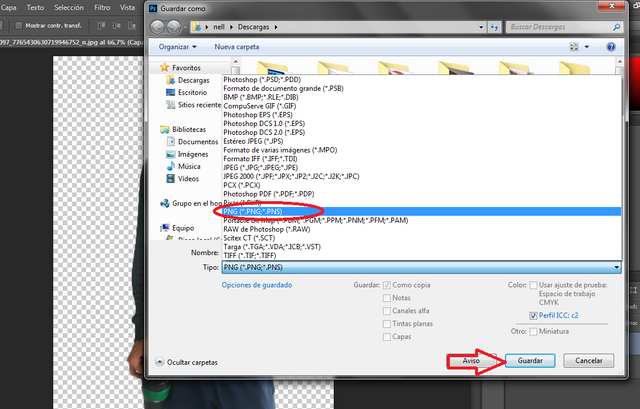
Then a small box will come out where they will give "OK" - FINISHED.
HOW TO DOWNLOAD AND INSTALL THE PHOTOSHOP