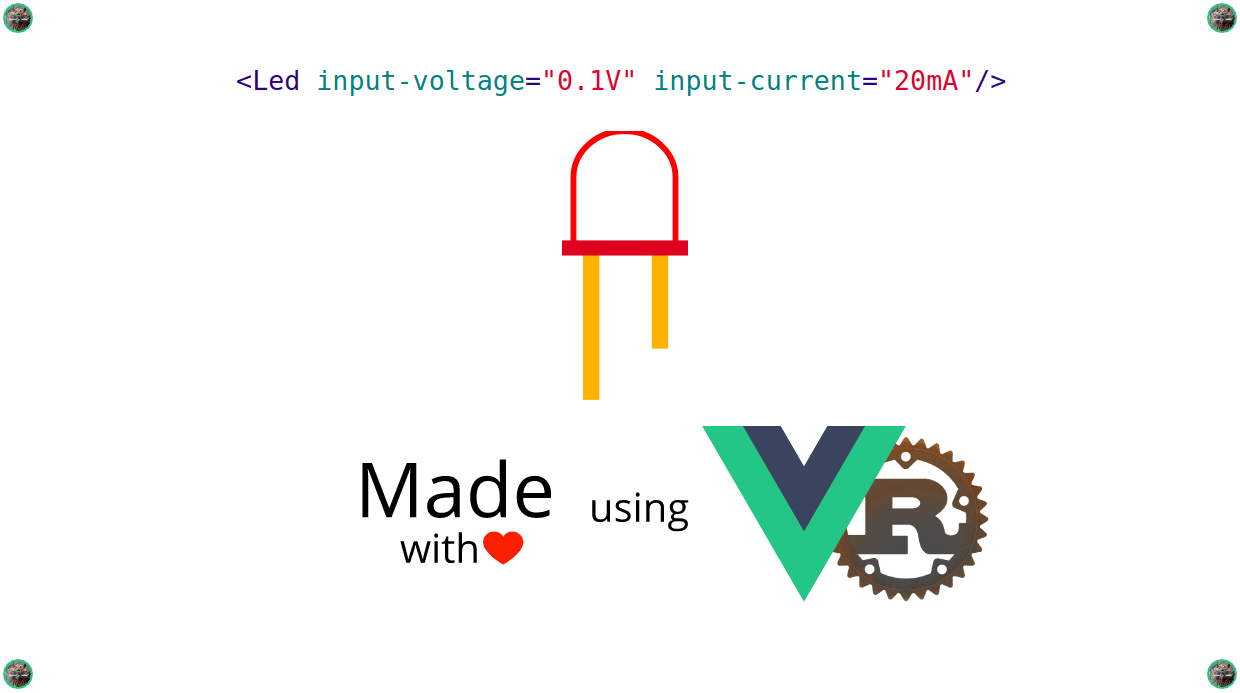
Create Vue Component based on Real Hardware #LED - part 3: use Rust as the computational layer
Repository
What Will I Learn?
This tutorial is the continuation of my previous tutorial to make WebComponent of a real LED. In this tutorials, we will try to reduce the bundle size of our component. Overall you will learn about:
- How to build Vue components
- How to utilize Rust as the computational layer
- How to use dimensioned package to do UoM checking at compile time
- How to trigger Webpack code splitting
Requirements
- Basic understanding of HTML and Typescript
- Basic understanding of Vuejs and Class-Style Vue Components
- Install vue-cli and yarn
- Some basic knowledge about WebAssembly (
wasm) limitation - Install rustup
- Install some code-editor/IDE (strongly suggested to use VSCode + Vetur)
Difficulty
- Intermediate
Tutorial Contents
On the previous tutorial, we learn how to reduce the bundle size of our LED WebComponent from ~1,76 mb to ~485 kb which is 72% reduction by utilizing partial import and remove auto conversion unit feature. However, it's risky to build a component that mimics real-world behaviorwithout UoM type check, especially when you are maintaining the long-running project or big codebase. One example of the importance of agreed units is the failure of the NASA Mars Climate Orbiter, which was accidentally destroyed on a mission to Mars in September 1999 instead of entering orbit due to miscommunications about the value of forces: different computer programs used different units of measurement (Newton versus pound force). Considerable amounts of effort, time, and money were wasted [2] [6].
In this tutorial, we will implement the computation layer in Rust (see my another tutorial for more insight about mixing Vue with Rust and how WebAssembly works) and use dimensioned package to have type safety in unit measurement level.
Integrating Rust build WASM with Webpack (vue.config.js)
In our first tutorial about building real LED, we use vue-cli 3 to scaffold our project. The nice thing about vue-cli is it's easy to configure and the configuration is plugin base. In vue-cli 3, rather than using webpack.config.js to configure the build system, it uses vue.config.js which hide some of the webpack configurations that is obvious. Before dive into vue.config.js file, let's setup our Rust build system first:
rustup default nightly
rustup target add wasm32-unknown-unknown
As I mentioned in my another tutorial, Rust build for WebAssembly are still in nightly channel so we need to switch the default compiler to nightly. Currently, there are 2 WebAssembly compiler for Rust, wasm32-unknown-unknown and wasm32-unknown-emscripten (utilize emscripten toolchain). We are going to install wasm32-unknown-unknown compiler because wasm32-unknown-emscripten have potential to make our component become bloated.
In this tutorial, we are going to structure our project in Rust workspace mode instead of Rust library mode like in my another tutorial. In workspace mode, we can output multiple .wasm file for each .rs file with the downside we also need to create multiple Cargo.toml. To utilize workspace mode, we need to structure our project more or less like in Fig 1.
~/vue-hardware
├── src
│   ├── components
│   │   └── Led
│   │       ├── Cargo.toml
│   │       ├── Led.vue
│   │       └── led.rs
│   ├── App.vue
│   ├── main.ts
│   └── math.ts
├── Cargo.toml
├── package.json
├── tsconfig.json
├── tslint.json
└── vue.config.js
Fig.1 - project structure for workspace mode
In Fig 1, we see that there is only 2 ./Cargo.toml file because we only have 1 Vue component (Led.vue) that depend on Rust code (led.rs). File ./Cargo.toml that placed in root project are Rust workspace configuration while file in ./src/components/Led/Cargo.toml are Rust library configuration which we will use to build led.rs into .wasm file.
[workspace]
members = [
    "src/components/Led",
]
Content of
./Cargo.toml[package] name = "led" version = "0.1.0" authors = ["Name <[email protected]>"] [lib] crate-type = ["cdylib"] path = "led.rs"Content of
./src/components/Led/Cargo.toml
Fig.2 - configuring the project
In Fig 2, we create the Cargo.toml file in the root of the project and that will configure the entire workspace. This file won’t have a [package] section or the metadata we’ve seen in other Cargo.toml files but will instead start with a [workspace] section that will allow us to add members to the workspace by specifying the path that contains Cargo.toml for library build; in this case, that path is src/components/Led. In ./src/components/Led/Cargo.toml, we specify crate-type as cdylib that will produce dynamic system library. This is used when compiling Rust code as a dynamic library to be loaded from another language. This output type will create *.so files on Linux *.dylib files on macOS, and *.dll files on Windows. Because by default cargo will build src/lib.rs (the path are relative to Cargo.toml), we need to specify path which is led.rs (we don't write it as ./led.rs because by default cargo will treat it as relative path).
After we prepare the Cargo.toml as workspace mode, we need to install loader that can automatically run cargo build --target wasm32-unknown-unknown so our rust code gets compiled into WebAssembly code when we serve via webpack dev server by executing yarn serve.
yarn add rust-native-wasm-loader wasm-loader -D
That command will install rust-native-wasm-loader and wasm-loader. Now, we can begin to integrate that loader into the webpack build system.
module.exports = {
  configureWebpack: {
    module: {
      rules: [{
        test: /\.rs$/,
        use: [{
          loader: 'wasm-loader'
        }, {
          loader: 'rust-native-wasm-loader',
          options: {
            release: process.env.NODE_ENV === 'production',
            gc: process.env.NODE_ENV === 'production'
          }
        }]
      }]
    }
  }
}
Content of vue.config.js
In file vue.config.js, we define the rule that any file with a name that ends with .rs (by declaring test: /\.rs$/) will get compiled via rust-native-wasm-loader then chained to wasm-loader (for more detail see my another tutorial). Because we only need bundle optimization (reduce bundle size) only when we execute yarn build, we enable release and gc options only when in production mode so that it compiles faster when we enter development mode via yarn serve. Because we enable gc options, we need to install wasm-gc using this command
cargo install wasm-gc
That will install wasm-gc command in the global environment. wasm-gc are responsible to gc (garbage collector) a wasm module and remove all unneeded exports, imports, functions, etc which reduce the bundle drastically (see at the end section of my another tutorial).
Implement the computation in Rust
Although WebAssembly only supports i32, i64, f32, and f64, rust wasm compiler can support u8, i8, u16, i16, i32, u32, and many more because under the hood wasm-unknown-unknown use LLVM to produce wasm code. In other words, we can utilize primitive data type u8, i8, u16, and i16. After we have prepared our project to be able to compile rust code into wasm, we can begin to write rust code to do the computation part.
src/components/Led/led.rs and fill it with
#[no_mangle]
pub fn diameter(size: u8, scale: u8) -> u8 {
    size * scale
}

#[no_mangle]
pub fn brightness(v_in: f32, i_in: f32, p_max: f32) -> f32 {
    v_in * i_in / p_max
}
In src/components/Led/led.rs, we make two functions: diameter to get bulb diameter in pixel scale and brightness to calculate the brightness of Led scale from 0 to 1 (that's why it use f32 data type). In diameter function you will notice that we do the computation in unsigned 8 bit (u8) domain. We do the computation in u8 domain because here we are trying to limit the bulb diameter to be 255 by utilizing 8 bit integer overflow behavior. In other words if size * scale more than 255 then it will get a runtime error as shown in Fig 3.
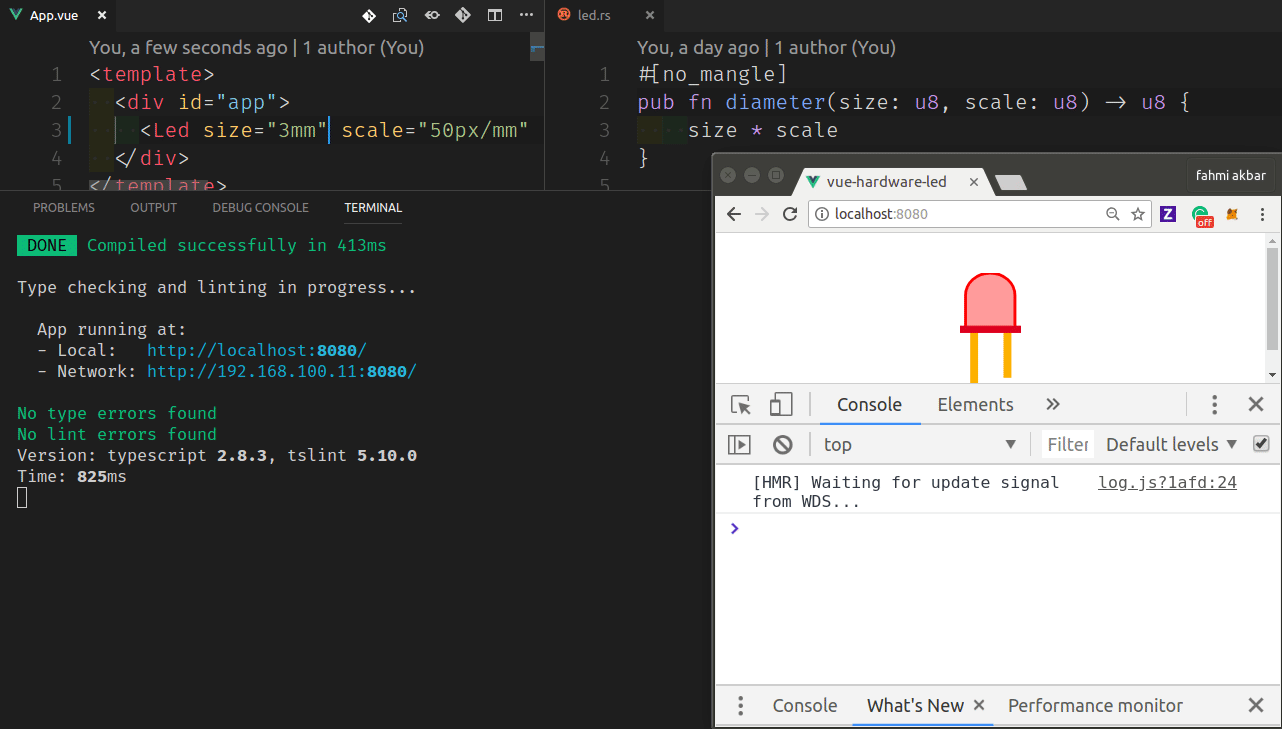
Fig.3 - integer overflow error at runtime because 6×30 ⩽̸ 255
Next step, we need to load led.rs into our Led.vue component. We need to create member variable to be bind as webassembly instance so that we can use webassembly methods across all methods in class Led. Also, we need to load led.rs as wasm in beforeCreate hooks and bind webassembly instance into a member variable we have been created as shown in Code Change 1.
  private led: any = {
    brightness: (Vin: number, Iin: number, Pmax: number) => Number(),
    diameter: (size: number, scale: number) => Number(),
  }
Some section in
src/components/Led/Led.vueto do wasm bindingasync beforeCreate() { const loadWasm = await import('./led.rs') const wasm = await loadWasm.default() this.led = wasm.instance.exports }Some section in
src/components/Led/Led.vueto bind memberledwith wasm instance
In Code Change 1, we created member variable led which is object type that consists methods brightness and diameter that all of them accept and return Javascript primitive type number. We declare access level of led as private because we only use it inside the class and never use it in <template> or other class/component. We also bind it to wasm instance at beforeCreate hook. Not like my another tutorial before, we declare beforeCreate as a Promise by using async modifier and use await to load wasm code (most people abbreviate this technique as async/await method). Also, by asynchronously importing led.rs will enable code splitting feature in webpack which will split our bundle size.
Finally, we can use the wasm code to calculate the brightness and height(size) of our LED. To do this we replace the calculation that previously writes in JS/TS with wasm function. In this case, we replace it with this.led.brightness and this.led.diameter as shown in Code Change 2.
  get brightness(): number {
    const result = this.led.brightness(
      unit(this.inputVoltage).toNumber('volt'),
      unit(this.inputCurrent).toNumber('ampere'),
      unit(this.maxPower).toNumber('watt')
    )
    this.broken = (result > 1.00)
    return this.broken ? 0 : result
  }
Some section in
src/components/Led/Led.vueto calculate brightnessget height(): number { return this.led.diameter( unit(this.size).toNumber('millimeter'), unit(this.scale).toNumber('pixel/millimeter') * 1.3 ) }Some section in
src/components/Led/Led.vueto calculate diameter
In Code Change 2, we still need to convert our props into number data type because the props accept only string to do Unit Measurement validation. To convert that we use a function in mathjs called unit.toNumber. Notice that in computed properties brightness, we convert the unit measurement into SI base unit because of we calculate brightness in floating point domain (regardless 32bit or 64bit). While in computed properties height, we are converting the unit measurement into same as a unit measurement in props because we calculate it in 8-bit integer domain which it will produce errors if one single operation result is more than 255. For example, this simple operation 26*11/10 will produce an error because 26*11 is 286 which is more than 255.
Utilize dimensioned crate to do UoM check
In the first tutorial of this series, we use mathjs to do UoM check at runtime but we found out in part 2 of this tutorial series that will increase the bundle size significantly and we don't have a way to do code splitting in mathjs compile feature. Also, the downsides of doing UoM check at runtime are:
- we need to check console message if it gets runtime errors,
- if we use CI (Continous Integration), we need to write tests that run on the headless/real browser to check if some change in our code make the equation become incorrect.
Instead of doing UoM check at runtime, we can use UoM check that runs at compile time which is faster to identify error (because it will not compile when there are errors). There is Rust crate name dimensioned and the great thing is it provide multiple unit measurement standard (dimensioned call it unit systems) like SI and CGS. This is where we utilize Rust and use dimensioned crate to do UoM check at the unit systems level.
dimensioned crate in src/Led/Cargo.toml file
[dependencies]
dimensioned="0.6"
When we change Cargo.toml defined in the workspace, our project will automatically be updated as long as we are still running command yarn serve. This including download and installing added dependencies which in this case is dimensioned crate. After the update is done, we can begin to import dimensioned crate, use some predefined UoM, and create new unit systems to hold unit type pixel as shown in Code Change 3.
#[macro_use]
extern crate dimensioned as dim;
1. import
dimensionedcrate asdim, including its macrosuse dim::si::{Ampere, Unitless, Volt, Watt};2. import some of UoM type from SI unit type system
make_units! {
    GRAPHICS;
    NUM: Number;
    base {
        PX: Pixel, "px";
        MM: Millimeter, "mm", Length;
    }
    derived {
        PX_PER_MM: PixelPerMilliMeter = (Pixel / Millimeter);
    }
    constants {}
    fmt = true;
}
3. create new unit type system called
GRAPHICSwith its UoM type
Code Change 3.1 is the syntax to import dimensioned crate with its macros (notice that there is #[macro_use]). In Code Change 3.2, we begin to declare which SI units that we want to use. In this case are Ampere, Volt, Watt, and Unitless. Maybe you notice that Unitless are not part of SI unit systems and that's true. Unitless are UoM which doesn't have a unit which for example 3.2, 1, -2, and 0 are Unitless while 3.2V, 1px, -2mA, and 0W is not Unitless.
In Code Change 3.3, we define new unit systems called GRAPHICS which the purpose is only to hold unit type Pixel with its derivative. Because it only feeds height function with arguments that in mm and px/mm, we only declare 2 base unit, 1 derivative which is the combination of that 2 base unit, and 0 constant. For more detail how to use it see the documentation of macro.make_units. These new unit systems are only used when constructing the equation of diameter as shown in Code Change 4.

In Code Change 4, we only replace each argument and return types (which is rust primitive types) of diameter and brightness function with UoM types provided and declared by dimensioned crate. Notice that we are not changing the primitive types that we previously declare, instead, we only add UoM types on top of primitive types we previously declared. In another word, we have 2 level check which first is the Rust primitive types and the second is UoM types provided by dimensioned crate. The interesting part is when we make mistake we get immediate feedback (error) as shown in Fig 4.
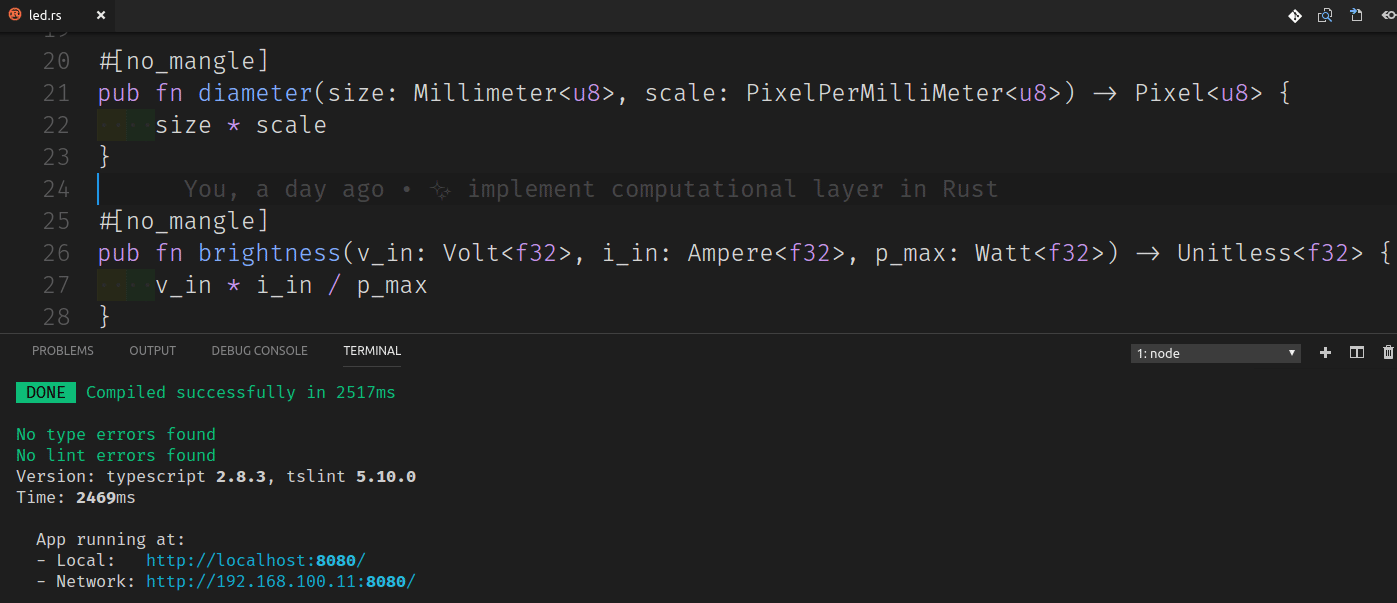 Fig.4 - error at compile time cause when returned UoM type doesn't match
Correcting the equation
Unfortunately, our equation to calculate brightness which that we write in the first tutorial are inaccurate because LED is actually Diode which has a voltage drop. In the most LED datasheet, voltage drop named as forward-voltage with symbol Vf. In other words, it will operate if there is enough voltage fed to the LED as shown in Fig 5.

Each LED type has different forward voltage. The typical forward voltage for the red LED is 2.0V ⁺∕₋ ~0.2V. If we take the minimum value of red LED forward voltage, then the voltage drop of our component will be 1.8V. Based on Fig 5 we can conclude:

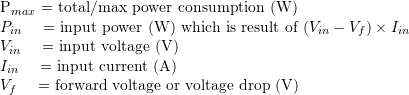
Base on equation 1, there are 2 condition when LED not emitting any light. First, when Iin × ( Vin - Vf ) > Pmax which is the condition when the LED is broken. Second is when Vin > Vf where in our case input-voltage must be greater than forward voltage of the LED which is 1.8V. We have already implement the first condition in our first tutorial of this series. The rest is to implement the second condition which shown in Code Change 5.
use dim::si::f32consts::{V};1. import constant UoM type V from SI unit type system with primitive data type
f32#[no_mangle] pub fn brightness(v_in: Volt<f32>, i_in: Ampere<f32>, p_max: Watt<f32>) -> Unitless<f32> { let v_forward = 1.8 * V; // voltage drop (Vf) if v_in >= v_forward { (v_in - v_forward) * i_in / p_max } else { Unitless::new(0.) } }2. change
brigtnessfunction base on equation 1
In Code Change 5.1, we import SI unit constant type V so that we can use it in brightness function as shown in Code Change 5.2. Notice that we import it from f32consts namespace so that constant type V are compatible with UoM type Volt<f32> which hold primitive data type f32. In Code Change 5.2, we utilize type inference feature in Rust so that variable v_forward will automatically have type Volt<f32>. Also, dimensioned crate can perform type-level arithmetic so that operation 1.8*V will automatically infer that the result is 1.8 with a type Volt<f32>. After we have declared our constant variable v_forward, we can safely write the second condition when the LED begin to emit light. Notice that when condition v_in >= v_forward is not met, we return 0 with the type Unitless<f32> hence we write it Unitless::new(0.) (there is no need casting to f32 type, thanks to type inference feature).
Conclusion
In summary, we are able to implement UoM check-in Rust which is run at compile time. UoM check at compile is faster to get feedback (error) rather than UoM check at runtime. We also gain more confidence when correcting the equation that was previously written because when we write it wrong, the compiler will give us a feedback about where is the line of code that is wrong. However, dimensioned crate (the package that we use to do UoM check) has a terrible error message which still been working on. Also, if we bundle our LED component into WebComponent, we will get the result as shown in Table 1.
yarn build --target wc --name hw-led **/Led.vue
| File | Size | Gzipped |
|---|---|---|
| dist/hw-led.0.min.js | 561.96 kb | 87.87 kb |
| dist/hw-led.min.js | 162.13 kb | 48.58 kb |
| dist/hw-led.0.js | 562.20 kb | 88.01 kb |
| dist/hw-led.js | 537.68 kb | 121.48 kb |
The total of the bundle size shown in Table 1 is nearly same as the bundle size when we use mathjs (see part 2) to do UoM check at runtime. However, unlike mathjs partial import, we still can do code splitting which will make the loading time faster. Because wasm code is hard to minified, it's obvious if we look at Table 4 that the Rust code part is compiled into dist/hw-led.0.js file.
In the next tutorials (which is the last tutorial of this LED series), we can finally write tests script to make our LED WebComponent maintainable and can invite contributor to contribute to this simple component. Next series we still create a component based on one of this real hardware:
| interface | hardware | type | series |
|---|---|---|---|
| Digital/Analog | LED | transducer | Ongoing |
| Digital/Analog | DC motor | actuator/sensor | TBD |
| Digital | PIR | sensor | TBD |
| Analog | LDR | sensor | TBD |
| Analog | FSR | sensor | TBD |
| PWM | Servo motor | actuator | Planned |
| PWM | Ultrasonic (HC-SR04) | sensor | TBD |
| I2C/SPI | IMU | sensor | TBD |
Curriculum
- Create Vue Component based on Real Hardware #LED - part 2: reduce the bundle size
- Create Vue Component based on Real Hardware/Thing #LED - part 1: implementing from basic math equation while doing UoM and CoU
- Complementary:
References
- Dimensional Analysis in Programming Languages (highly recommend reading this to better understand UoM benefit)
- NASA Mars Climate Orbiter (see cause of failure)
- LED Basics
- F# Unit of Measure
- dimensioned crate
- Unit of Measurement (UoM) definition
- SI base unit
Wow amazing tutorial
Thank you 😊
Thank you for your contribution.
This is one of the more impressive tutorials I have gone through.
I enjoyed reading the concepts behind, haven't ran into them before! But also loved the citations and the academic approach into it!
Would have loved to see your own output and relevant screenshots/vids of running the solution.
Great work!
Your contribution has been evaluated according to Utopian policies and guidelines, as well as a predefined set of questions pertaining to the category.
To view those questions and the relevant answers related to your post, click here.
Need help? Write a ticket on https://support.utopian.io/.
Chat with us on Discord.
[utopian-moderator]
Thank you for the moderation. I'm glad that someone like it despite in busy.org says 18 min read 😂 (don't have a clue how to shorten it).
Actually, the end result is in the first animated gif that I use as a banner. Maybe for a process that takes >10s long, I will present it as a video rather than animated gif.
Congratulations @drsensor! You have completed some achievement on Steemit and have been rewarded with new badge(s) :
Click on the badge to view your Board of Honor.
If you no longer want to receive notifications, reply to this comment with the word
STOPTo support your work, I also upvoted your post!
Hey @drsensor
Thanks for contributing on Utopian.
Congratulations! Your contribution was Staff Picked to receive a maximum vote for the tutorials category on Utopian for being of significant value to the project and the open source community.
We’re already looking forward to your next contribution!
Contributing on Utopian
Learn how to contribute on our website or by watching this tutorial on Youtube.
Want to chat? Join us on Discord https://discord.gg/h52nFrV.
Vote for Utopian Witness!