Create a forum application using django #4: Admin dashboard ang setting redirect
Repository
What Will I Learn?
- Admin dashboard
- Settings redirect
Requirements
- Basic Python
- Install Python 3
- Install Django
Resources
- Python - https://www.python.org/
- Django- https://www.djangoproject.com/
- Bootstrap 4 - https://getbootstrap.com/docs/4.0/getting-started/introduction/
Difficulty
Basic
Tutorial Content
Hi everyone, this is an advanced tutorial from the previous tutorial series. In this application, we will learn how to create a forum using Django. in the previous tutorial, I created an authentication system and template system that uses a class-based view. Well in this section of the tutorial we will discuss a new feature that is an important part of this application, namely the admin system, of course, if we want to create a forum application we must create an admin system to manage the content in our application. For that, we just start this tutorial.
Make admin dashboard
To know Django provides an admin dashboard that is ready to use, but there needs to be something that must be configured when we want to use this feature. to start using it we need to manage who can use this dashboard.
- Create superuser
to make the superuser we will make it through the command prompt. later the user will have access to manage the admin. You can open a command prompt and access manage.py as we can see in the picture below:
We have created a superuser to access the dashboard page, you can go back to the command prompt page and run your server. as we see in the picture below:

- Access the admin dashboard
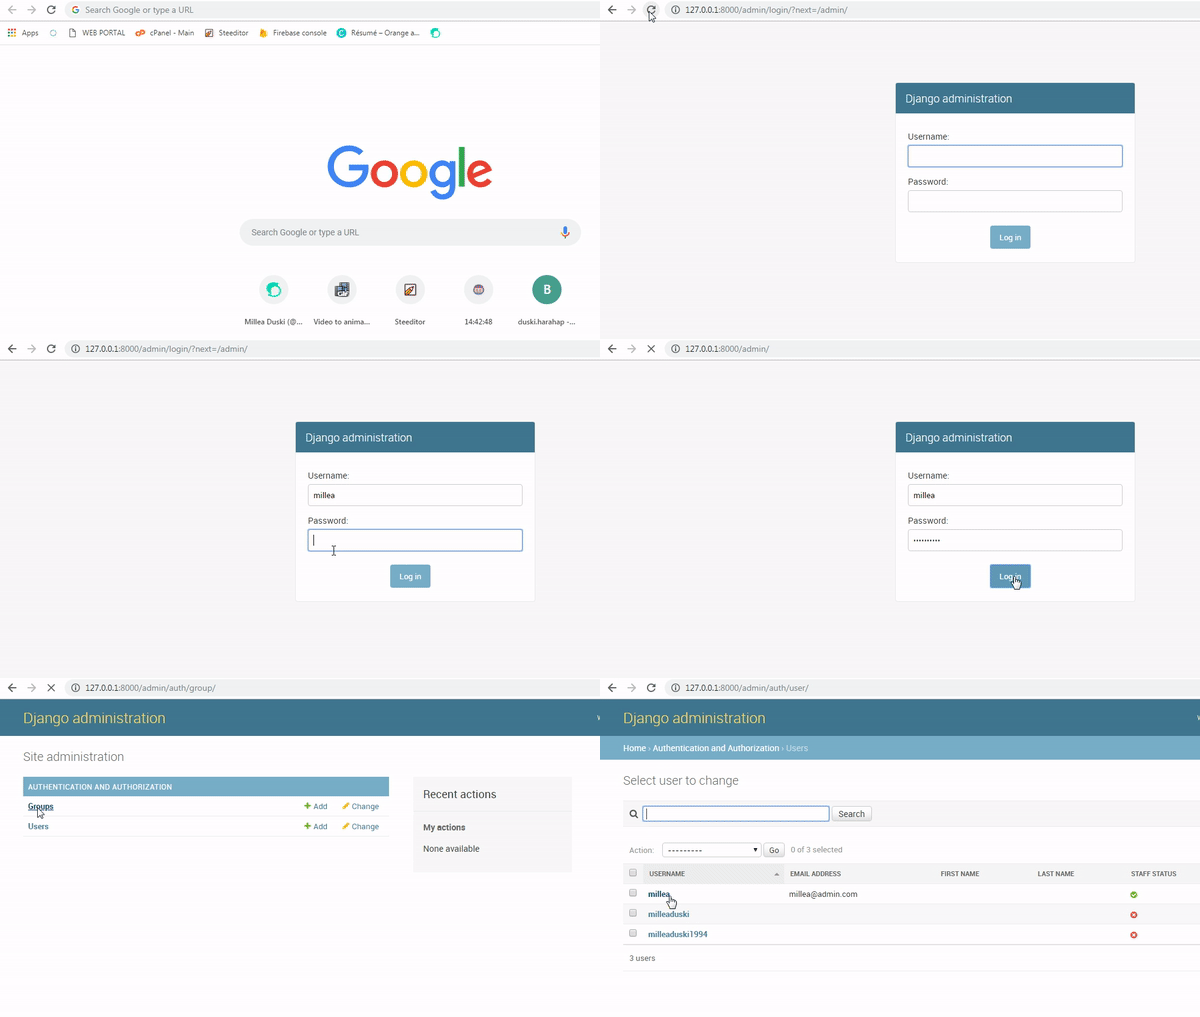
After we run the server, then we will access the admin dashboard and log in with the user that we have created as a superuser. The following is the admin dashboard:
The superuser we have registered in the previous section is Millea and we will log in with that user. we can see the demonstration in the picture below:
.gif)
Now you can see in the picture above we have successfully entered the admin dashboard.
- Setting redirect
There is a part that will be changed in this tutorial, in Django we can set the redirect to the page we want. we can do this in the settings.py section.
settings.py
# Static files (CSS, JavaScript, Images)
# https://docs.djangoproject.com/en/2.1/howto/static-files/

STATIC_URL = '/static/'

LOGOUT_REDIRECT_URL = '/account/login'         //redirect when logout
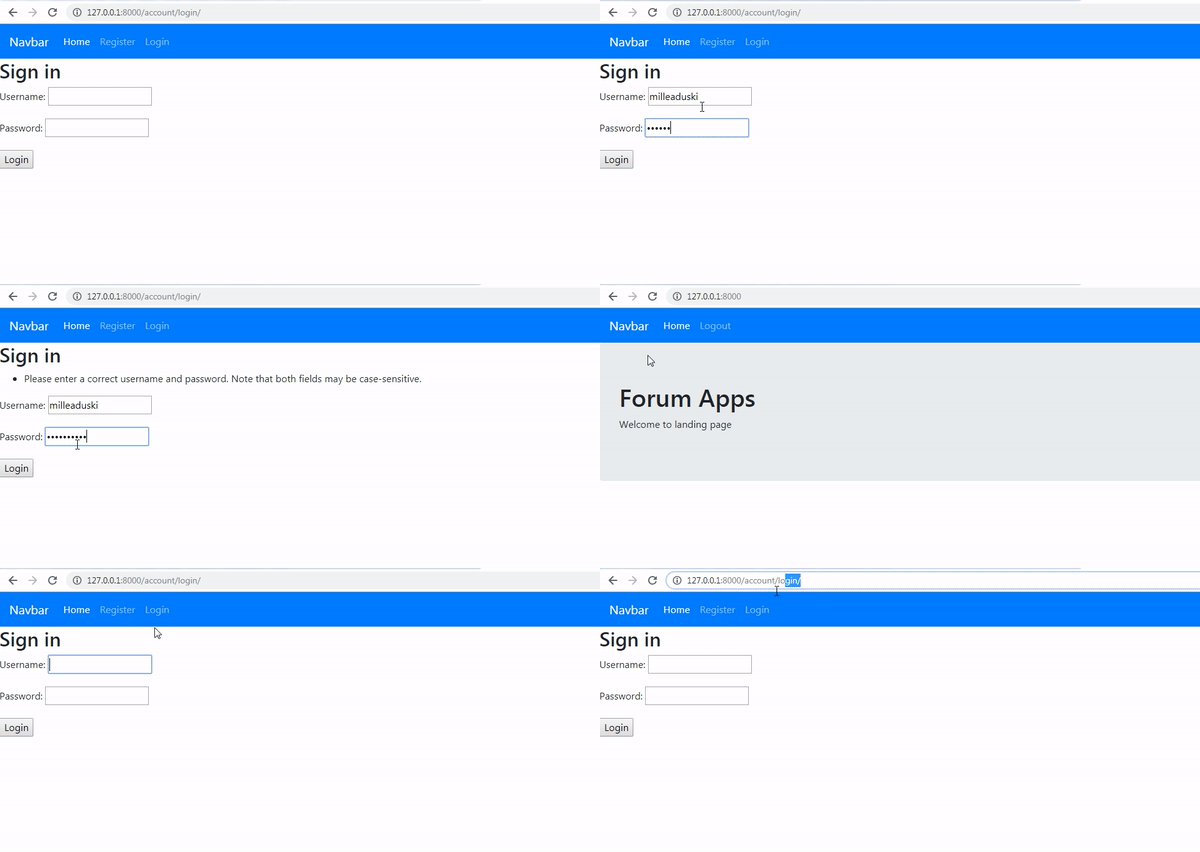
We will redirect the page when we log out. If there is no error then we can get the results as follows:
.gif)
Then I will create a filter menu that will be displayed on the menu in the Navbar. The logout menu will only appear when the user is logged in. For more details, we can look at base.html below:
base.html
    <ul class="navbar-nav mr-auto">
          <li class="nav-item active">
            <a class="nav-link" href="">Home <span class="sr-only">(current)</span></a>
          </li>
        {% if user.is_authenticated %}
          <li class="nav-item">
            <a class="nav-link" href="{% url 'logout' %}">Logout</a>
          </li>
        {% else %}
          <li class="nav-item">
            <a class="nav-link" href="{% url 'signup' %}">Register</a>
          </li>
          <li class="nav-item">
            <a class="nav-link" href="{% url 'login' %}">Login</a>
          </li>
        {% endif %}
    </ul>
- We can check whether the user is logged in or not by checking the is_authenticated value, The value is boolean, so we can use it like this
{% if user.is_authenticated %}.
- Create welcome page
Now we will make a welcome page that will be used for the home page. we will create a new page that is welcome.html which will become the home page. here is the code:
welcome.html
{% extends "base.html" %}

{% block title %} Sign in{% endblock %}

{% block content %}
<div class="jumbotron">
  <h1>Forum Apps</h1>
  <p>Welcome to landing page</p>
</div>
{% endblock%}
on the homepage I will use jumbotron from the boostrap to make the homepage appear
Routing home page
Of course, we will also provide routing for the homepage page that was created. we can make it urls.py page.
urls.py
from django.contrib import admin
from django.urls import path, include
from django.views.generic import TemplateView // import generic view

urlpatterns = [
      path(' ', TemplateView.as_view(template_name='welcome.html')),
    path('admin/', admin.site.urls),
    path('account/', include('account.urls')),
    path('account/', include('django.contrib.auth.urls')),
]
As we learned in the previous tutorial, we will use generic view, a function provided by Django to create a view. to use this function we will import it first as follows
from django.views.generic import TemplateView.And then to use it we can write it like the following
path(' ',TemplateView.as_view(template_name='welcome.html')),. We can use TemplateView because we have already name it when importing. We adjust the view that will be rendered on template_name.
Settings redirect
Then I will do a redirect setting for users who have successfully logged in to redirect the home page. for that I will add it in settings.py.
# Static files (CSS, JavaScript, Images)
# https://docs.djangoproject.com/en/2.1/howto/static-files/

STATIC_URL = '/static/'

LOGOUT_REDIRECT_URL = '/account/login'
LOGIN_REDIRECT_URL = '/'  ## Redirect to homepage
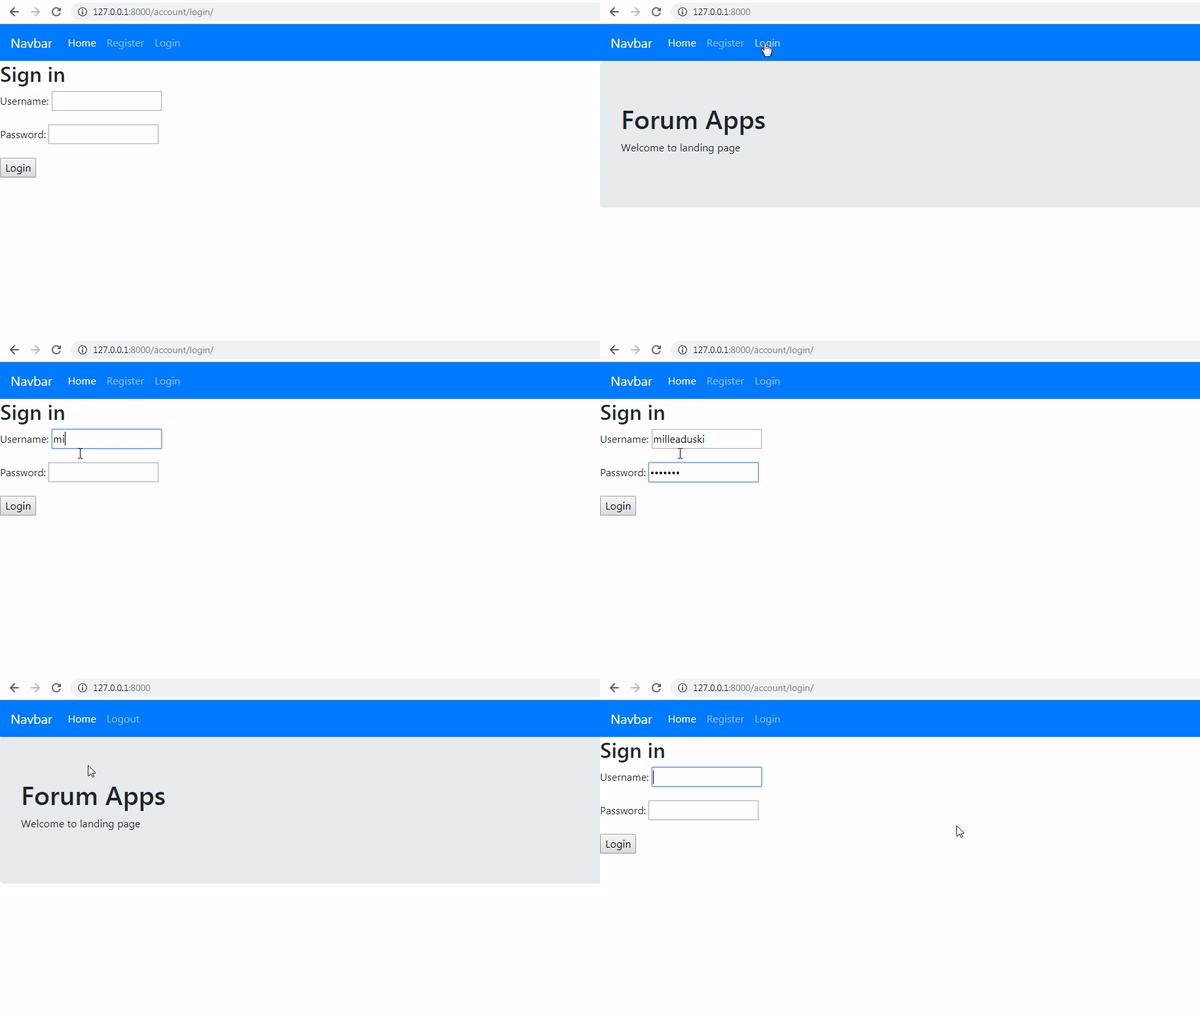
If there is no error then we can see when logging in, we will be directed to the homepage:
.gif)
We can see in the picture above we managed to make a page redirect and create a function to access the admin dashboard in the application that we created. we have added some features. Of course there are still some features that we will add, but I will discuss them in the next tutorial, hopefully, this tutorial will be useful for you.
Curriculum
- Class-based views
Tutorial Django - Class based view #2 : Use Class based view method and Get and Post method
- Forum app
Create a forum application using django #1 : Init projects and dependencies and Database schema
Create a forum application using django #2: Template system and Class-based view implementation
Thank you for your contribution @duski.harahap.
After analyzing your tutorial we suggest the following points below:
We suggest that you take more care when writing your contribution. For the tutorial to be well understood for the reader needs to be well written.
Your tutorial is quite short for a good tutorial. We recommend you aim for capturing at least 2-3 concepts.
Having GIFs instead of images makes your tutorial more intuitive. Good job!
We suggest you add more features to your tutorial.
Looking forward to your upcoming tutorials.
Your contribution has been evaluated according to Utopian policies and guidelines, as well as a predefined set of questions pertaining to the category.
To view those questions and the relevant answers related to your post, click here.
Need help? Chat with us on Discord.
[utopian-moderator]
Thank you for your review, @portugalcoin! Keep up the good work!
Hi @duski.harahap!
Your post was upvoted by @steem-ua, new Steem dApp, using UserAuthority for algorithmic post curation!
Your post is eligible for our upvote, thanks to our collaboration with @utopian-io!
Feel free to join our @steem-ua Discord server
Hey, @duski.harahap!
Thanks for contributing on Utopian.
We’re already looking forward to your next contribution!
Get higher incentives and support Utopian.io!
Simply set @utopian.pay as a 5% (or higher) payout beneficiary on your contribution post (via SteemPlus or Steeditor).
Want to chat? Join us on Discord https://discord.gg/h52nFrV.
Vote for Utopian Witness!