Your Guide How To Draw A Portrait Using Colored Pencil: Featuring KIM CHIU
Good day everyone!!! Finally I'm back once again for another art session with you guys. I just finished another artwork again using the same materials that I used in our previous portrait which is the prisma colored pencil. I think prisma is one of the best ideal materials that you can use in your portrait artwork because it gives you those colors that you need and the quality is pigmented which is easy to blend.
So I'm going to show you and teach you some techniques that I applied on my artworks and I hope it will help you a lot on your run.
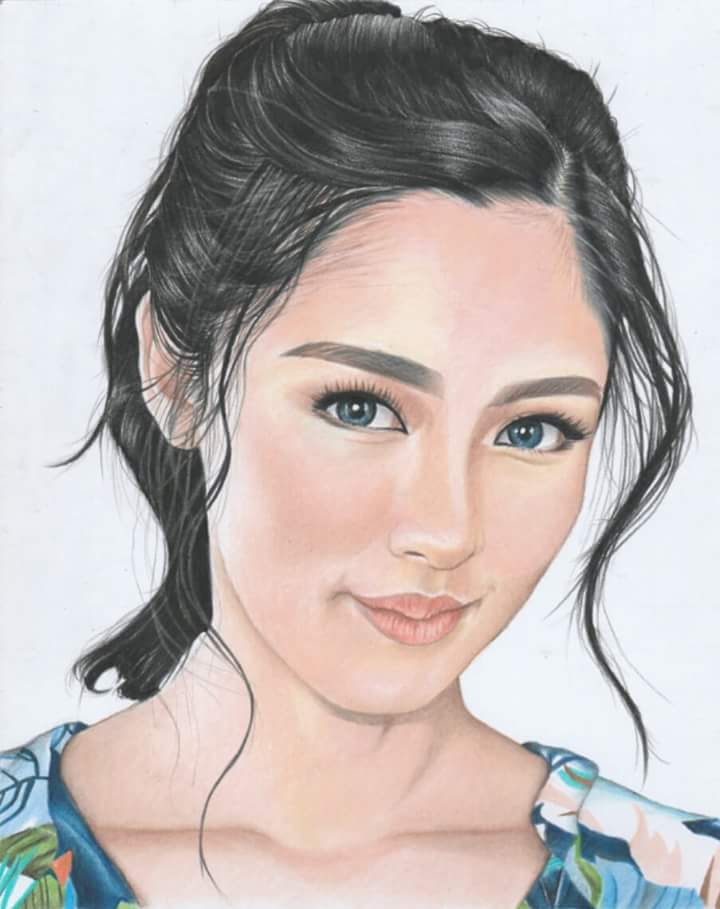
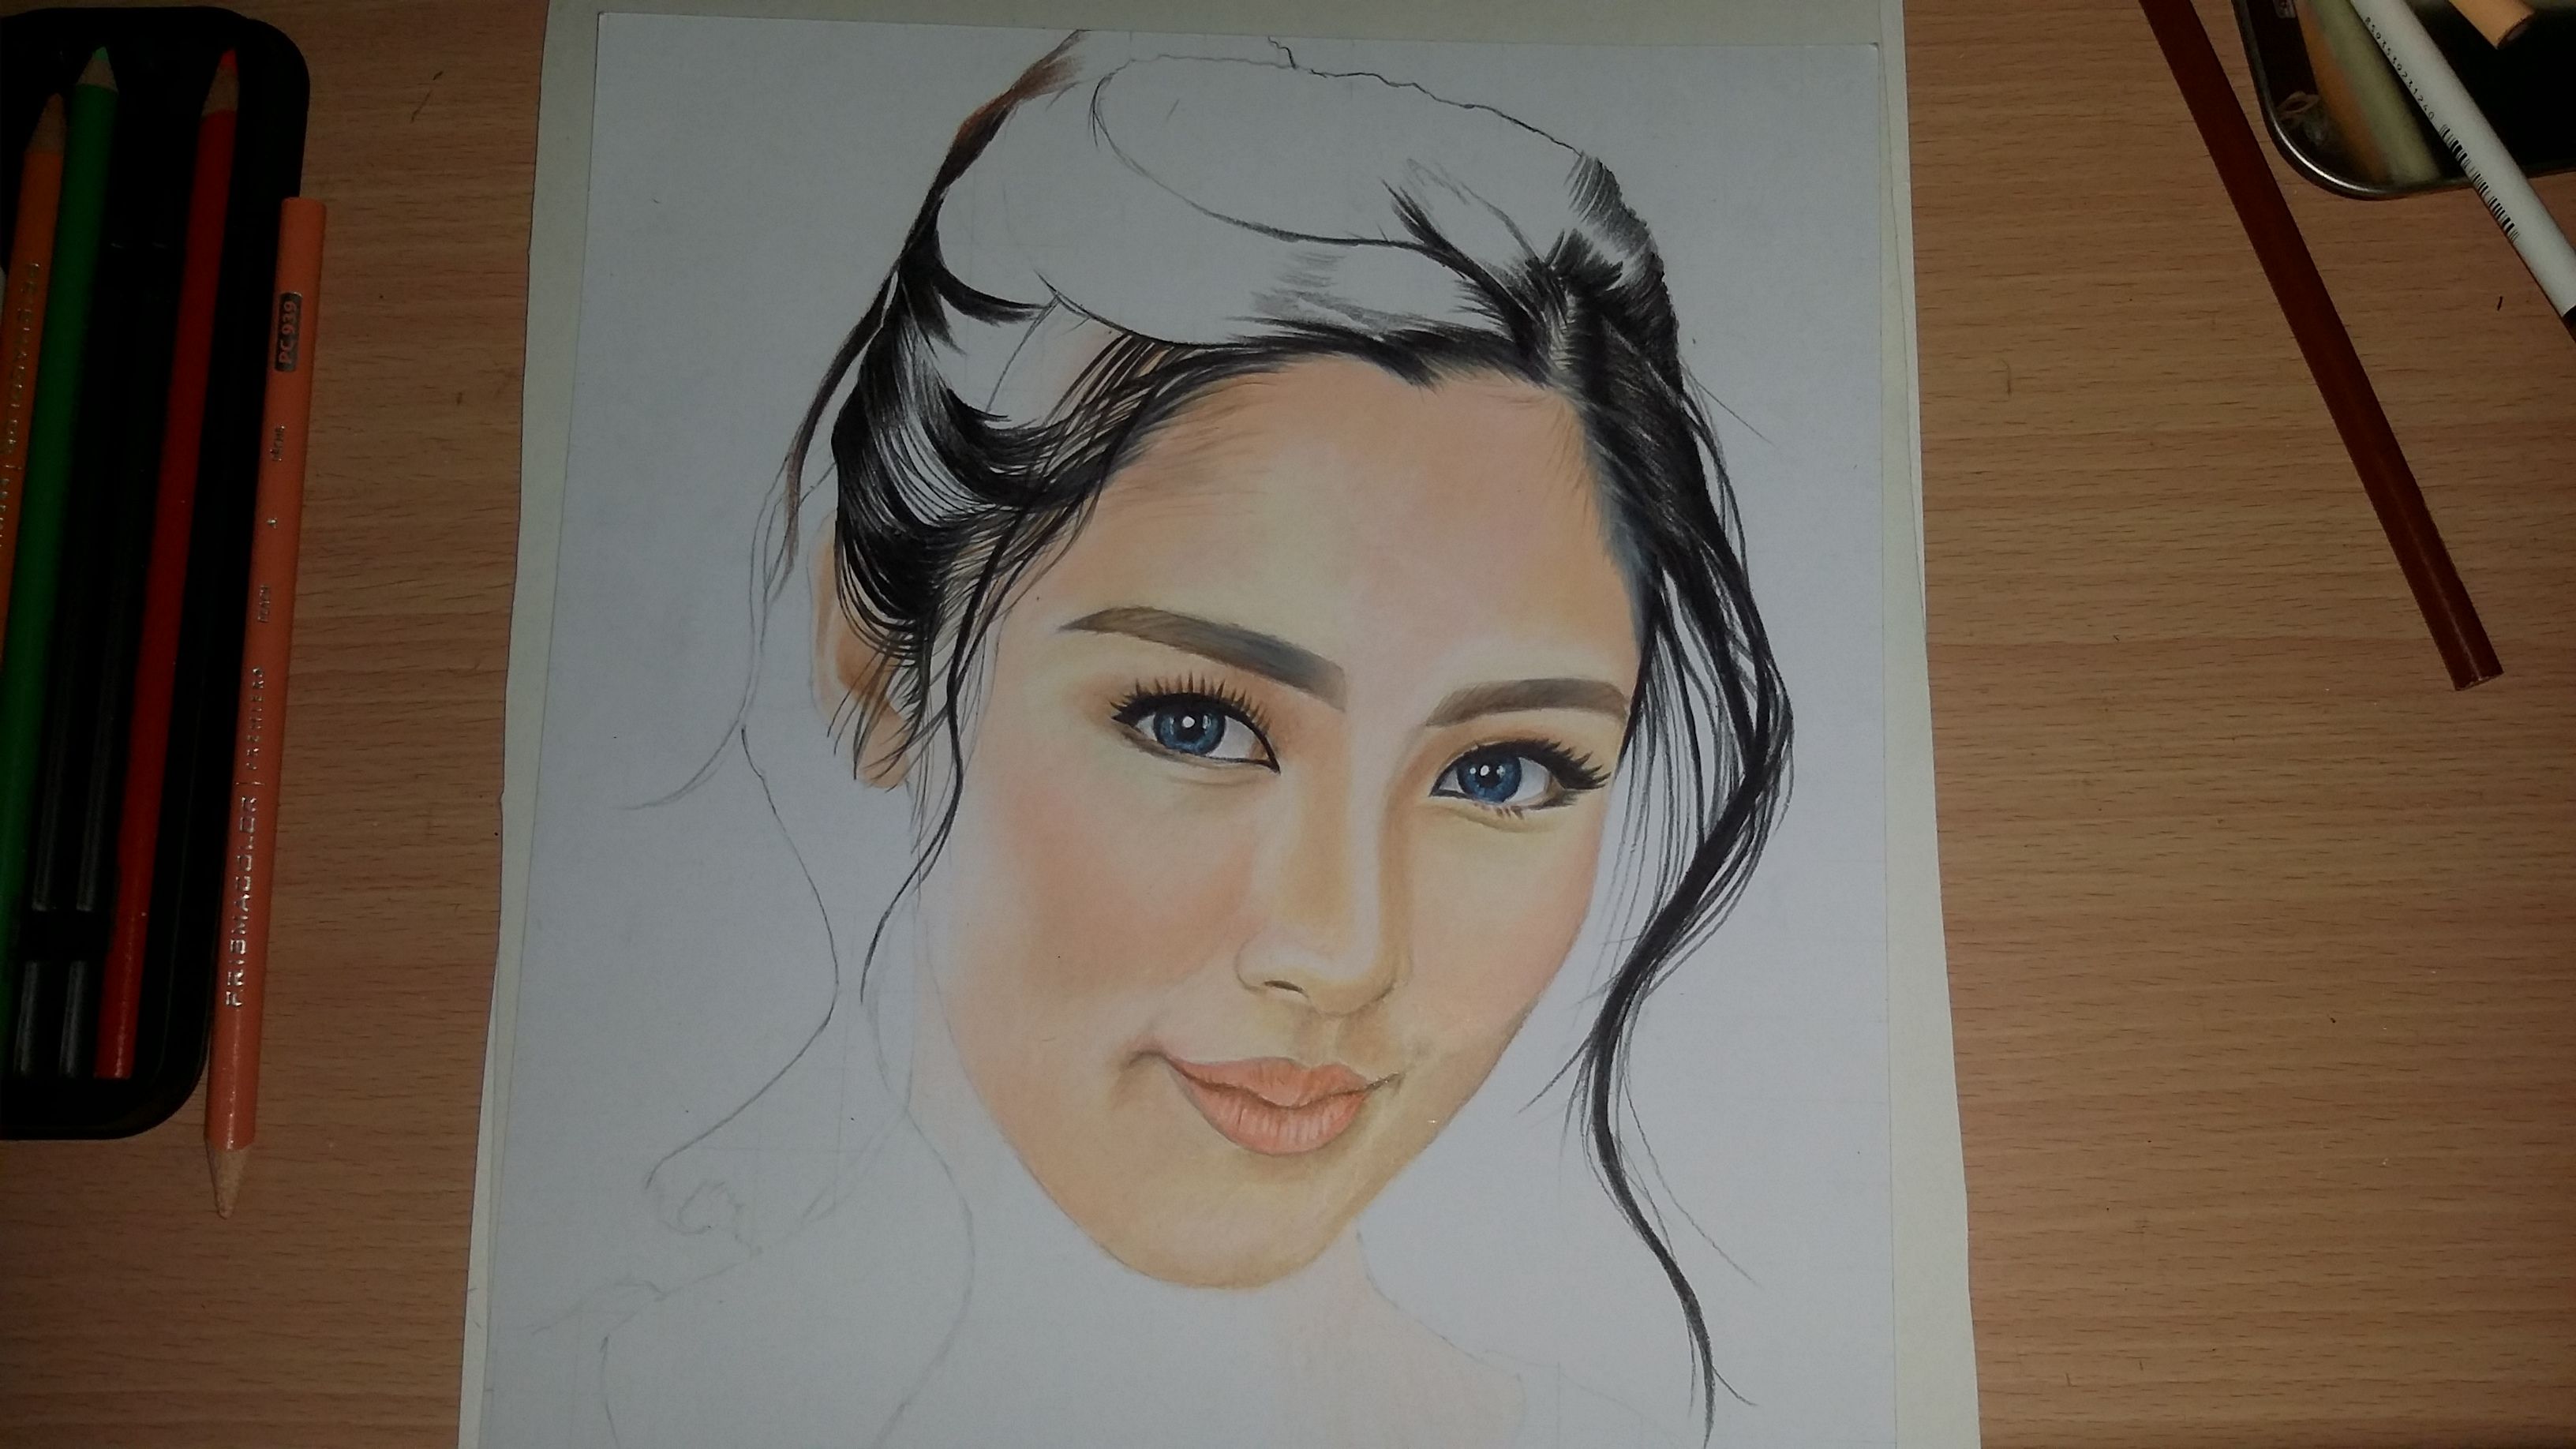
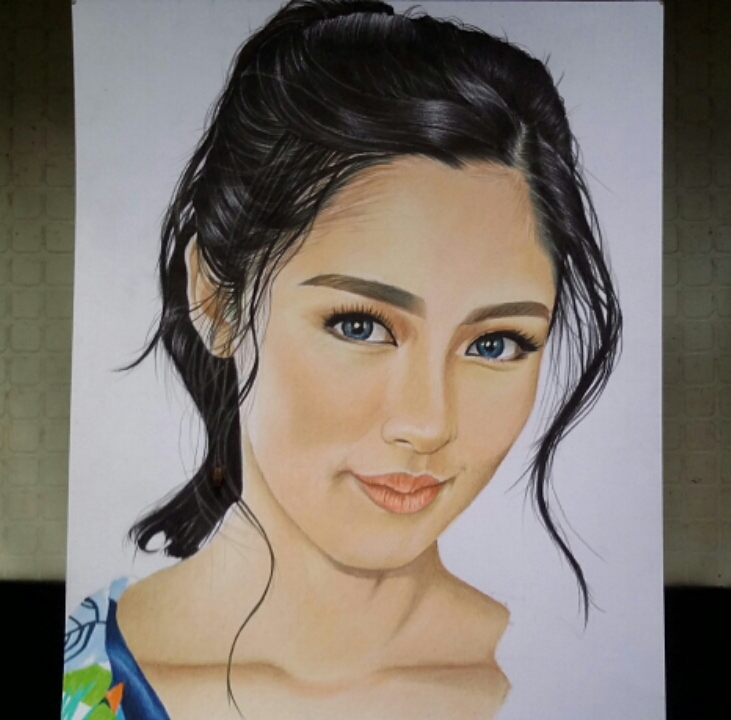
I'm going to draw a portrait of Kim Chiu. She's an actress, tv host , model and half Chinese and filipina.
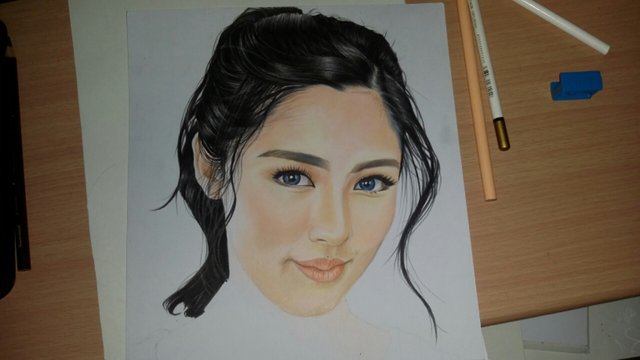
This is the final image of my drawing and was scanned to my computer via a scanner.
It took me almost 4 days to finish the portrait and I spent 3 to 4 hours per day of drawing. Sometimes, I'm not in the mood to draw and feel tired so I skipped and continued it later. I think that good thing about working with a period of time will help you improve your artwork more. Because if you comeback and sometimes you see some mistakes or probably you forgot something you can still fix it up and look for some flaws of some of the details that you missed. That's the only advantage compared to working in one full shot.
Materials
Prisma Colored Pencil
Graphite Steadler Pencil
Colorless Blender Pencil
Hardtmuth kohinhor Pencil eraser
Vellum Board
So guys, we will start with the coloring. So make a sketch whoever person you would like to draw. I always start with the skintone color first before I put details in other parts.
Blending
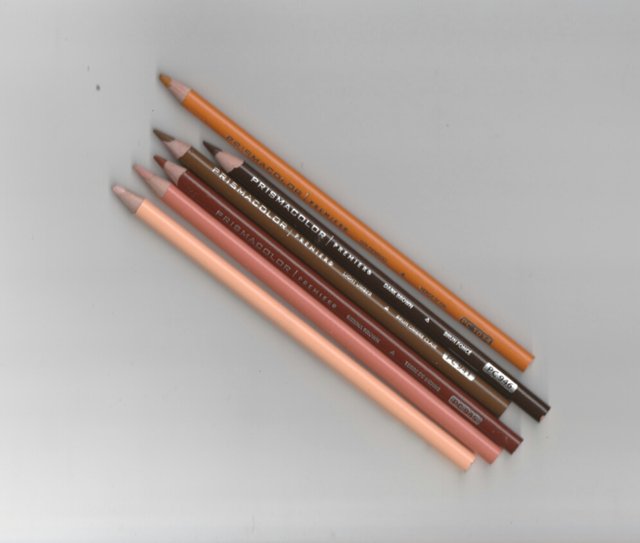
First, take look at your reference and see all the possible colors that are present. In skintone, I used 4 to 5 colors mostly but still depends on your reference. Here are those:
Light peach
Peach
Goldenrod
Light umber
Sienna brown
Dark brown
To blend, start with the lightest color first. This is what you call layering. Most importantly, apply smooth pressure first using light colors. Once you applied all necessary colors from light to dark you can now go back to light again and now with some pressure and from light to dark again but with a little bit of pressure.
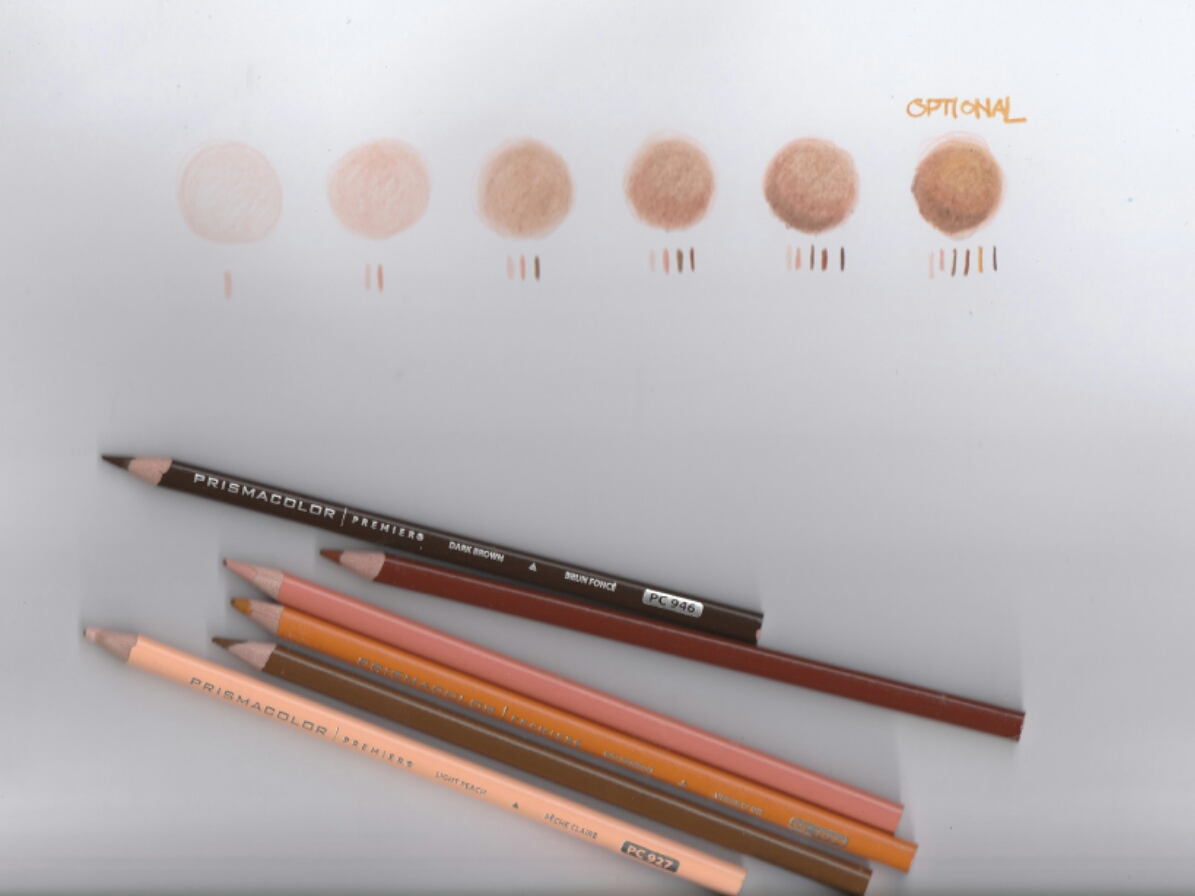
You see the transition from color to color. The 6 part is optional and if you think the skin is a little bit yellowish you can use that color.
Colorless Blender Pencil
The use of colorless blender is important. It allows you to smoothen some edges and texture of your colors. This will eliminate all lumps and some hard pigments that will make it more fine more smooth and flawless. Don't be afraid to use it. It doesn't have color so you can apply a hard pressure to blend your colors well. Now I'm going to use the same illustration a while ago but I blended the colors with the use of colorless blender pencil.
Did you see how it went from light to dark toning and how the colors changed from a rough texture to a smooth outcome. Some people use white pencil to blend the colors and you can use it too... but the only thing about that is the color will change to light because it's obviously white. I think colorless blender is very important and a must have in your pocket.
Pencil eraser
If you don't know, pencil eraser also plays a big role in your artwork. Not only for erasing but also for creating those thin lines and edges that will help your artwork look more detailed and realistic. I use this for creating hairlines, hair strands and in small detailed areas.
Now, I want you take a look at this sketch that I made using a graphite pencil. It's obviously a hair and it looks flat right now just by taking a look.
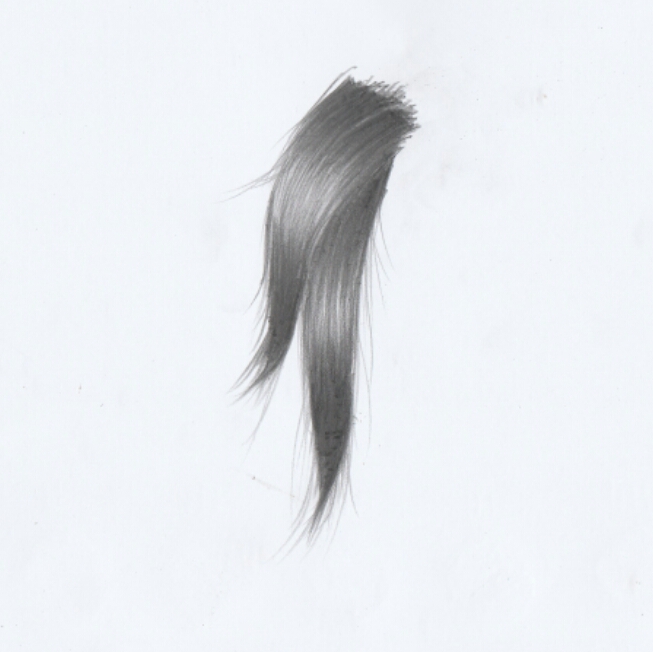
It looks great but if you apply some pencil eraser let's see.
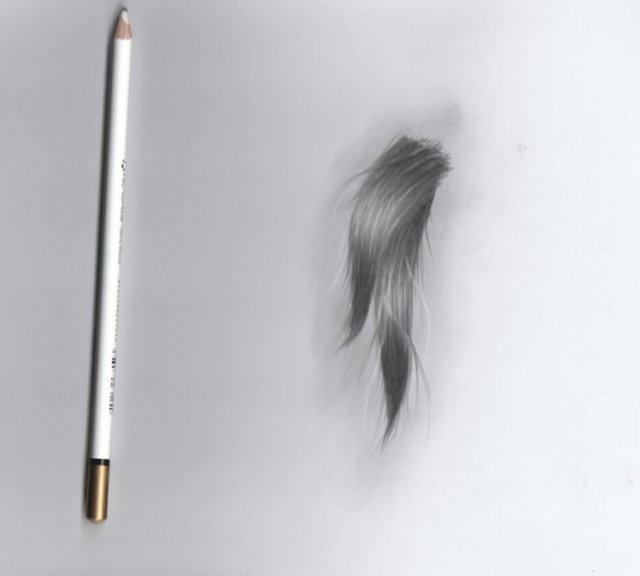
It looks more convincing now because of the highlights and strands created by the pencil eraser. One more thing to remember... always make your pencil sharp and your pencil eraser as sharp as possible to create that thin strands and make it realistic. Good thing about pencil eraser is, it applies in colored pencil as well.
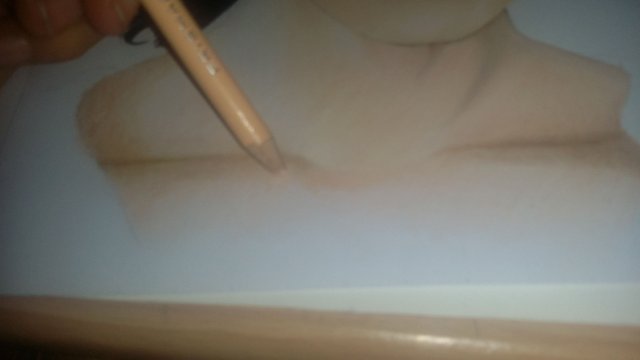
Here are some WIP images that I took using my camera phone. Please excuse my camera quality I don't have a good one just for you to see.
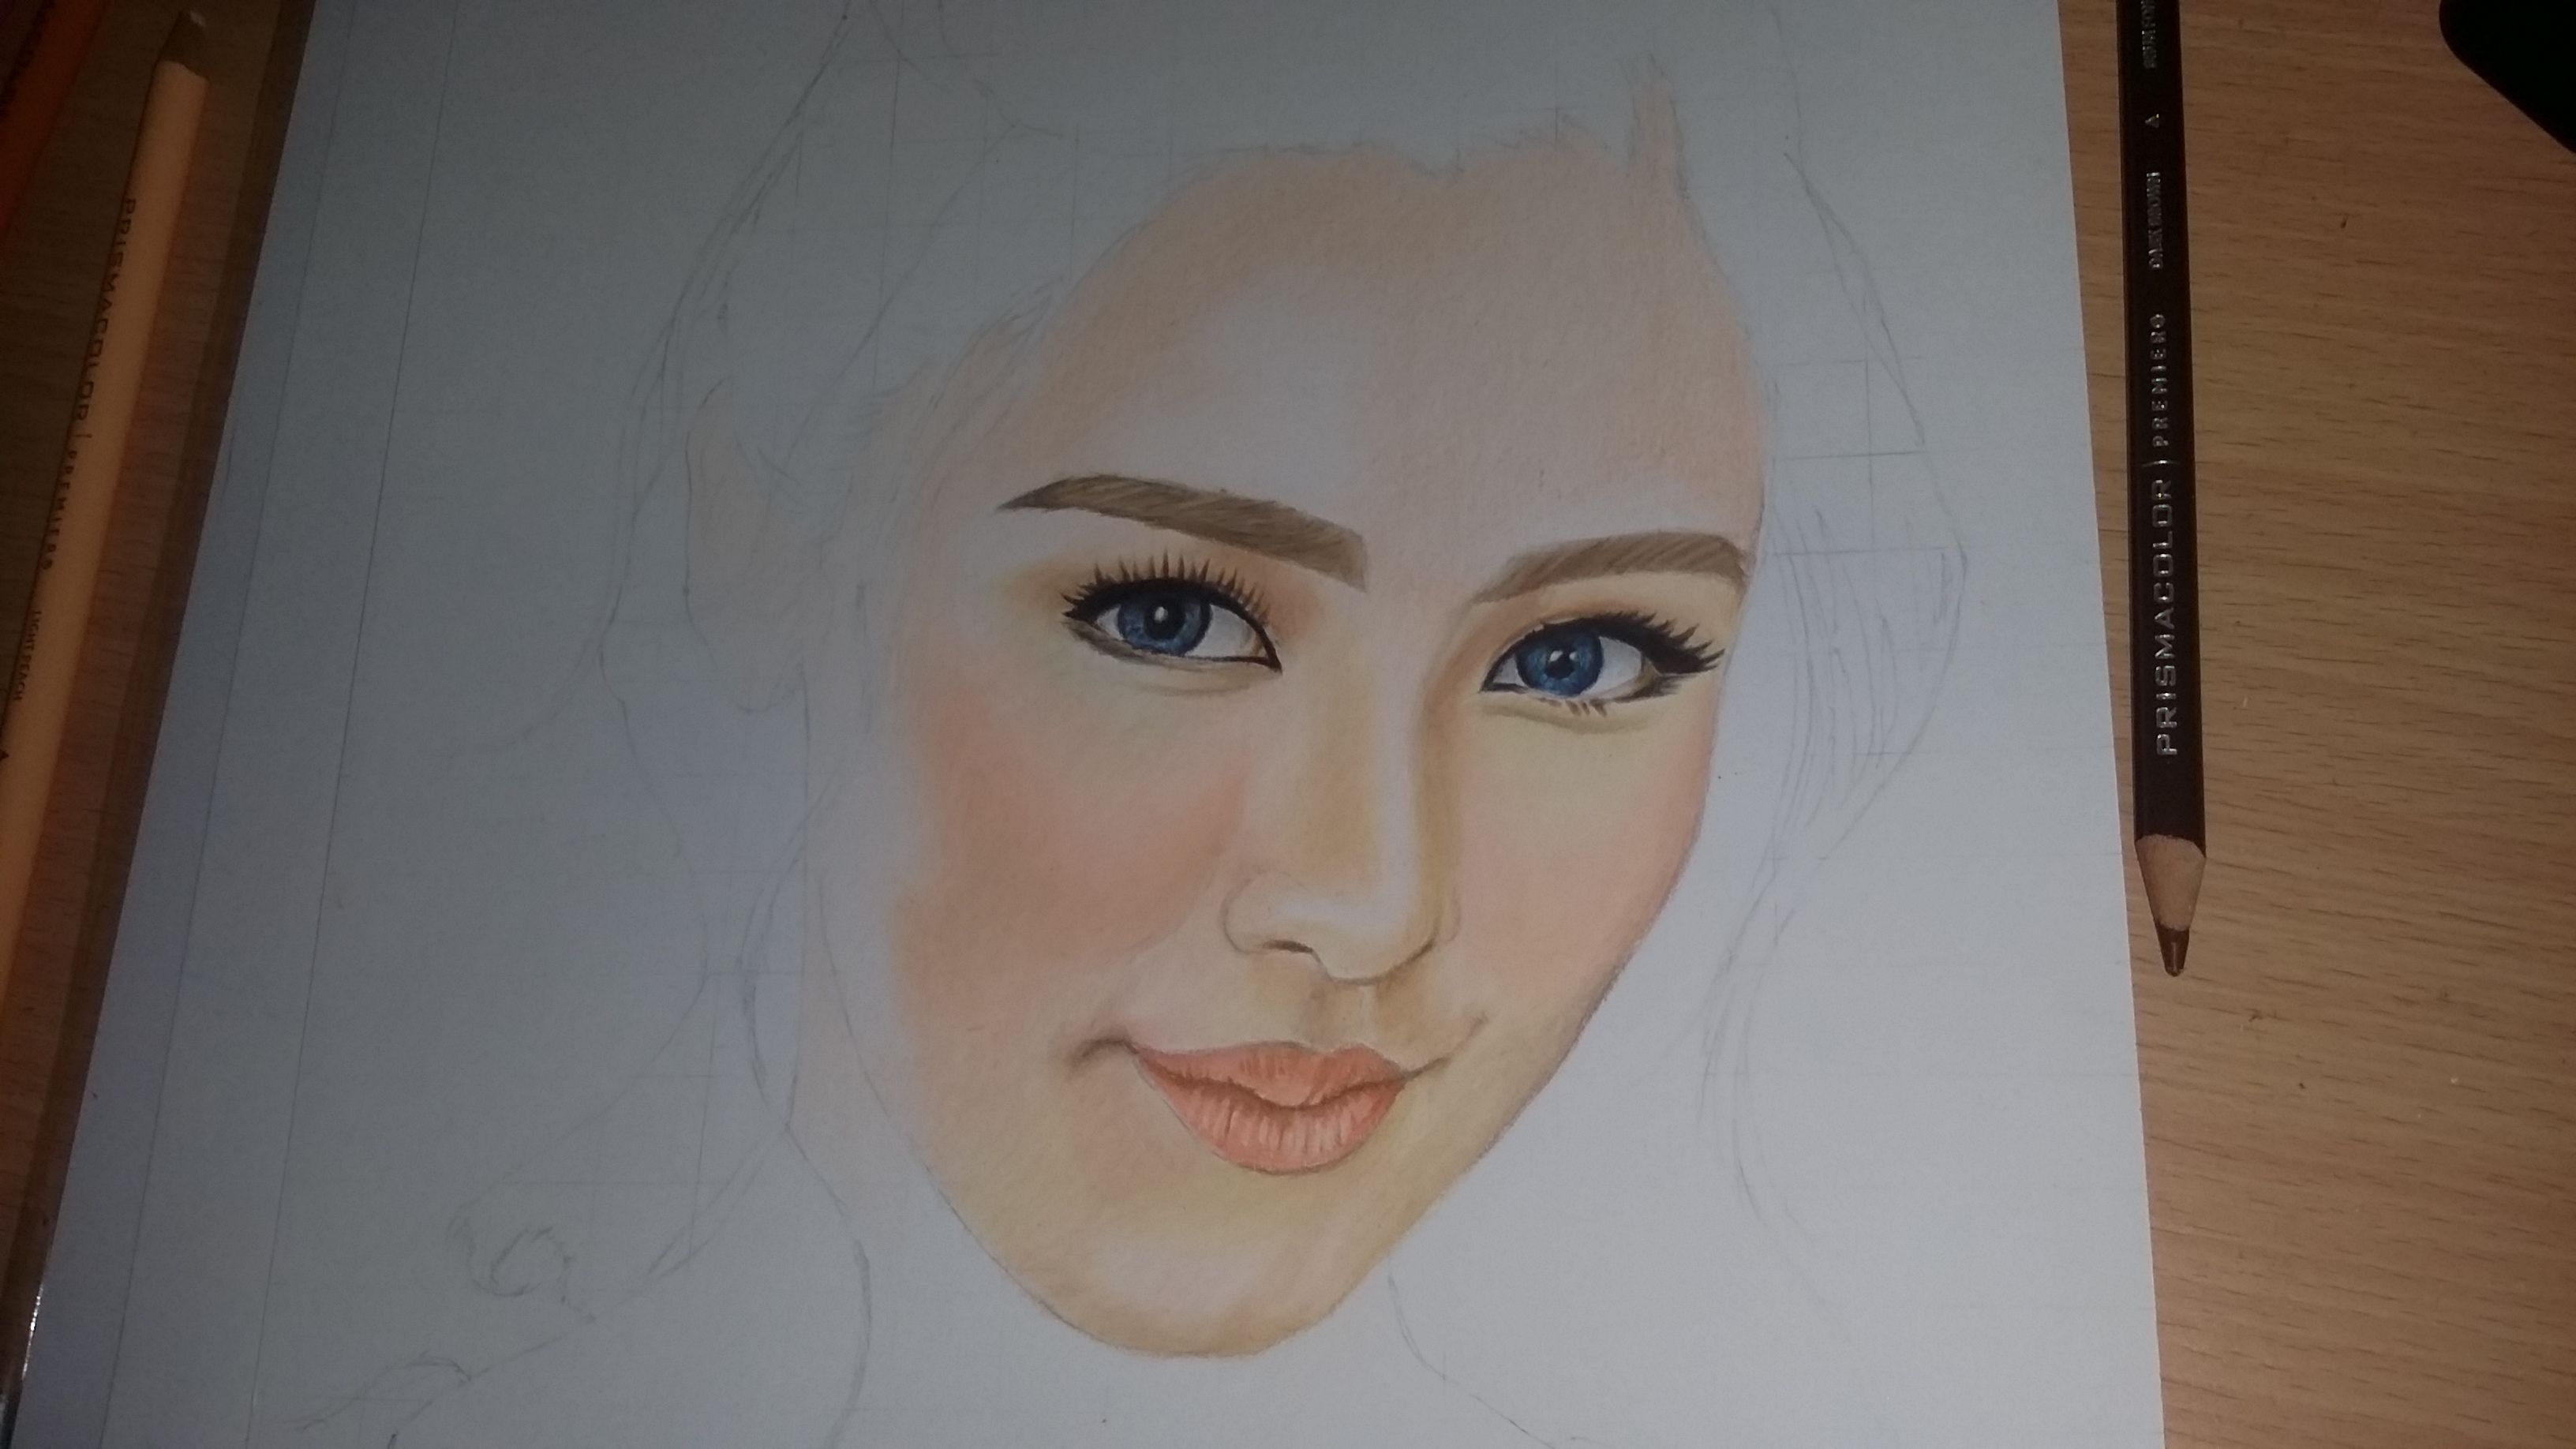
After I sketched the outline. I always start with the skintone first. Get all colors that you need and put away all unnecessary materials that you don't need yet. This will help you to work easily comfortable and your table won't look messy.
Now I tried capturing the drawing in daylight too see if the colors are natural. This will help you to see if the colors are natural and if not... you can readjust it later. If you notice, I put a little bit of hair too to see if the color compliment well especially the black color.
The colors seems well suited. Now I'm trying to work on her hair and applied little of details. This will take you some time and be patient.
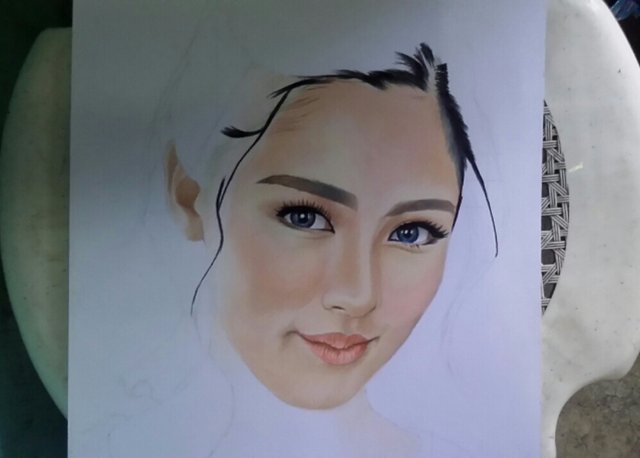
It seems ok, but will add some detail later. Trying to work on her skintone again.
I'm trying to take a picture of her again in daylight to see if the colors are okay and refined. I'm almost done and see the difference between a shot that has a flash and a normal camera shot.
With camera flash
No camera flash
Okay the colors are nice and smooth. I guess it's time to finish it.
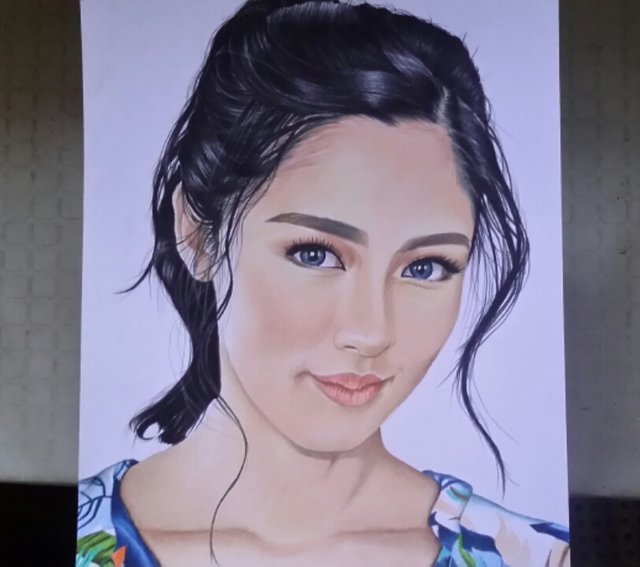
Here is the scanned drawing. You see how the colors are changing and they depend on your shots.

There you go guys!!!
I hope you learn with me on my tips and techniques on how you make a portrait drawing using colored pencil. Be patient and don't rush your drawing so it will look more better and clean. See you again on my next future posting.
Have a great one!
Good bye!

perfect! stay awesome...upvoted and resteemed!!!
Thanks otom for your kindness. Good things will comeback at you too.
Your so talented with a gifted hand.
Thanks mam
I am very impressed with your talent. All perfect. I know well what it means to do someone's portrait on a sketch, but to do it in addition to the koloz this championship. Greetings and thank you for learning. I will try to use it in the future. thanks again.
Thank you and you learned from me. I want to see your artwork too
I have not drawn anything in this style for a long time, I have forgotten how it is done, but I practice as much as I can. Unfortunately, I have little time because of my work. so far I'm realizing small projects and tame my hand. Regards
What a beautiful drawing, you do excellent work. Congratulations 👏.
Thank s man,
Sir, I see that you got the talent. Why not try to draw a historical place perhaps?
By the way, this portrait is awesome.
Thank you, I'lltry it using a different medium. Thanks for your suggestion
You're welcome sir.
Hello. this portrait as vivid. Perfect !!!!
Thank you sir. Glad you like it!
Congratulations @gremayo! Well done. I love your Kim Chiu portrait. I like her , same here from Cebu 😊
Thank you mam wella
That's a really amazing art, and I wondering that you paint it with pencil color, well its so beautiful art and photography as well, thanks a lot.
Thanks sir
Wow..perfectly done! Upvoted and resteemed..😊 great work of art !!!
Thanks mam.same here
Amazing!!!!! Upvoted
Thanx, I followed you