(PT 5) Ethereum Front End - Creating Components, Handling Nulls And passing Props (Part 5)
Repository
https://github.com/igormuba/EthereumFrontEnd/tree/master/class5
What will I learn?
- Handling nulls returned by the blockchain
- Creating and connecting new components
- Passing React props forward
Requirements
- Chrome or Brave Browser
- Metamask browser extension
- Node/NPM
- Ganache
Difficulty
- Intermediary.
Introduction
It has been a little while since the last tutorial. But I always aim to make the tutorials accessible for people that "just landed in". Either if you are new, or you need a refresher on what we have done so far, there is no need to start from scratch! Just clone the repository with the classes for this project, and start from the class 4.
If you already have the starting files (class 4), you are good to go. You may need a refresher on what we've done so far, so it is probably a good idea to read again the last tutorial.
Also, if you haven't read the tutorial on making an ERC20 token, you don't need to know how to do it (though it is recommended). You can find the exact code for the ERC20 token we are using on my Github repository. Just copy the code and deploy the token using Ethereum remix. If you don't know how to deploy a smart contract, this tutorial might be helpful.
The previous class content walks you through, mainly, the adding of new components to our React project, specifically Bootstrap. Bootstrap is the interface library we are using because it is very commonly used for prototyping, so if you have any difficulties, you can Google them and quickly find help.
Handling null token balances
Javascript is an interpreted language, that means it does not "compile" (React kinda does but we won't talk about that yet). If the language does not compile, it means it will not look for possible invalid variable uses. A tangible example for us is, in case a user does not have tokens and have never received tokens, the balance of his account will be null.
Null is different from zero. The structure we are using to store users balances is an Ethereum mapping. A mapping, in short, maps one value to another. In our case, we map an address to a positive integer.
Because the Ethereum virtual machine is expensive to work with, this data structure has to be efficient. It achieves efficiency by simply not having a key-value pair for keys that do not have a value. In practice, that means, if a user has never received a token, his balance will be null, that is, there no representation of this user in any means.
If we ask the contract for a balance and we get a null balance (not uncommon!) we have to handle that on our off-chain code.
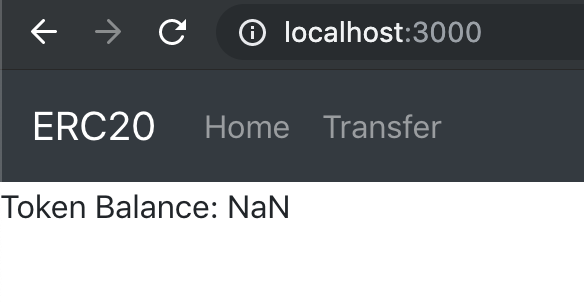
On our function blockchainConnection() we do query the contract for the user balance. Right now, if I check a user with zero balance (I have created a new account for this), what we get is "Not a Number"(NaN):
To handle this, keep in mind this is the variable in our code that is storing the returned and untreated value from the blockchain:
let myTokenAmount = await erc20token.methods.balanceOf('0xeB38D4269c2880d555A29D906A320DA2b340A675').call()
The simplest way to deal with it is by coding "if we get a null, then set this variable to zero". We can do that in one line using a ternary operator right after we query the blockchain:
let myTokenAmount = await erc20token.methods.balanceOf("0xeB38D4269c2880d555A29D906A320DA2b340A675").call();
myTokenAmount = myTokenAmount ? myTokenAmount : 0;
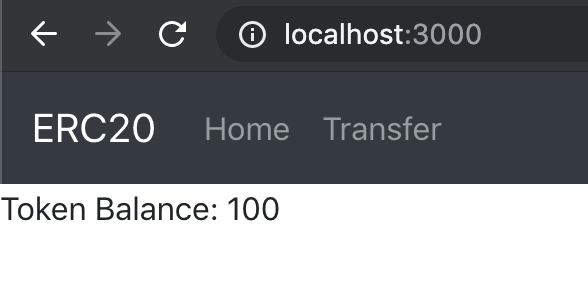
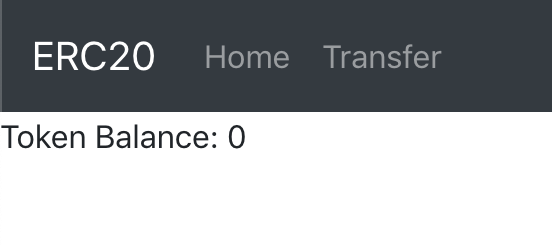
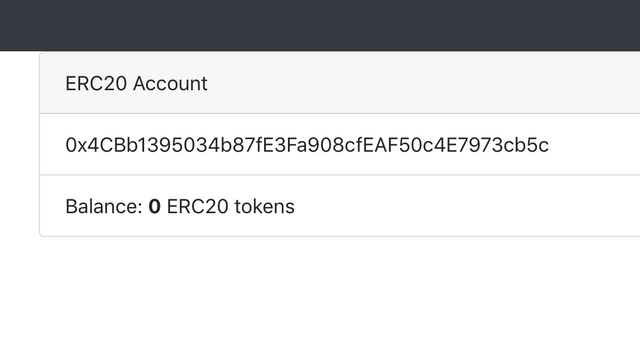
Now if the user has or does not have tokens, it will show the balance or zero(if null or zero):
Let's understand it. Remember, in Javascript, we have the unique feature of loose equality.
That means, null can represent false!
A ternary operation can be read as:
variable = boolean (if true assign) value (if false, assign) otherValue
If myTokenAmount has a value, then the variable is itself, else, if it is null, it is zero! Javascript is powerful!
Saving the account on the state
Previously, we were hardcoding the address we want to query about balance.
On the next section we will improve the interface with data from the user, but first, let's do ourselves a favor and dynamically query the address, so any user can use any address. Also, we want to store the address on the React state so that we can use it on the rendered page!
To get the "logged in" address, the code is:
//this is the same web3 variable and line we declared previously
let web3 = new Web3(Web3.givenProvider);
let accounts = await web3.eth.getAccounts();
The "get accounts" function returns an array of accounts from the node (Metamask).
Now that the account array is stored in the variable accounts, we add a new line for the call of setState we have declared previously:
this.setState({
      account: accounts[0],
      balance: parseInt(myTokenAmount)
    });
The above saves the value (the address) of the first account (account[0]) as the key account to be used when calling the state.
The "Card" interface
Bootstrap has many components that can be used creatively to send the message you want on your app's interface. For the task of displaying the account details (address and balance), I believe that the card component does the job well.
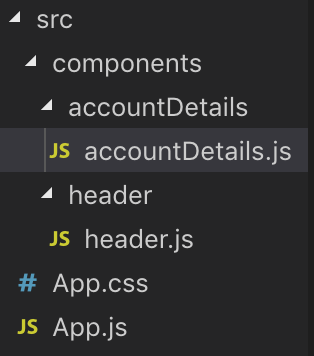
To make the new component, we create a new folder on the "components" directory. Let us call it accountDetails.
Inside accountDetails we then create a file to hold the code for this component only:
The boilerplate for most of the new components we will create from now on is:
import React, { Component } from 'react';
//following line is only used when we are building a bootstrap component
//which is the most likely scenario
import {Container} from 'react-bootstrap';

//The class name must start with a capital letter
//even though the file "account" word is not capitalized
export default class AccountDetails extends Component {
  render() {
    return (
      <Container>

      </Container>
    )
  }
}
It will only change when we are not using Bootstrap on a component, for whatever reason, in this case, just remove the line that imports it. However, if you forget to do so, it won't hurt your app.
The Container component is used to style. It is a div with constraints of size, so that the element we code inside it fits well within the screen, not too small but not too big.
To use the Card component, we import it, and the list group component (for listing balances) on the same line we imported Container Bootstrap:
import {Card, ListGroup, Container} from 'react-bootstrap';
Passing the data to the React component
Still, inside the component, we must create the code that will "fill" the interface with the data we want.
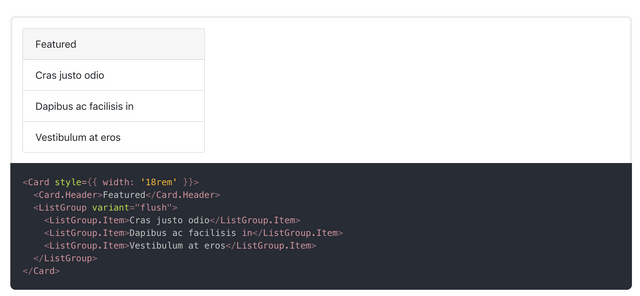
The card component will want looks like:
<Card>
  <Card.Header>ERC20 Account</Card.Header>
  <ListGroup variant="flush">
    <ListGroup.Item>{this.props.account}</ListGroup.Item>
    <ListGroup.Item>Balance: <b>{this.props.balance}</b> ERC20 tokens</ListGroup.Item>
  </ListGroup>
</Card>
Props are like "arguments" to functions. Notice, we are pulling this.props.account and this.props.balance from the props, but our component does not mention props anywhere! But trust me, there are props!
This is because React class components can "inherit" properties from its parent, without declaring one inside itself. A react function component can have similar behavior, but you have to add more code to it, specifically, you have to declare a function that receives arguments, and those arguments are the props. Both coding styles are valid, and people still argue which is better. For simplicity, we will use class components, but you can read more about class vs functional components to extend your understanding of the topic.
Now that the component is coded and receives the "props", we will pass them to it.
On our App.js, we import the component below the Header import:
import Header from "./components/header/header";
import AccountDetails from "./components/accountDetails/accountDetails";
We will use it below the header. We can already delete the <p> we were using so far to read our web3 data and replace it with our component. So it becomes:
<div>
  <Header />
  <AccountDetails/>
</div>
And finally, we pass the properties (props we've talked before), just like you do with any HTML component!
<AccountDetails account={this.state.account} balance={this.state.balance}/>
Series curriculum
-Part 4
-Part 3
-Part 2
-Part 1
Beneficiaries
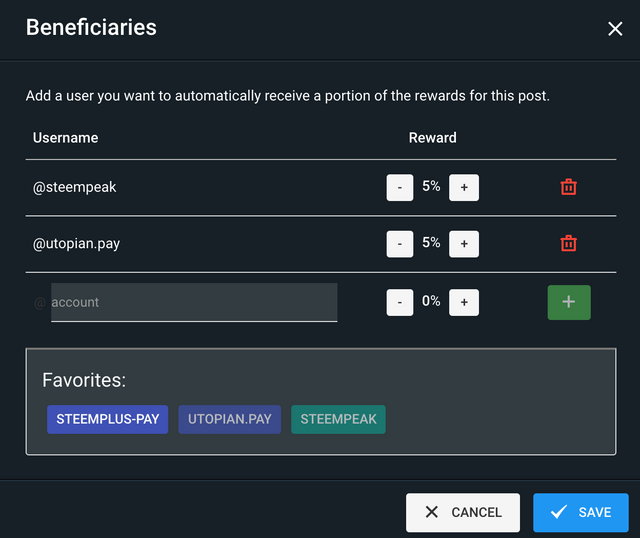
This post has as beneficiaries
- @utopian.pay with 5%
- @steempeak with 5%
using the SteemPeak beneficiary tool: