Building a Hotel Management System With ASP.NET Core(#8) - Working with Jquery and AJAX
Repository
https://github.com/jquery/jquery
What Will I Learn?
- You will learn how to make AJAX requests using Jquery's
$.ajax()helper function. - You will learn about Event Delegation in Jquery.
- You will learn about the concept of "Bubbling the DOM".
- You will learn how to create Custom Event Handlers in Jquery and how to trigger these custom event handlers.
- You will learn how to use selectors in Jquery.
- You will learn how to make use of various jquery methods like
prepend(),attr(),parent(),remove(),show(),trigger(), etc - You will learn how to update the Room Create View of our Hotel Management System
Requirements
- Basic knowledge of HTML, CSS and Javascript
- Any suitable code editor
- Previous Tutorial
Difficulty
- Basic/Intermediate
Tutorial Contents

In this tutorial, we are going to explore a slightly different aspect from what we have been treating. Although I mentioned that this tutorial series was not aimed at teaching front-end design or development, however, I felt the need to dedicate one post to explain jquery and Ajax, specifically how they interface with ASP.NET Core and also the helper classes and features .NET provides for working them. Reason being that, these two technologies are very important to achieving our end goal, and also they find extensive use and popularity among web developers(most especially, full stack developers). So there, we have a bonus tutorial!
Jquery
Jquery is a JavaScript library used for HTML DOM manipulation, event handling and so many other cool client-side related functions and interactivity such as animations. It basically saves you the stress of having to write so much code for common javascript tasks and it takes care of the the hassle that comes with multi browser compatibility.
Read More: http://jquery.com/
AJAX
AJAX is short for asynchronous javascript and XML. It allows supposed static web pages to interact with a web server through asynchronous data exchange causing different part of the web page to be updated without reloading the page.
ASP.NET Core provides support for Jquery and AJAX in the form of helper class and intelliscence.
In the previous tutorial, we coded the ImageController. There, we learnt how to add new images to our server file system and using mappings to an images table in our database, we learnt how to manage these images and certain properties we've defined for them. However, the main purpose of having these images is to link them with various entities within the system. In this tutorial, we are going to deal with managing these images on the front-end and in the subsequent tutorial, we will deal with managing these relationships on the back-end.
The aim here is to have the admin user select images for a room when creating it. In that static Create web page, the images are going to be fetched from the database via an AJAX call. The result which is a partial view is then rendered in a modal. Preferred images can then be selected from this modal popup and then upon completion, these images' ids, image source url and any other required detail is captured and used to populate an image preview div. Images from this preview div can then be removed and/or replaced right there on the same page after which the final selected imageIDs are then posted to the server for processing.
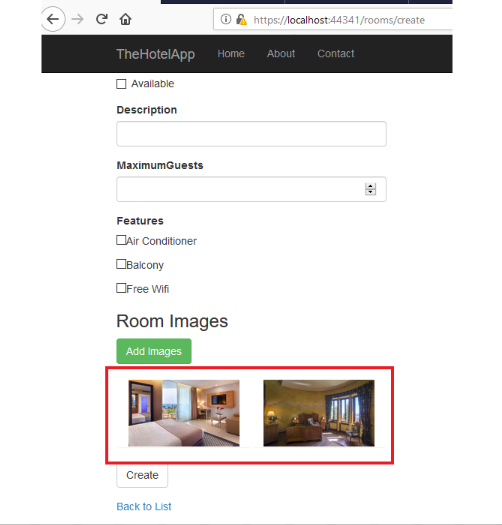
Room Create.cshtml
Currently, our view has this look:
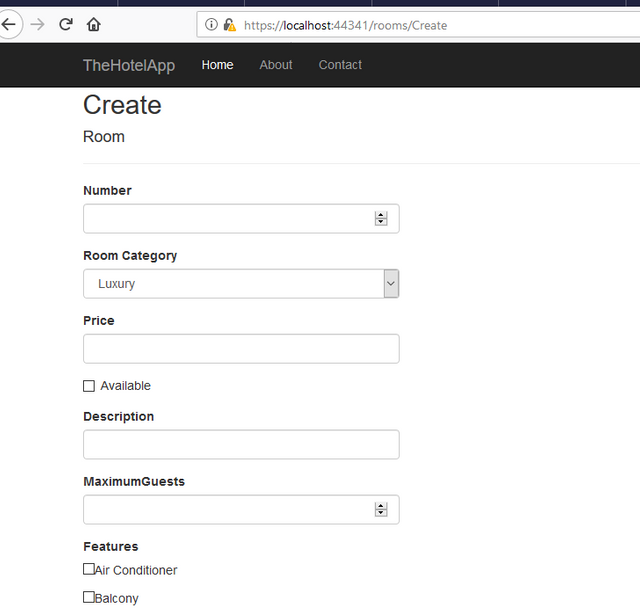
(1) Firstly, after our Features form-group, add the following lines of code:
<div class="form-group">
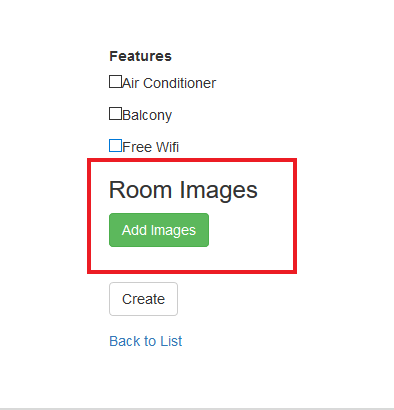
<h3>Room Images</h3>
<a data-toggle="modal" data-target="#AddImagesModal" class="btn btn-success">Add Images</a>
<div id="images">
@if (ViewBag.Images != null)
{
foreach (var image in ViewBag.Images as IEnumerable<Image>)
{
<div class="panel" style="background-color:lightgrey; margin:2px;">
<lmg class="img-responsive" src="@image.ImageUrl" asp-append-version="true" alt="@image.Name" width="200" />
<div class="panel-group" style="padding:5px;">
<input type="hidden" name="imageIDs" value="@image.ID" />
</div>
<div class="panel-footer" style="width:100%;">
<a href="#">View</a> |
<a data-image-id="@image.ID" data-image-name="@image.Name" data-toggle="modal" data-target="#DeleteModal">Remove <i class="glyphicon-trash"></i></a>
</div>
</div>
}
}
</div>
</div>
Explanation
We added a form-group for the images. We have an anchor link button that opens a modal when clicked. I have made use of the data-toggle and data-target to open a bootstrap modal to select images.
<a data-toggle="modal" data-target="#AddImagesModal" class="btn btn-success">Add Images</a>
Next, we have defined a <div> with the id "images". This div will house our selected images. Notice the "if" statement in the div. It checks if any Images ViewBag was sent from the controller action. That is, if the room in question already has images linked to it, from the database.
 @if (ViewBag.Images != null)
                    {
                        foreach (var image in ViewBag.Images as IEnumerable<Image>)
                        {
                            <div class="panel" style="background-color:lightgrey; margin:2px;">
                                <lmg class="img-responsive" src="@image.ImageUrl" asp-append-version="true" alt="@image.Name" width="200" />
                                <div class="panel-group" style="padding:5px;">
                                    <input type="hidden" name="imageIDs" value="@image.ID" />
                                </div>
                                <div class="panel-footer" style="width:100%;">
                                    <a href="#">View</a> |
                                    <a data-image-id="@image.ID" data-image-name="@image.Name" data-toggle="modal" data-target="#DeleteModal">Remove <i class="glyphicon-trash"></i></a>
                                </div>
                            </div>
                        }
                    }
Naturally, this conditional statement would find its way only in the Edit.cshtml view which deals with already existing entities. However, I have included it here for the sake of prevention of repetition.
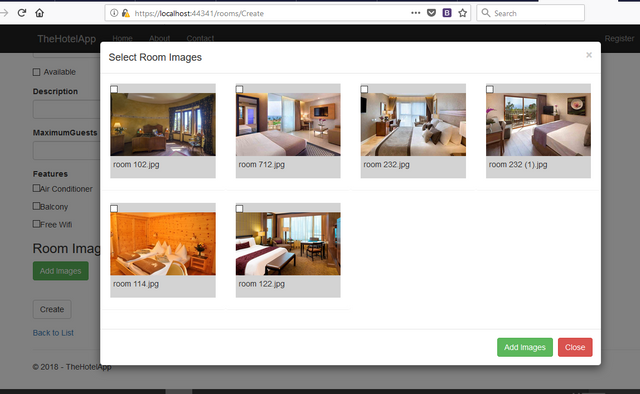
Populating the AddImagesModal
Remember, we defined an anchor link button "Add Images". This button triggers a modal which we specify below:
<div class="modal fade" id="AddImagesModal" role="dialog">
<div class="modal-dialog modal-lg">
(html comment removed: Modal content)
<div class="modal-content">
<div class="modal-header">
<button type="button" class="close" data-dismiss="modal">×</button>
<h4 class="modal-title">Select Room Images</h4>
</div>
<div class="modal-body">
</div>
<div class="modal-footer">
<form>
<p id="AddImages" class="btn btn-success">Add Images</p>
<button type="button" class="btn btn-danger" data-dismiss="modal">Close</button>
</form>
</div>
</div>
</div>
</div>
Notice that we have the modal-bodycurrently empty at the moment. We are going to populate this with data from an AJAX call.
Add this to @section Scripts{} at the bottom of your page:
    <script>
        $(document).ready(function () {
   $('#AddImagesModal').on('show.bs.modal', function (e) {
                $('#loading').show();
                $.ajax({
                    url: "/Images/GetAllImagesJson",
                    type: "GET",
                    cache: true
                }).success(function (result) {
                    $('.modal-body').prepend(result);
                    $('#loading').hide();
                });
            });
      }); // document.ready
</script>
Explanation
We set an event listener on the button with the id AddImagesModal that triggers when the modal is opened. When the event is fired, the element with id "loading" is displayed. $('#loading').show();. This element could be a gif or whatsoever you deem fit.
Next, we make an ajax call to the url -- /Images/GetAllImagesJson, specify the request type - GET and cache to true.
 $.ajax({
          url: "/Images/GetAllImagesJson",
          type: "GET",
          cache: true
        })
Note that the syntax used here $.ajax() is a jquery function which is used for working with ajax.
Next, we call a success() method which executes if the ajax request was successful.
.success(function (result) {
               $('.modal-body').prepend(result);
               $('#loading').hide();
           });
This function takes the result from the ajax request and loads(prepend) it into our modal-body. Then hides the "loading" element.
Read More: http://api.jquery.com/jquery.ajax/
The action that is being called in the ajax request is:
 public async Task<IActionResult> GetAllImagesJson()
        {
            var images = await _hotelService.GetAllItemsAsync();
            return PartialView("GetAllImagesPartial", images);
        }
It returns a PartialView GetAllImagesPartial with the images in our database.
GetAllImagesPartial.cshtml
@model IEnumerable<TheHotelApp.Models.Image>

<div class="row">
    @foreach (var item in Model)
    {
        <div class="col-md-3 panel">
            <div style="background-color:lightgrey; margin:2px;" class="imageItem" id="@item.ID">
                <div>
                    <input type="checkbox" name="selectedImages" value="@item.ID" style="float:left;" />
                    <lmg class="img-responsive" src="@item.ImageUrl" asp-append-version="true" alt="@item.Name" width="200" />
                    <div class="panel-group" style="padding:5px;">
                        <p>@item.Name</p>
                    </div>
                </div>
            </div>
        </div>
    }
</div>
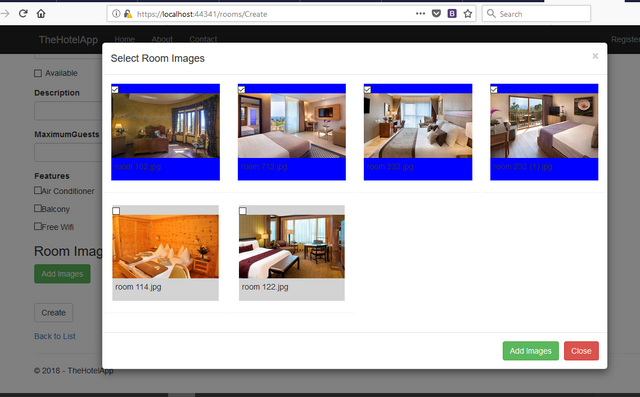
Selecting Images from the Modal
Now that we've presented the images in a modal, we want the user to select required images and pass this information back to our form.
A big problem arises here: These images data were not present in the DOM as at the time the jquery script is rendered. Note that the function $(document).ready() waits for the html document to be loaded completely before processing any of javascript code. However, these elements were dynamically added to DOM, and as such these elements are not present when the jquery code is loaded. To target these elements, we use a concept called Event Delegation
Event Delegation
Before diving into event delegation, it is important to understand a concept known as "bubbling the DOM". Assuming you have a <p> tag in a <div> tag which is inside <body> tag. Whenever the <p> tag is clicked, invariably the <div> tag is also clicked because it contains the <p> tag, as well as the <body>. Infact, clicking an element means clicking the whole document itself. So an event called on the <p> tag is also called on every one of its parents. Event delegation capitalizes on this principle to target descendants which are currently non existent at the time of DOM creation by targeting already existing parent element.
Event delegation allows you to attach a single event listener, to a parent element, that will fire for all descendants matching a selector, whether those descendants exist now or are added in the future.
Read More: https://learn.jquery.com/events/event-delegation/
Add the following code to our script tag, inside $(document).write():
    $('.modal-body').on('click', '.imageItem', function () {
                var checkbox = $(this).children('input');
                if (checkbox.attr('checked') == undefined && checkbox.attr('checked') == null) {
                    $(this).attr("style", "background-color: blue");
                    $(this).children('input').attr('checked', 'checked');
                }
                else {
                    $(this).attr("style", "background-color: lightgrey");
                    checkbox.removeAttr('checked');
                }
            });
Explanation
The code above selects the '.modal-body', an element that already exists in the DOM before the ajax call. Then using event delegation, we call the on() method and pass in the prospected descendant selector(in our case, '.imageItem') and the event handler function. So this code listens for a click on the '.modal-body' class, and then check if it was initiated by the descendant selector specified as the second argument. If it is, then the event handler function is executed.
Our event handler function checks if the checkbox associated with the image in question has an attribute "checked" or not using attr().
if (checkbox.attr('checked') == undefined && checkbox.attr('checked') == null)
If the attribute is not set(undefined), then we add a "checked" attribute to the checkbox, and give the parent div a background color of blue(representing a form of highlighting)
  $(this).attr("style", "background-color: blue");
  $(this).children('input').attr('checked', 'checked');
Else, if it is checked and the div highlighted, we remove the checked attribute and set the background color back to normal:
 else {
                $(this).attr("style", "background-color: lightgrey");
                checkbox.removeAttr('checked');
           }
Previewing Selected Images in Form
Up until now, we've only looked at how to perform an ajax call, dynamically add content to our DOM and how to use event delegation to select these dynamically added contents. Another important thing we need to figure out is how to pass this data selected in our modal to our form. There are so many ways to this, but I will approach this from the following angle in other to touch another powerful concept in jquery - Custom Event Handlers.
Clicking on "Add Images" Button
When the user clicks on "Add Images" button in our modal, we want to trigger a function that gets all the checked images and displays them in our <div id="images"></div>. However, there is no event that actually does this. So we write a custom event handler!
Writing a custom event is as easy as writing a normal defined event. Note that, because our elements are dynamically added elements to the DOM, we make use of event delegation as we have done above.
$('.modal-body').on("custom", ":checked", function () {

                var checkedImageDiv = $(this).parent();
                console.log($(this).val());
                console.log(checkedImageDiv.children('img').attr('src'));
                var newImageDiv = '<div class="col-md-6 panel">' +
                    '<input type="hidden" name="imageIDs" value="' + $(this).val() + '"/>' +
                    ' <lmg class="img-responsive" width="400" src="' + checkedImageDiv.children('img').attr('src') + '" />' +
                    '<a class="remove">Remove</a>'
                '</div>';

                $('#images').prepend(newImageDiv);
            });
Explanation:
The event listener is placed on the '.modal-body' as usual(because it exists in the initial targeted DOM) and then when an event is captured, it checks if the event was triggered by a descendant checkbox with the attribute "checked".
Next, we get the parent <div> of this checked checkbox and obtain theimg src of the selected image checkedImageDiv.children('img').attr('src'), then input it in a formatted html <div> which has a hidden input element with the value set to the image's ID - '<input type="hidden" name="imageIDs" value="' + $(this).val() + '"/>'. This we then prepend to our <div id="images">
Triggering the Custom Event Handler
Now we've defined our custom event handler, there's no event action that exists to actually cause it to execute. To achieve that, we tie this handler to an already existing jquery event and then manually trigger the handler when this event occurs - in our case, clicking the "Add Images" button.
  $('#AddImages').click(function () {
                $(':checked').trigger("custom");
                $('#AddImagesModal .close').click();
            });
Notice how we call the trigger() method and pass in "custom" as the event handler with the caller as $(':checked'). This causes this event $('.modal-body').on("custom", ":checked", function () {}) to be fired up and executed for every element that matches it.
Read More: http://api.jquery.com/trigger/
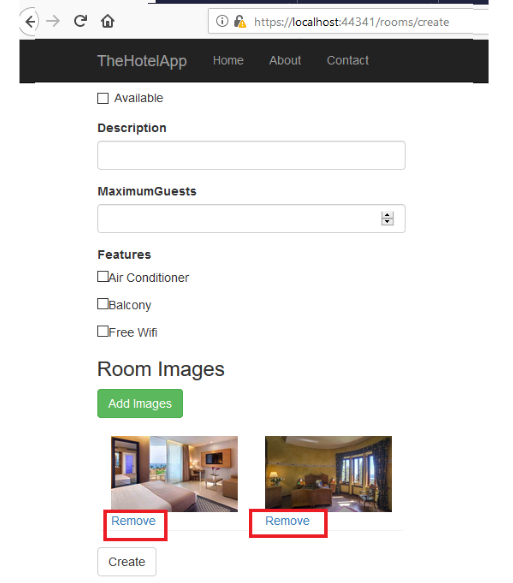
Removing Images in Preview
The user might erroneously select an image from the modal and might wish to remove it from the preview window, and probably replace it or add a new one, before finally sending the request to the server. For that, we added a '<a class="remove">Remove</a>' to the newImageDiv that is prepended to the preview area, and then specify the following event handler to handle the click action.
 $('#images').on("click", ".remove", function () {
                $(this).parent().remove();
            });
Also note how we have made use of event delegation, because these elements, like the ones we have seen before were not present in the initial DOM but were dynamically added.
Now that we've seen how to manipulate the images on the front-end, in our next tuorial, we will look at how to handle the request in the back-end after the user has clicked on Create Button.
Curriculum
- Building a Hotel Management System With ASP.NET Core(#1) - Introduction
- Building a Hotel Management System With ASP.NET Core(#2) - Building the Service Layer
- Building a Hotel Management System With ASP.NET Core(#3) - Building the RoomType Controller Logic
- Building a Hotel Management System With ASP.NET Core(#4) - Building the Room Controller Logic
- Building a Hotel Management System With ASP.NET Core(#5) - Complex Data Relationships(ManyToMany Relationship Linking)
- Building a Hotel Management System With ASP.NET Core(#6) - Displaying and Updating Related Data
-Building a Hotel Management System With ASP.NET Core(#7) - Working With Images
Proof of Work Done
Github Repo for the tutorial solution:
https://github.com/Johnesan/TheHotelApplication
Go here https://steemit.com/@a-a-a to get your post resteemed to over 72,000 followers.
Thank you for your contribution.
While I liked the content of your contribution, I would still like to extend few advices for your upcoming contributions:
Looking forward to your upcoming tutorials.
Your contribution has been evaluated according to Utopian policies and guidelines, as well as a predefined set of questions pertaining to the category.
To view those questions and the relevant answers related to your post, click here.
Need help? Write a ticket on https://support.utopian.io/.
Chat with us on Discord.
[utopian-moderator]
Hey @johnesan
Thanks for contributing on Utopian.
We’re already looking forward to your next contribution!
Contributing on Utopian
Learn how to contribute on our website or by watching this tutorial on Youtube.
Want to chat? Join us on Discord https://discord.gg/h52nFrV.
Vote for Utopian Witness!