Build A Blog Site With React, Redux Firebase And MaterializeCSS (Part 3)

Repository
React
https://github.com/facebook/react
Material-ui
https://github.com/mui-org/material-ui
My Github Address
This Project Github Address
https://github.com/pckurdu/Build-A-Blog-Site-With-React-Redux-Firebase-And-MaterializeCSS-Part-3
What Will I Learn?
- You will learn to build the
reduxstructure in react applications. - You will learn to use
storeandreducerconcepts in redux. - You will learn to combine two reducer and use it in store.
- You will learn the
connectmodule in redux. - You will learn the
combineReducersmodule in redux. - You will learn the
createStoremodule in redux. - You will learn the
Providermodule in react-redux.
Requirements
- text editor (I used visual studio code editor)
- Basic javascript information
- Basic react information
Difficulty
- Basic
Tutorial Contents
In this tutorial we will set up the redux structure in our react application and show 2 of the 3 elements of redux. We will learn how to use store and reducer structure from redux elements and what it does.
We'll also create fake data in this tutorial and we'll show this data in the ProjectSummary component using the redux structure. To do this, we will design the ProjectSummary Component using MaterializeCSS.
I'll section this tutorial for a better understanding and I'll explain these sections in detail, so you can better integrate the issues and there will be no more exposed topics.
First, we will create the ProjectSummary component to list the projects and we will use this component that we created in the ProjectList page.
Then we will use the store structure in redux. In this section we will learn what the Store works for and how to use it in the react.
Then we will do the authentication settings and the reducers in which we will process our data. Since we will define more than one reducer, we will combine them and make them ready for the store.
Finally, we'll create our fake data and we'll define it for use in the store and we will access this data within the ProjectSummary component.
The following is a list of chapters:
- Create ProjectSummary Component
- Create Store
- Create Reducers
- Use Reducer in Store
- Create Fake Data
Let’s start and enjoy
1-Create ProjectSummary Component
In this section, we will create the ProjectSummary component using materializeCSS and we will show the properties of the project with this component and use it in ProjectList.
We have created 3 projects in ProjectList component in previous tutorial. We can create ProjectSummary using one of them. Then all we have to do is to import ProjectSummary in ProjectList.
In ProjectSummary.js
import React from 'react'

const ProjectSummary = () => {
  return (
    <div>
        {/* We use the card class to create a card. */}
        <div className="card z-depth-0 project-summary">
        {/* With the card-content class, we create the body part of the card space. */}
            <div className="card-content grey-text text-darken-3">
            <span className="card-title ">Project title from ProjectSummary</span>
            <p>Posted by The Pckurdu</p>
            <p className="grey-text">3rd September, 2am</p>
            </div>
        </div>
    </div>

  )
}

export default ProjectSummary
We should show it in ProjectList when we make such an adjustment.
In ProjectList.js
import React from 'react'
import ProjectSummary from './ProjectSummary';

const ProjectList = () => {
  return (
    <div className="project-list section">
    {/* we can use as much projectSummary as we want. */}
      <ProjectSummary/>
      <ProjectSummary/>
      <ProjectSummary/>

    </div>
  )
}

export default ProjectList
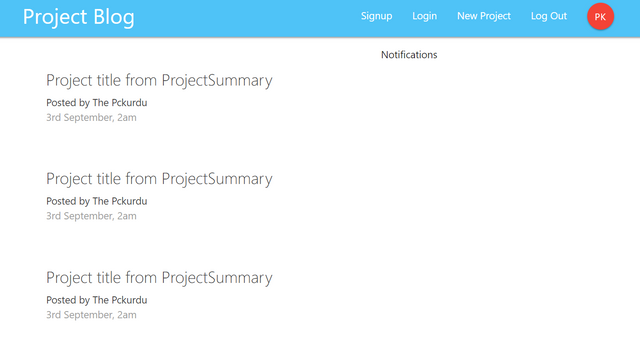
When we do this, there will be no changes in the image. The reason we do is that we can access each project and make it easier to control.
2-Create Store
In this section we will create the store within the application. Primarily we start by explaining what is store.
When we decide to use the redux structure within the react applications, we must first create a store. With store, we can avoid the complexity of data generated using react state.
Using states creates problems as the project progresses and becomes more complex. We can avoid this complexity by using the store in redux.
If we need to explain briefly, the store is the structure in which our data are controlled.
We can create a store using the createStore module in redux packages.
Let's create store.
First we download redux packages to our project files.
yarn add redux
Then create the store in the file where the components of the application are rendered.
In index.js
//createStore import code
import {createStore} from 'redux';

//We create a store using createStore.
const store=createStore();
The reason why we create store in index.js is because we render the App component in this file.
So we have created the store but we have to provide this store App component, we will do this later.
3-Create Reducers
Before creating the reducer, what should the reducers do?
Reducer allows us to determine how to change the states in store. By creating reducer, we also have access to store states.
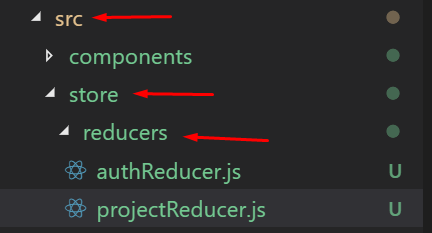
We will create the reducers in a separate folder so let's create the store folder into the src folder. In the store folder, create the reducers folder and create the authReducer.js and projectReducer.js files in this folder.
We'll create reducer in authReducer.js. With this reducer, we will send the authentication information to the store.
In authReducer.js
//default data is used if no state data is assigned.
const initState={}

//create reducer with state and action parameters
const authReducer=(state=initState,action)=>{
    return state
}

export default authReducer
Then we'll create a projectReducer. With this reducer, we will forward the project data to the store.
In projectReducer.js
//default data is used if no state data is assigned.
const initState={}

//create reducer with state and action parameters
const projectReducer=(state=initState,action)=>{
    return state
}

export default projectReducer
We created two reducers and we have to use them in the store but we have a problem. One reducer is used in one store. Since we are going to create one store, we need to follow a different way to use these reducers.
4-Use Reducer in Store
We can create a merge to use the two reducer in the store. In another file by combining these two reducer and placing the result into the store we overcome this problem.
We will use the combineReducers module to combine the reducers. This module allows multiple reducers to operate like a single reducer.
In the reducers folder, we'll create the rootReducer.js file.
In rootReducer.js
//Let's import the reducers to be merged
import authReducer from './authReducer';
import projectReducer from './projectReducer';

//Let us call the combiner module.
import {combineReducers} from 'redux';

//Let's do the merge using combineReducer.
const rootReducer=combineReducers({
    auth:authReducer,
    project:projectReducer
});

export default rootReducer
We create a constant using the combineReducer and create the identifier for the reducers. Thanks to these identifiers we can access the reducers.
We can now use rootReducer in the store so we use two reducer.
In index.js
import rootReducer from './store/reducers/rootReducer';

//We create a store using createStore.
//Let's give  reducer as parameter
const store=createStore(rootReducer);
Finally, we should provide the App component according to the store. We will use the Provider module included in the react-redux packages to perform this operation.
yarn add react-redux
In index.js
import {Provider} from 'react-redux';
…
//In store attribute, we place the store that we created.
ReactDOM.render(<Provider store={store}><App /></Provider>, document.getElementById('root'));
5-Create Fake Data
We will create fake data for testing purposes in this section and we will use this data from the store through the application.
Let's create project objects within the initState function in projectReducer.
In projectReducer.js
//default data is used if no state data is assigned.
const initState={
    //projects data
    projects:[
        {id:'1',title:'pckurdu1',content:'first project'},
        {id:'2',title:'pckurdu1',content:'second project'},
        {id:'3',title:'pckurdu1',content:'third project'},
    ]
}
We can now use the store on the Dashboard page. We will access the store created using connect module and then produce a function. This function will access the store with the state object and bring the information we want from this state.
In Dashboard.js
//import connect module
import {connect} from 'react-redux';
…
//function that gets data from store
const mapStateToProps=(state)=>{
  return {
    projects:state.project.projects
  }
}

export default connect(mapStateToProps)(Dashboard)
Import the auth and project objects in the rootReducer into the state object. With project object we can access projectReducer. Here we also access the projects object defined in initState.
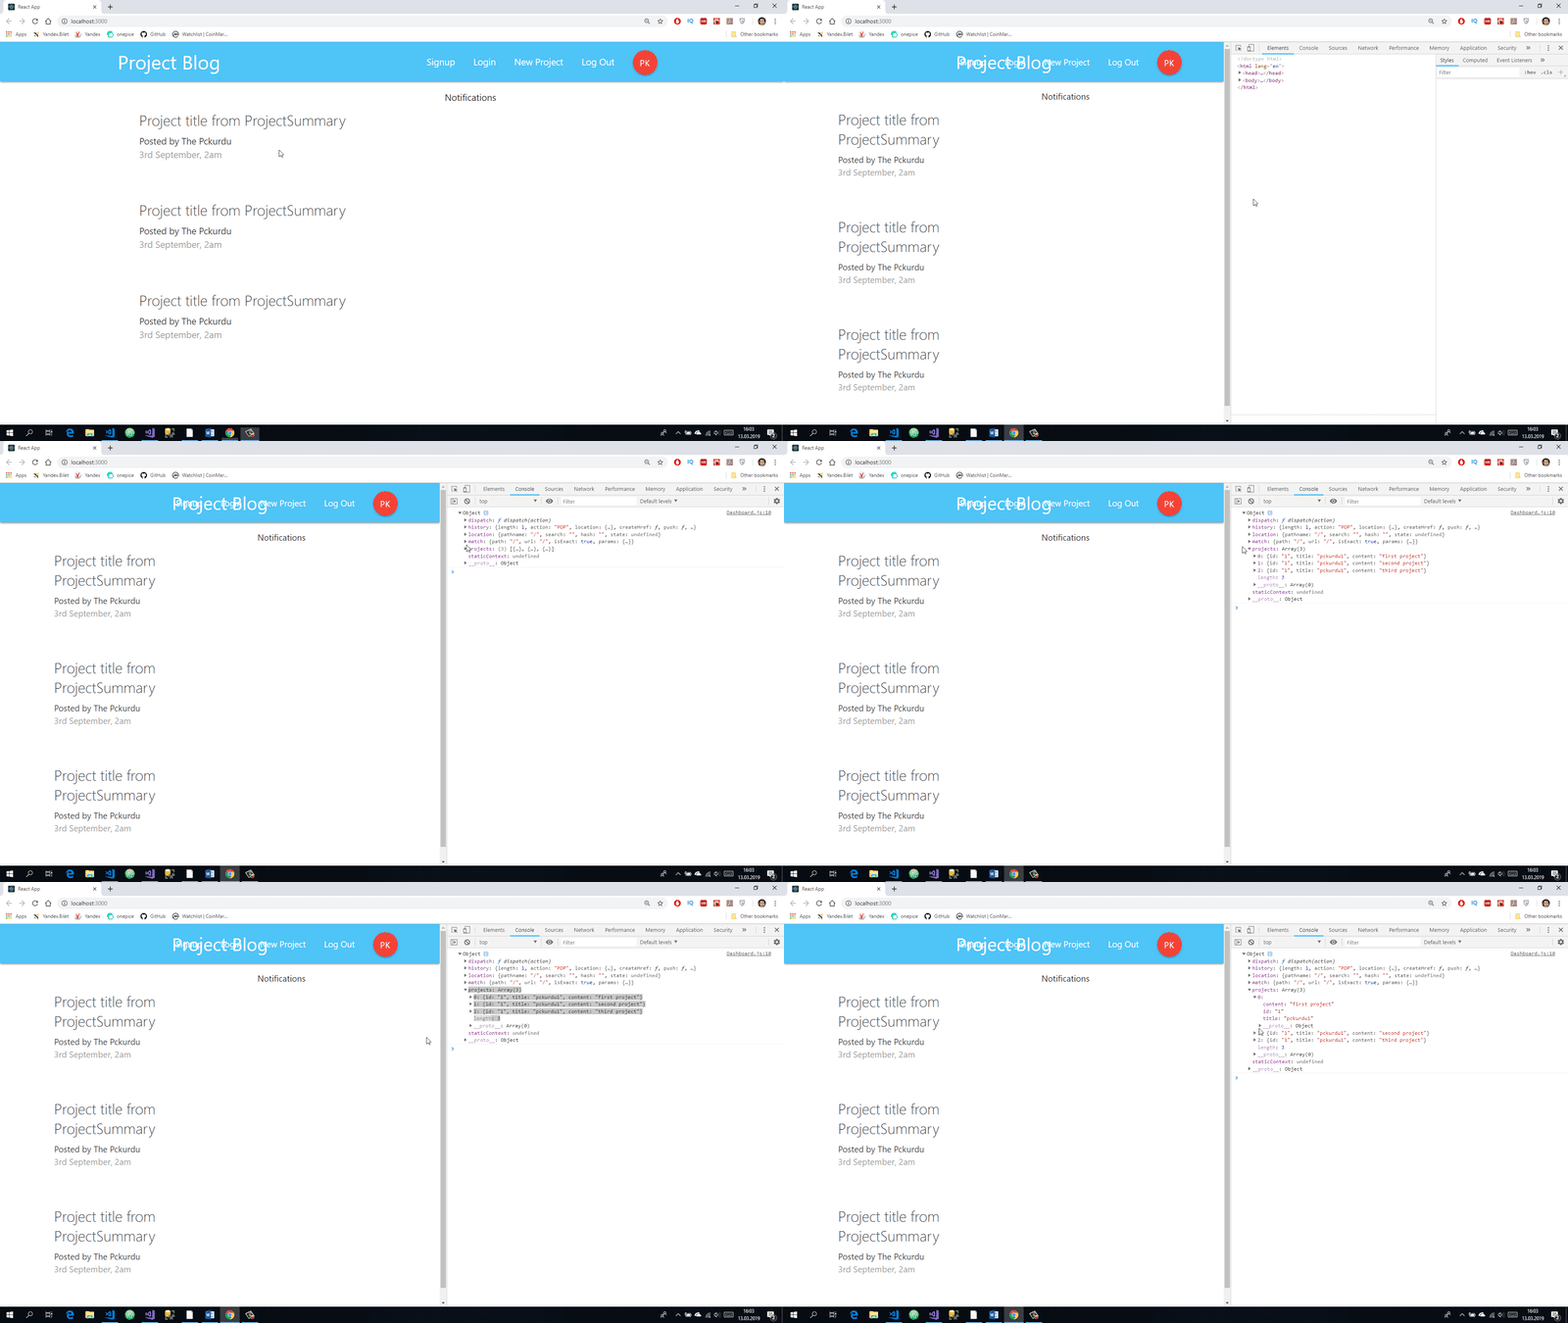
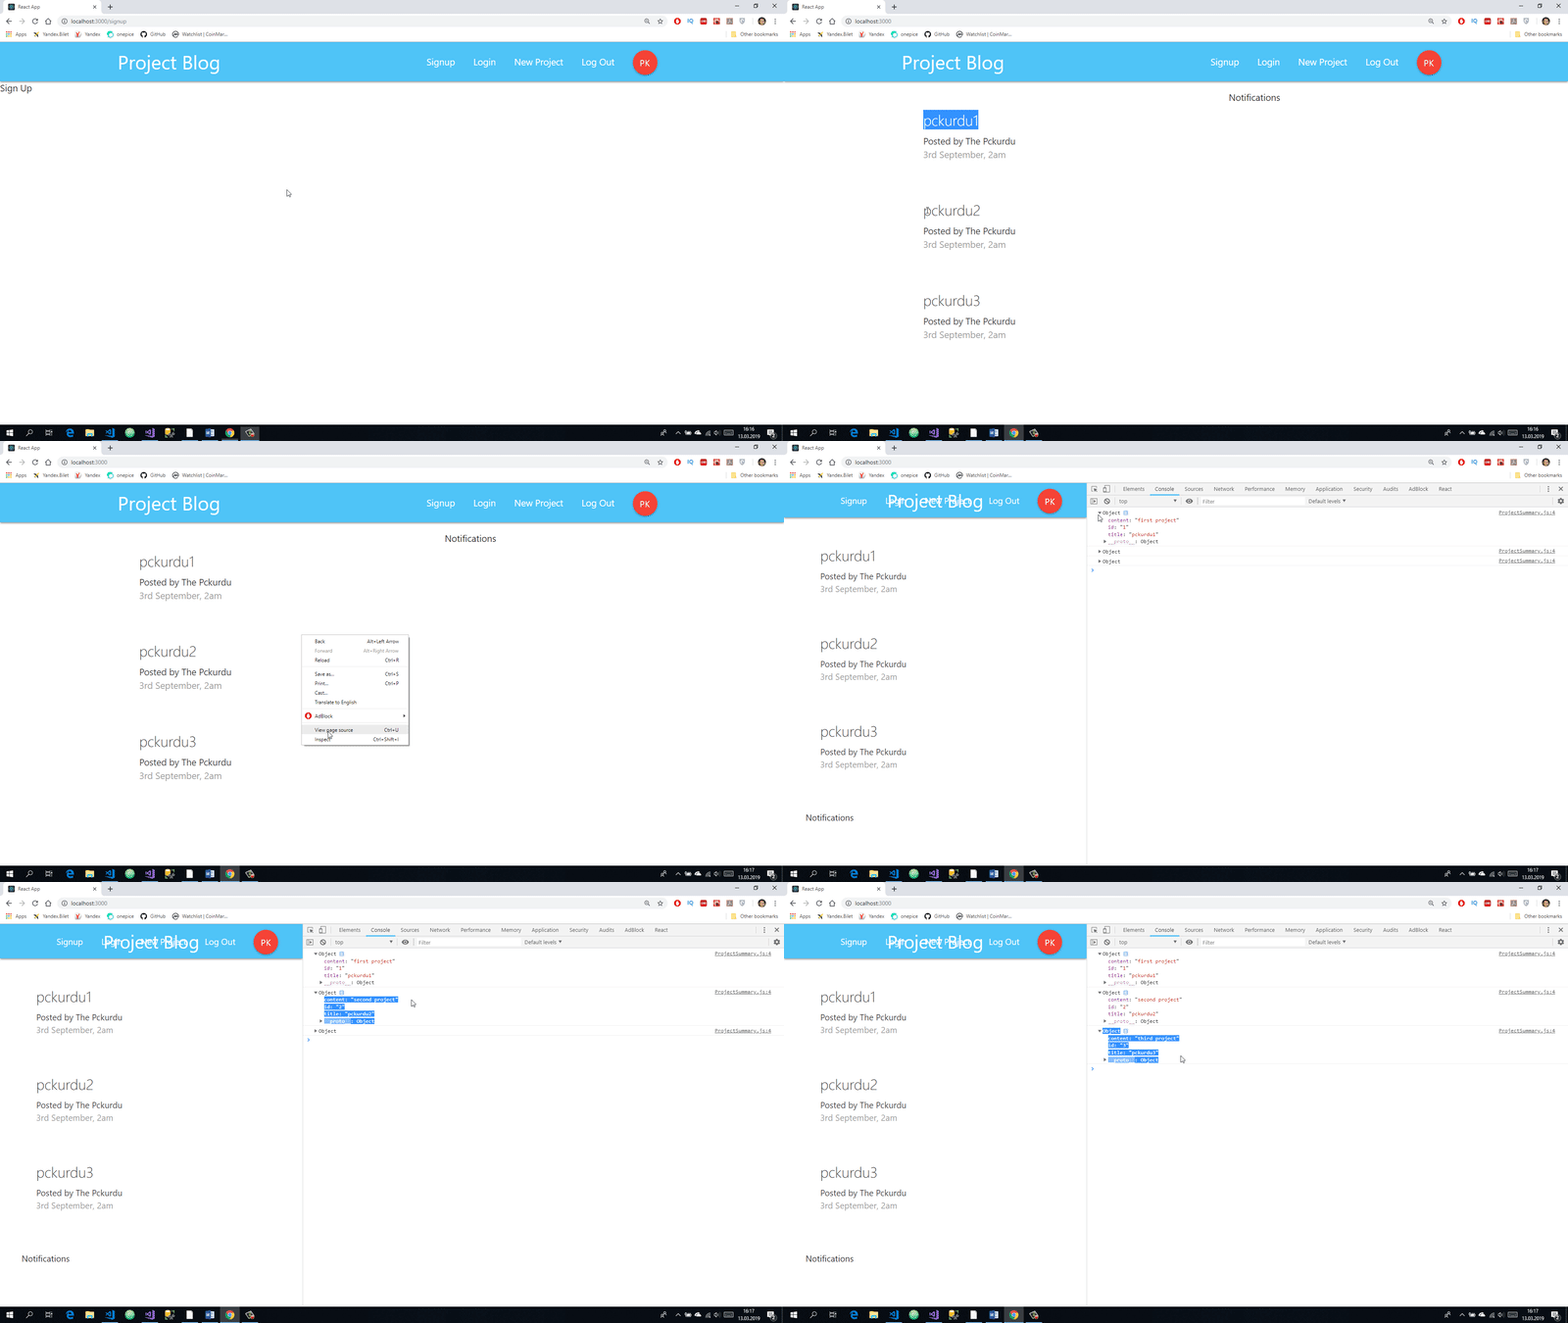
Data is now added to the props of the Dashboard page. Let's we'll print incoming data to the console.
console.log(this.props);
We can define this data in ProjectSummary.
Firstly we send this data from the Dashboard page to the ProjectList page.Then we use map because there is more than one data.
//let's use projects object
    const {projects}=this.props;
…
{/* here ProjectList Component  */}
   <ProjectList projects={projects}/>
We need to re-create the ProjectList function with this data.
In ProjectList.js
const ProjectList = ({projects}) => {
  return (
    <div className="project-list section">
    {/* we can use as much projectSummary as we want. */}
      {projects && projects.map(project=>{
        return (
          <ProjectSummary project={project} key={project.id}/>
        )
      })}

    </div>
  )
}
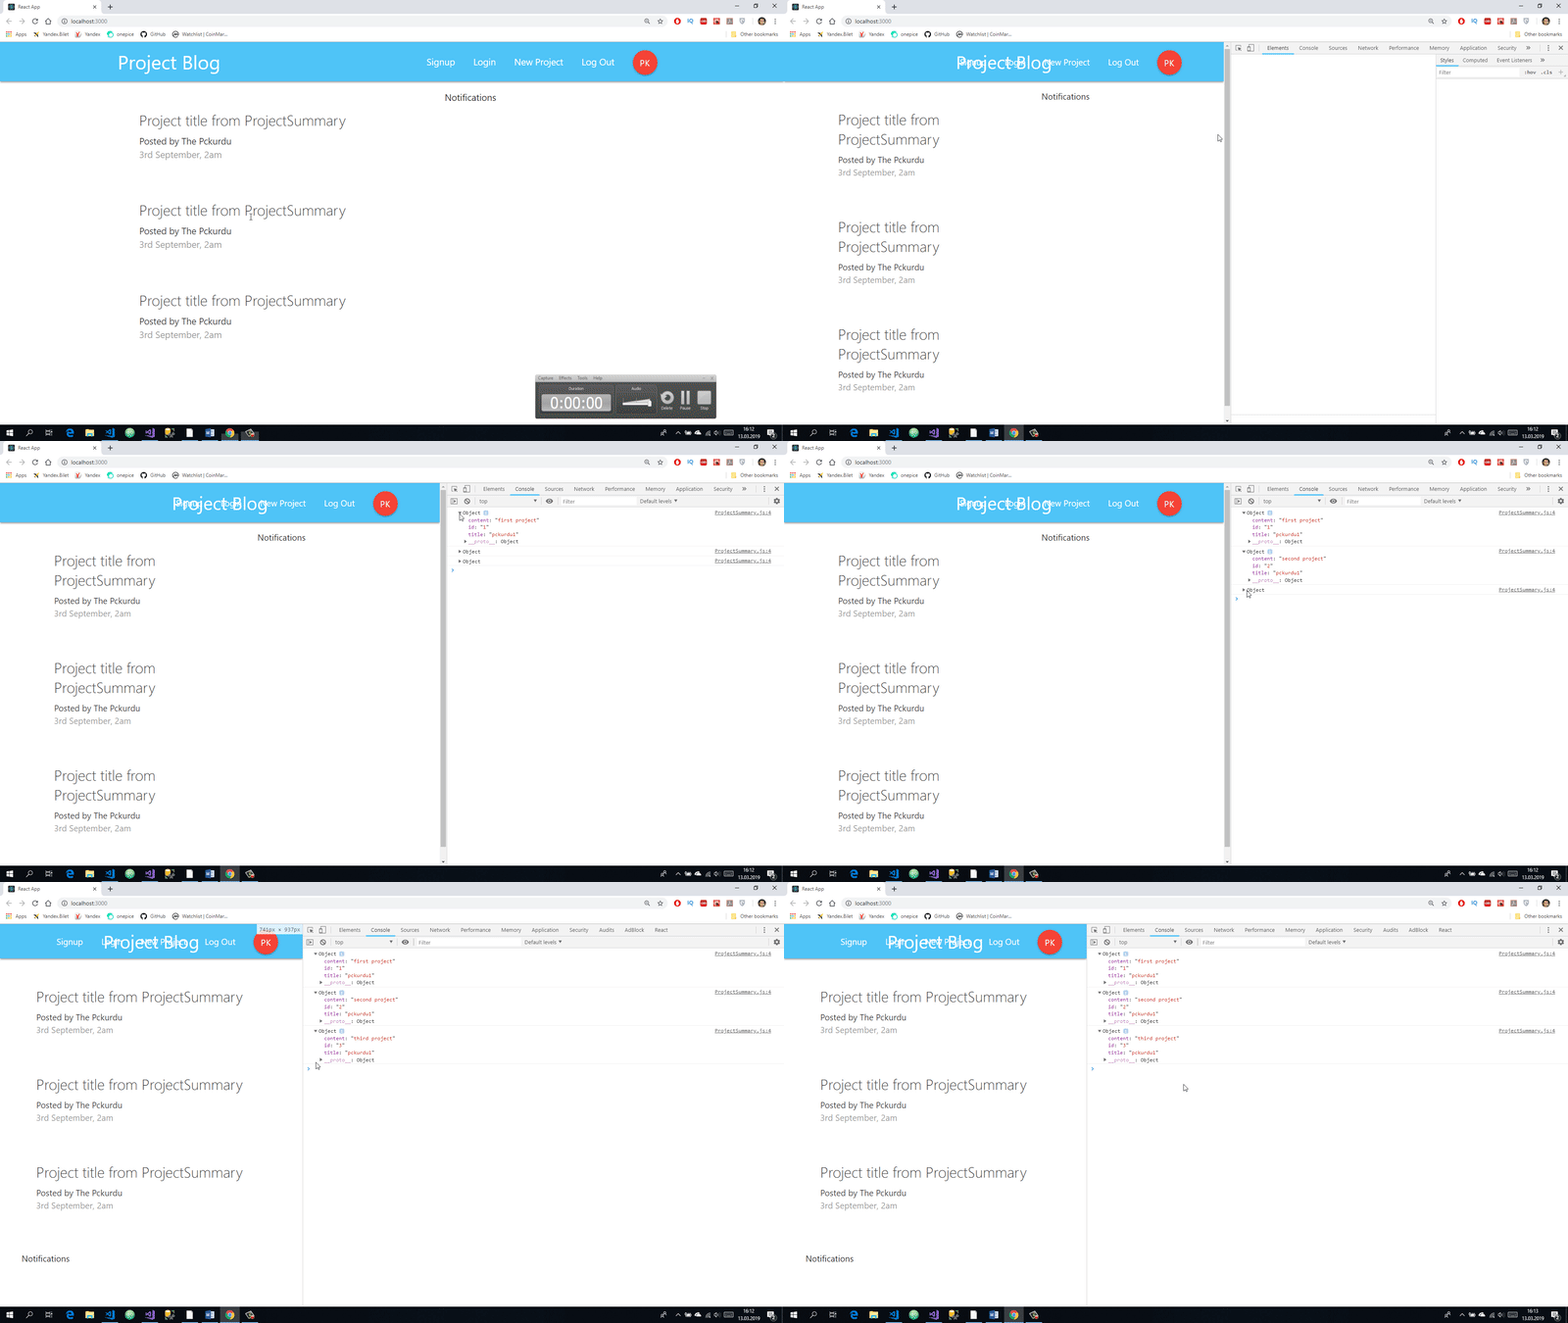
Let's print incoming data to the console in ProjectSummary.
const ProjectSummary = ({project}) => {
  console.log(project)
Finally, you need to make the necessary settings to show the data on the screen.
const ProjectSummary = ({project}) => {
  console.log(project)
  return (

    <div>
        {/* We use the card class to create a card. */}
        <div className="card z-depth-0 project-summary">
        {/* With the card-content class, we create the body part of the card space. */}
            <div className="card-content grey-text text-darken-3">
            <span className="card-title ">{project.title}</span>
            <p>Posted by The Pckurdu</p>
            <p className="grey-text">3rd September, 2am</p>
            </div>
        </div>
    </div>

  )
}
Curriculum
Proof of Work Done
https://github.com/pckurdu/Build-A-Blog-Site-With-React-Redux-Firebase-And-MaterializeCSS-Part-3
Thank you for your contribution @pckurdu.
After analyzing your tutorial we suggest the following points:
Excellent work in the development of this tutorial. The structure of the contribution is very good, making your tutorial pleasant to read. Good job!
In my personal opinion the GIF visualization demonstrates excellently what you are developing. The reader gets the idea of what was developed and explained.
Thank you for your work in developing this tutorial.
Looking forward to your upcoming tutorials.
Your contribution has been evaluated according to Utopian policies and guidelines, as well as a predefined set of questions pertaining to the category.
To view those questions and the relevant answers related to your post, click here.
Need help? Chat with us on Discord.
[utopian-moderator]
Thank you for your review, @portugalcoin! Keep up the good work!
Hey, @pckurdu!
Thanks for contributing on Utopian.
We’re already looking forward to your next contribution!
Get higher incentives and support Utopian.io!
Simply set @utopian.pay as a 5% (or higher) payout beneficiary on your contribution post (via SteemPlus or Steeditor).
Want to chat? Join us on Discord https://discord.gg/h52nFrV.
Vote for Utopian Witness!