Build An Application With React Hooks, Material-UI and Firebase (Part4)

Repository
React
https://github.com/facebook/react
Material-ui
https://github.com/mui-org/material-ui
My Github Address
This Project Github Address
https://github.com/pckurdu/Build-An-Application-With-React-Hooks-Material-UI-and-Firebase-Part4
What Will I Learn?
- You will learn to use the
Promisein javascript. - You will learn to use the
onAuthStateChangedin firebase. - You will learn to use the
useEffectin react-hook. - You will learn to use the
CircularProgressin material-ui. - You will learn to use the
history.push()in react. - You will learn to get firestore data in firebase.
- You will learn
hostingin firebase
Requirements
- text editor (I used visual studio code editor)
- Basic javascript information
- Basic react information
Difficulty
- Basic
Tutorial Contents
Hello to everyone,
Authentication has an important place in our applications. In our applications, we can have data that we don't want everyone to see. We would like to show this data after certain authentication. We must forward this authentication to a confidential page and we should not show this confidential page to everyone. Thanks to firebase authentication, we can provide this authentication and restrict access to confidential pages.
In this tutorial we will create the dashboard page and we will direct the page to those who have just authenticated and will also close the dashboard page from outside.
In dashboard, we will show the user name and the fruits that the user likes. We'll bring the user name from the displayName property, which is the result of authentication. and the user's favorite fruit from the fruit field in the document of the uid.
Finally, after completing our application, we will present our application using firebase hosting service.
Let's apply the things I explained above on the application.
One of the best things that prepares the reader for tutorial is to see the topics beforehand.
- Firebase Status Controls
- Create Dashboard Page
- Accessing User Name And Firestore Field
- Firebase Hosting
Let’s start
Firebase Status Controls
In this section we will create a firebase connection setting on the homepage. We will use the Promise structure to keep the application waiting until the connection is made. We will show the user to the loader while waiting for Firebase to respond. We will use the CircularProgress component in this loader material-ui.
Let's start by creating the function that controls the firebase situation.
firebase.js
isInitialized(){
        //hold until the process ends
        return new Promise(resolve=>{
            //firebase notifies status change
            this.auth.onAuthStateChanged(resolve)
        })
    }
The Promise() function stops the application during a process. If the process returns successfully, the data is passed to the resolve variable.
The onAuthStateChanged() function informs us of a state change in the firebase. It is located in the auth and triggered login or logout moments.
If we use the isInitialized function in the App file, we can capture state changes.
App/Index.js
import React, { useEffect, useState } from 'react'
import firebase from '../firebase'
import {CircularProgress } from '@material-ui/core'
We've imported to use the useState object to keep the firebase state, we've also imported useEffect when we need to run isInitialized() while loading the app page.
We will use the CircularProgress component while waiting to find out the application firebase status.
App/Index.js
//Let's use the useState object to keep the firebase state
    const [firebaseInitialized,setFirebaseInitialized]=useState(false)

    //Let's use useEffect to run the isInitialized function before the page loads.
    useEffect(()=>{

        firebase.isInitialized().then(val=>{
            setFirebaseInitialized(val)
        })
    })
We'll keep the firebase state worth firebaseInitialized and set it to false as the first value. In the useEffect () function, we learn the firebase state and update the useState object with setFirebaseInitialized.
If the application connects to the firebase, the firebaseInitialized object will get a value of true.
We should show the components of the application when the firebaseInitialized object is true, and if it is false, we must run the CircularProgress component.
App/Index.js
//Process of displaying components according to firebase connection result
    return firebaseInitialized!==false?(
       <MuiThemeProvider theme={theme}>
           <CssBaseline/>
           <Router>
               <Switch>
                   {/* Routing according to the path entered */}
                   <Route exact path='/' component={HomePage} />
                   <Route exact path='/register' component={Register} />
                   <Route exact path='/login' component={Login} />
                   <Route exact path='/dashboard' component={Dashboard} />
               </Switch>
           </Router>
       </MuiThemeProvider>
    ):<div id="loader"><CircularProgress/></div>
Create Dashboard Page
In this section we will create the dashboard page and perform logout operations.
On the dashboard page, we must show the displayName property of the user that we have previously set and the user's favorite fruit should be called firestore. We also have to place the button to perform the exit operations.
Dashboard/Index.js
return (
     <main className={classes.main}>
      <Paper className={classes.paper}>
        <Avatar className={classes.avatar}>
          <VerifiedUserOutlined />
        </Avatar>
        <Typography component="h1" variant="h5">
          Hello
        </Typography>
        <Typography component="h1" variant="h5">
          Your favorite fruit:
        </Typography>
        <Button type="submit" fullWidth variant="contained" color="secondary" onClick={logout} className={classes.submit}>
          Logout
        </Button>
      </Paper>
    </main>
  )
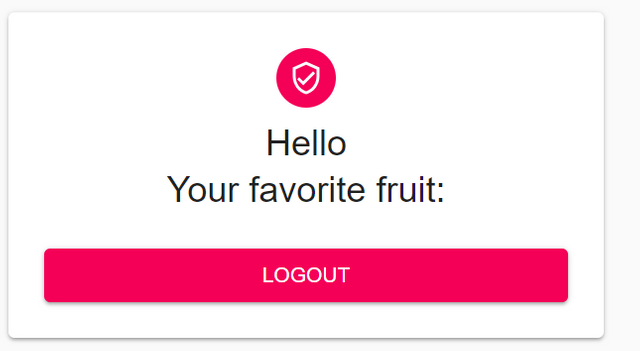
They came empty as we didn't perform data extraction. For the logout process, we have set the function to run when the buton is clicked and we have defined the button on the onClick event. In this function, we can execute the logout function defined in the firebase file and execute the logout process.
  async function logout() {
    await firebase.logout()
    //use for routing
    props.history.push('/')
  }
The history.push() function can be redirected to the route directory it receives without refreshing the page. The difference from the replace() function is that it does not refresh the page.
Accessing User Name And Firestore Field
In this section we will show the user name and fruit on the dashboard page. First, we will create functions that run the required firebase codes in the firebase file and then use these functions where necessary.
Let us generate the following function to return the user name.
firebase.js
getCurrentUsername() {
        //return displayName if user is logged in
        return this.auth.currentUser && this.auth.currentUser.displayName
    }
If currentUser is present, the user is logged in so we can return the user's name.
On the dashboard page we should first check the presence of the user. If the user is not logged in, we must specify this user and make the login page point.
Dashboard/Index.js
if(!firebase.getCurrentUsername()) {
    // not logged in
    alert('Please login first')
    props.history.replace('/login')
    return null
    }
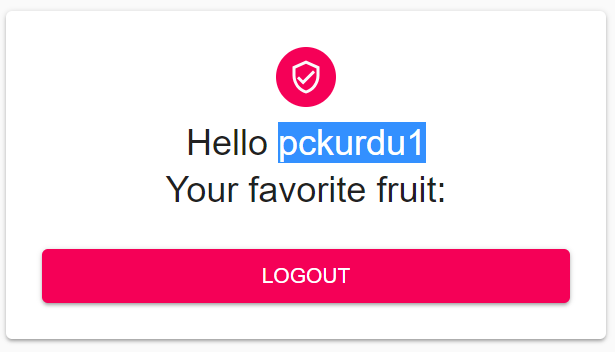
If the user has logged in, we can display the user name on the page.
<Typography component="h1" variant="h5">
          Hello { firebase.getCurrentUsername() }
        </Typography>
We used the getCurrentUsername function in firebase to display the user name in the Typography component. In order to use this function, the firebase file must be imported.
Let us define the function that will reach the firestore to use the fruit that the user likes.
firebase.js
async getCurrentUserFruit() {
        //Access to the fruit field in the user uid document in the pckurdu collection.
        const fruit = await this.db.doc(`pckurdu/${this.auth.currentUser.uid}`).get()
        //export data
        return fruit.get('fruit')
    }
We'll keep firestore data in useState object. We must produce a useState object and write the returned result to the object. We will call the getCurrentUserFruit function in useEffect because we will access the firestore when the page opens.
const [fruit, setFruit] = useState('')

  useEffect(() => {
    //getting firestore data
    firebase.getCurrentUserFruit().then(setFruit)
  })
We can now show the data on the dashboard page.
<Typography component="h1" variant="h5">
          Your favorite fruit: {fruit ? `"${fruit}"` : <CircularProgress size={20} />}
        </Typography>
During firestore data fetching process, we can run CircularProgress at the interval we expect.
Firebase Hosting
We can create a project in the cloud system using firebase hosting.
Firstly, we should install the firebase-tool toolkit on our computer. We can use this tool kit to perform firebase hosting.
npm install -g firebase-tools
Then we should make hosting settings with firebase init hosting.
If we give the answers to the questions in the picture below, we will work on firebase hosting.
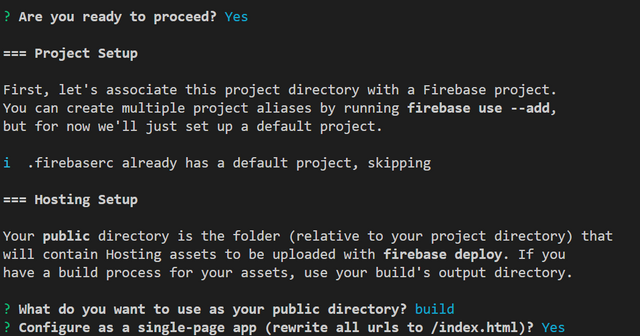
We can present the project with the deploy command.
firebase deploy
Curriculum
Proof of Work Done
https://github.com/pckurdu/Build-An-Application-With-React-Hooks-Material-UI-and-Firebase-Part4
Thank you for your contribution @pckurdu.
After analyzing your tutorial we suggest the following points:
Using GIFs to show results is definitely better than standard still images.
In the next tutorial put a different functionality without being login / registration.
Again excellent work!
Thank you for your work in developing this tutorial.
Looking forward to your upcoming tutorials.
Your contribution has been evaluated according to Utopian policies and guidelines, as well as a predefined set of questions pertaining to the category.
To view those questions and the relevant answers related to your post, click here.
Need help? Chat with us on Discord.
[utopian-moderator]
Thank you for your review, @portugalcoin! Keep up the good work!
Hi @pckurdu!
Your post was upvoted by @steem-ua, new Steem dApp, using UserAuthority for algorithmic post curation!
Your post is eligible for our upvote, thanks to our collaboration with @utopian-io!
Feel free to join our @steem-ua Discord server
Hey, @pckurdu!
Thanks for contributing on Utopian.
We’re already looking forward to your next contribution!
Get higher incentives and support Utopian.io!
Simply set @utopian.pay as a 5% (or higher) payout beneficiary on your contribution post (via SteemPlus or Steeditor).
Want to chat? Join us on Discord https://discord.gg/h52nFrV.
Vote for Utopian Witness!