How to Login Electron Application with Child Windows
Repository
Electron GitHub Address
https://github.com/electron/electron
My GitHub Address
https://github.com/pckurdu
This Project GitHub Address
https://github.com/pckurdu/How-to-Login-Electron-Application-with-Child-Windows
What Will I Learn?
- You will learn what is parent and child windows
- You will learn how to read electronda file
- You will learn what are the ipc modules
- You will learn how to install and use jQuery.
- You will learn how to use javascript foreach loop and split function.
Requirements
Difficulty
Intermediate
Tutorial Contents
In this tutorial I will show how to create child windows in electron applications and how to communicate between parent and child windows.
I thought it was an example of a better understanding of the subject. In this example I will create child window and parent window. With the child window, I will ask the user to enter the information contained in the file, and when the correct information is entered, the parent window will open.
With this tutorial you will also learn file reading in electron and parent-child window communication using IPC.
Let's coding and enjoying !
As known was built with a window BrowserWindow module in electron. To create a child window we only need to define the parent window while we create the required window.
Let's define the parent window first, then let's define the child window.
In main.js
- parent window
let win
win =new BrowserWindow({width:800,height:600,show: false})

    win.loadURL(url.format({
        pathname:path.join(__dirname,'index.html'),
        protocol:'file',
        slashes:true
}))
I set the BrowserWindow show property to false because it has to be opened after a login.
- child window
let child
child = new BrowserWindow({parent: win,width:400,height:300,frame:false})
    child.loadURL(url.format({
        pathname:path.join(__dirname,'login.html'),
        protocol:'file',
        slashes:true
    }))
We set the parent property of BrowserWindow to win so win window became parent of child window.
There is no need for a frame to login in child window so I set the browserwindow frame property to false.
The main.js file looks like this when we make the necessary arrangements to make the application work.
const {app,BrowserWindow }=require('electron')
const path=require('path')
const url=require('url')

let win
let child

function createWindows() {

    win =new BrowserWindow({width:800,height:600,show: false})

    win.loadURL(url.format({
        pathname:path.join(__dirname,'index.html'),
        protocol:'file',
        slashes:true
    }))

    child = new BrowserWindow({parent: win,width:400,height:300,frame:false})
    child.loadURL(url.format({
        pathname:path.join(__dirname,'login.html'),
        protocol:'file',
        slashes:true
    }))


}

app.on('ready',createWindows)
I set the index.html page for the parent window and I set the login.html page for the child window.
First we will code index.html page.
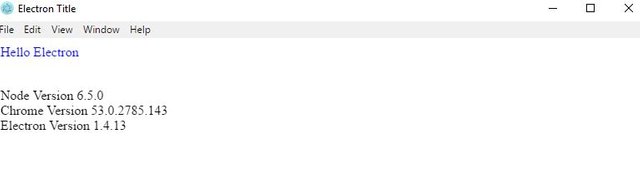
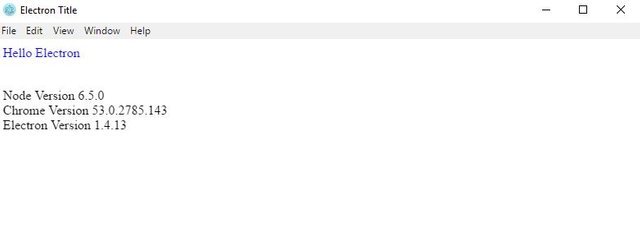
This page tell us about the versions. Let's show the node, chrome and electron versions we are using to the end user.
In index.html
<html>
    <head>
        <meta charset="utf-8">
        <title>Electron Title</title>
    </head>
    <body>
        <p style="color:blue">Hello Electron</p><br/>
        Node Version <script>document.write(process.versions.node)</script><br/>
        Chrome Version <script>document.write(process.versions.chrome)</script><br/>
        Electron Version <script>document.write(process.versions.electron)</script>
    </body>
</html>
We can access the versions with the process.version command.
The display of the index.html page is as follows.
Now let's code the login.html page.
I divide this page into four coding stages.
- Designing the page
- Coding with jQuery
- File read operations
- Communication between two windows
Step 1: Designing the page
I need to place two text and one button because the login process will be on the page. I will be using bootstrap to design html elements, so I need to load the bootstrap cdn.
Place the following code in the head section of the page.
<link href="https://stackpath.bootstrapcdn.com/bootstrap/4.1.1/css/bootstrap.min.css" rel="stylesheet"
    integrity="sha384-WskhaSGFgHYWDcbwN70/dfYBj47jz9qbsMId/iRN3ewGhXQFZCSftd1LZCfmhktB" crossorigin="anonymous">
Let's design the page.
In login.html
<div class="container">
        <br/>
        <div class="form-group">
            <label for="usr">User Name:</label>
            <input type="text" class="form-control" id="txtUsr">
        </div>
        <div class="form-group">
            <label for="pwd">Password:</label>
            <input type="password" class="form-control" id="txtPwd">
        </div>
        <button class="btn btn-default" id="btn-login">Login</button>
        <label  id="lbl"></label>
</div>
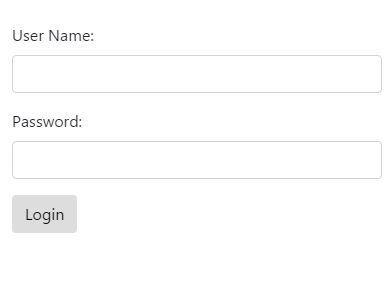
To inform the end user when an incorrect entry is made I put the label element.
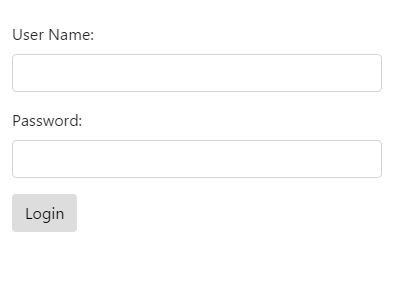
The login.html page looks like the following.
Step 2: Coding with jQuery
We use npm to use electron da jquery.
Let us now install jquery using the npm command
npm install --save Jquery
So that the node_module folder under the jquery code project is downloaded into the file.
In order to use the jQuery code on our page, we must write the command let $ = require ('jquery')
Now we can capture the moment the button is clicked with jQuery.
$('#btn-login').on('click', () => {

})
Step 3: File read operations
The file system must be imported in order to perform electron file operations. I created a file called authorities for this tutorial and I have placed the user and password information in this file.
When we read the file and make the necessary actions, we can reach the necessary data.
Let's do these necessary operations.
First we will import the file system and let us record the name of the file we will process.
let fs = require('fs')
let filename = 'authorities'
When this button is clicked, we have to check the file and read the file.
We can find the existence of the file by using the existsSync method. With the readFileSync function we can read the file. If we use the readFileSync function, we must allocate space by space.
if(fs.existsSync(filename)) {
   let data = fs.readFileSync(filename, 'utf8').split('\n')
}
If we print data to the console with console.log (data), we get the following data.
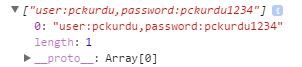
We have to return in the data with the forEach function because we have received the data in the form of an array.
First, let's separate the user and password fields.
data.forEach((authorities, index) => {
         let [ user, password ] = authorities.split(',')
         console.log(user)
         console.log(password)
}
Separated by a comma, we now have two data. I set the first data is the user variable, and the second is the password variable.
When we print the console it looks like the following.

We can now separate it from the colon to reach the raw data.
let [name1,usr]=user.split(':')
let [name2,pass]=password.split(':')
We can now compare the values from the input with the data in the file but before we get input values with jQuery.
let txtUser=$('#txtUsr').val();
let txtPwd=$('#txtPwd').val();
if(txtUser==usr && txtPwd==pass){
}
else{
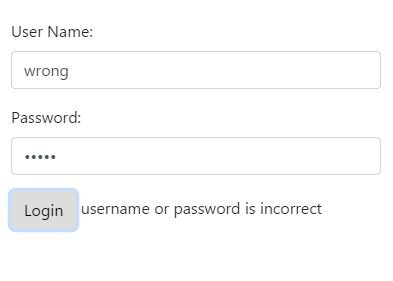
$('#lbl').text('username or password is incorrect')
}
If the data are equal, we need to open the parent window. If it is not equal I printed the label is not equal.
Here is the current state of the script tags below
<script>
            let $ = require('jquery')
            let fs = require('fs')
            let filename = 'authorities'

            $('#btn-login').on('click', () => {

                if(fs.existsSync(filename)) {
                let data = fs.readFileSync(filename, 'utf8').split('\n')


                data.forEach((authorities, index) => {
                    let [ user, password ] = authorities.split(',')
                    console.log(user)
                    console.log(password)
                    let [name1,usr]=user.split(':')
                    let [name2,pass]=password.split(':')

                    let txtUser=$('#txtUsr').val();
                    let txtPwd=$('#txtPwd').val();

                    if(txtUser==usr && txtPwd==pass){

                    }
                    else{
                        $('#lbl').text('username or password is incorrect')
                    }

                    })
                }

            })
    </script>
Step 4: Communication between two windows
In electron applications, we provide the communication between the main process and the renderer process with the IPC modules.
In our application, if the data in the file and the input values are equal to each other, we need to send this information to the main process.
We need to use the ipcRenderer module because we check the equality in the renderer process.
First we define the ipcRenderer module and then we send the equal information to the main process.
In login.html
const ipc = require('electron').ipcRenderer;
…
if(txtUser==usr && txtPwd==pass){
   ipc.sendSync('entry-accepted', 'ping')
   }
   else{
       $('#lbl').text('username or password is incorrect')
    }

…
We can now grab the message sent in main.js and close the child window and display the parent window.
In main.js
ipcMain.on('entry-accepted', (event, arg) => {
    if(arg=='ping'){
        win.show()
        child.hide()
    }
  })
So we have completed our application.
Conslusion
In this tutorial you have learned the differences between the parent-child window. You also learned about electron file processing and ipc modules.
Processing of the application is as shown in the following pictures.
First open screen when application is run.
When an incorrect username or password is entered.
When the correct data is entered.
Curriculum
Routing Operation in Electron Application
File Synchronous Operation with Electron
What are Standart Dialogs in Electron
Proof of Work Done
https://github.com/pckurdu/How-to-Login-Electron-Application-with-Child-Windows
Thank you for your contribution.
While I liked the content of your contribution, I would still like to extend few advices for your upcoming contributions:
Try to come up with new and more innovative/useful ways to utilize Electron.
Looking forward to your upcoming tutorials.
Your contribution has been evaluated according to Utopian policies and guidelines, as well as a predefined set of questions pertaining to the category.
To view those questions and the relevant answers related to your post, click here.
Need help? Write a ticket on https://support.utopian.io/.
Chat with us on Discord.
[utopian-moderator]
Hey @pckurdu
Thanks for contributing on Utopian.
We’re already looking forward to your next contribution!
Contributing on Utopian
Learn how to contribute on our website or by watching this tutorial on Youtube.
Want to chat? Join us on Discord https://discord.gg/h52nFrV.
Vote for Utopian Witness!