Creating Pop-Up Modal Window and Buttons with Alert Messages Using Semantic-UI Modal Function
Repository
https://github.com/Semantic-Org/Semantic-UI
What Will I Learn?
- You will learn how to create a web page with using modal function.
- You will learn how to use modal functions with scripts.
- You will learn how to add images and articles into pop-up text boxes with using modal function.
- You will learn how to create ui buttons with alert messages.
Requirements
- Semantic-UI v2.4.0 Minified CSS. (Latest Version)
- jQuery v2.1.3 Minified JS.
- Semantic-UI v2.4.0 Minified JS. (Latest Version)
- Gulp v3.9.1
- NPM & Node.js
- Microsoft Visual Studio Code. (or another text editor.)
- A browser for testing.
- XAMPP Localhost Server. (Control Panel)
Resources (for Windows 10)
- Semantic-UI Download Link (NPM-Node.js-ZIP-Homebrew-GIT-Gulp):
https://semantic-ui.com/introduction/getting-started.html - Gulp Installation: https://gulpjs.com/
- NPM Installation: https://www.npmjs.com/get-npm
- Node.js (NPM) Installation: https://nodejs.org/en/download/ (Includes NPM v6.4.1)
- Visual Studio Code Web Site: https://code.visualstudio.com/
- Visual Studio Code Download Link for Win x64: https://go.microsoft.com/fwlink/?Linkid=852157
- XAMPP Control Panel Server Web Site: https://www.apachefriends.org/en/
- XAMPP Control Panel Server (For Windows) Download Link: https://www.apachefriends.org/download.html
Knowledge Resources (Wiki)
- Semantic-UI Main CSS Stylesheet (v2.4.0 - Latest | Minified Edition): https://cdnjs.cloudflare.com/ajax/libs/semantic-ui/2.4.0/semantic.min.css
- jQuery Minified JavaScript Library (v2.1.3 - Minified Edition): https://cdnjs.cloudflare.com/ajax/libs/jquery/2.1.3/jquery.min.js
- Semantic-UI Minified JavaScript Library (v2.4.0 - Latest | Minified Edition): https://cdnjs.cloudflare.com/ajax/libs/semantic-ui/2.4.0/semantic.min.js
- Modal Function Settings: https://semantic-ui.com/modules/modal.html#/settings
- Modal Function Usage: https://semantic-ui.com/modules/modal.html#/usage
- Gulp Building and
semantic.jsonConfiguration Files: https://semantic-ui.com/introduction/build-tools.html - Basic Semantic-UI Parameters: https://semantic-ui.com/globals/site.html
- Alert Message Integration to Button: https://semantic-ui.com/collections/message.html
Cover Image Source
OS Requirement for Running Semantic-UI
- Linux [via PPA] (Debian, Red Hat, Ubuntu)
- Windows 7 / Windows 8 / Windows 8.1 and Windows 10.
- macOS
Difficulty
- Basic
Tutorial Contents
Welcome to my first tutorial series! In this tutorial, we created a basic web page with using Semantic-UI Modal and Alert Message functions. The Semantic UI is a framework that continues to be developed because this is open source! Semantic-UI aims to make websites more semantic. Semantic-UI coding is much more readable and understandable according to other competitors. Semantic-UI has more than 50 UI element and more than 3000 CSS option. This is the first tutorial of the Semantic-UI tutorial series therefore we will create a basic page. We will also learn about basic parameters, basic division classes and basic functions of semantic-ui. Semantic-UI tutorial series will progress from basic - intermediate to advanced. If you wish, you can access the web pages of these programs and download links for Windows from the Resources section.
Defining Semantic-UI & jQuery Libraries
  <link rel="stylesheet" href="https://cdnjs.cloudflare.com/ajax/libs/semantic-ui/2.4.0/semantic.min.css">
  <script src="https://cdnjs.cloudflare.com/ajax/libs/jquery/2.1.3/jquery.min.js"></script>
  <script src="https://cdnjs.cloudflare.com/ajax/libs/semantic-ui/2.4.0/semantic.min.js"></script>
  <title>Sargoon Semantic-UI Modal Project</title>
</head>
Creating Main Modal Button and Pop-Up Text Box Header
In this step, we need to use this script sources and Semantic-UI CSS Stylesheet to run our <script> codes. After that we have defined our title as "Sargoon Semantic-UI Modal Project" that means, this text will be shown in the tab of our web page.
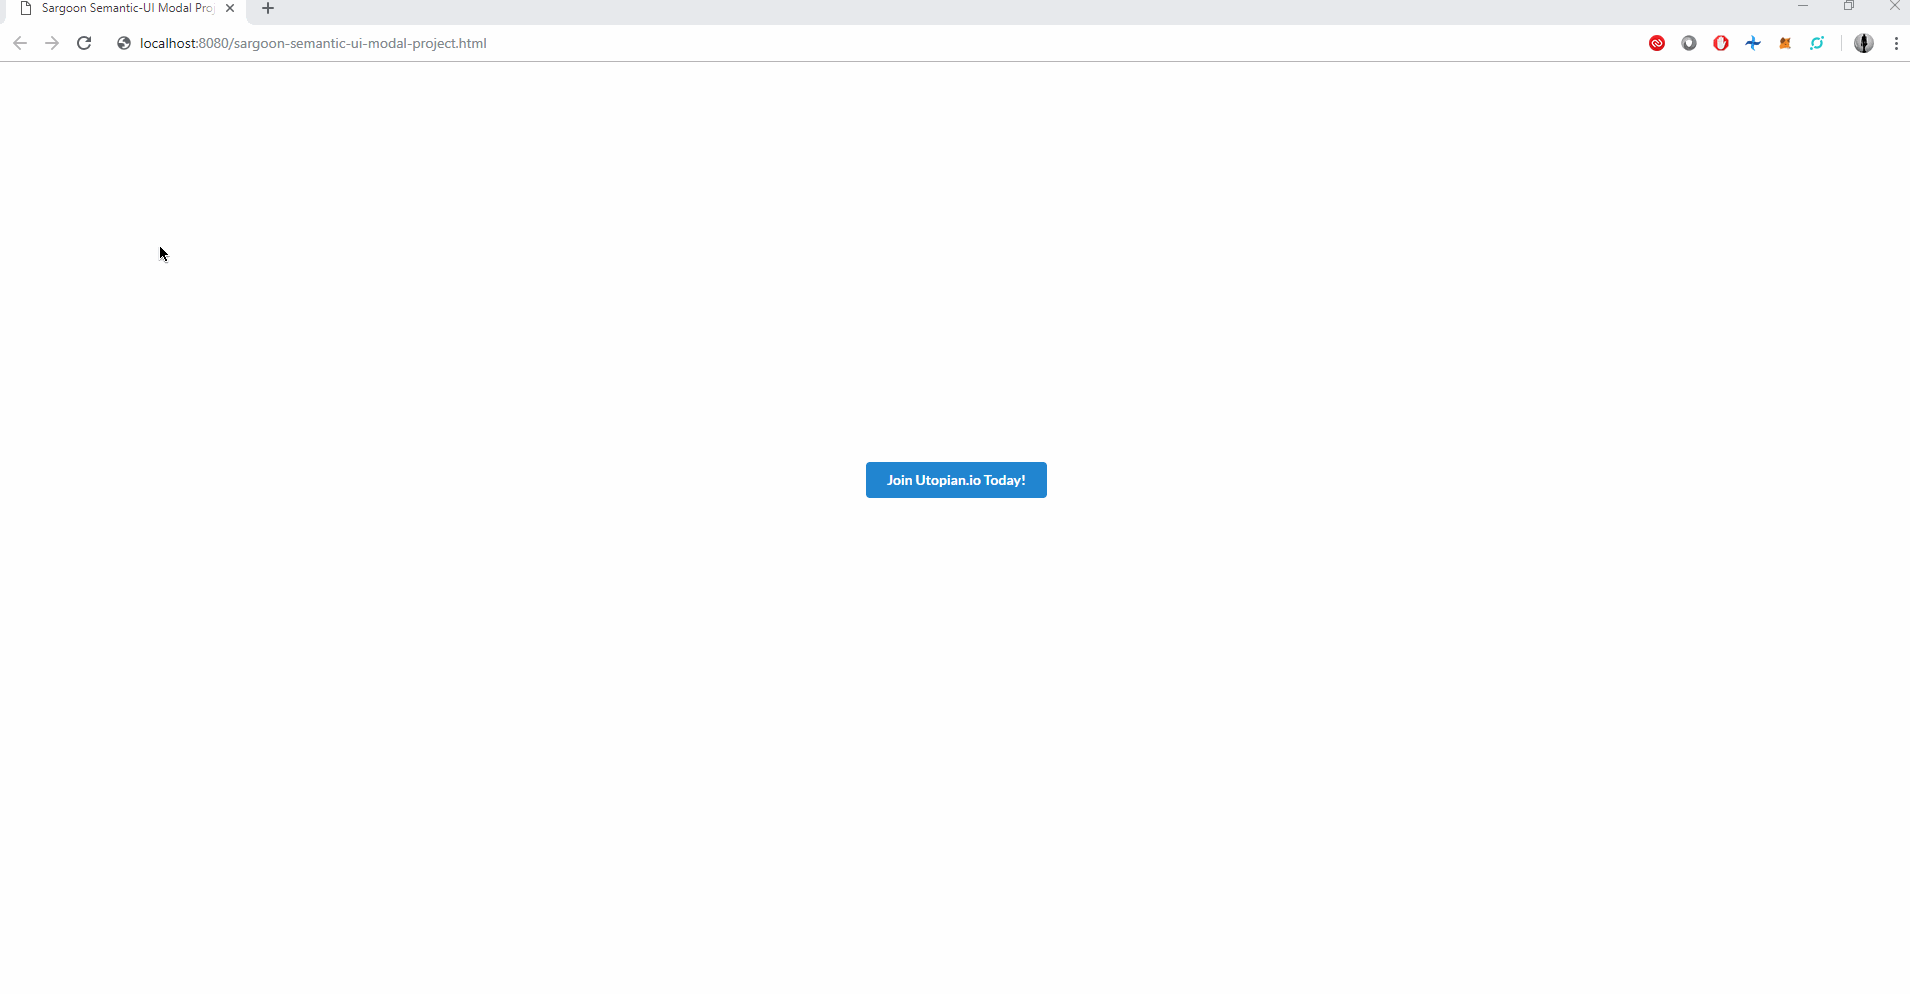
<center><button class="ui button blue" id="joinUtopian" type="button" style="margin-top:400px;">Join Utopian.io Today!</button></center>
      <div class="ui modal joinUtopian">
  <div class="header">
    Utopian.io - The Open Source Economy
  </div>
Firstly we need to define a button to open the pop-up text box, so we created an button with using <button class="ui button blue" also we defined that buttons color as blue with ui, we have used the <center> tags to add the button to the center of the page.
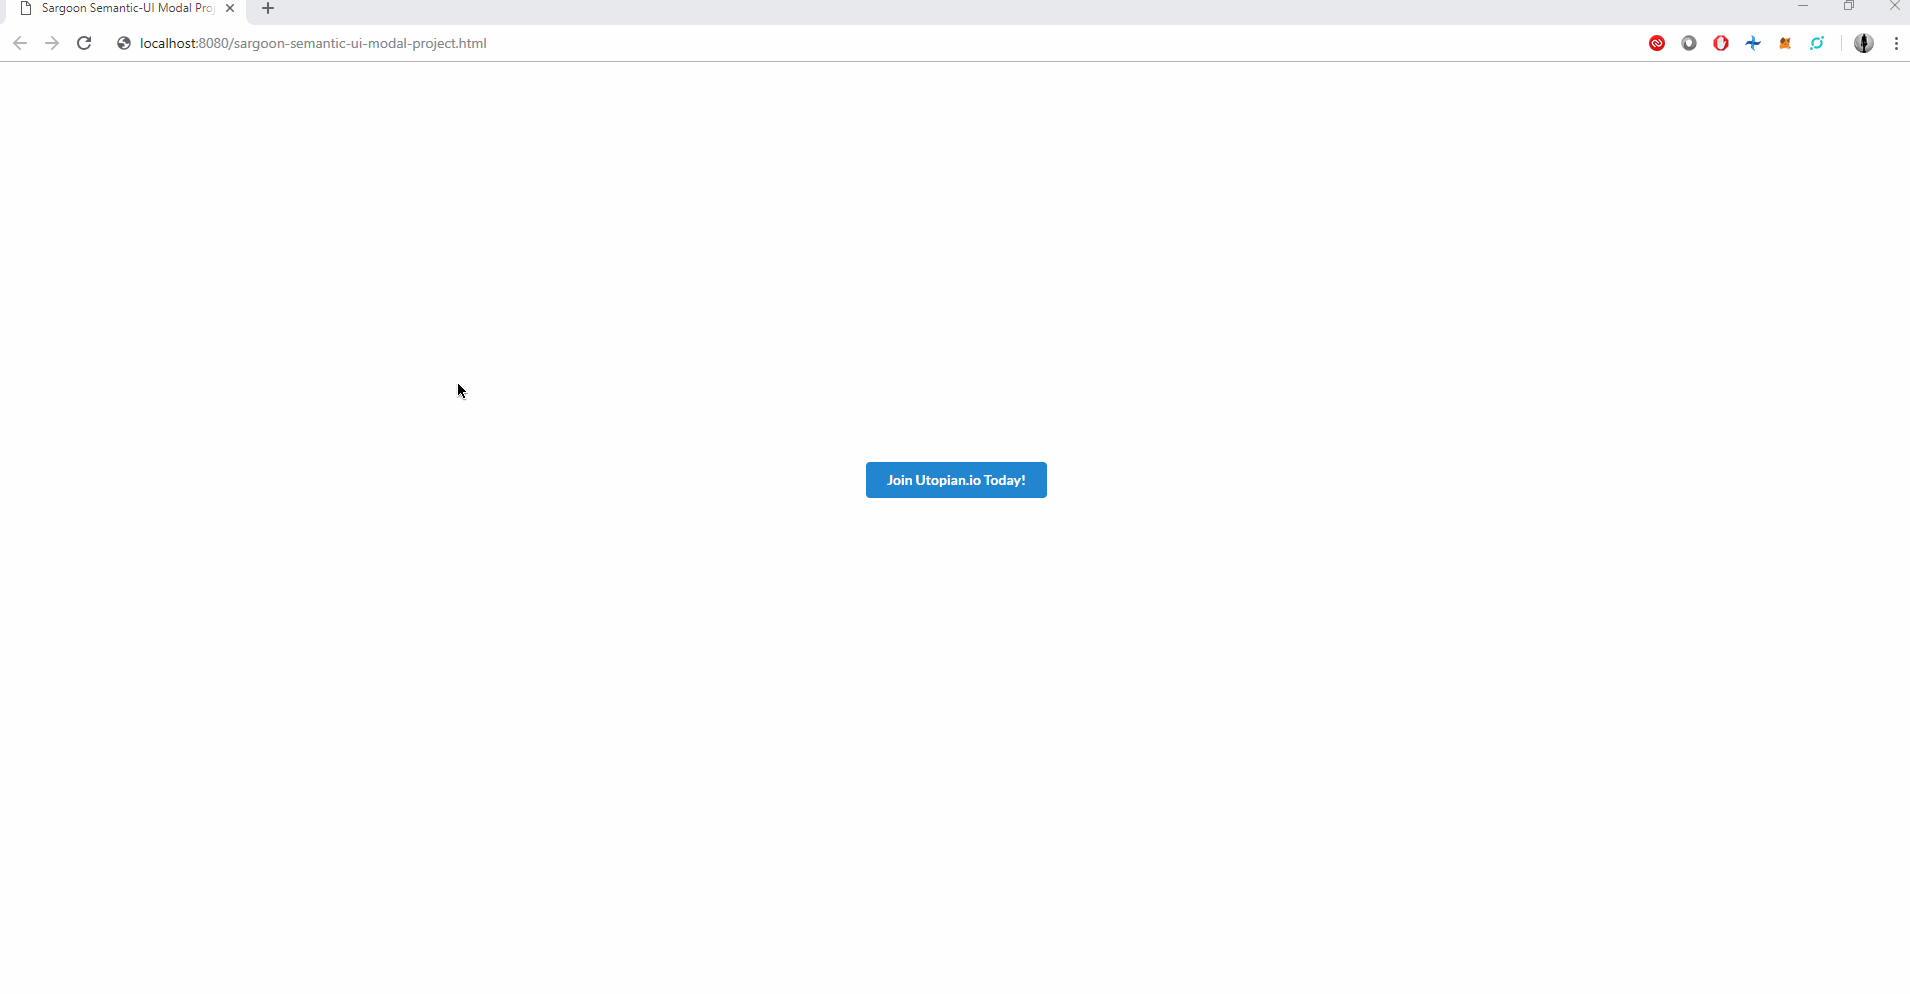
We needed to open the pop-up modal page with a button as I mentioned, so we created a button and gave the button an ID as joinUtopian. The ID we gave to button will provide us to define the script tasks (modal, $(document).ready(function()) in the script section.
After that we have created <div class... as ui modal joinUtopian, in this case, we have defined the ui modal to our button (with defining our button id as [joinUtopian]). So with defining division class as ui modal [buttonID], we can use our special modal functions in the script section.
And finally, we defined the title of the Modal Text Box as Utopian.io - The Open Source Economy. This sentence will appear at the top of the modal text box.
Adding Image Into the Modal (Pop-Up) Text Box
<div class="image content">
    <div class="ui huge image">
      <img src="https://i.imgur.com/GcK7r4f.png">
    </div>
    <div class="text">
      <div class="ui header">Which category do you prefer to contribute to?</div>
      <p><font size="4">Utopian aims to empower professionals in their contribution to the Open Source movement. Now everyone can be rewarded for contributing to Open Source projects.
        Choose your favourite category and publish your contribution by following our <a href="https://join.utopian.io/guidelines/" target="_blank">Guidelines.</a></p></font>
      <p><font size="4">Don't know how to prepare your contribution? Take a look at <a href="https://github.com/utopian-io/editor-templates" target="_blank"> the predefined editor templates</a> for each Utopian category!</p></font>
      <img src="https://i.imgur.com/iKVL6qq.png" height="62" width="80"></img>
    </div>
  </div>
In this step, we have defined division class as image content because we will add a few images into our modal text box. After defining first division class, we have defined second division class as ui huge image this code bunch is specific to Semantic-UI only. At this point we have 8 image sizing words, these words are;
mini-> Mini provides 35-pixel size for the image to be added. (smallest size)tiny-> Tiny provides 80-pixel size for the image to be added.small-> Small provides 150-pixel size for the image to be added.medium-> Medium provides 300-pixel size for the image to be added.large-> Large provides 450-pixel size for the image to be added.big-> Big provides 600-pixel size for the image to be added.huge-> Huge provides 800-pixel size for the image to be added. (We have chose this size for the image we will use.)massive-> Massive provides 960-pixel size for the image to be added. (biggest size)
After defining image size, we have added our image with using<img src="imageaddress">. Immediately after, we have defined another division class astextbecause we will add our modal text box's article here. Firstly we have defined our next division class asui header, this header will affect the inside of the modal text box so we defined the ui header as a question. After that, we have added a paragraph which is will describe the Utopian.io's purpose (I quoted this article from join.utopian.io page).
And after these operations, we finally added our last paragraph with defining<font size..as 4, we also defined Guideliness and Predefined Editor Templates sections as clickable with using<a href="relatedwebsiteadress...and finally we defined target value as _blank ->target=_blank, this means, when we click on the clickable words (Guideliness - Predefined Editor Templates) that we have created, it will redirect us to the relevant links we defined.
This is the latest state of the codes we wrote in this step. (referring to gif)
In the last code bunch we added Utopian logo to the end of the informative text with using<img src=...and we also defined the Utopian Logo's height and width values asheight="62" width="80"
Creating Approve and Deny Alert Buttons
<div class="actions">
    <button id="denybutton" type="button" class="ui negative button">I'm not interested. Don't show it again.</button>
    <button id="approvebutton" type="button" class="ui positive button">Cool! Can't wait to make a contribution!</button>
               </div>
                      </div>
As usual, we started with defining division class. We have defined div class as "actions" because we will add alert buttons (Approve/Deny). Firstly, we have defined our first button id as denybutton, this ID will provide us to assign special task to buttons in the <script> section. We will use these button IDs for defining alert messages.
We have defined our first button as deny button, so we gave that button's class as ui negative button. This class (especially negative section) is only a visual impact, the deny button will appear as red. And In the same way, we have created approve button, we defined that button's class as ui positive button, that means, this button will appear as green.
As you can see in this gif, we just added the approve and deny buttons and we will add the alert messages in the script section with using the button IDs we have defined (<button id="denybutton" & <button id="approvebutton").
Defining Script Section: Adding Alert Message Into the Buttons & Adding Special Modal Script
<script>

$(document).ready(function() {
    $("#approvebutton").click(function() {
        alert("We're glad to hear it! Welcome to the Open Source Community!");
    });
});

$(document).ready(function() {
    $("#denybutton").click(function() {
        alert("This informative text will not be shown again.");
    });
});

$(function(){
    $("#joinUtopian").click(function(){
        $(".joinUtopian").modal('show');
    });
    $(".joinUtopian").modal({
        closable: true
    });
});

</script>
In the last step, we have defined the alert messages of #approvebutton and #denybutton's. That means, when we click on the Approve button, we will receive the We're glad to hear it! Welcome to the Open Source Community! message and Immediately after, when we click on the Deny button, we will receive the This Informative text will not be shown again., as you know, this button alert message script is the same for all programming languages.
Unlike them, we have defined our special modal function, If you remember, at the beginning of the tutorial, the first ID we defined was "joinUtopian". We refer the "joinUtopian" ID to create modal script.
After that, we wrote:
$(function(){
    $("#joinUtopian").click(function(){
        $(".joinUtopian").modal('show');
    });
That means, when we click on the main #joinUtopian button, the modal will open with special transition effect, so we defined modal function as show [---.modal('show');]
And after that, we wrote our last codes for this tutorial, these codes are:
$(".joinUtopian").modal({
        closable: true
    });
});
We started to write again with $(".joinUtopian").modal({code bunch because we need to set the modal page closable state. We defined that status as true. That means, you can Ignore this modal by clicking any empty place of the page, If we define this value as false Modal will be locked to the page and you will not be able to exit the modal text box window until you refresh the page.
Final State of The Work
Last Words
Thank you very much for reading my tutorial post! I hope this tutorial will help you. This is my first tutorial post, I am looking forward to your comments and suggestions.
Curriculum
This tutorial is the first tutorial post of the Semantic-UI.
Thank you for your contribution.
Modals are easily created indeed when using Query and Semantic UI.
Below is our feedback:
Your contribution has been evaluated according to Utopian policies and guidelines, as well as a predefined set of questions pertaining to the category.
To view those questions and the relevant answers related to your post, click here.
Need help? Write a ticket on https://support.utopian.io/.
Chat with us on Discord.
[utopian-moderator]
Thank you so much for your valuable comment @mcfarhat !
I know, this tutorial is too basic but I wanted to start the Semantic-UI Tutorial Series with the basic concepts, I will consider your valuable suggestions for my next tutorial contributions.
I made a few mistakes at some points that you mentioned, because I prepared this contribution very quickly, I'm sorry for that.
I used NPM and Node.js for Semantic-UI Installation so I felt I should add NPM and Node.js into Requirements and Resources sections. I didn't mention Semantic-UI Installation because the Semantic-UI installation is simple and takes a long time.
Best Regards Sir, thank you for moderating my contribution.
Thank you for your review, @mcfarhat! Keep up the good work!
Hi @sargoon!
Your post was upvoted by @steem-ua, new Steem dApp, using UserAuthority for algorithmic post curation!
Your post is eligible for our upvote, thanks to our collaboration with @utopian-io!
Feel free to join our @steem-ua Discord server
This post has been voted on by the SteemSTEM curation team and voting trail in collaboration with @curie.
If you appreciate the work we are doing then consider voting both projects for witness by selecting stem.witness and curie!
For additional information please join us on the SteemSTEM discord and to get to know the rest of the community!
Huge thanks for your support!
Hello, as a member of @steemdunk you have received a free courtesy boost! Steemdunk is an automated curation platform that is easy to use and built for the community. Join us at https://steemdunk.xyz
Upvote this comment to support the bot and increase your future rewards!
Hey, @sargoon!
Thanks for contributing on Utopian.
We’re already looking forward to your next contribution!
Get higher incentives and support Utopian.io!
Simply set @utopian.pay as a 5% (or higher) payout beneficiary on your contribution post (via SteemPlus or Steeditor).
Want to chat? Join us on Discord https://discord.gg/h52nFrV.
Vote for Utopian Witness!
Congratulations @sargoon! You received a personal award!
Click here to view your Board
Do not miss the last post from @steemitboard: