How To Install Wordpress With Steem Payments
Wordpress is a powerful content management system that is popular with bloggers and many e-commerce shops. In this guide I will show you the basic steps for Wordpress installation on a virtual private server. Virtual private servers are usually sold as "cloud hosting" today. The advantages of using cloud hosting or "VPS" hosting include cost savings and more freedom to run your own applications compared to shared hosting.

Installation Checkpoints
- Choosing the right hosting plan with a cloud hosting provider
- Terminal Basics
- Installing Vestacp
- Configuring the domain
- Configuring Vestacp and and adding domain
- Upload Wordpress via FTP
- Configuring the domain at your registrar with or without Cloudflare DDoS Protection
- Installing and configuring Wordpress with Woocommerce and Steem payments
Choosing the right hosting plan with a cloud hosting provider
Web hosting is a highly competitive industry so naturally one might be confused on what plan or service provider to go with. Digital Ocean, OVH, AWS, and Kimsufi are all good options to provide reliable hosting. You can go with 2GB of ram for a small blog or for 8gb if launching a shop with more visitors. Prices start at $4.50 per month at OVH.
Terminal Basics
Depending on the operating system you are using, you will need to configure the software to be able to connect to your server. For example if using a linux computer, you can connect directly from terminal. Simply open one up, and type "ssh [email protected]" and hit enter. Using Windows you need to download the program putty then follow this youtube guide to familiarize yourself with the software. If you are a Mac OSX user, you will need to follow this guide.
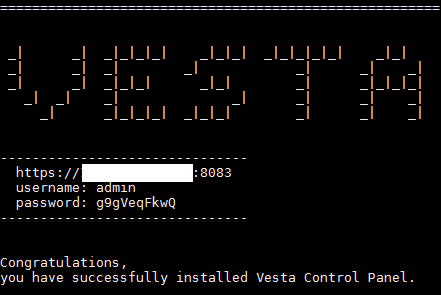
Installing Vestacp
For our installation I will be using Ubuntu 16.04. First connect to your server with the root account. and begin updating the operating system. To do this we will use the commands. This will update the software to the latest packages.
sudo apt-get update
sudo apt-get install
Next you want to set the hostname, email, and password for the control panel at the end of the script, then paste that into terminal to install the vesta control panel. You can also customize the script here.
bash vst-install.sh --nginx no --apache yes --phpfpm no --named yes --remi yes --vsftpd no --proftpd yes --iptables yes --fail2ban yes --quota yes --exim yes --dovecot yes --spamassassin yes --clamav yes --softaculous no --mysql yes --postgresql no --hostname puthostnamehere --email putemailhere --password putpasswordhere
Screenshot below.
Configuring Vestacp and adding a domain
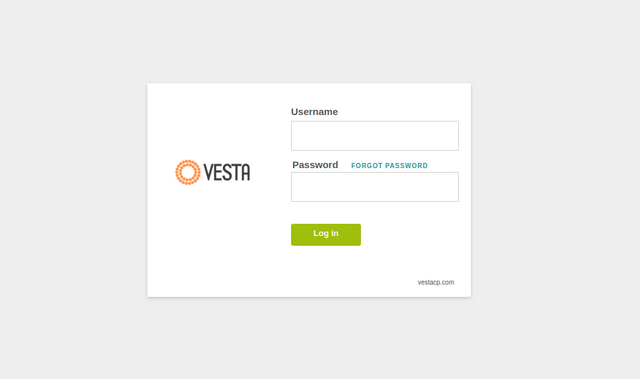
You now want to connect to your Vesta control panel. Navigate to your IPaddress:8083 . With changing IPaddress to the one provided by your host.
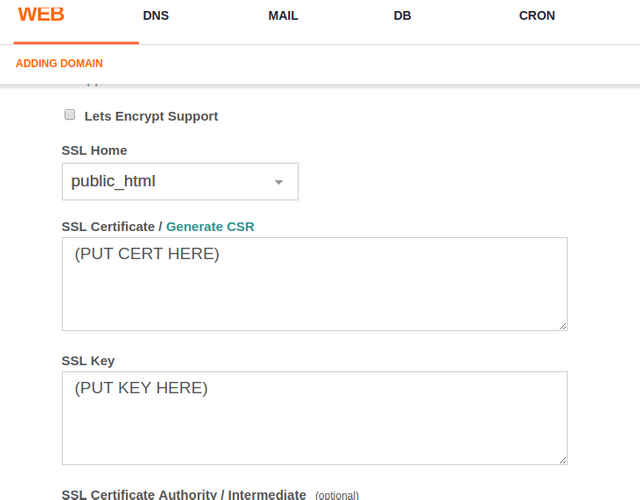
Login. Create a domain under the DNS tab. Then by selecting "Web" you can click the green + button to add a website. Input your domain name, Tick the boxes for DNS support, Mail Support, SSL support, and FTP. Create a FTP username and password and save it for later we will need it. Before you leave the page scroll to SSL, And Generate CSR, input the information requested like name and address then copy that on to the previous page into the first two boxes like shown below.
Click add, and you should see a notification that the task was successful.
Upload Wordpress via FTP
Connect to the server using the vesta ftp account you setup in the previous step. You can use Filezilla with this guide if you are unfamiliar with the process. Once your Wordpress zip file is uploaded, you can extract it using this command. Change "wordpress-4.9.6" to the current version if it has updated.
unzip wordpress-4.9.6.zip
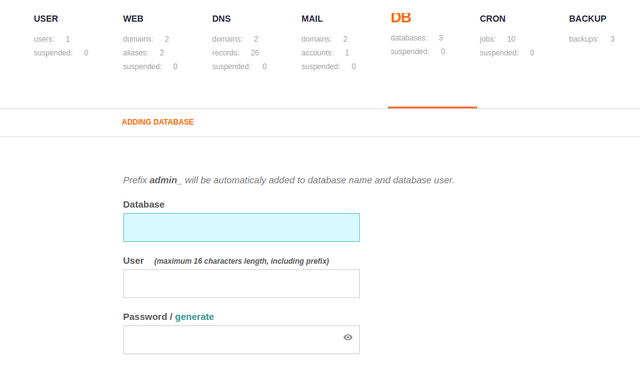
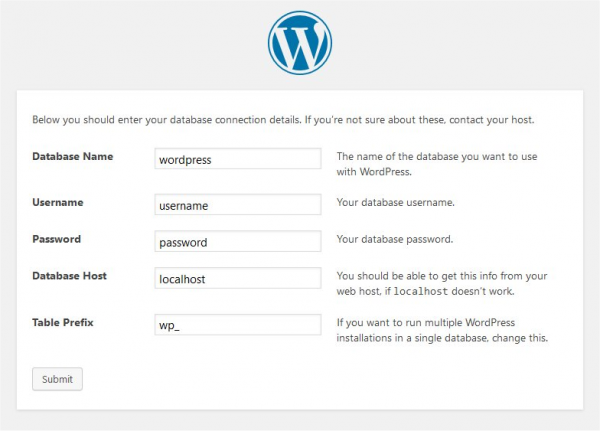
Create a MYSQL database inside VestaCP and save those credentials to insert into the wordpress configuration. See screenshot below.
Configuring the domain at your registrar with or without Cloudflare DDoS Protection
Sign-up for a domain using a registrar. If you do not want to Cloudflare then you want to go into the DNS management and add two records
First Record: Host Name — @ Points to IP Address — TTL —
Second Record: Host Name — www Points to IP Address — TTL —
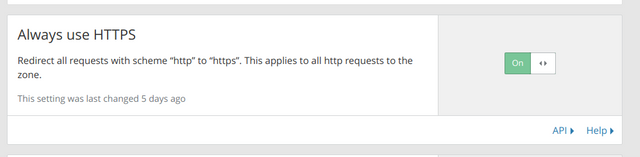
If you would like to switch eventually and use Cloudflare keep the same records set as listed above. Then sign up to cloud flare with your domain. Cloudflare will see your domain records and automatically copy them into the cloud service. You then change your nameservers at your registrar's, such as if you had Godaddy you would change from Godaddy's nameservers to the provided Cloudflare nameservers. For SSL if not using Cloudflare, you need to enable apache redirects like in this guide. If you are using Cloudflare the setting located under "Crypto" should look like this.
Installing and Configuring Wordpress, Themes, Woocommerce, then Steem payments
After loading your website and letting dns propagate it will look like this.
You want to use the data you saved in the previous step. Then click next
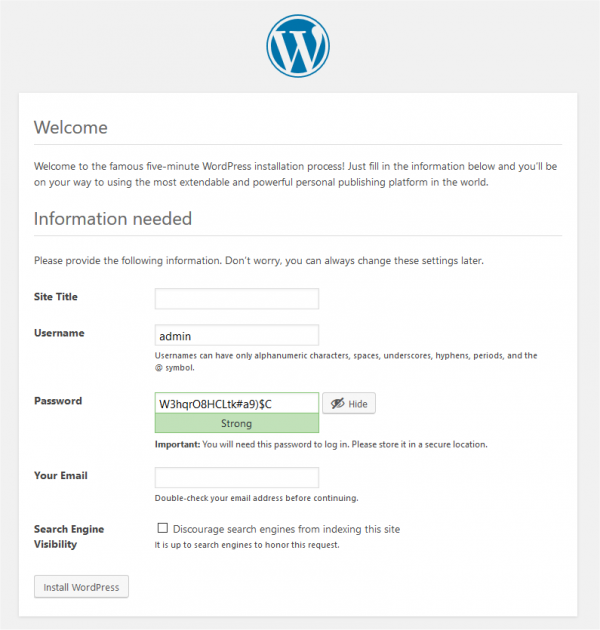
Input the site name you want, as well as the other details, and click install. Wordpress should then install the website. If you are having issues, make sure the wordpress folder is in the public_html folder. With a path of /home/admin/web/yourwebsitename/public_html . You swap yourwebsitename with the website you created in the VestaCP. You can also find out about how to fix ownership problems at the vestacp forum.
Login to wordpress by going to yourdomain/admin . Next you want to find Plugins - Add New. Then search for Steem and find the plugin "Woocommerce Steem". Install, but don't activate yet.
Search for woocommerce and install and configure that to your website's liking. You can find a basic guide here.
Now that you have woocommerce installed, lets setup the Woocommerce Steem Plugin. Navigate to Woocommerce in the admin control panel by going to Woocommerce - Settings - Payments - Steem - Setup
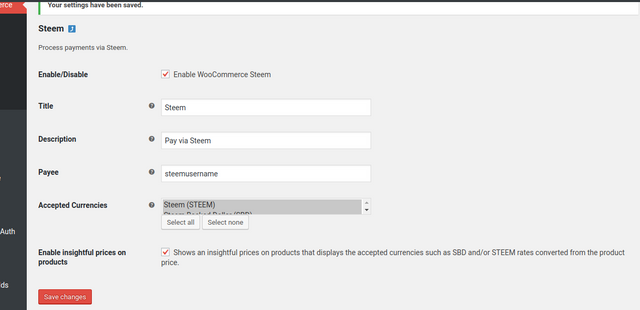
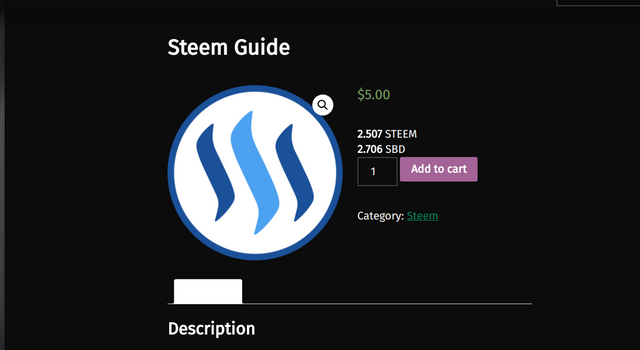
Configure the plugin by adding your steemit.com name, then create some products and a privacy page. If you setup woocommerce and wordpress correctly, it should have created a page called "Shop' , Add it the menu bar by going to widgets. Or you can load it as your home page by using the customize tool at the top of the website and going to "homepage settings" .
Congratulations, you should now have a product that accepts Steem Payments. Don't forget to follow @recrypto , as he is the one who created this fantastic Steem integration plugin.
Sweet thank you! What a great plugin
Yes it is. WordPress and steem together are a powerful tool . Thanks for stopping by.
If you donate 1 SBD or STEEM to @a-a-a I will resteem your last post to over 72,500 followers on my 2 accounts @a-a-a and @a-0-0
Congratulations @gray00: this post has been upvoted by @minnowhelpme!!
This is a free upvote bot, part of the project called @steemrepo , made for you by the witness @yanosh01.
Thanks for being here!!
My dude! This is brilliant :) I love Wordpress great post <3
Thank you for your feedback! I love wordpress too! <3