Ionic 4: Designing a DOM friendly expandable header bar

Repository: Ionic Github Repository
Software Requirements:
Visual Studio Code(Or any preferred code editor),
npm, ionic.
What you will learn:
In this tutorial you would learn about how to manage your ionic/Electron app on whatever platform you choose to target covering these major concepts
- How to create a header directive
- Implementing the directive in the module
- Implementing your header bar in the template
Tutorial
Ionic is a hybrid web application, which means that ionic is running in the web view. In light of this, no matter how well ionic developers try ,they cant get that exact native feeling no matter how they try. The best way to go is to prevent numerous dom changes depending on the devices your users may be running your app on.
On an iphone or samsung with a marvelous GPU and marvelous RAM of about 8gigg ram, the changes on the dom would not be noticed but on other average phones the lag would affect performance and make it feel less user friendly. In one of my previous tutorial i made a dismissible header bar but in this tutorial the header bar we would be making would be more user friendly and would look more native.
We cannot make the header to absolutely sync with the scroll events so we would just initiate the animation based on the scroll events. In most native apps these animated effects help improve user effect significantly and with ionic we're trying to achieve that.
At the end of this post you can find a starter project with the expandable header and press and hold event already enabled so if you would like use the starter project you're free just clone the GITHUB repo at the end of this repo.
Lets get started...
Before we progress i would like you to see a short gif of what we would be trying to achieve
In the last header tutorial done last year we used a component, in this tutorial i would be using a directive which is much better and easier to implement in the app. Directives are the names implied additional scripts you can add to already made components to make them work more suitably for your needs.
So rather than making a whole component that rises and shrinks we can simply add a directive to a normal ion-toolbar to make it rise and shrink as we please.
Creating a header directive and implementing it
A directive can be created using the ionic angular command
First make a directory
mkdir directives
navigate into it
cd directives
and create the directives
ionic g directive expandableHeader
So lets get to the logic
import { Directive, Input, ElementRef, Renderer2, OnInit } from '@angular/core';
import { Observable, fromEvent } from 'rxjs';
import { DomController } from '@ionic/angular';//Important for managing DOM events
@Directive({
selector: '[myScrollVanish]'
})
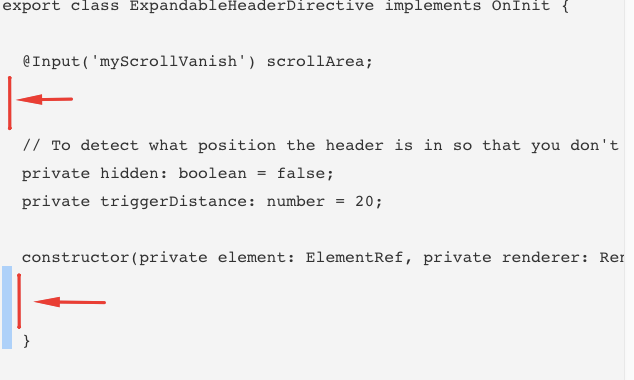
export class ExpandableHeaderDirective implements OnInit {
@Input('myScrollVanish') scrollArea;
// To detect what position the header is in so that you don't trigger too many events into the dom
private hidden: boolean = false;
private triggerDistance: number = 20;
constructor(private element: ElementRef, private renderer: Renderer2, private domCtrl: DomController) {
}
ngOnInit(){
console.log(this.scrollArea)
// Wait until 'ion-scroll' element is added to 'ion-content'
this.initStyles();
this.scrollArea.ionScroll.subscribe((scrollEvent: CustomEvent) => {
let delta = scrollEvent.detail.deltaY;
if(scrollEvent.detail.currentY === 0 && this.hidden){
this.show();
}
else if(!this.hidden && delta > this.triggerDistance){
this.hide();
} else if(this.hidden && delta < -this.triggerDistance) {
this.show();
}
});
}
initStyles(){
this.domCtrl.write(() => {
this.renderer.setStyle(this.element.nativeElement, 'transition', '0.3s linear');
});
}
hide(){
this.domCtrl.write(() => {
this.renderer.setStyle(this.element.nativeElement, 'min-height', '0px');
this.renderer.setStyle(this.element.nativeElement, 'height', '0px');
this.renderer.setStyle(this.element.nativeElement, 'opacity', '0');
this.renderer.setStyle(this.element.nativeElement, 'padding', '0');
});
this.hidden = true;
}
show(){
this.domCtrl.write(() => {
this.renderer.setStyle(this.element.nativeElement, 'height', '55px');
this.renderer.removeStyle(this.element.nativeElement, 'opacity');
this.renderer.removeStyle(this.element.nativeElement, 'min-height');
this.renderer.removeStyle(this.element.nativeElement, 'padding');
});
this.hidden = false;
}
}
The next thing would be to implement and use this directive.
For ionic 4 apps, managing modules is very important and since lazy loading is not more optional we have to deal with modules optimally.
Note: I would be importing the module into the page is is being used in, this would minify your code and help with boot time.
Implementing the directive in the pages module
As stated above we would be implementing the directive only in the page that we would be using it. So head to your homepage.ts and implement it as such
import { NgModule } from '@angular/core';
import { CommonModule } from '@angular/common';
import { IonicModule } from '@ionic/angular';
import { FormsModule } from '@angular/forms';
import { RouterModule } from '@angular/router';
import { HomePage } from './home.page';
import { ExpandableHeaderDirective } from '../expandable-header.directive';

@NgModule({
  imports: [
    CommonModule,
    FormsModule,
    IonicModule,
    RouterModule.forChild([
      {
        path: '',
        component: HomePage
      }
    ])
  ],
  declarations: [HomePage,ExpandableHeaderDirective]
})
export class HomePageModule {}
and then we can move to implementation
Implementing the directive in your template
To implement this in the template you simply use the directly part of the template in whichever component you would like to use it in
<ion-header>
  <ion-toolbar color="primary" [myScrollVanish]="scrollArea">
    <ion-buttons slot='end'>
      <ion-button (click)="delete()">
        <ion-icon name='trash'>
          <ion-badge>{{ this.selected.length }}</ion-badge>
        </ion-icon>
      </ion-button>
    </ion-buttons>
    <ion-title text-center>Press and Hold Starter</ion-title>
  </ion-toolbar>
</ion-header>

<ion-content padding #scrollArea scrollEvents="true">
  <ion-list>
    <ion-item *ngFor="let item of myArray; let i = index" (press)="onHold($event,item)" (click)="onClick($event,item)">
      <h2>{{ item }}</h2>
    </ion-item>
    <div class="nothing" *ngIf="myArray.length < 1">
      <h2>
        Nothing Here
      </h2>
    </div>
  </ion-list>
</ion-content>
Hopefully everything should work from this point and you can leave a comment if you have any issues implementing this yourself. You can however download this with my hold and select feature from the last tutorial as a starter template
GITHUB REPO
Thanks for reading
.gif)
Thank you for your contribution @yalzeee.
We've been reviewing your contribution and suggested the following points for your next tutorial:
Your tutorial is quite short for a good tutorial. We recommend you aim for capturing at least 2-3 concepts.
The first GIF you put in your tutorial is very small. The reader sure will not realize what you want to show. We suggest you put the GIF a bit higher.
The comments in the code are very important, and they help the less experienced readers to better understand what you are developing. We suggest you put comments in your contribution in the next tutorial.
Why do you give the line breaks in your code? It is important that your code to be indent.
The functionality you explain is simple. It would be important to put more features in a single tutorial when the features you will be explaining are basic.
Thank you for your work in developing this tutorial.
Looking forward to your upcoming tutorials.
Your contribution has been evaluated according to Utopian policies and guidelines, as well as a predefined set of questions pertaining to the category.
To view those questions and the relevant answers related to your post, click here.
Need help? Chat with us on Discord.
[utopian-moderator]
Thank you for your review, @portugalcoin! Keep up the good work!
Hi @yalzeee!
Your post was upvoted by @steem-ua, new Steem dApp, using UserAuthority for algorithmic post curation!
Your post is eligible for our upvote, thanks to our collaboration with @utopian-io!
Feel free to join our @steem-ua Discord server
Hey, @yalzeee!
Thanks for contributing on Utopian.
We’re already looking forward to your next contribution!
Get higher incentives and support Utopian.io!
Simply set @utopian.pay as a 5% (or higher) payout beneficiary on your contribution post (via SteemPlus or Steeditor).
Want to chat? Join us on Discord https://discord.gg/h52nFrV.
Vote for Utopian Witness!
Congratulations @yalzeee! You have completed the following achievement on the Steem blockchain and have been rewarded with new badge(s) :
You can view your badges on your Steem Board and compare to others on the Steem Ranking
If you no longer want to receive notifications, reply to this comment with the word
STOPVote for @Steemitboard as a witness to get one more award and increased upvotes!