Construct a Simple Move-In Checklist App for Tenants: Part 2, Making the App
If you have a Property Management business you may ask tenants to accomplish a move in checklist/inspection of the unit to allow them to document any property damage as a sign of good faith so they can protect their security deposit. While a paper checklist can be used for this task, paper forms lack the ability to capture pictures and automate the capture of this important information for both the tenant and landlord. If you run a property management agency, using a paper form becomes another administrative burden to track and manage. Taking 3-4 hours to develop a simple Move-In Checklist app for your tenants will save your business time in the long run.
This is the second part in a two-part series. The first part gave an overview of how the app works. This post will cover how to make the app on the AppSheet platform.
Part 2: Making the App
The post assumes you understand the basic funcitonality of AppSheet and how to use it. If you are just learning about AppSheet please check out this video for a good first primer on how to use the platform. You will also find several other resources that will help you to learn and leverage this powerful tool.
Data Tables and User Settings
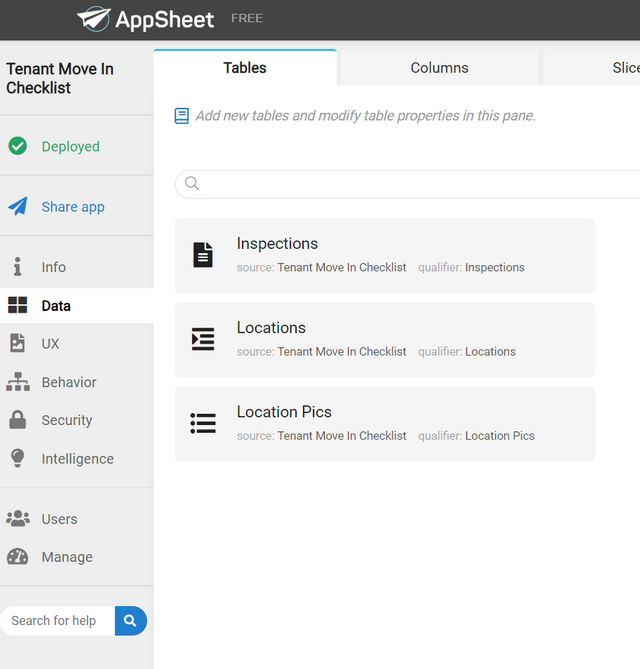
3 tables will be needed to record data for this app. Inspections, Locations, Location Pics and a couple of User Settings columns. The Inspections table maintains the top level data for each inspection while the Locations table will record the specific details for each location such as "Dishwasher" or "Master Bedroom". The Location Pics is a simple table that will store the picture data for each of the Locations in the "Location" table. Lastly the User Settings will be setup to record 2 inputs "Agreement_ID" and "Last Name".
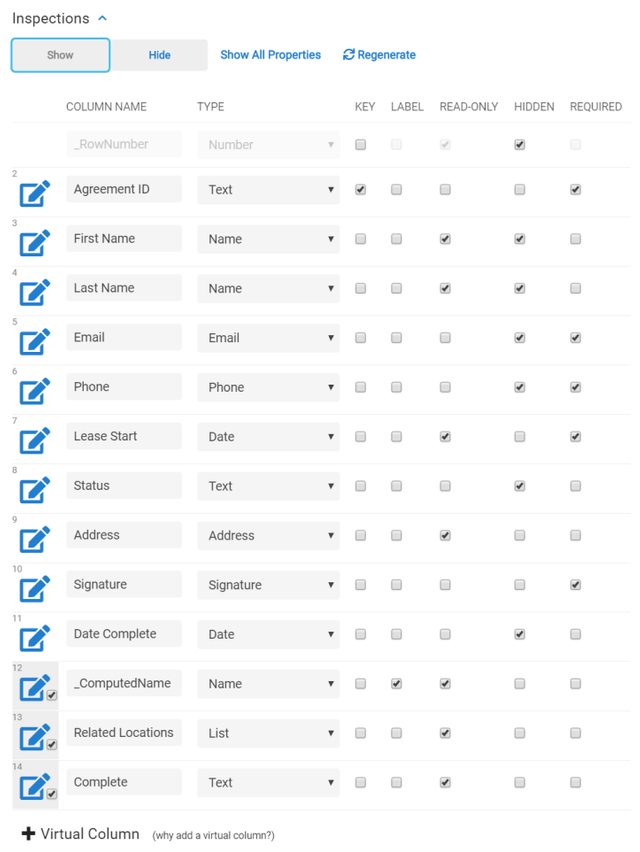
The Inspections tables will have the following columns and types. This table is used to record the top level inspection data for each move in checklist. Location of the checklist, Names, contact info, basic lease agreement, and status of the inspection and the Completed date. The "Related Locations" column will be automatically generated when you create the reference column in the following table. The "Complete" column is used to give the user a message on whether the checklist is Inprogress or Compete. You can use this formula to create that message.
=if([Status]="Complete","Checklist Complete!","Checklist Inprogress")
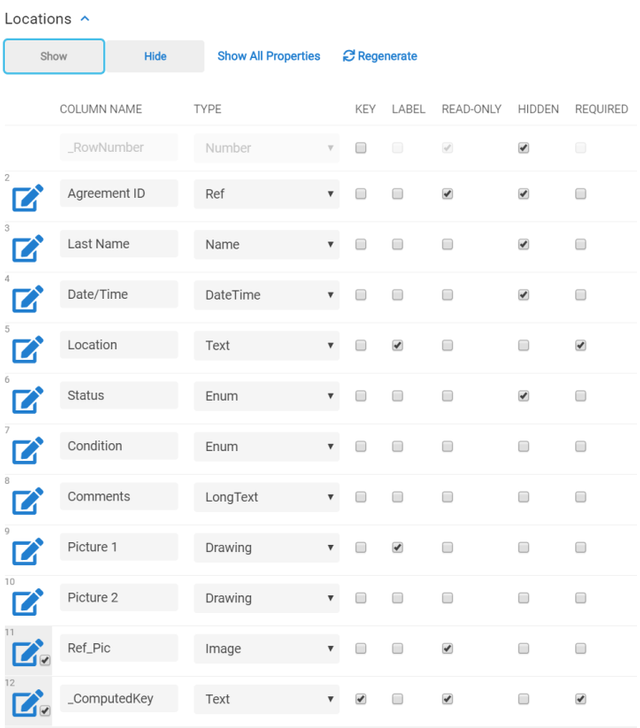
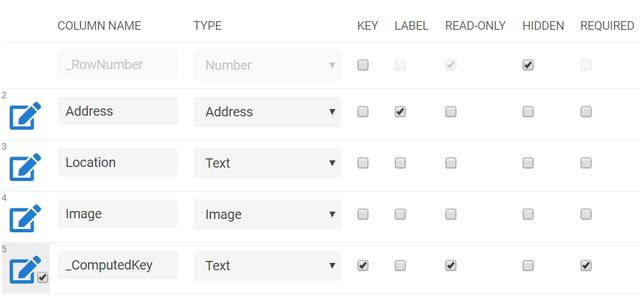
The next table you will create is the locations table. This table records each of the individual rooms or appliance condition for each inspection. As mentioned above, the "Agreement ID" column should be a reference column referencing the "_ComputedKey" column from the Inspections table which will create the "Related Locations" column in the prior table. The "_ComputedKey" in this table is the concatenation of "Agreement ID" and "Location" columns. The other columns are straight forward with one I would like to emphasize. The "Ref_Pic" column is virtual and will reference the next table "Location Pics". This is important so we can keep a static set of pictures for each type of location at a specific property. Here is the formula to use for this
=lookup(lookup([Agreement ID],"Inspections","Agreement ID","Address")&[_thisrow].[Location],"Location Pics","_ComputedKey","Image")
The last table is "Location Pics". As covered above, this is the table that simply records the pictures for each specific location. The "_ComputedKey" is just a concantenation of "Location" and "Address."
Next, the User Settings should be 2 columns that record text inputs "Agreement_ID" and "Last Name". These will be used as a security filter to prevent any other user from seeing other tenant data. The Inspections and Locations tables should have a security filter that filters out all data that does not have those two User Settings.
Slices, Views and Actions
Now that we have the data structure setup its time to add the views. I put slices and views together because it is important to remember that you should only show what the user needs to see. Having too much displayed makes any app more confusing. One should always work backwards by thinking about how to create the best user experience and then developing the data to support the interaction. Since this app is a checklist, there is only 2 main views to create for the user to interact with: the "Move In Checklist" and the "Finalize" view. The Settings view will be automatically created. Ensure you set the app to display this view when the user opens the app.
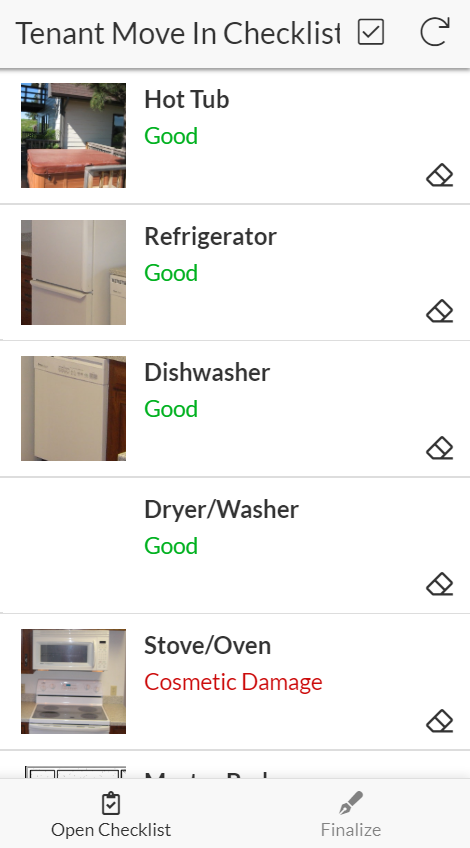
The "Move In Checklist" view is what you are expecting, the actual checklist that the tenant will be using. First you will want to create a slice that has only the "Agreement ID, Location, Ref_Pic, Date/Time, Condition, Comments, Picture1, and Picture 2. Then you will create a view with the following setup:
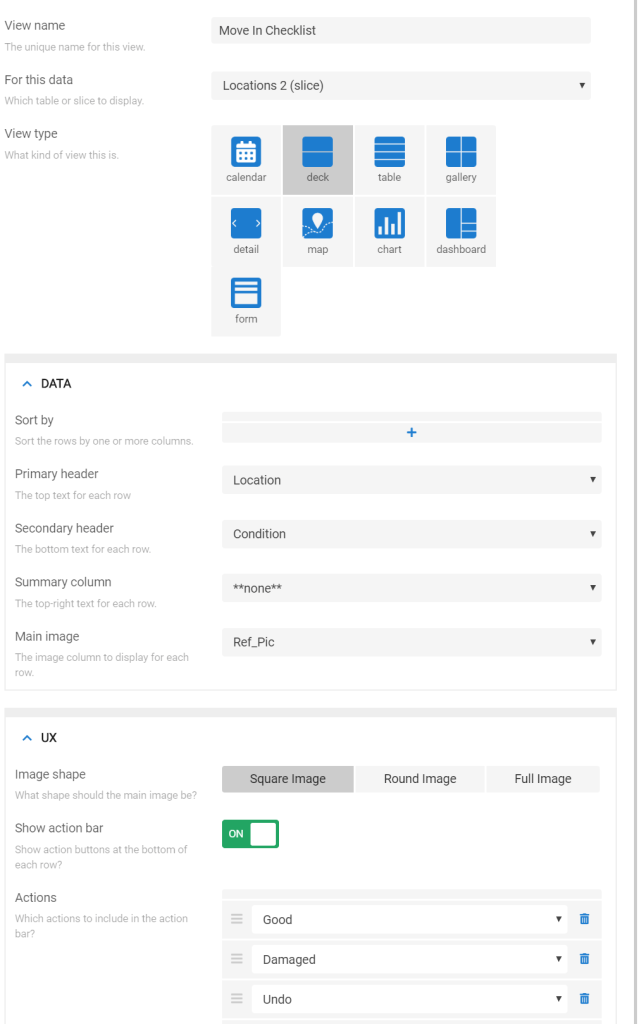
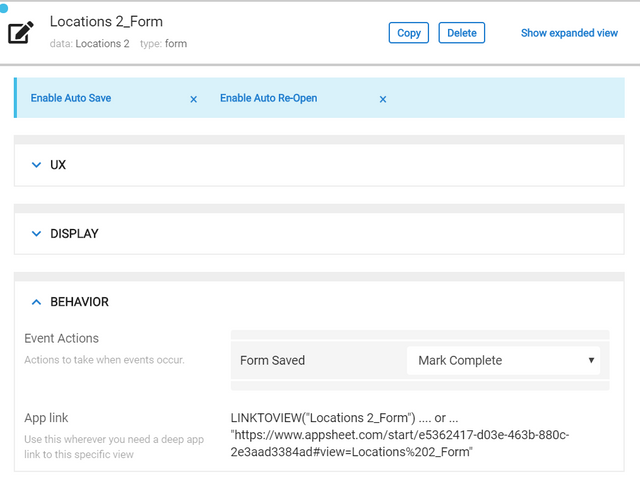
The actions in this view are what gives the user the ability to mark locations as "Good", "Damaged" or will give the ability to "Undo" if they accidentally hit any of the prior two actions. The "Good" action marks the "Status" and "Condition" columns as "Complete" and "Good" respectively. The "Damaged" action marks the "Status" as "Awaiting Details" and takes them to the "Edit" view form. "Undo" is simply an action that clears all of the fields so the user can re-input if needed. After this you will need to find the form created for this slice and then change the Event Actions section to "Mark Complete" which is an action that will mark the status complete for that location.
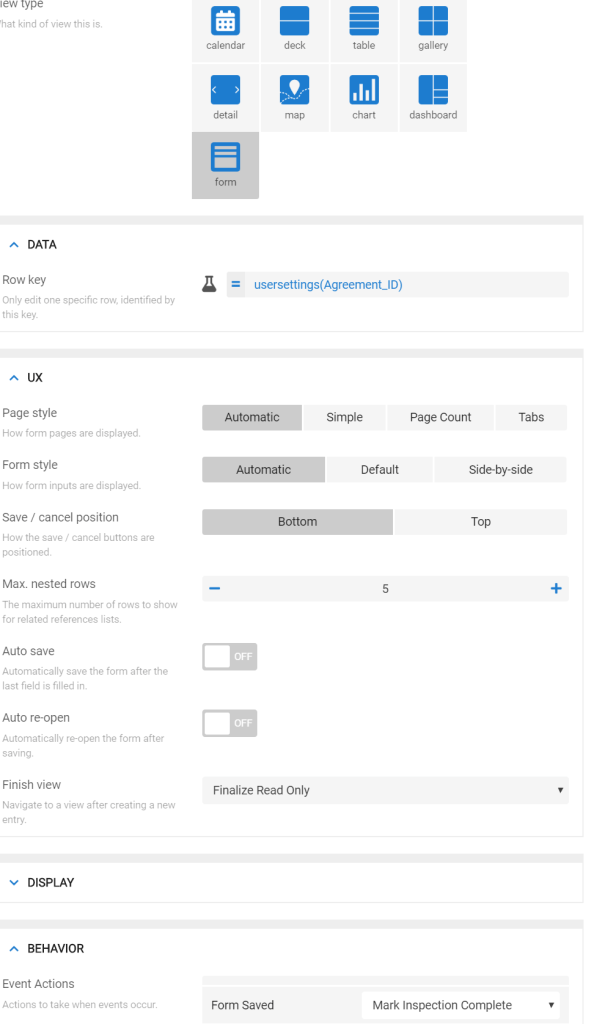
The "Finalize" view allow the tenant to sign off on the checklist to finalize what they recorded. Agreement ID, Lease Start, Signature, Date Complete" are columns that should be shown in a slice to keep the view as simple as possible. A couple of unique aspects to this view are that the row key needs to be equal to the Agreement ID User Setting and when the form is saved it should use the action "Mark Inspection Complete" which is an action that changes the status to Complete and sets the "Date Completed" column to the current date.
Reports
Lets not forget the final product. We want a form equivalent to the paper form. The one thing automated apps can do well is to reproduce the legacy versions such as paper copies. While some tenants may not want a paper copy, there are some that do and it is important that the app provides for those tenants. To create this you just need to create a workflow that will activate when the "Inspections" table column "Status" is changed to "Complete". You can then have the workflow email a PDF attachment of the data to the Email column. Below is the template that will create a PDF of the data mimicking a paper form. Using "Start:" followed by the Reference Locations column tells the template to use all columns from that related table until it sees "<<end>>".
Move In Checklist for Agreement <<[Agreement ID]>>
<<[Address]>>
<<[Date Complete]>>
Tenant: <<[First Name]>> <<[Last Name]>>
Email: <<[Email]>>
Phone: <<[Phone]>>
Lease Start: <<[Lease Start]>>
Areas Inspected
<<Start:[Related Locations]>>
<<[Location]>>
Condition: <<[Condition]>>
<<[Picture 1]>>
<<[Comments]>>
<<[Picture 2]>>
<<end>>
I have inspected the property at <<[Address]>> for the items listed in the preceding checklist. I certify that the above record is accurate.
<<[Signature]>>
<<[First Name]>> <<[Last Name]>> | <<[Date Complete]>>
That's it! Creating simple apps is that can make your customers interactions simpler and can pay huge dividends, not only for the professional look, but also your company workflow. In addition as a property manager, If you develop a maintenance app on Appsheet you can have any findings from this checklist app move into the maintenance app for a maintenance technician to assess at a later date. This will help your company stay responsive and give a good impression to your customers.
If you like the concept of low-cost mobile tools for your business, but do not have the time to create an app, CryptoCoach provides a service that will develop custom tailored apps for your business workflow. Please contact [email protected] or call 707-200-7978 for a free consultation.
[](https://steemit.com/@richellis) Web: http://www.cryptocoach.cc Memo.Cash: https://memo.cash/profile/16A3J6ZCj3udFABRVc2zRK9fkWMZD5czJ7 Minds: https://www.minds.com/richellis Yours: https://www.yours.org/@richfromcryptocoach
Thank you so much for participating the Partiko Delegation Plan Round 1! We really appreciate your support! As part of the delegation benefits, we just gave you a 3.00% upvote! Together, let’s change the world!
@richellis You have received a 100% upvote from @botreporter because this post did not use any bidbots and you have not used bidbots in the last 30 days!
Upvoting this comment will help keep this service running.