CREATE ASTONISHING PHOTOGRAPHS ON YOUR LIVING ROOM TABLE WITH CUTOUTS
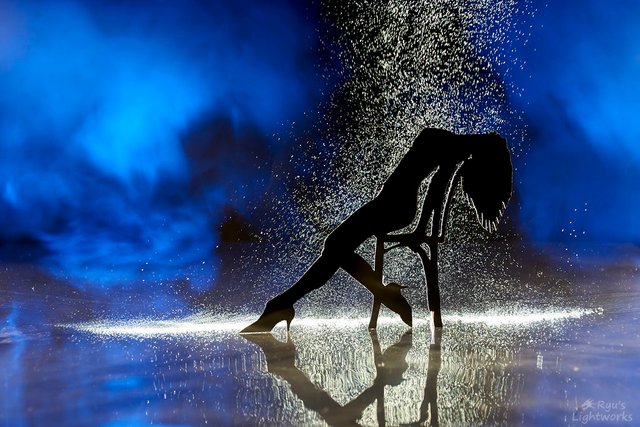 This is an instruction on how to create cutouts for dioramas that use lightpainting techniques to create astonishing photos.Lightpainting is an advanced photographic technique that can create a lot of stunning effects that combine manually applied light with real elements. So basically everything you can imagine can somehow be created in a photo using such techniques, and also without ever toughing the photo with any kind of image manipulating software. This shot was done entirely in camera, only things done with the raw file was nudging the white balance and contrast a bit (and adding the watermark obviously).In this tutorial I will take you through the steps of creating the photo you can see here. The process consists of creating a cutout using cardboard to have a main subject in the photo and also taking the photo itself. You can find the tools used in this shot and a description on how I achieved the effects seen in the photo.
Step 1: Materials Needed for the Cutout
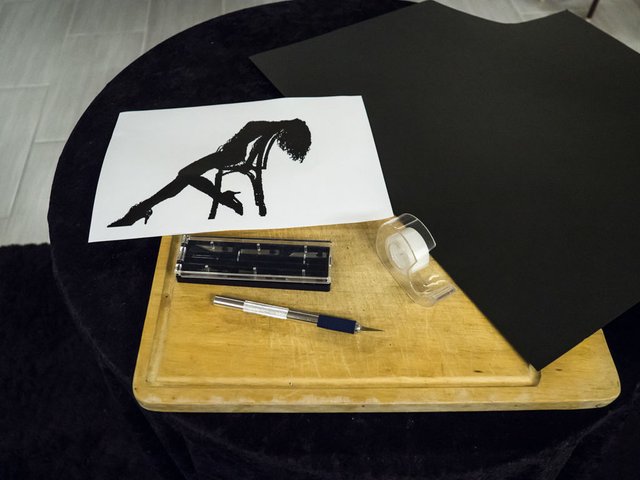
- black cardboard
- x-acto knife with a sharp (fresh) blade
- silhouette to cut out
- tape
- cutting board
- patience!
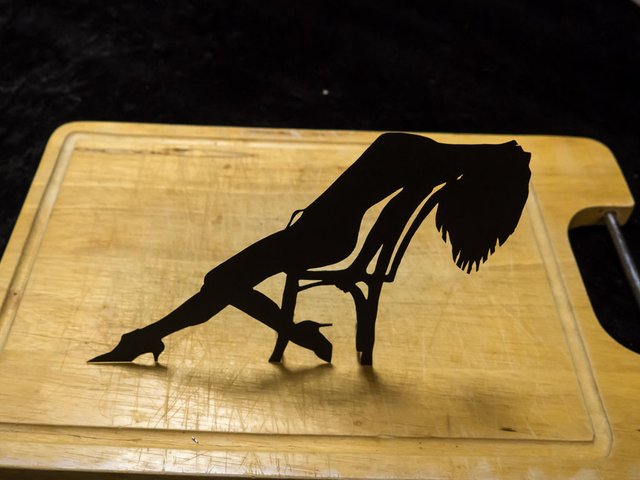
In this example I have chosen a famous scene from the movie "Flashdance". Basically you can use any kind of silhouette for this as long as it fits into your scene you want to create. To get the best results and make your life a bit easier aim to create the cutout at the correct size. Here the table has to stretch over the whole photo so the best size for the cutout was about the size of an A4 sheet of paper.
Step 2: Preparing the Cutout
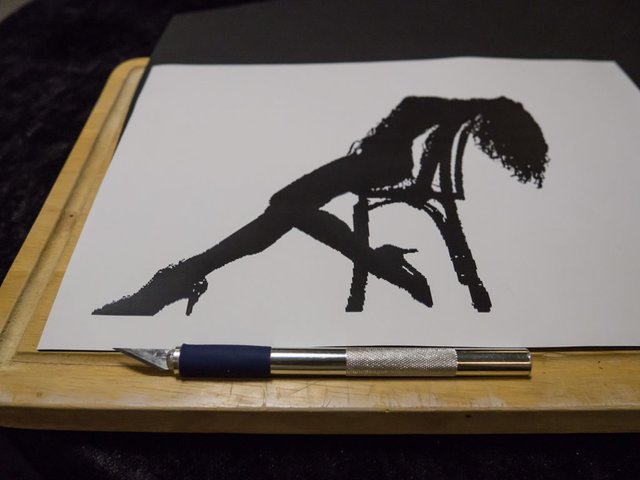
Place the cardboard on the cutting board and put the print of the silhouette over the cardboard. It is best to align edges of the silhouette with edges of the cardboard to save material. in this case the bottom of the shoes and the end of the legs of the chair were aligned with the bottom edge of the cardboard.If you keep a little pressure on the paper it should not be able to move while cutting. But it is best to do the whole cutting in one go, otherwise it might be hard to align the already cut out pieces with the remaining. If you need to take a break or have more complicated silhouettes you can use tape along the edge of the paper to keep it in place. Keep in mind that cutting through the paper will loosen some parts so plan the parts that you tape down accordingly.
Step 3: Doing the Cutting
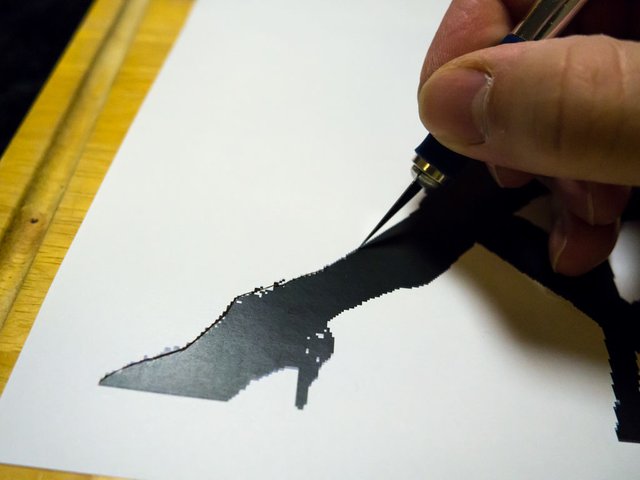
The best way to cut out a silhouette is to not lift the knife on a continuous circumference. Keep a little pressure on the blade so it cuts through the paper and the cardboard at the same time. It is no problem if the cardboard does not get cut all the way through at a few points, this can be corrected later.On round cuts cut slowly in one continuous movement, it is better to turn the the cutting board if the angle of your arm gets uncomfortable then to stop the movement. Only ever lift the knife when you reach a sharp corner along the edge of the silhouette or if the circumference. is complete.Start with inner areas, in this example it is best to start with the white parts between the woman and the chair, because the paper looses stability as you cut away parts of it and it might move if not taped down properly.
Step 4: Prepare the Cutout for the Shot
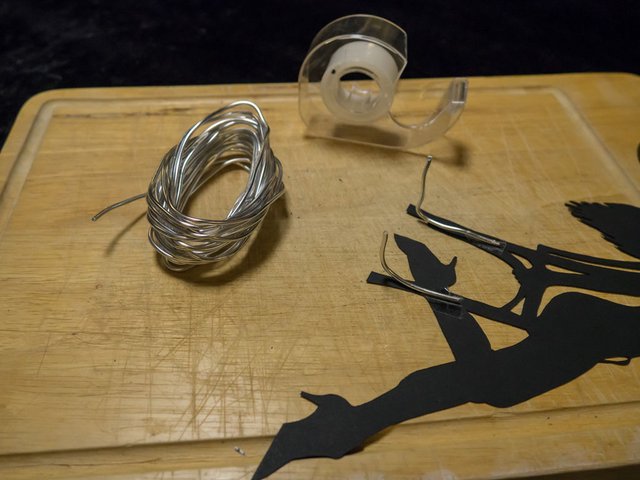
In order to use the cutout in a photo in most cases it has to stand upright. One of the best ways to do this is to use small pieces of wire taped at the back of the cutout. You can get easy bendable wire in art stores, here they go by the name of "silver wire". For this cutout two small pieces were enough to give the cutout enough stability to support it