3D Cryptocurrency Coins Part 3 || Blender Tutorial || How to import FBX and normal maps
Hello everybody!
I noticed that someone contacted me on Sketchfab. She/he got problems at importing the Coins and adding the texture. I think some people are not used to Blender or trying it for the first time. That’s why I made a little tutorial how to import .fbx files in Blender and using the normal maps.
Prequel:
This is the third part: How to model and texture cryptocurrency? Before you start to read this post, I recommend to read the first two parts. In my first post I explain how I model the coins in Blender. In my second post I talk about how I use Substance Painter and how I made the normal maps.
Part #1: Tutorial Coin Modelling
Part #2: Tutorial Coin Texturing
If you are not interested in the tutorial rather in downloading and use my coins, please visit my Sketchfab (download them for free) profile.
Side note:
What is Sketchfab?
Sketchfab is a great realtime rendering web based application. I felt in love with the Sketchfab community, the workers and all the nice rendering options. And the cool thing is, everyone can use it. If you are interested in 3D, I really really recommend Sketchfab.
Goal:
My goal is to give you cryptocurrency coins as 3D models for free. I modelled them in Blender and painted the textures in Substance Painter. If you currently working on something about cryptocurrency and you need them for your game, advertisment, YouTube videos or whatever, just follow this link to my Sketchfab profile and get them.
Credit me:
You are allowed to use them for whatever you like. But it would be cool, if you credit me. Use my Sketchfab link.
What do you download?
You get the files .fbx and .pngs (seven normal maps and seven low poly coins)
What software did I use?
I used the software Blender. It is a free software.
The normal maps are made in Substance Painter. Unfortunately this software is not free. But you can download the trial version.
How did I model them (Tutorial)?
Please read the first part. :)
How did I texture them (Tutorial)?
Please read the second part.
For the ones, who are not interested in how I made them, you don't have to continue reading. Now the little tutorial for beginners follows. :)
Before I start, I will give you some fundamental tips (for beginners):
- To select one object in Blender (geometries, cameras etc.) use the Right Mouse Button.
- Middle Mouse Button is to rotate the view around the object.
- Shift + Middle Mouse Button is to move the view.
- 'a' is for select or deselect all objects
- 'x' is to delete objects
- 'g' is to move selected objects
- 's' is to scale selected objects
- 'r' is to rotate selected objects
- Shift + 's' is to change the 3D cursor [that little red white circle] (if you add a new object, it will appear at the 3D-cursor). I always click Shift + 's' and then choose ‘curser to center’. Don’t mess your energy and time too much with that right now. It is important, when you are more experienced.
- Shift + 'a' is for adding objects
It is only a small tutorial (but a lot of screenshots I took for you) and please consider that there is always more than one way. So, if someone else knows a better way, please let me know. This tutorial talks about how to clean the scene, import .fbx files, change the renderer, using nodes, what kind of nodes and how to add them.
Step one:
Open a new fresh scene and delete all objects.Go to “File” in the top left corner and select “New”.
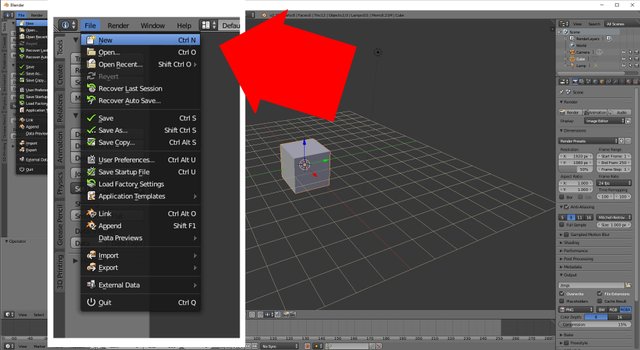
Now you should have a fresh and new scene, that looks like the following picture. You got one cube, camera and light.
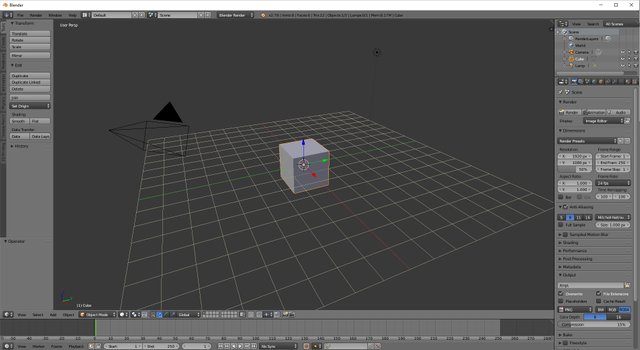
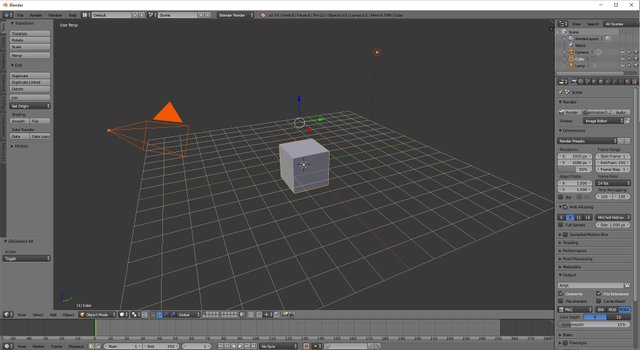
For the beginning please delete all objects by pressing “A” (select or deselect all objects in the scene). When you hit “A” all your objects should have orange outlines.
…and hit “X” (for deleting).
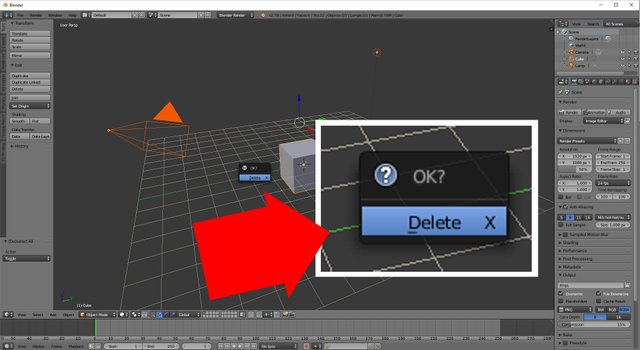
Now your scene is empty.
Step two:
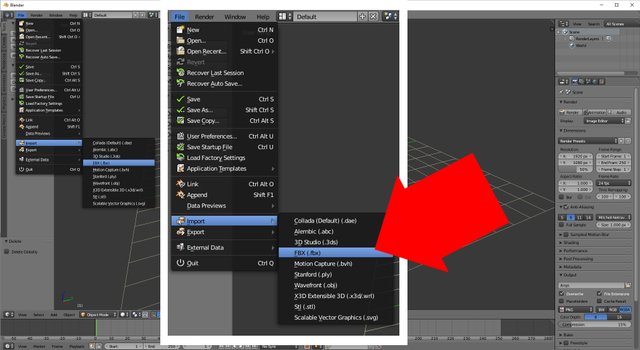
Import .fbxGo to “File” → “Import” → “FBX”.
Your object should be inside your scene now.

If the object is rotated, you will move your view or object. Moving the view is: press your middle mouse button (MMB) and move your mouse.
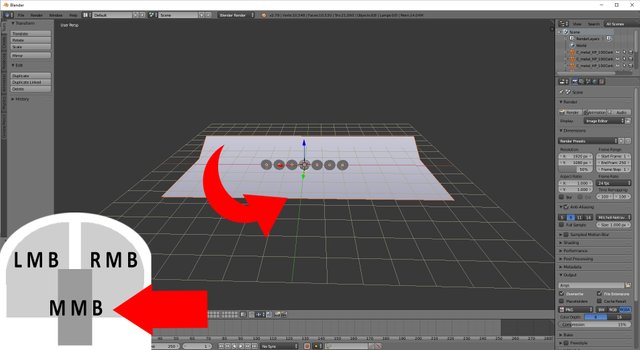
Moving the object is: select your object, press “R” (for rotation) → then press “Z” (for z axis) → and type on your numpad 270 for degrees. Type whatever you like. You can type one or 90 degrees. It depends on how much you want to rotate your objects. You can use your mouse, too.
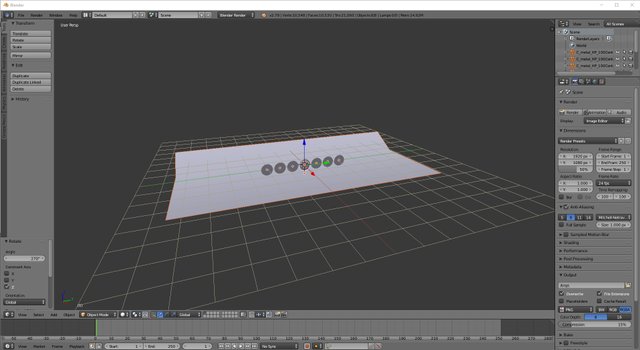
Consider that all your objects are selected. You can also rotate your objects in top view. Change your view to “top view” by pressing “7”. Press now “R”. You are able to rotate only in z axis. To go back in your old view: use “MMB” and move your mouse.
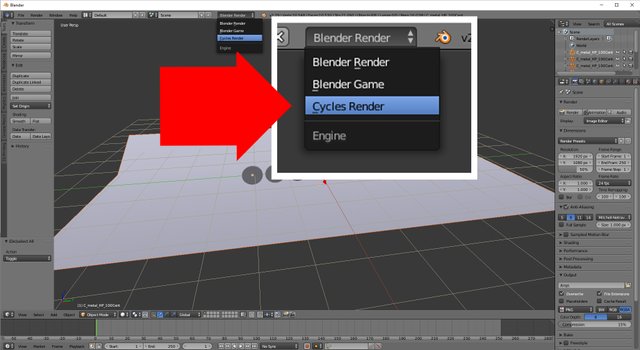
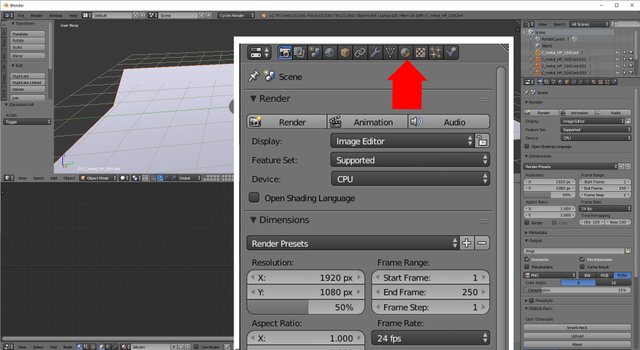
Step three:
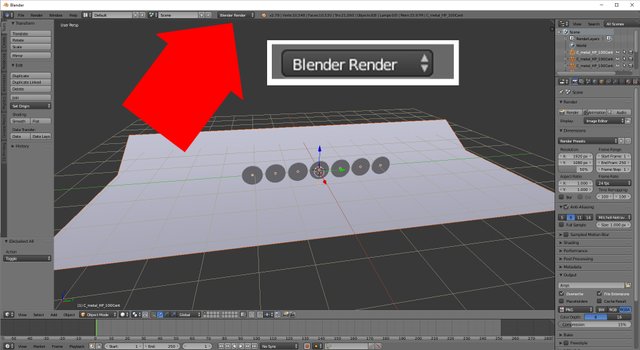
Change the rendererIn the middle of the top you can choose between the renderer. Use Cycles Render. This one needs longer to render, but makes more realistic renderings.
Step four:
Open the Node EditorUsually you have four screens. See the following picture:

Each Screen has at the left side a button to select the “Editor Type”
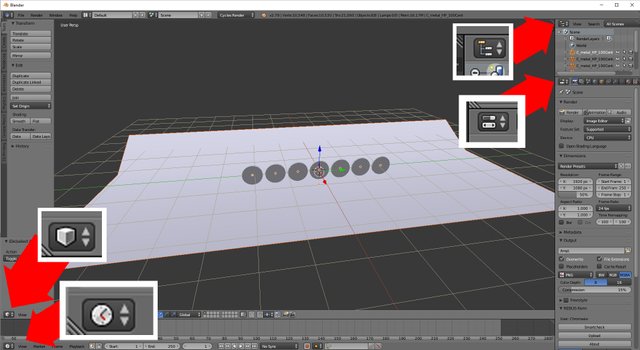
Go to the left bottom one and select “Node Editor”

You can also just move your mouse somewhere in the screen and press “Shift F3”.
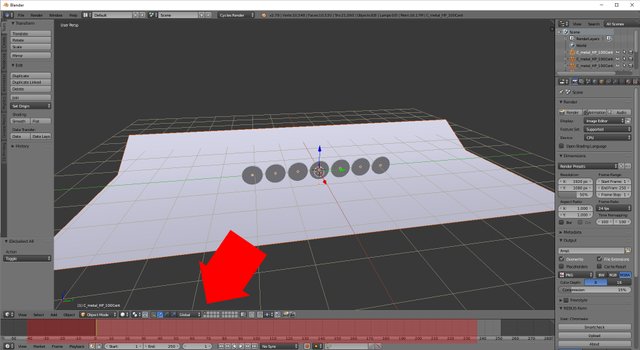
Make the editor a bit bigger by dragging the bar up.
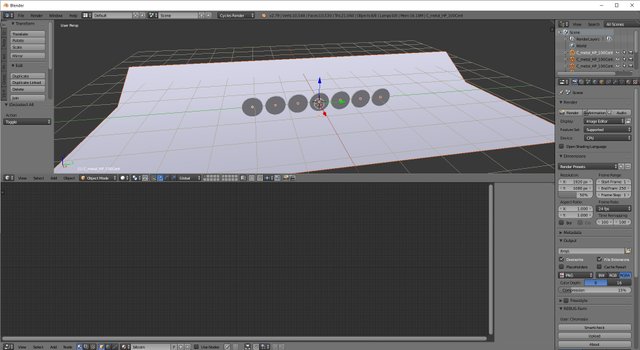
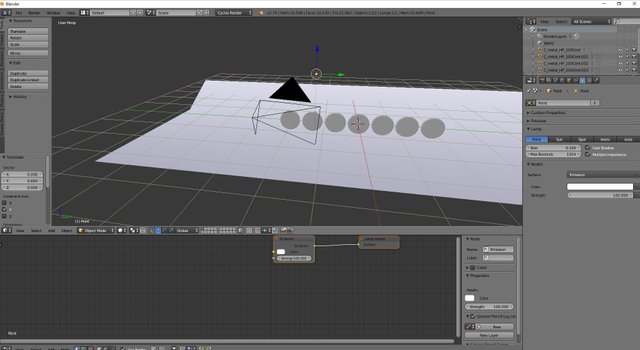
Step five:
Select “Use Nodes”On the right side you see the properties of your objects. Select “Material”.
Under “Surface” is the button to activate the nodes.
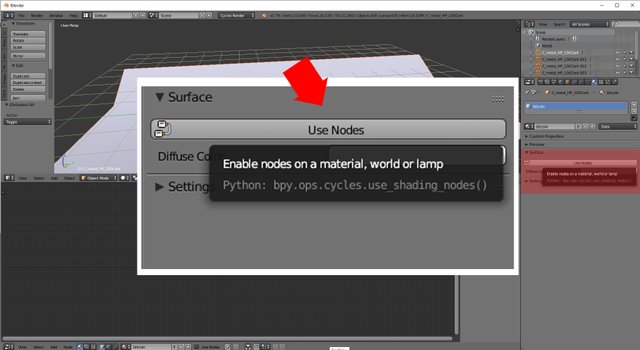
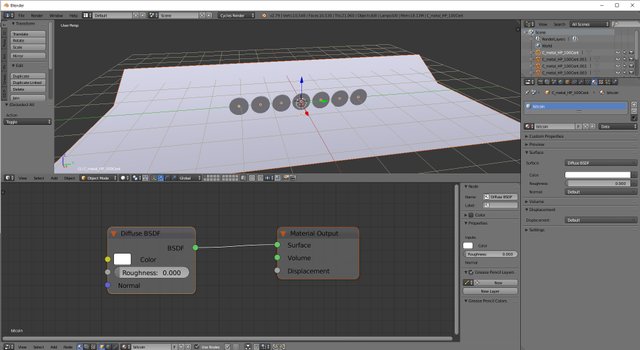
Click on it and you should see in your Node Editor the Materials.
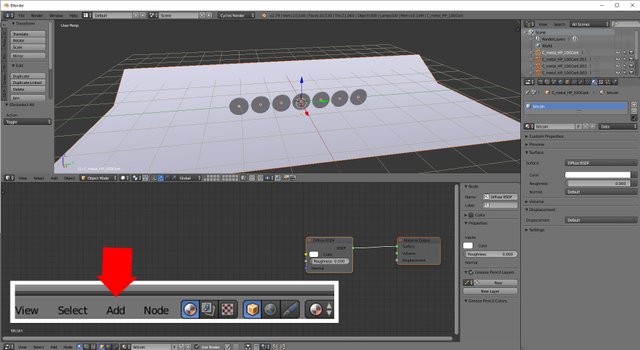
Step six:
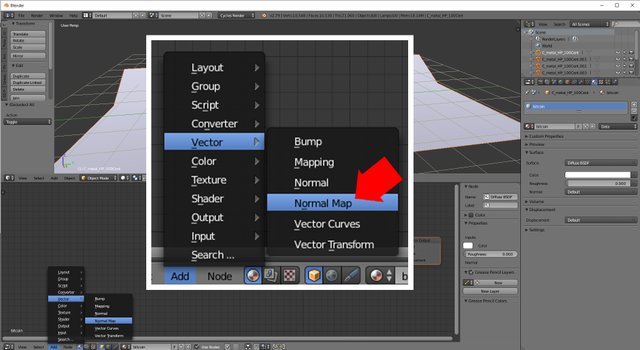
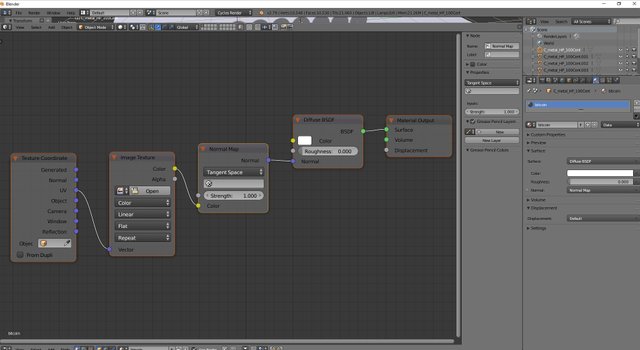
Add the nodes.You find the “add” button at the bottom.
Add “Vector” → “Normal Map”
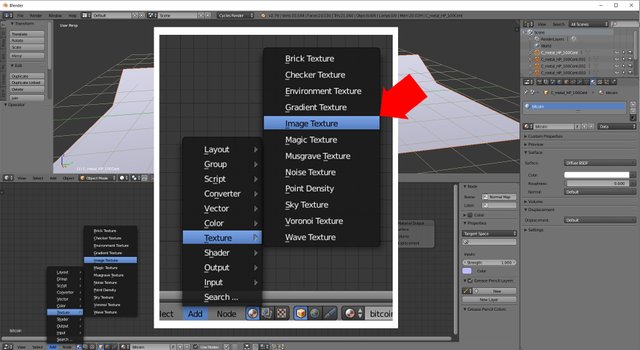
Add “Texture” → “Image Texture”
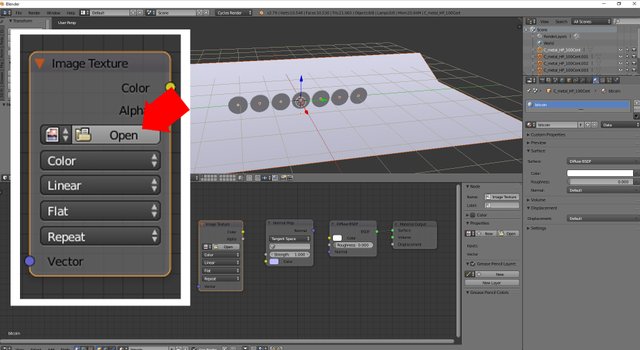
And add your Texture (.png as instance). In this case you need the normal map.
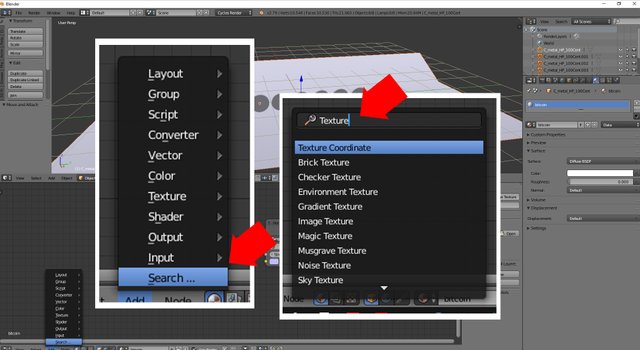
And add the “Texture Coordinate”. By the way you can use “Search” to find all the nodes. Click “Search” → and type in “Texture Coordinate”
Connect all the nodes like in the following picture.
Step seven:
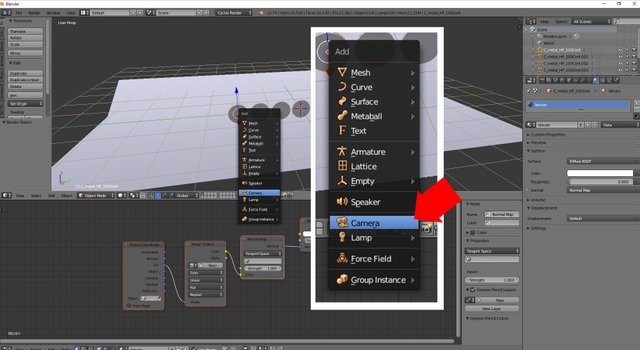
Add camera and lightPress “Shift + A” and select camera.
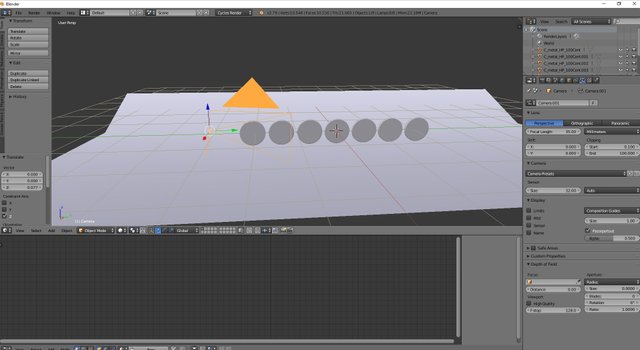
Move your camera. Use the x,y,z-axis (the red, green and blue axis).
Press “Shift + A” and select light. Up to you what kind of light you prefer. I used point.
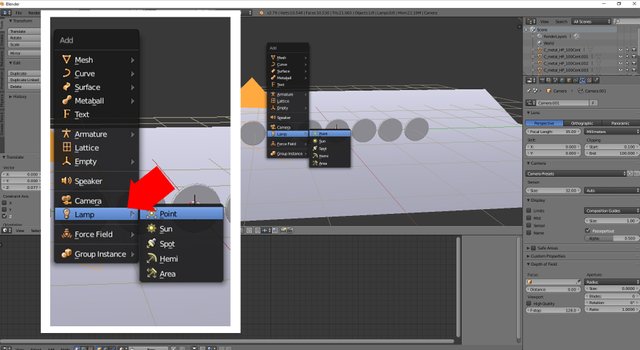
Move the light in the same way like your camera.
Add objects, if you like in the same way. As example, if you don’t have a plane. Just press “Shift + A” and add one. In the properties you can change the size (or hit "s"). Set the plane below the coins, if you don’t have one there. Up to you.
Step eight:
RenderingSelect you camera with the RMB and press on your numpad “0”. Or, if you don’t have a numpad. Go to “View” → “Cameras” → “Active Camera”.
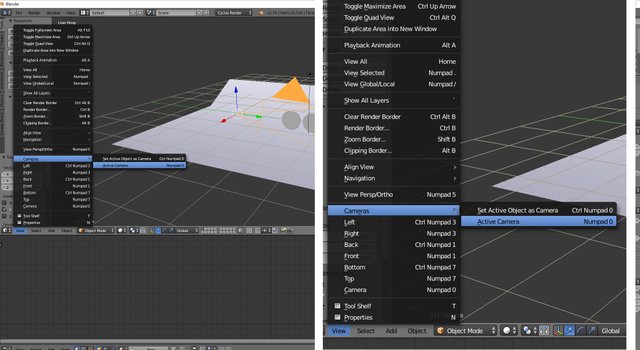
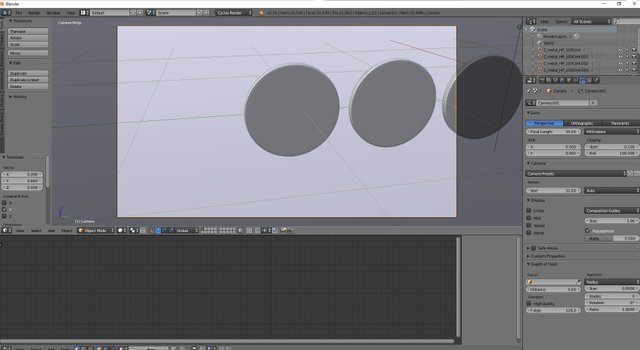
Now your view should be your cameraview.
Hit “F12” for rendering.
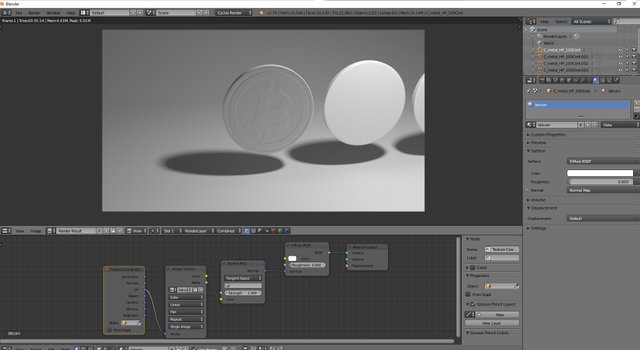
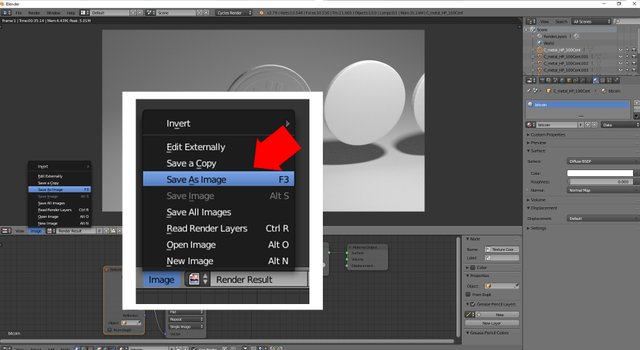
To save your image go to “Image” → “Save as Image”
To go back to your scene press “ESC”. And to go back to your normal view just press MMB and move your mouse. Adjust your camera and light how you prefer. If you wanna change the color of your coin, just change your “Diffuse BSDF” in your Node Editor. If you don’t see your nodes, please right click on the correct object.
Step nine:
Your turn.Now do that for all the other objects. 😊
I hope I could help.
Thanks for reading!
If you like my work check out my blog @chromasie. I am new here, so I don't have so many posts yet. But when you read this, I probably work on my next post.
I don't only model 3D stuff. I also like to paint, photography, photogrammetry, traveling etc. Stay tuned!
You can find me on:
 |
|  |
|  |
| 
I took all the pictures. I made all the 3D stuff and tutorials by myself. All pictures, tutorials and films belongs to me. Copyright 2018 Chromasie. All rights reserved. Please do not copy or publish them.
Great effort.