Creating a fantastic glowing deer in Adobe Photoshop CC 2019 Part 3
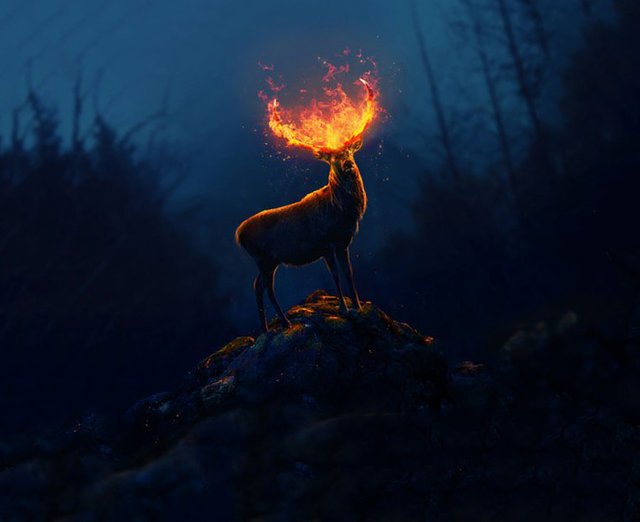
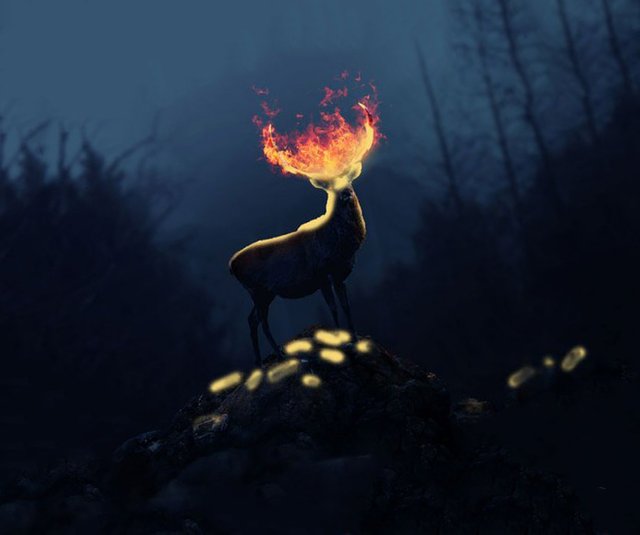
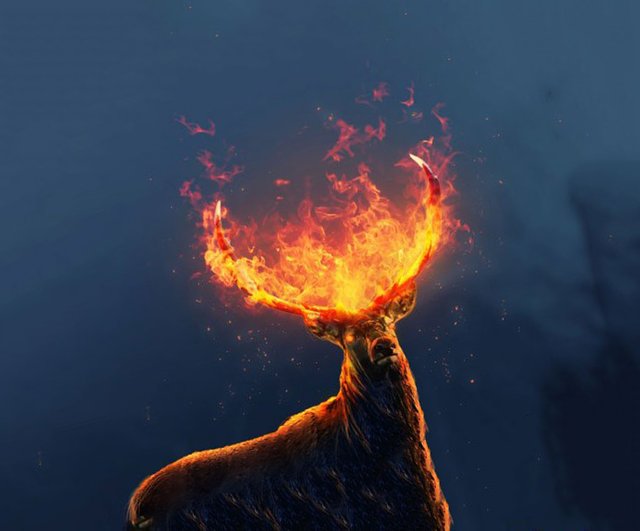
Final Result
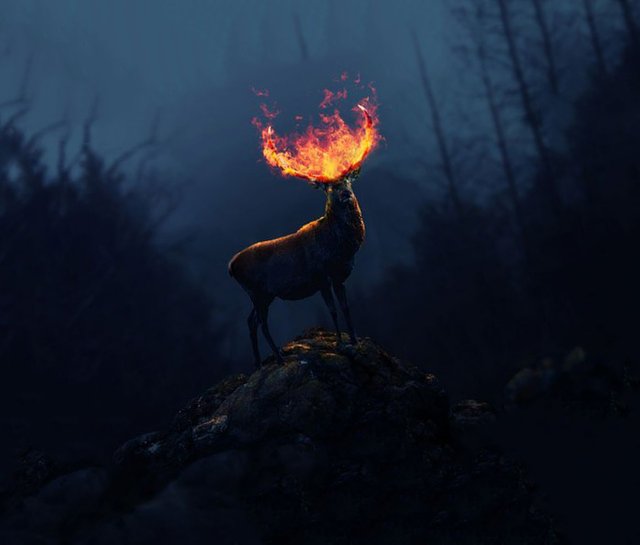
Step 6. Add the effect of fire.
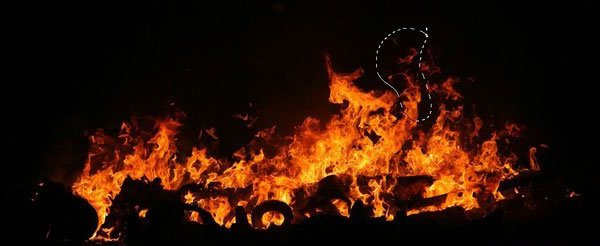
Step 1:
Open the image pack with fire. We will use image 8 and 3 to add fire to the horns. Select a portion of the fire on image 30 — using the Lasso Tool / Lasso Tool [L].
Put this part of the fire on one horn and change the blending mode to Screen 100%.
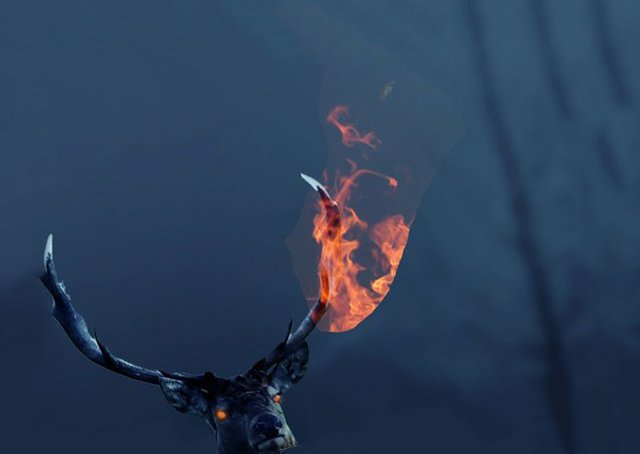
Add a layer of fire to the mask and use a black, soft brush to erase the white sharp edges.
Step 2:
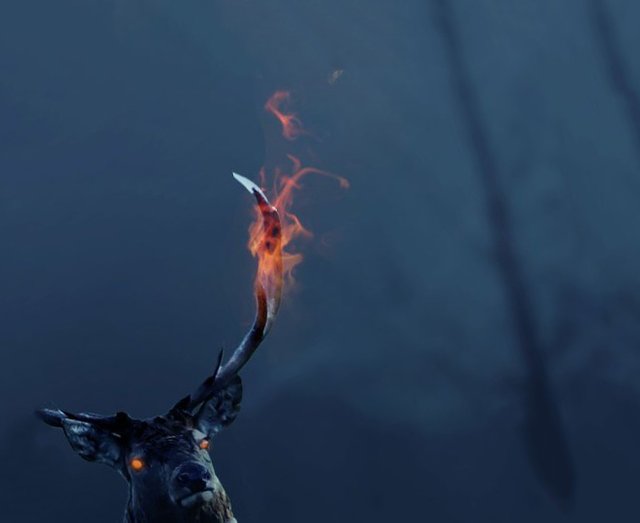
Add other parts from the image of fire on the horns using the same method. You can duplicate, transform, and rotate these layers using the free Ctrl + T transform if needed.
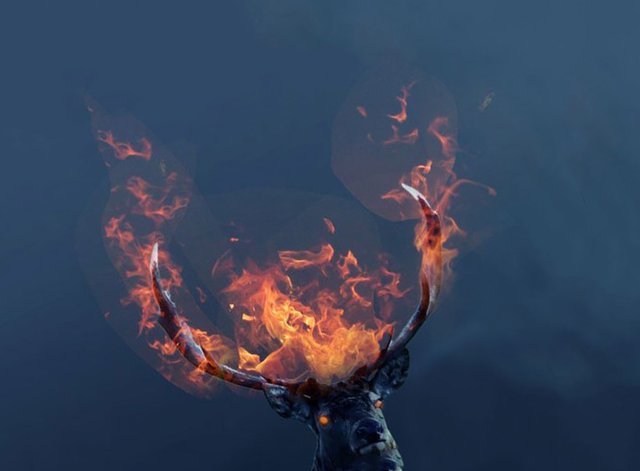
Do not worry about white clear edges, as we will fix them later.
Step 3:
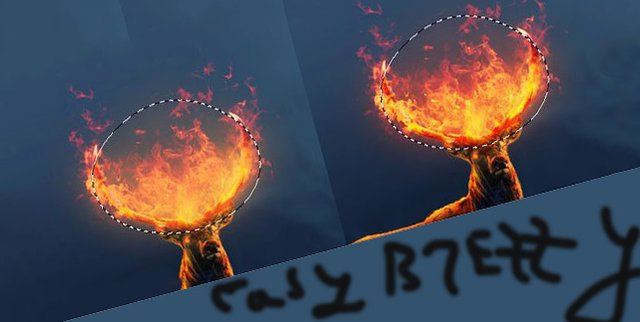
Using the same technique, add more fire to the horns and make it more dense and intense.

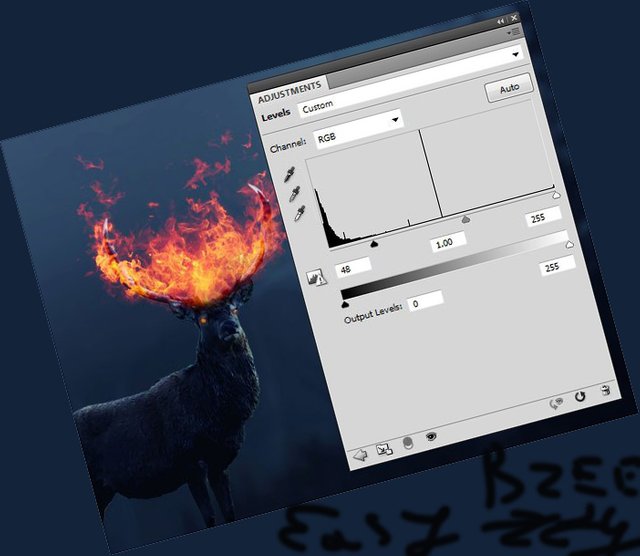
Step 4:
Group all layers with fire and change the group's blending mode to Screen 100%. Create a new adjustment layer Levels / Levels above all layers in the group and adjust the level markers, as shown in the screenshot below.
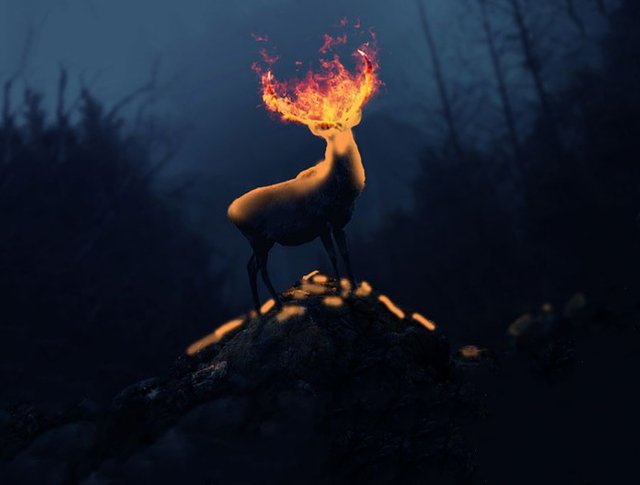
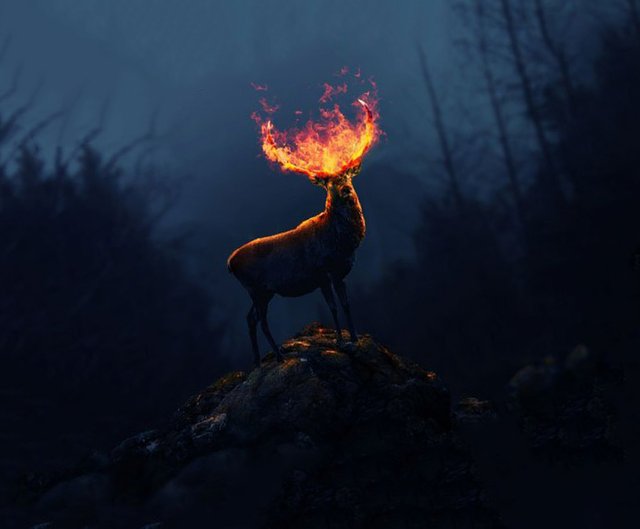
Stage 7. Add light effects.
Step 1:
We will add light effects from fire on deer and stone. To do this, create a new layer under the group of layers with fire. Using the soft brush # ea6842, draw this color along the deer horns, body and head, as well as on the stone. Then, change the blending mode to Overlay 100 / Overlap 100%.
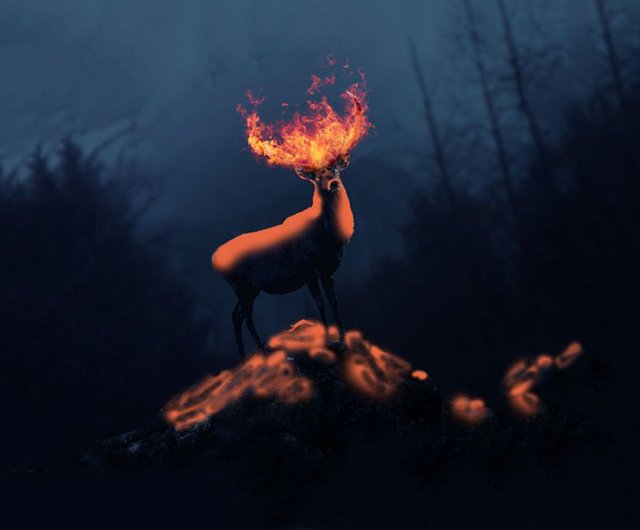
Step 3:
On a new layer, use a soft brush of color # fc994b to make light on a deer and a stone. Set the blending mode to Overlay 100 / Overlap 100%.
Step 4:
Create a new layer and use a solid brush of color # fc994b and draw a slight glow of fur along the body of the deer, legs and head. Change the Opacity Opacity / Brush opacity to 10-15% and draw subtle lighting effects on the blurred stone - the one in the foreground.
Step 5:
Create a new layer and use a # # fc994b soft brush to draw more glow effect on the head. Then change the blending mode to Hard Light 100 / Hard Light 100%.
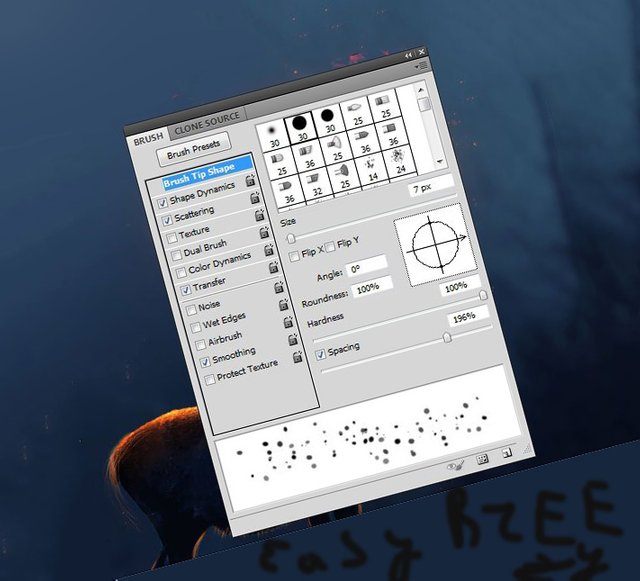
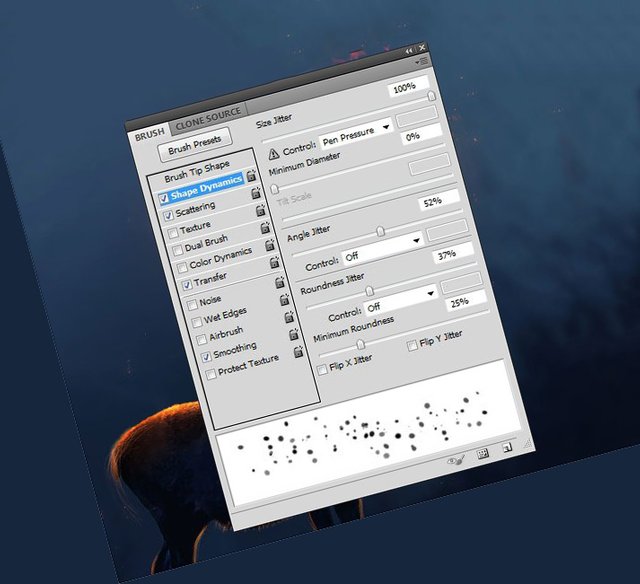
Step 6:
Create a new layer and select the Brush Too [B] tool by setting the brush color to # ea6842. Then press F5 and adjust the brush, as shown in the screenshots below.
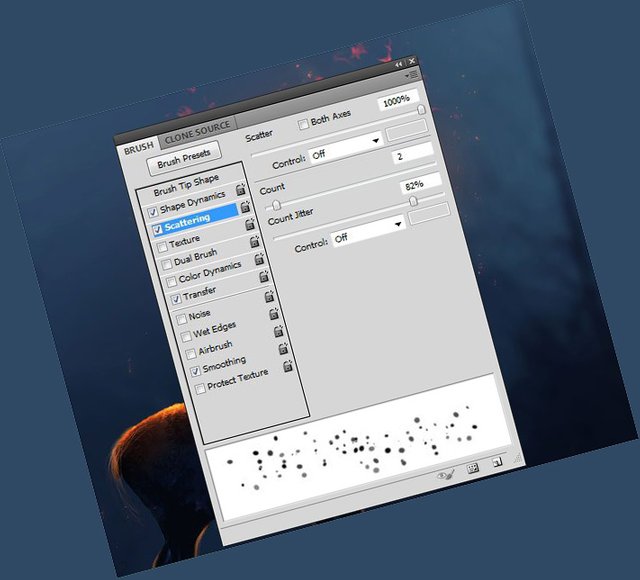
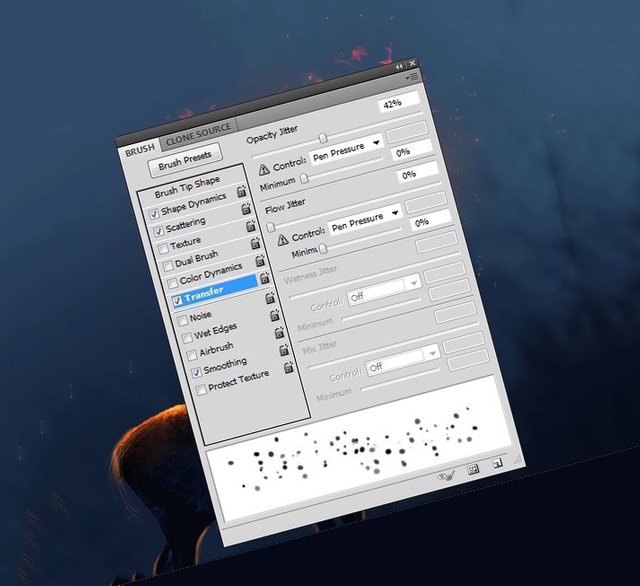
Draw a glow in the form of scattered points around the fire.
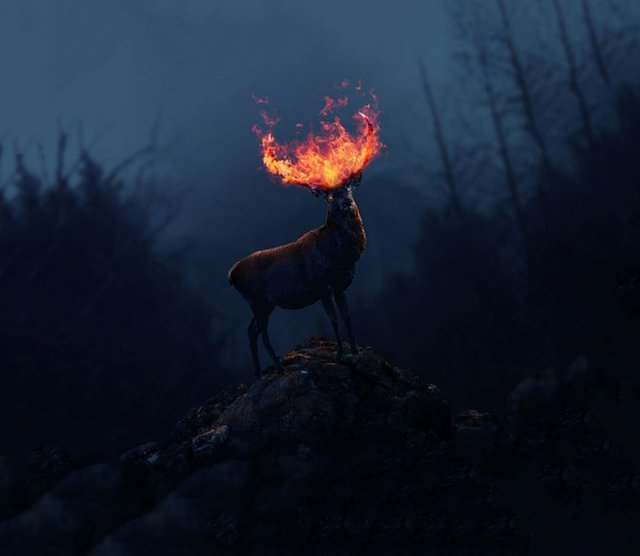
Stage 8. Final preparation.
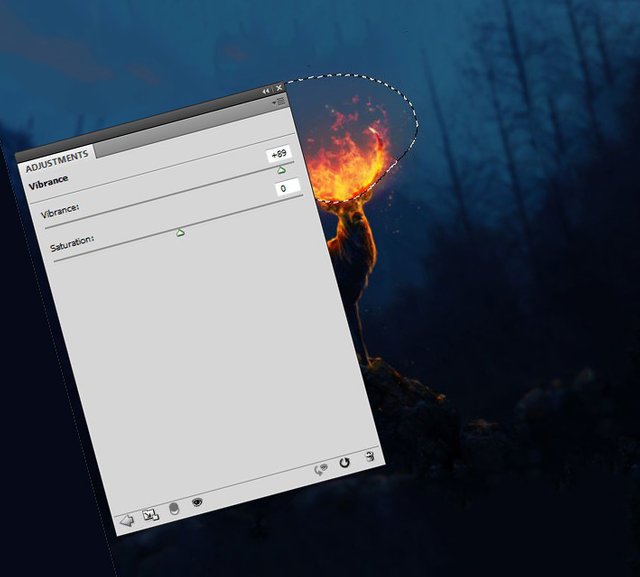
Step 1:
Create a new Vibrance adjustment layer above all layers. Select a mask for the adjustment layer and use a black, soft brush to erase the area of fire as shown in the screenshot and increase the Vibrance / Vibration value to 89.
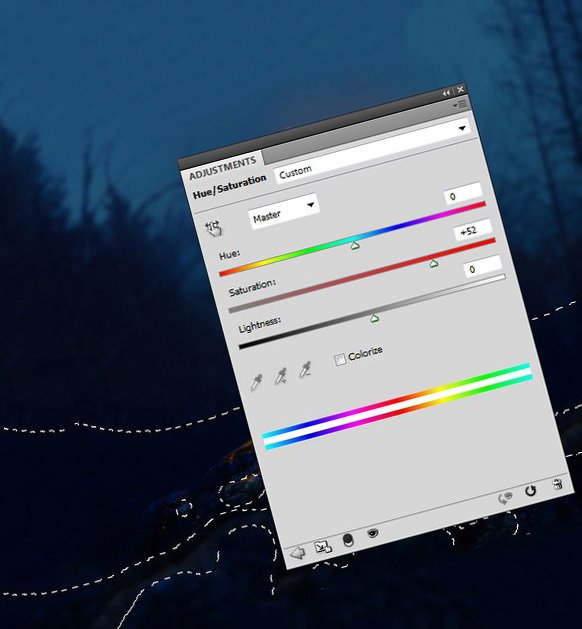
Step 2:
Create a new Hue / Saturation adjustment layer / Hue / Saturation increase the Saturation / Saturation value to 52. Select the adjustment layer mask and use a soft, black brush to erase the upper part and the blurred area of the stone.
That's all.
Congratulations, you have completed the lesson.
Congratulations @easy-breezzy! You have completed the following achievement on the Steem blockchain and have been rewarded with new badge(s) :
You can view your badges on your Steem Board and compare to others on the Steem Ranking
If you no longer want to receive notifications, reply to this comment with the word
STOPTo support your work, I also upvoted your post!
Vote for @Steemitboard as a witness to get one more award and increased upvotes!
Congratulations @easy-breezzy! You received a personal award!
You can view your badges on your Steem Board and compare to others on the Steem Ranking
Vote for @Steemitboard as a witness to get one more award and increased upvotes!