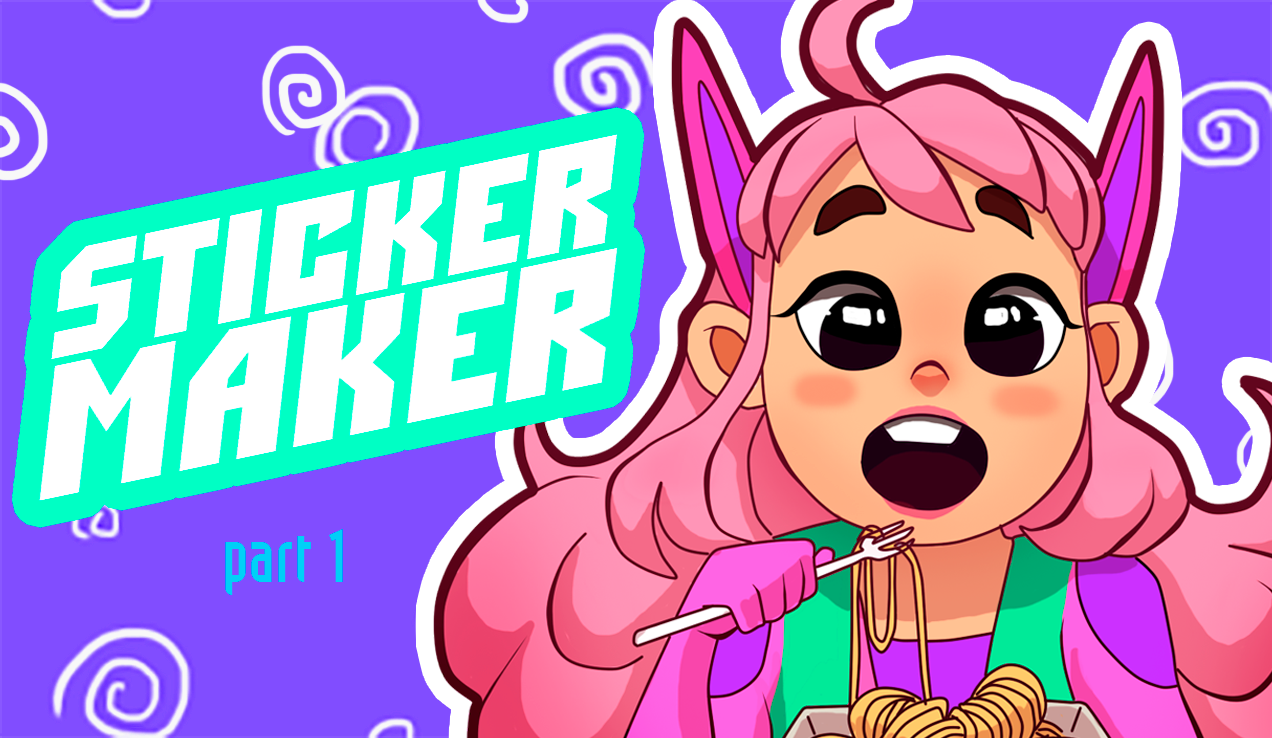
#Stickermaker part 1. How i make stickers and share secret knowleges about it. Okay, not secret.
Hi)
Today I will tell you about how and why people make stickers. In my opinion, a main objective of stickers is in the messangers - transfer of emotions in response to messages of interlocutors. And therefore artists from around the world have involuntarily rallied and have created a set a sticker of a pack ice for users that those in turn could give precisely the reaction, having chosen a suitable sticker. And so. Did you never ask a question why there are a lot of stickers? It is so much subjects for them? It is so much different expressions and reactions? I think that on the same situation, we react differently. We rejoice differently, we hesitate, we long and so on. But if so it happened that still any artist couldn't report your favourite emotion correctly, I will tell and I will show how to create the sticker or a set of stickers which will be ideal for you. Why do it? For fun :D
So, first, tools will be necessary for us. Generally many artists use vector graphics for creation of stickers. But as I am a raster artist, I will disassemble raster tools. Even without graphic tablet it is possible to create the stickers, using in the arsenal only a mouse, but in more detail I will tell about it in the following parts of Stikermayker).
Programs: I use for a drawing of an ideal contour of easy paint tool SAI, and for filling, painting and work with layers of Adobe photoshop CC 2017, but you can download or buy any, tools which are useful to us, a little in what differ in different versions, except the oldest, of course.
It is possible to download programs and to try them in work here:


And here, everything is ready for work. The following step - creation of a selection of an emoji which will be at the heart of our stickers. On the same sticker it is possible to bind from 1 to 3 emoji (if to bind more emoji, then our sticker will often flash and to more irritate the user, than to please).
For example:  +
+  +
+  =
= 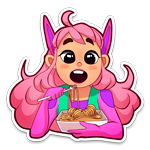
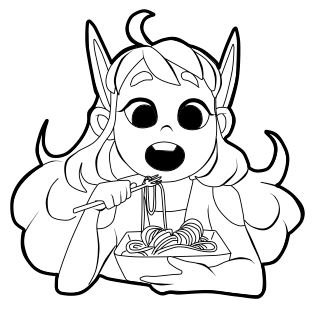
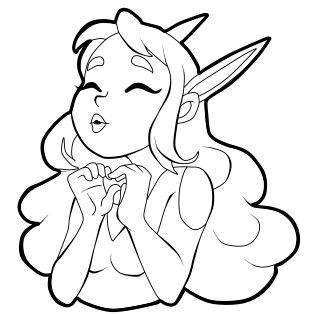
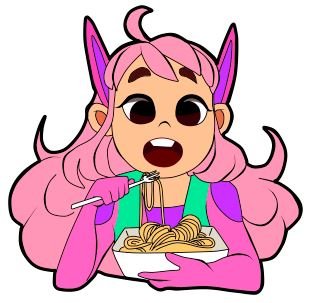
And now, if the user chooses emoji with a plate of noodles, then to him our sticker as option, also will be displayed if he chooses flowing round saliva of an emoji or a shrimp (I just love shrimps :D), then there will be the same. But usually do a binding one emoji-one sticker. Here and we will do so too). As at me it is already prepared 20+ of sketches to stickers, emoji I will show the table in different parts little by little and at the end I will already publish it completely.
Today I will create two stickers tied to these emoji:

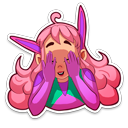
It's cool! The plan of work is ready already. We pass to the idea. Here we need to solve who or what will become "face" of our stickers. It can be anyone, whether it be your neighbor from above or the fictional friend. As I already have the character who is a certain Muscat of all my creativity, I also will take her as an image for stickers. Further, we do sketches, we look for bright emotions which would suit us as the user and most precisely could display our emotion. And yes, council -
try not to use a large number of details. It is enough to represent characteristic features and a little attributes which will make your character recognizable, otherwise you risk to go to deep specification, having forgotten that ahead 20-40 more stickers need to be drawn :D
Simple - better, believe me.
Sketches are ready:
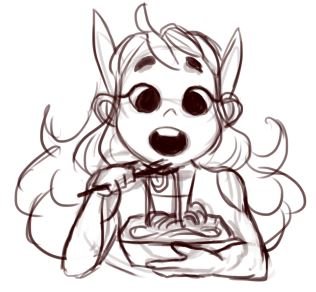
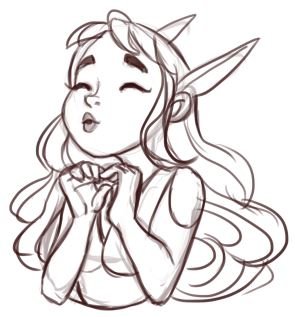
And I will tell all details connected with drawing about how to draw them in the subsequent parts not to overload strongly one post.
The following stage - a line:
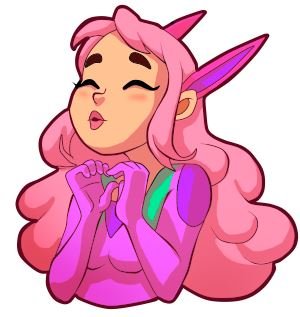
Now we need to make a simple palette of several flowers which will be used practical in all stickers. I have such palette: 
And filling with these colors:
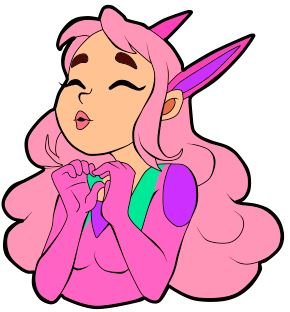
The main work is already made, it was necessary to give to stickers a little volume and is sensitive to trace characteristic details:

Well and right at the end we add a fat line on a contour, and we adjust a shadow to the necessary size:

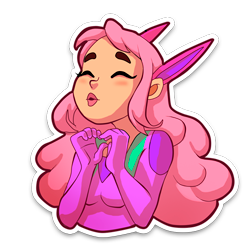
It is ready! Here also two stickers were born. I plan to make the whole pack of 30-40 pieces so in parallel with creation of stickers, I will share cunnings and knowledge which can be useful to those who will want to make the stickers.
And now on a good tradition I embrace read up this post up to the end and I tell thanks for patience ٩(◕‿◕)۶
In the following post I will tell what brushes, it is necessary to work with settings and stuff that the sticker has turned out


Charming!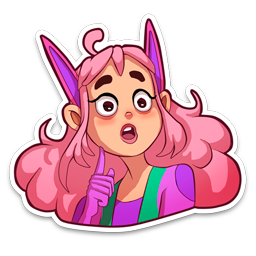
Thank you so much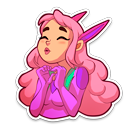
Always makes me happy seeing your work .
it's so nice @admyrer thank you a lot