The Importance of Bargue Plates
The Importance of Bargue Plates
Greetings and salutations Everyone!
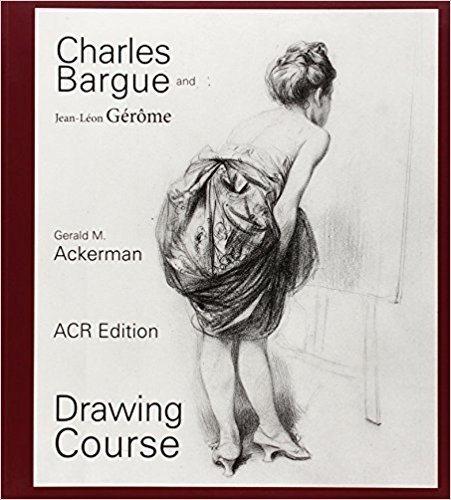
In today’s post I decided to discuss the importance and practice of copying Bargue Plates. These plates were created as a part of an intensive drawing course system designed by the late great draftsman, artist, and painter Charles Bargue. During my atelier training these lessons were integrated within the curriculum (as I’d imagine with most ateliers around the world) and taught as a mode of refinement of observational skills within the practice of drawing. So once again I’ll be using a couple of plates I did during my time spent in the atelier as to assist my narrative explanation.
Albeit at first glance it may appear that Barge plates are merely a glorified form of sterile copying, but as one learns as to how to go about their use and obtaining what they have to offer, they soon find that these benefits are perpetually engaged within the entire scope of the artist’s development. To have the ability to accurately record what the eye sees without deviation or mental hindrance, I’d say is the fundamental principle behind this drawing system. Once this is gained the artist is now in a better position to integrate their imagination in a precision controlled manner.
To begin with your Bargue plate copy, you must first obtain your chosen image and a sturdy drawing board. It is very important that your chosen image is large enough (The larger the better really and for most plates I’d recommend no smaller than 16” x 20”) and that it is taped directly alongside your drawing. In later posts I’ll happily discuss the differences between “relative measuring” and sightsize, but for now it is absolutely necessary for success that the plate will be copied the exact same size as the image. This method of visual documentation is what is commonly known as sightsize.
It is also important to know that when working on your plate, that you should be working on it in an upright position throughout its completion. So if you have access to an easel, I highly advocate its use and if not a wall should suffice. Under no circumstances should you be randomly shifting your position around during its progress. I would also like to add that you’ll need a plumbline directly over your image to act as a centerline. This can be made with some simple black sewing string with a small bolt or metal washer tied to the bottom. The use of tape can keep it from swaying back and forth. And just like in my previous block in post, a skewer should always be within arm’s reach. I can assure that the need for precise measurement during the construction of the armature/block in will be pushed to its extreme.
Graphite is also still acceptable, but as you can see below I have chosen to stick with the use of Nitram charcoal. Not only will charcoal allow to you to push values, but it is also extremely forgiving. Regardless of what you choose (graphite or willow/vine charcoal), it is imperative that these tools remain sharp at all times. Not only will this facilitate the accuracy of the block in but will not impede in the efforts of turning subtle form.
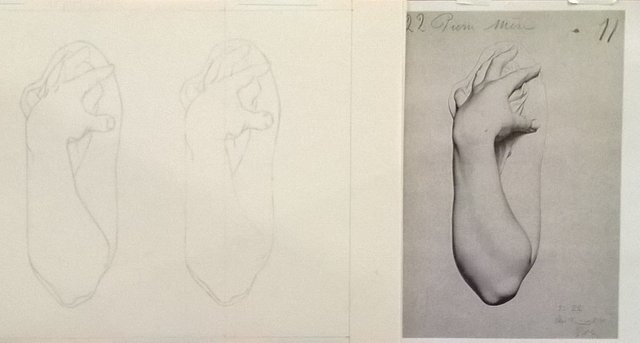
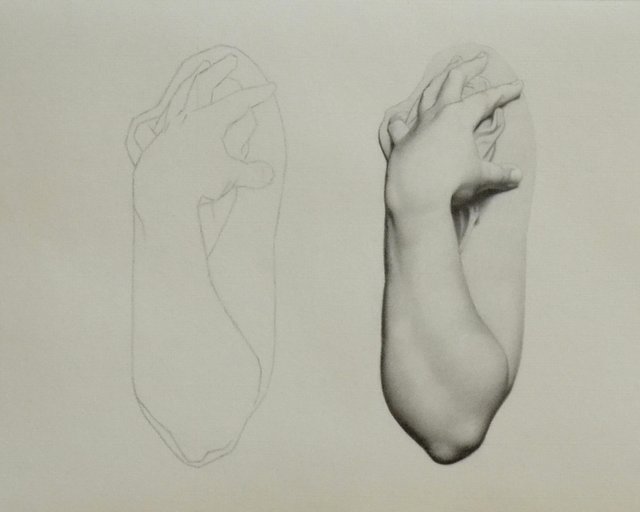
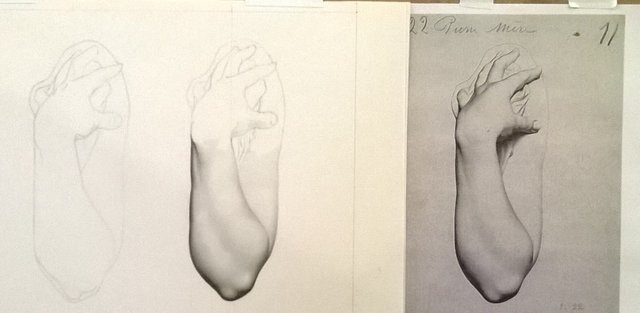
As you can see here, it looks as though I have redundantly completed the armature wire twice in a row, but I assure you that that isn't entirely true. If you're fortunate enough to have obtained the book, you have probably noticed that most plates within the book show the block in alongside the finished plate. That was the case with this one in particular and I chose to embrace this exercise as religiously as possible. After finishing the first block in, I ended up shifting the reference image partially under my drawing as to make it easier to cross reference with horizontal and vertical follow through lines. Perhaps you've already noticed that some plates have them on there already? I encourage you to absolutely make the most of them. Believe me,...that's what they're there for! I can imagine some might feel "guilty" in using them as they might think it's "cheating". I promise there's no need for that as it is completely unnecessary. In fact you should be making your own. Just make sure that they are faint, light, and strategically placed through the use of your skewer. I'd advise looking for coincidences and parallels (just like in my block in post) to continually cross reference the original. You're basically looking for "key points" in which lines and forms intersect. Having the image and your drawing side by side also helps when flicking your eyes back and forth. When you keep doing it, it almost appears as though the mistakes are causing it to look animated. When this illusion stops, you'll know you're achieving accuracy. By now, you're probably realizing the importance of sightsize right? The eye has a strange way of immediately picking out mistakes and with the incorporation of sightsize, it just makes the process all the more expedient. The inaccuracies seem to just pop right out.
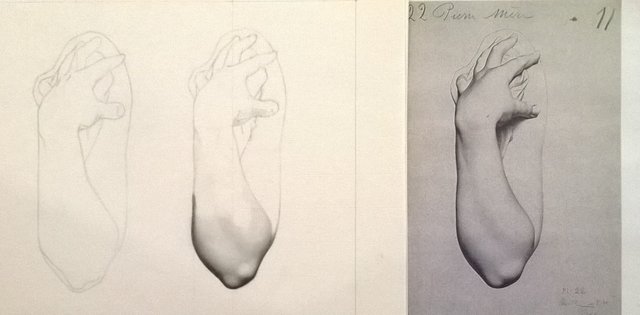
Now that I have refined my second block in to absolute precision, I decided to begin turning form at the bottom and slowly and methodically work my way up. The reason why I chose to begin at the bottom was because I found it easier to lock in and key my values for further comparison. Working in this way is commonly referred to as "window shading". Even though at this stage I am very confident in the execution of the block in, I am ALWAYS aware of the possibility in that I might have to make corrections. One of the downsides in working this way I might add is that if potential inaccuracies are easily or lazily overlooked, one could later stumble into problems unknowingly. That is why in order to achieve success in this way, it is very important to maintain a steady course with a high degree of patience and focus.
Still plodding along! While I'm thinking about it, if you're finding that you're having difficulty in maintaining a steady hand for this kind of work, I definitely recommend you should invest in a mahlstick. In maintaining the mental shift in order to work this way, you're probably finding that it can be quite exhausting. I encourage you to take as many breaks as needed. It is very important to remain mentally sharp and present rather than fighting through a mental fog. At this stage of the Bargue plate's development and during my academic training, I remember having a wonderful and insightful realization. I remember when I was initially taught of the concepts of the block in and the ability to render form, I took mental notes on the mental/psychological shifts necessary for those modes of observation. Now realizing that what once was appearing as two opposing perspectives akin to the opposite sides of a coin, are now intricately and interlocked modes of perception.
Continually moving across and upwards, moving from larger forms to breaking down smaller forms...I am now finished!
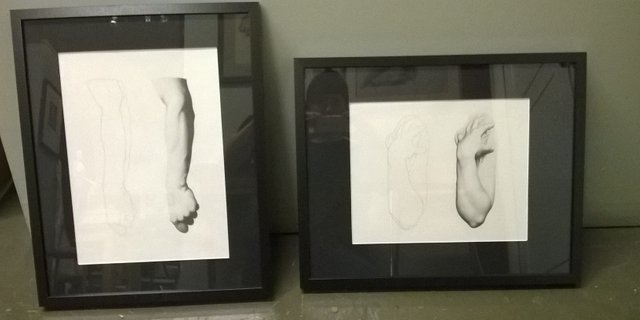
Here are two Bargue plates finished, matted and framed during my time at the Aristides Atelier. They both took me about three weeks each to complete.
Please feel free to let me know what you think?
Thanks for reading Everyone!
-James Hansen
https://jameszenartist.weebly.com/
Added to my shopping list. Are there any other essential books on drawing that you would recommend? I was thinking of getting "Drawing Lessons from the Great Masters" by Robert Beverly Hale as well.
Yes definitely!! Robert Beverly Hale is good. Elliot Goldfinger is good for anatomy. Bridgman's is good. Anything by Harold Speed and Andrew Loomis. And Solomon J Solomon's book is awesome. And of course anything by my teacher Juliette Aristides :)
I'll be damned, Juliette Aristides is your teacher? Love her "Lessons In Classical Painting". Appreciate your recommendations - glad it's soon Christmas :)
Yeah, it's true! I worked very close with her until I finished the atelier. As a matter of fact, I have a few examples of my work and a demo in that book. I'm also the model near the end of that book in her demo. You're very welcome :)
I'll be damned (again), there you are, in chapter 3. It's a small world!
Ha! Yeah I feel the same way :)
Nice work @jameszenartist very informative
Thanks man! :)
No worries dude, keep up the good work!
Very nice! I'm envious that you studied at the Aristides Atelier! Well done..
Thanks @luminousflux :) It was one of my greatest experiences, hands down. I'm hoping I can share as much as I possibly can from what I learned in the atelier here on Steemit :)
love this way of working!
olalaa caliteee!
thankss for share...

Thank you so much! :)
@originalworks
The @OriginalWorks bot has determined this post by @jameszenartist to be original material and upvoted(1.5%) it!
To call @OriginalWorks, simply reply to any post with @originalworks or !originalworks in your message!